- Python Import Command
- How to use the import command
- Import Python built-in modules
- Create your module
- Example
- Conclusion
- About the author
- Kamran Sattar Awaisi
- import
- saves any visible window on an X server and outputs it as an image file. You can capture a single window, the entire screen, or any rectangular portion of the screen. The window to capture is selected by clicking the desired window or a program option.
- TLDR
- SYNOPSIS
- OVERVIEW
- DESCRIPTION
- import
- 👋 Example
- ⚙️ Compatibility
- 📚 Documentation
Python Import Command
![]()
The import command in Python is used to get access to other modules. Modules are the same as a code library in Java, C, C++, or C#. A module typically involves a set of functions and variables. When we need to include or use these functions of modules in our code, we can simply import the module by using the import command and we can easily invoke the module functions and variables. The import command is the simplest and common way of including modules into your code.
Python comes up with many built-in modules that we can include in our code easily. We can also create our module by just saving the Python code file with the .py extension.
In this article, we will learn that how we can import our own and built-in modules in Python. Spyder3 editor is used to creating and running the Python scripts.
How to use the import command
We use the import keyword to import the modules in Python. While importing the module in our code, we write the module name with import command in this way:
Import Python built-in modules
Python comes up with many built-in modules. Math module is one of the common modules that is used to perform the mathematical functions.
Let’s import the math module by using the import keyword and use its functions to perform mathematical calculations. When we access any function from a module, we write the name of the module and put a dot and write the name of the function like that:
# importing the math module
import math
# printing the value of pi constant
print ( «The value of PI is: » , math . pi )
# calculating the factorial of a number using factorial function
print ( «The factorial of number 5 is: » , math . factorial ( 5 ) )
# calculating the log of a number using the log function
print ( «The log of 10 is: » , math . log ( 10 ) )
# printing the value of Euler’s number
print ( «The value of Euler’s number is: » , math . e )
# calculating the radians from degrees
rad = math . radians ( 90 )
print ( «The radians of 90 is: » , rad )
# calculating the sin value
print ( «The sin of 90 is: » , math . sin ( 90 ) )
# calculating the coa value
print ( «The cos of 90 is: » , math . cos ( 90 ) )
# calculating the tan value
print ( «The tan of 90 is: » , math . tan ( 90 ) )
The output is displayed on the Python console.

In some cases, if we want to import only a specific function or a constant from a module, we can do in this way:
For example, only the pi constant from the math module can be imported in this way
Let’s see an example of it.
# importing only pi value from the math module
from math import pi
# printing the value of pi constant
#here we use pi directly instead of math.pi()
print ( «The value of PI is: » , pi )
The output is displayed on the Python console.

All the functions and constants can be imported in this way:
In the case of the math module it would be like this:
# importing only pi value from the math module
from math import *
# Now we don’t need to specify math with the constant and function
# printing the value of pi constant
print ( «The value of PI is: » , pi )
# calculating the value of sin 90
print ( «The value of sin 90 is:» , sin ( 90 ) )
# calculating the factorial of 8
print ( «The factorial of 8 is: » , factorial ( 8 ) )
The output is displayed on the Python console.

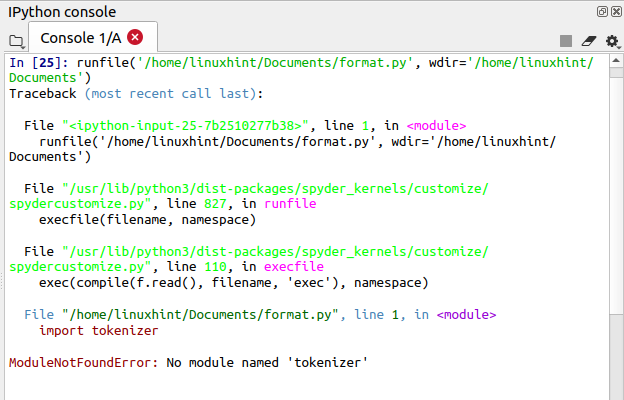
The import command searches for the module name if the module is not found, then it shows an error. Let’s try to import the module “Tokenizer”.
In the output, you can see that it throws an error “ModuleNotFoundError”.
Create your module
To create your module, create a python file, write the code, and save it with .py extension.
Let’s see an example of it.
Example
We have created a new module named “calculate.py”. It has a function, which takes two numbers as an argument and returns it sum.
Now let’s create another Python file (test.py) and call the “calculate” module in that file.
# importing the calculate module
import calculate
# calling the sum function
print ( calculate. sum ( 1 , 2 ) )
The output is displayed on the Python console.

Now let’s modify the calculate module file and create two variables here.
Let’s try to access the variables of calculate module in test.py
# importing the calculate module
import calculate
# accessing the first variable and assigning a value
calculate. val_1 = 10
# accessing the second variable and assigning a value
calculate. val_2 = 20
# calling the sum function from calculate module
print ( calculate. sum ( ) )
The output is displayed on the Python console.

We can also create an alias while importing a module by using the “as” keyword and it will work fine.
# importing the calculate module as cal
import calculate as cal
# accessing the first variable and assigning a value
cal. val_1 = 10
# accessing the second variable and assigning a value
cal. val_2 = 20
# calling the sum function from calculate module
print ( cal. sum ( ) )
In the output, you can see that it works fine and does not show any type of error.
We can use the Python built-in dir() function to list down all the available functions and variables of a module.
# importing the calculate module as cal
import calculate as cal
# using dir() function
print ( dir ( cal ) )
The output shows all the available variables and functions of the “calculate” module.

Conclusion
This article explains the Python import command in detail with the help of simple examples. The import command is used to call the built-in and user-defined modules in Python files.
About the author
Kamran Sattar Awaisi
I am a software engineer and a research scholar. I like to write article and make tutorial on various IT topics including Python, Cloud Computing, Fog Computing and Deep Learning. I love to use Linux based operating systems.
import
saves any visible window on an X server and outputs it as an image file. You can capture a single window, the entire screen, or any rectangular portion of the screen. The window to capture is selected by clicking the desired window or a program option.
TLDR
Capture the entire X server screen in the PostScript image format
Capture contents of a remote X server screen in the PNG format
Capture a specific window, given its ID as displayed by xwininfo, into the JPEG format
SYNOPSIS
import [options] output-file
OVERVIEW
The import program is a member of the ImageMagick(1) suite of tools. Use it to capture some or all of an X server screen and save the image to a file.
For more information about the import command, point your browser to file:///usr/share/doc/ImageMagick-7/www/import.html or http://imagemagick.org/script/import.php.
DESCRIPTION
Image Settings: -adjoin join images into a single multi-image file -border include window border in the output image -colorspace type alternate image colorspace -comment string annotate image with comment -compress type type of pixel compression when writing the image -define format:option define one or more image format options -density geometry horizontal and vertical density of the image -depth value image depth -descend obtain image by descending window hierarchy -display server X server to contact -dispose method layer disposal method -dither method apply error diffusion to image -delay centiseconds display the next image after pausing -encipher filename convert plain pixels to cipher pixels -endian type endianness (MSB or LSB) of the image -encoding type text encoding type -filter type use this filter when resizing an image -format «string» output formatted image characteristics -frame include window manager frame -gravity direction which direction to gravitate towards -identify identify the format and characteristics of the image -interlace type None, Line, Plane, or Partition -interpolate method pixel color interpolation method -label string assign a label to an image -limit type value Area, Disk, Map, or Memory resource limit -monitor monitor progress -page geometry size and location of an image canvas -pause seconds seconds delay between snapshots -pointsize value font point size -quality value JPEG/MIFF/PNG compression level -quiet suppress all warning messages -regard-warnings pay attention to warning messages -repage geometry size and location of an image canvas -respect-parentheses settings remain in effect until parenthesis boundary -sampling-factor geometry horizontal and vertical sampling factor -scene value image scene number -screen select image from root window -seed value seed a new sequence of pseudo-random numbers -set property value set an image property -silent operate silently, i.e. don’t ring any bells -snaps value number of screen snapshots -support factor resize support: > 1.0 is blurry, < 1.0 is sharp -synchronize synchronize image to storage device -taint declare the image as modified -transparent-color color transparent color -treedepth value color tree depth -verbose print detailed information about the image -virtual-pixel method Constant, Edge, Mirror, or Tile -window id select window with this id or name root selects the whole screen
Image Operators: -annotate geometry text annotate the image with text -channel mask set the image channel mask -colors value preferred number of colors in the image -crop geometry preferred size and location of the cropped image -extent geometry set the image size -geometry geometry preferred size or location of the image -help print program options -monochrome transform image to black and white -negate replace each pixel with its complementary color -quantize colorspace reduce colors in this colorspace -resize geometry resize the image -rotate degrees apply Paeth rotation to the image -strip strip image of all profiles and comments -thumbnail geometry create a thumbnail of the image -transparent color make this color transparent within the image -trim trim image edges -type type image type
Miscellaneous Options: -debug events display copious debugging information -help print program options -log format format of debugging information -list type print a list of supported option arguments -version print version information
By default, ‘file’ is written in the Postscript image format. To specify a particular image format, precede the filename with an image format name and a colon (i.e. ps:image) or specify the image type as the filename suffix (i.e. image.ps). Specify ‘file’ as ‘-‘ for standard input or output.
import
import is a simple and fast module system for Bash and other Unix shells.
Inspired by Go’s import command, you specify the URL of the shell script, and the import function downloads the file and caches it locally, forever.
The code will never change from below your feet, and will continue to work offline.
👋 Example
https://git.io/fAWiz ← This URL contains a simple add shell function:
You can use the import function to download, cache, and use that function in your own script:
#!/usr/bin/env import # The URL is downloaded once, cached forever, and then sourced import "https://git.io/fAWiz" add 20 22 # 42⚙️ Compatibility
The core import function is fully POSIX-compliant, and maximum compatibility is the goal. import is unit tested against the following shell implementations:
- ash — Almquist Shell (BusyBox ash and Debian dash )
- ksh — KornShell ( oksh , mksh and loksh flavors)
- zsh — Z Shell
- bash — GNU’s Bourne Again Shell
📚 Documentation
- Authentication — Making private GitHub repos work
- API — Application programming interface reference
- Caching — Explanation of the caching strategy
- Configuration — Customizing import with environment variables
- Installation — Installing and bootstrapping import
- Namespaced Imports — Top-level and community imports
- Relative Imports — Implementation for relative imports