- A minimal Arch Linux installation with Gnome. My notes.
- Partitioning
- Encrypt and mount
- Bootstrap
- Grub
- Add user and desktop environment
- Summary
- Add an extra encryption key
- History
- Jacqueline’s misc notes
- Featured Posts
- Recent Posts
- How to Install GNOME in Arch Linux
- Arch Linux GNOME Installation Guide
- Step 1: Update Arch Linux
- Step 2: Install X Window System (Xorg)
- Step 3: Install GNOME Desktop Environment
- Step 4: Start and Enable gdm.service
- Alternate Option: Choose a DM (Display Manager)
- Step 5: Reboot the System
- Step 6: Install Applications
- Customize GNOME Desktop Environment with GNOME Tweak Tool
- Change Background and Lock Screen Wallpaper
- Disable Animations
- Customize Fonts
- Add Applications to the Startup
- Enable Dark Theme
- Enable Extensions
A minimal Arch Linux installation with Gnome. My notes.
Arch Linux is extremely well documented so I highly recommend to read the Arch installation guide. This guide installs the Gnome desktop environment, but one can easily swap Gnome for i3 or another desktop environment, or leave it all together. This is the procedure I used for installing Arch on a Thinkpad t460s, t490s and a Dell Precision 5550.
Partitioning
Checkout the current partition scheme and the name of the harddrive(s)
Determine how you want to partition the disk. I do not use anything fancy (yet).
Let’s go ahead and delete the existing partitions and create new partitions.
1fdisk /dev/nvme01 2fdisk d # delete until no partitions are left 3fdisk n # boot partition, type +512M for size 4fdisk n # for root partition, remainder of disk 5fdisk t L 1 # set to EFI 6fdisk p # check 7fdisk w # write Optional: if you need a swap partition just create an extra partition and prepare it as follows:
1mkswap /dev/nvme0n1p3 2swapon /dev/nvme0n1p3 Encrypt and mount
To encrypt the root partion with Luks:
1cryptsetup -y -v luksFormat /dev/nvme0n1p2 2cryptsetup open /dev/nvme0n1p2 cryptroot Set filesystem to ext4 and mount it:
1mkfs.ext4 /dev/mapper/cryptroot 2mount /dev/mapper/cryptroot /mnt Make filesystem for boot and mount
1mkfs.fat -F32 /dev/vme0n1p1 2mkdir /mnt/boot 3mount /dev/vme0n1p1 /mnt/boot Bootstrap
1pacstrap /mnt vim sudo grub efibootmgr linux linux-lts base base-devel dhcpcd linux-firmware 1genfstab -U /mnt >> /mnt/etc/fstab Now chroot into the newly mounted root:
1ln -sf /usr/share/zoneinfo/Europe/Amsterdam /etc/localtime 2hwclock --systohc 3 Edit /etc/locale.gen and uncomment en_US.UTF-8 UTF-8 and other needed locales.
Generate the locales by running:
Create the locale.conf(5) file, and set the LANG variable accordingly:
1/etc/locale.conf 2LANG=en_US.UTF-8 1/etc/hostname 2myhostname 3 4/etc/hosts 5127.0.0.1 localhost 6::1 localhost 7127.0.1.1 myhostname.localdomain myhostname Grub
This step is the most exciting. We need to create a ramdisk to configure early userspace. See here: https://en.wikipedia.org/wiki/Initial_ramdisk
- We need to make sure to add an encrypt hook before the filesystem is loaded
- We need to add the video driver so it starts before GDM (only for Gnome users)
Leave the rest of the file in tact.
1vim /etc/mkinitcpio.conf 2# only change this: 3MODULES=(i915) 4HOOKS=(base udev autodetect keyboard keymap consolefont modconf block encrypt filesystems fsck) Next generate the ramdisk:
1grub-install --target=x86_64-efi --efi-directory=/boot --bootloader-id=GRUB 2# if you didn't configure encryption, you should mount the EFI partition in /boot/efi and also set --efi-directory=/boot/efi Edit the grub conf to point to the encrypted root.
1vim /etc/default/grub # --> cryptdevice=/dev/nvme0n1p2:cryptroot 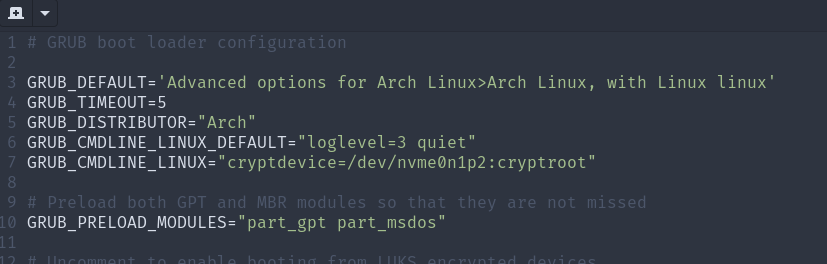
Here is a screenshot from my grub config. I also changed the order as you can see.
1grub-mkconfig -o /boot/grub/grub.cfg Add user and desktop environment
1passwd 2useradd -mg users -G wheel,storage,power -s /bin/bash jacqueline 3passwd jacqueline 4pacman -S xorg xorg-server gnome zsh cmake git neofetch jq ansible 5systemctl enable gdm.service 6systemctl enable NetworkManager.service 7systemctl enable dhcpcd Summary
Add an extra encryption key
If you regret your disk encryption key, you can easily set another one:
1sudo cryptsetup luksDump /dev/nvme0n1p2 2sudo cryptsetup luksAddKey --key-slot 1 /dev/nvme0n1p2 History
1ln -sd /usr/share/zoneinfo/Europe/Amsterdam /etc/localtime 2hwclock --systohc 3vim /etc/locale.gen 4locale-gen 5vim /etc/locale.conf 6vim /etc/hostname 7vim /etc/hosts 8vim /etc/mkinitcpio.conf 9mkinitcpio -P 10grub-install --target=x86_64-efi --efi-directory=/boot --bootloader-id=GRUB 11vim /etc/default/grub 12grub-mkconfig -o /boot/grub/grub.cfg 13passwd 14useradd -mg users -G wheel,storage,power -s /bin/bash jacqueline 15passwd jacqueline 16pacman -S xorg xorg-server gnome zsh cmake git neofetch jq ansible 17systemctl enable gdm.service 18systemctl enable NetworkManager.service 19systemctl enable dhcpcd Jacqueline’s misc notes
Featured Posts
Recent Posts
How to Install GNOME in Arch Linux
Arch Linux remains one of the most popular Linux distributions owing to its versatility and low hardware requirements. The command line environment can, however, be challenging for beginners.
GNOME is a desktop environment offering a stable GUI solution for Arch Linux, making it more convenient to use.
In this tutorial, we offer a step-by-step guide to installing and setting up GNOME in Arch Linux.
Arch Linux GNOME Installation Guide
Follow these steps to install GNOME on Arch Linux:
Step 1: Update Arch Linux
Read up on the latest version of Arch Linux on the official website. Make sure that no manual intervention is required to upgrade from your current version.
1. To apply the update, use:

2. Reboot the system for the update to take effect:
Step 2: Install X Window System (Xorg)
1. Start the X Window System (Xorg) install process with:
sudo pacman -S xorg xorg-server2. Press Enter to select all of the components available for installation.
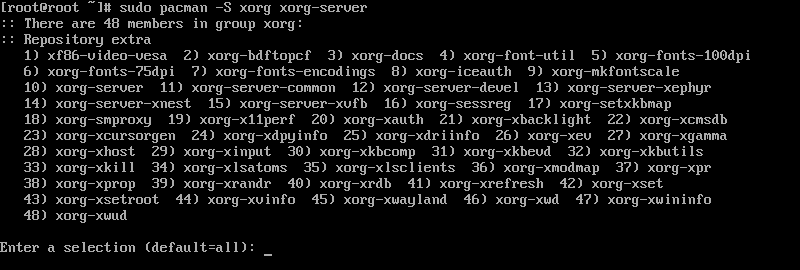
3. When prompted, type Y and press Enter to proceed with the install process.

Note: If you are running an Ubuntu system, learn how to install a GUI on Ubuntu.
Step 3: Install GNOME Desktop Environment
1. Install the GNOME desktop environment by running the following command:
2. Press Enter to select all of the available components.
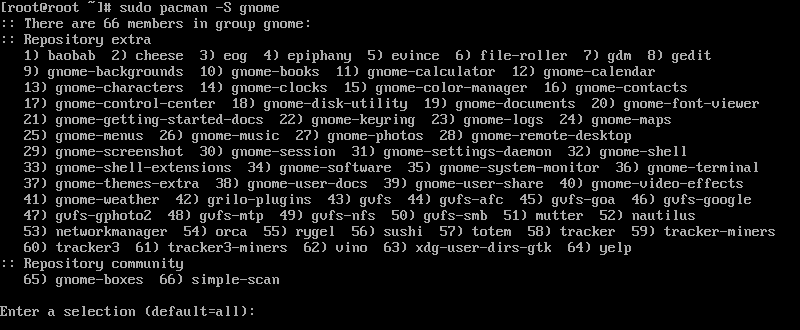
4. If you are missing any dependencies, GNOME offers a choice of provider for the download. For each prompt, select the appropriate provider and press Enter to proceed.

5. When prompted, type Y and press Enter to proceed with the installation.

Step 4: Start and Enable gdm.service
1. Once GNOME is fully installed, start the gdm service by using:
sudo systemctl start gdm.serviceStarting the gdm service enables the GNOME GUI.
2. Log in with your account credentials and open a terminal window.
3. Use the following command to set the gdm service to run on system boot:
sudo systemctl enable gdm.serviceAlternate Option: Choose a DM (Display Manager)
Arch Linux also allows you to use other popular display managers, such as LXDM, MDM, SDDM, or XDM.
1. Start by installing the display manager you want to use. For instance, install LXDM by using:
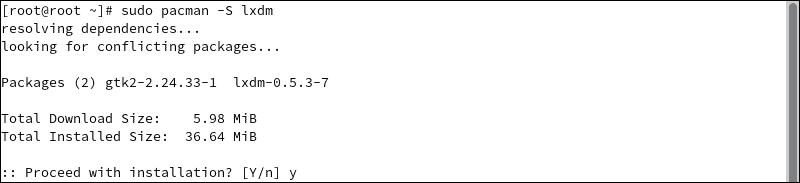
2. When prompted, type Y and press Enter to proceed with the install process.
3. Stop the currently-running gdm service by using:
sudo systemctl stop gdm.service sudo systemctl disable gdm.service4. Start the LXDM display manager with:
sudo systemctl start lxdm.service sudo systemctl enable lxdm.serviceStep 5: Reboot the System
Reboot your Arch Linux system for the changes to take effect:
Step 6: Install Applications
Use the pacman package manager to install any additional applications you require. For instance, use the pacman command to install Firefox, VLC Player, and Leafpad:
sudo pacman -S firefox vlc leafpadCustomize GNOME Desktop Environment with GNOME Tweak Tool
To customize the GNOME desktop environment, install the GNOME Tweaks application.
1. To install GNOME Tweaks, run the following command:
sudo pacman -S gnome-tweaks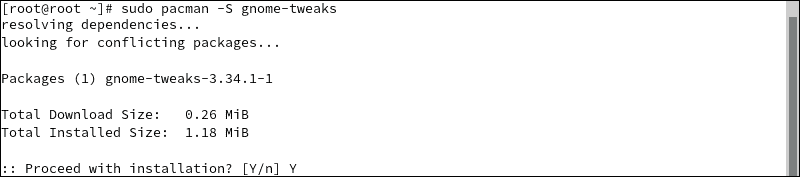
2. Open the Tweaks application to start setting up your version of GNOME.
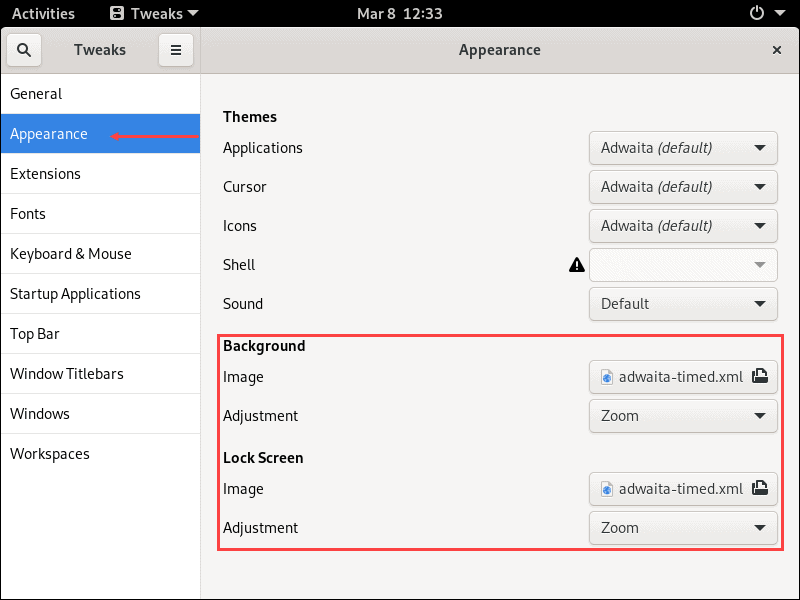
Change Background and Lock Screen Wallpaper
1. Under the Appearance tab, find the Background and Lock Screen sections:
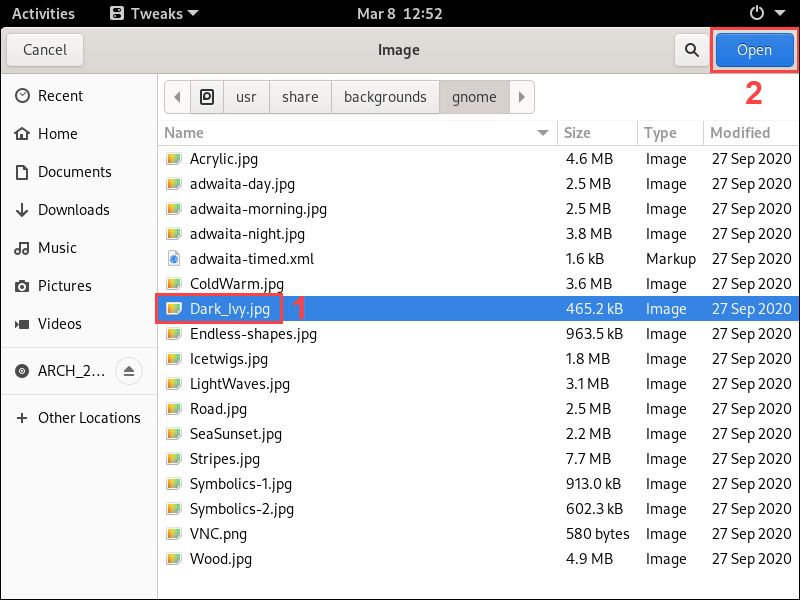
2. Click the Image button to open the image selection window:
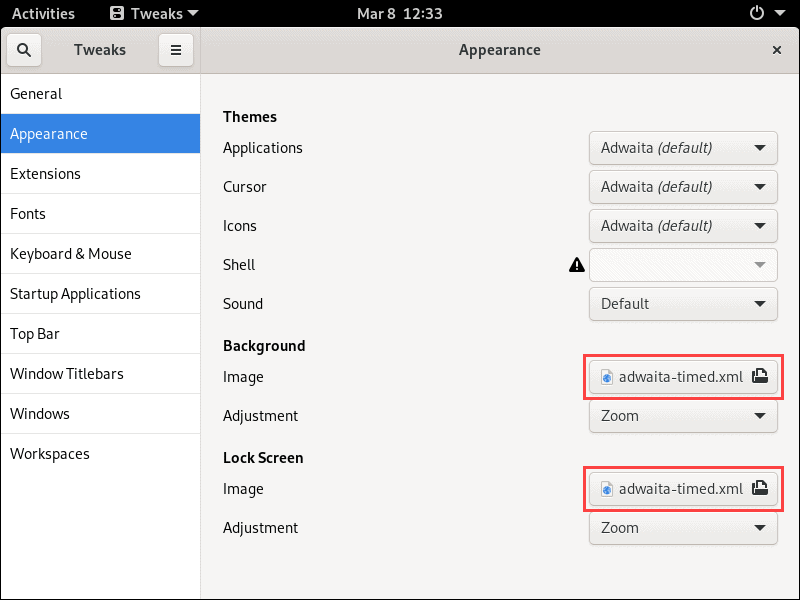
3. Once you select the image you want to use, click Open to confirm:
4. Use the Adjustment dropdown menu to select the way you want the new background to fit:

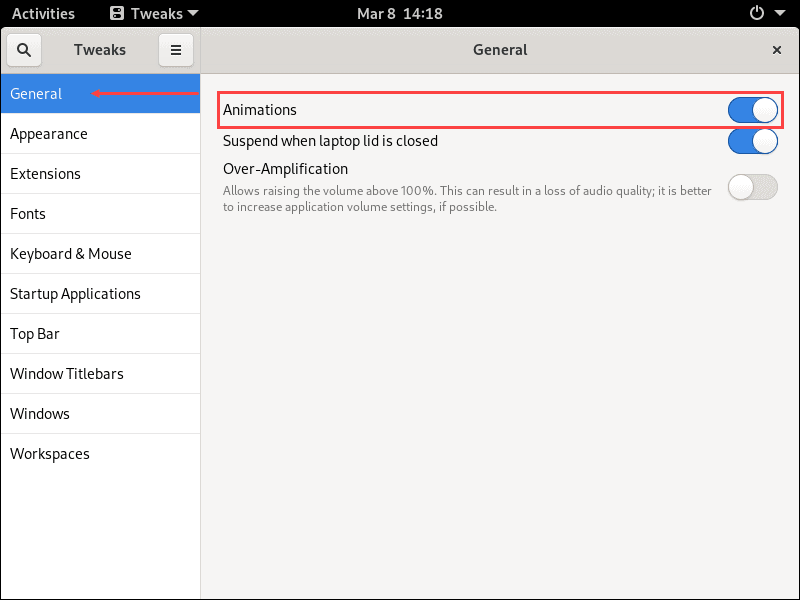
Disable Animations
Navigate to the General tab to turn the animations on or off by using the toggle on the right-hand side:
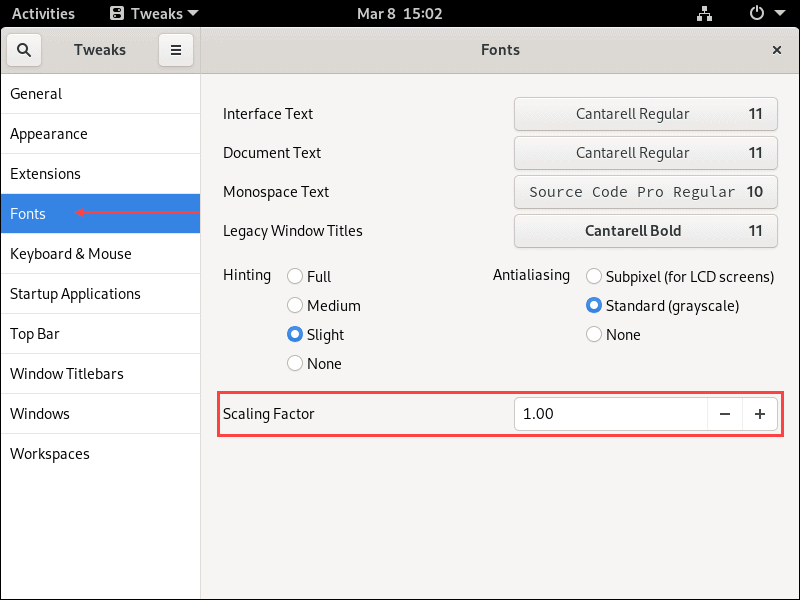
Customize Fonts
1. Use the Fonts tab to select which fonts are used for the interface, documents, monospace text, and legacy window titles.
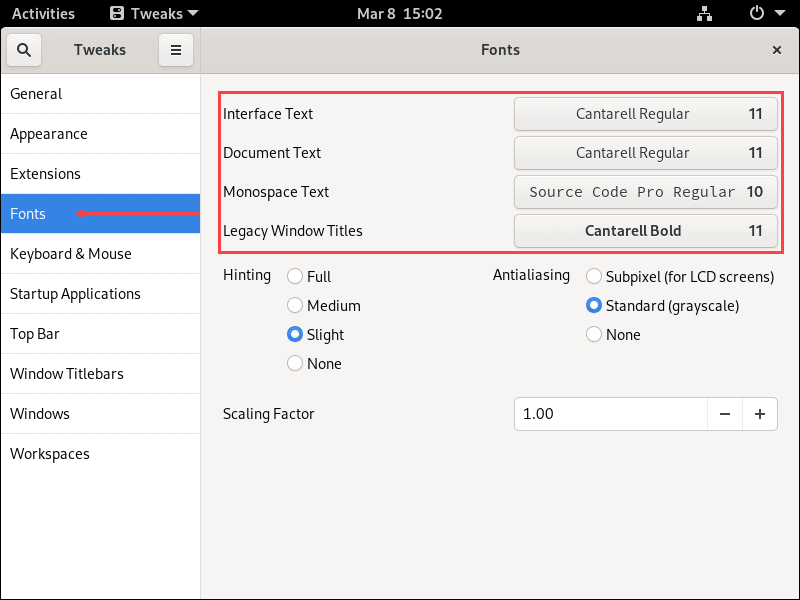
2. You can also change hinting and antialiasing settings.
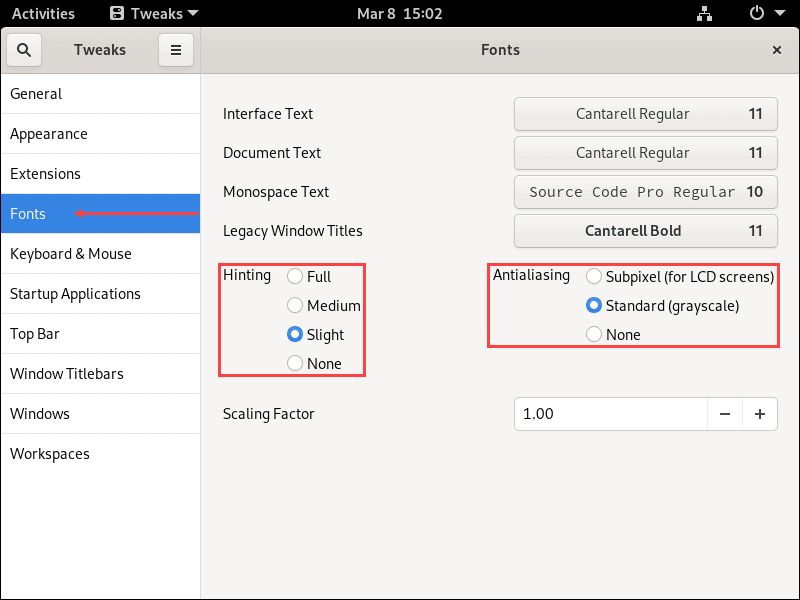
3. Finally, scale on-screen text up and down using the Scaling Factor setting.
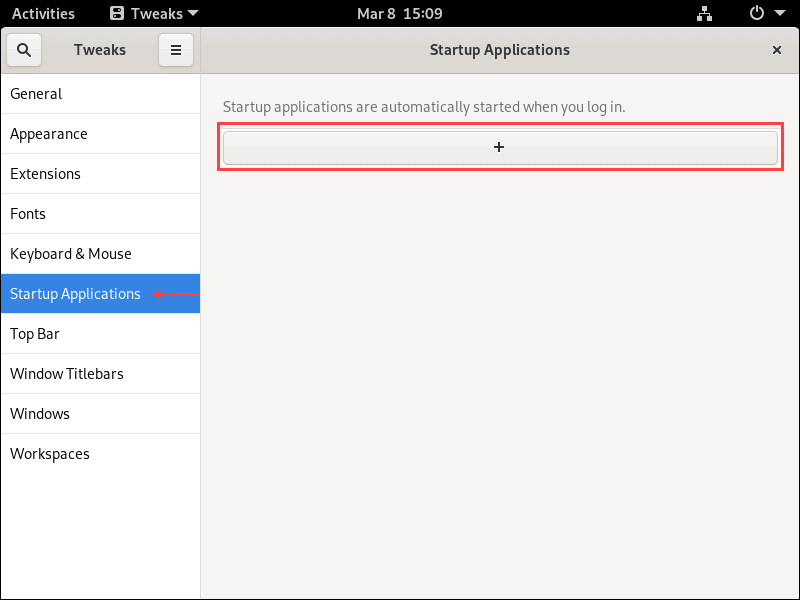
Add Applications to the Startup
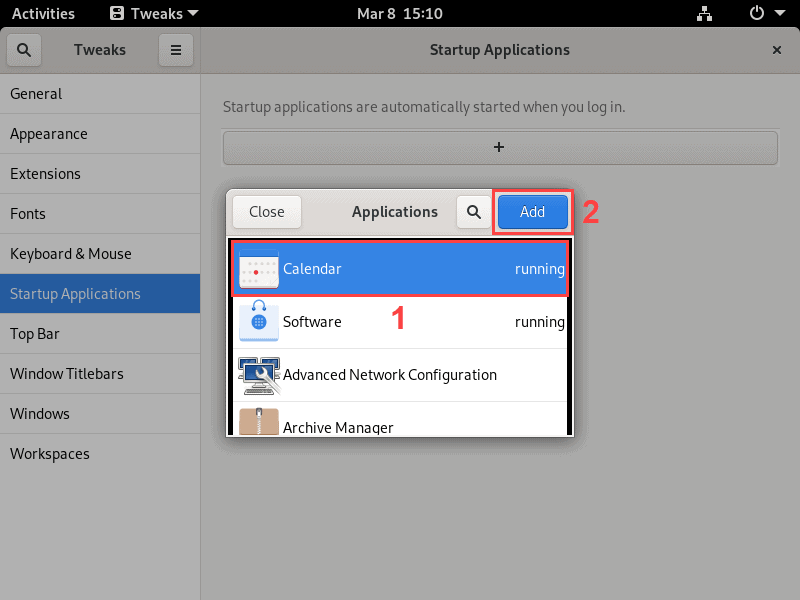
1. The Startup Applications tab lets you set up applications that start on system boot by clicking the + button:
2. Select the application you want to add from the list and click Add to confirm.
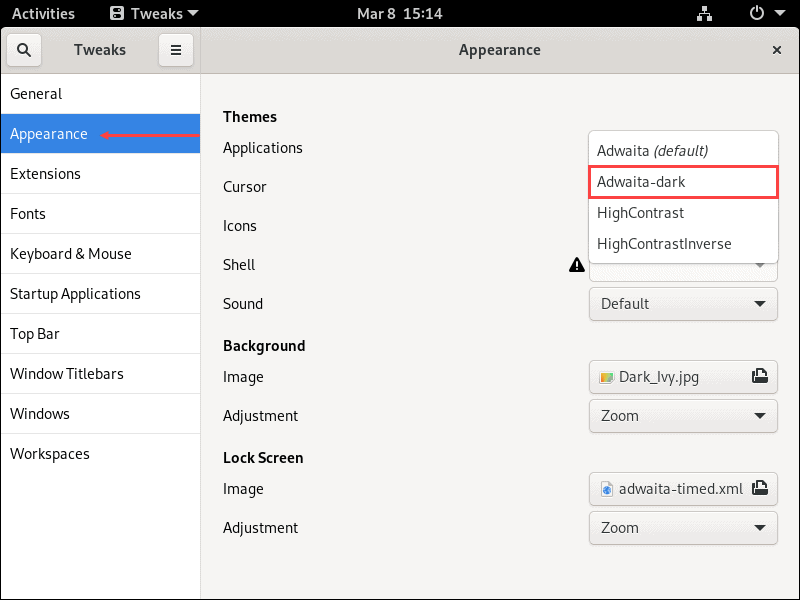
Enable Dark Theme
Under the Appearance tab, open the Applications dropdown menu in the Themes section. Select the Adwaita-dark option to switch to the dark theme.
Enable Extensions
Switch GNOME extensions on or off under the Extensions tab.
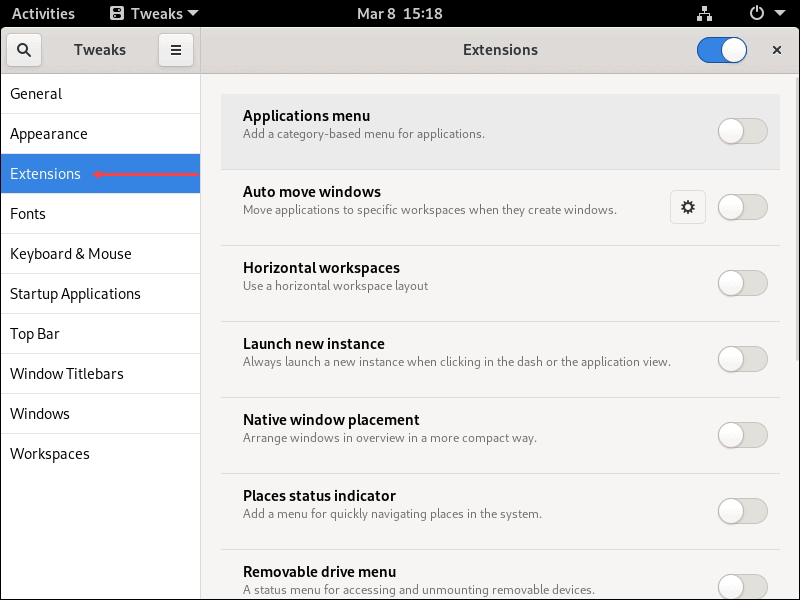
Add new extensions by visiting the GNOME extensions website.
After following this tutorial, you should have a fully set-up and customized copy of Arch Linux using the GNOME display manager.