- Introduction#
- Dependency management#
- System Requirements#
- Installation — Linux / Unix / macOS#
- Downloading the Composer Executable#
- Locally#
- Globally#
- Installation — Windows#
- Using the Installer#
- Manual Installation#
- Docker Image#
- Using Composer#
- Установка Composer Ubuntu 20.04
- Установка Composer в Ubuntu
- Использование Composer
- Выводы
Introduction#
Composer is a tool for dependency management in PHP. It allows you to declare the libraries your project depends on and it will manage (install/update) them for you.
Dependency management#
Composer is not a package manager in the same sense as Yum or Apt are. Yes, it deals with «packages» or libraries, but it manages them on a per-project basis, installing them in a directory (e.g. vendor ) inside your project. By default, it does not install anything globally. Thus, it is a dependency manager. It does however support a «global» project for convenience via the global command.
This idea is not new and Composer is strongly inspired by node’s npm and ruby’s bundler.
- You have a project that depends on a number of libraries.
- Some of those libraries depend on other libraries.
- Enables you to declare the libraries you depend on.
- Finds out which versions of which packages can and need to be installed, and installs them (meaning it downloads them into your project).
- You can update all your dependencies in one command.
See the Basic usage chapter for more details on declaring dependencies.
System Requirements#
Composer in its latest version requires PHP 7.2.5 to run. A long-term-support version (2.2.x) still offers support for PHP 5.3.2+ in case you are stuck with a legacy PHP version. A few sensitive php settings and compile flags are also required, but when using the installer you will be warned about any incompatibilities.
Composer needs several supporting applications to work effectively, making the process of handling package dependencies more efficient. For decompressing files, Composer relies on tools like 7z (or 7zz ), gzip , tar , unrar , unzip and xz . As for version control systems, Composer integrates seamlessly with Fossil, Git, Mercurial, Perforce and Subversion, thereby ensuring the application’s smooth operation and management of library repositories. Before using Composer, ensure that these dependencies are correctly installed on your system.
Composer is multi-platform and we strive to make it run equally well on Windows, Linux and macOS.
Installation — Linux / Unix / macOS#
Downloading the Composer Executable#
Composer offers a convenient installer that you can execute directly from the command line. Feel free to download this file or review it on GitHub if you wish to know more about the inner workings of the installer. The source is plain PHP.
There are, in short, two ways to install Composer. Locally as part of your project, or globally as a system wide executable.
Locally#
To install Composer locally, run the installer in your project directory. See the Download page for instructions.
The installer will check a few PHP settings and then download composer.phar to your working directory. This file is the Composer binary. It is a PHAR (PHP archive), which is an archive format for PHP which can be run on the command line, amongst other things.
Now run php composer.phar in order to run Composer.
You can install Composer to a specific directory by using the —install-dir option and additionally (re)name it as well using the —filename option. When running the installer when following the Download page instructions add the following parameters:
php composer-setup.php --install-dir=bin --filename=composerNow run php bin/composer in order to run Composer.
Globally#
You can place the Composer PHAR anywhere you wish. If you put it in a directory that is part of your PATH , you can access it globally. On Unix systems you can even make it executable and invoke it without directly using the php interpreter.
After running the installer following the Download page instructions you can run this to move composer.phar to a directory that is in your path:
mv composer.phar /usr/local/bin/composerIf you like to install it only for your user and avoid requiring root permissions, you can use ~/.local/bin instead which is available by default on some Linux distributions.
Note: If the above fails due to permissions, you may need to run it again with sudo .
Note: On some versions of macOS the /usr directory does not exist by default. If you receive the error «/usr/local/bin/composer: No such file or directory» then you must create the directory manually before proceeding: mkdir -p /usr/local/bin .
Note: For information on changing your PATH, please read the Wikipedia article and/or use your search engine of choice.
Now run composer in order to run Composer instead of php composer.phar .
Installation — Windows#
Using the Installer#
This is the easiest way to get Composer set up on your machine.
Download and run Composer-Setup.exe. It will install the latest Composer version and set up your PATH so that you can call composer from any directory in your command line.
Note: Close your current terminal. Test usage with a new terminal: This is important since the PATH only gets loaded when the terminal starts.
Manual Installation#
Change to a directory on your PATH and run the installer following the Download page instructions to download composer.phar .
Create a new composer.bat file alongside composer.phar :
C:\bin> echo @php "%~dp0composer.phar" %*>composer.batPS C:\bin> Set-Content composer.bat '@php "%~dp0composer.phar" %*'Add the directory to your PATH environment variable if it isn’t already. For information on changing your PATH variable, please see this article and/or use your search engine of choice.
Close your current terminal. Test usage with a new terminal:
Composer version 2.4.0 2022-08-16 16:10:48Docker Image#
Composer is published as Docker container in a few places, see the list in the composer/docker README.
docker pull composer/composer docker run --rm -it -v "$(pwd):/app" composer/composer installTo add Composer to an existing Dockerfile you can simply copy binary file from pre-built, low-size images:
# Latest release COPY --from=composer/composer:latest-bin /composer /usr/bin/composer # Specific release COPY --from=composer/composer:2-bin /composer /usr/bin/composerRead the image description for further usage information.
Note: Docker specific issues should be filed on the composer/docker repository.
Note: You may also use composer instead of composer/composer as image name above. It is shorter and is a Docker official image but is not published directly by us and thus usually receives new releases with a delay of a few days. Important: short-aliased images don’t have binary-only equivalents, so for COPY —from approach it’s better to use composer/composer ones.
Using Composer#
Now that you’ve installed Composer, you are ready to use it! Head on over to the next chapter for a short demonstration.
Found a typo? Something is wrong in this documentation? Fork and edit it!
Composer and all content on this site are released under the MIT license.
Установка Composer Ubuntu 20.04
Composer — это свободный пакетный менеджер для установки зависимостей и самих пакетов PHP. Он разработан Нильсом Адерманом и Хорди Боггиано. С помощью скрипта можно в несколько нажатий установить нужный пакет, а также все его зависимости, например, ZendFramework или Symfony. Он широко используется разработчиками PHP скриптов.
В этой статье мы рассмотрим как установить Composer Ubuntu 20.04 и более поздних версиях, а также как пользоваться утилитой.
Установка Composer в Ubuntu
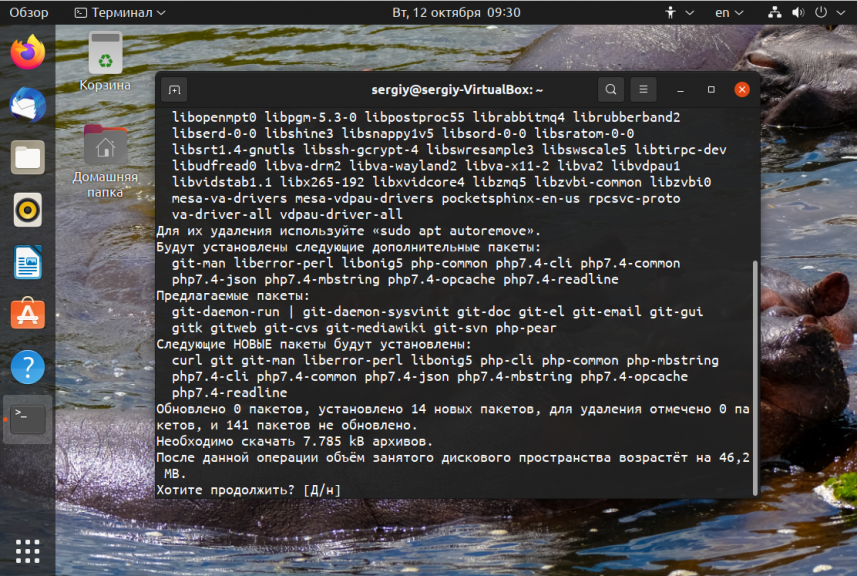
Вы не можете установить программу из официальных репозиториев. Нужно скачать скрипт из официального сайта и поместить его в папку с вашим проектом. Но сначала обновите систему и установите зависимости:
sudo apt install curl php-cli php-mbstring git unzip
Установка Composer ubuntu может быть выполнена двумя способами. Либо локально в папку проекта, либо же глобально, для всей системы. Сначала рассмотрим как установить программу локально. Перейдите в папку проекта:
Выполните такую команду для загрузки установочного скрипта:
curl -sS https://getcomposer.org/installer -o composer-setup.php
Затем запустите этот скрипт, чтобы создать файл composet.phar, который и будет использоваться для установки пакетов:
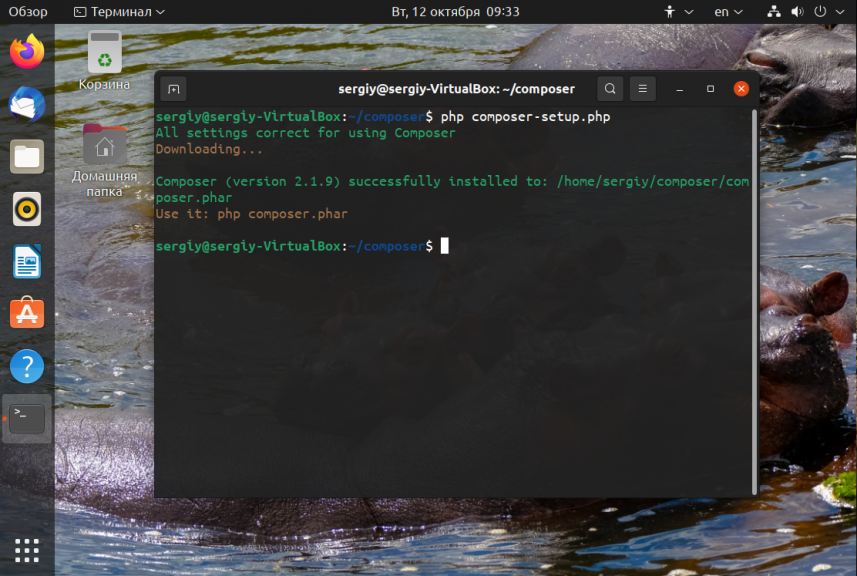
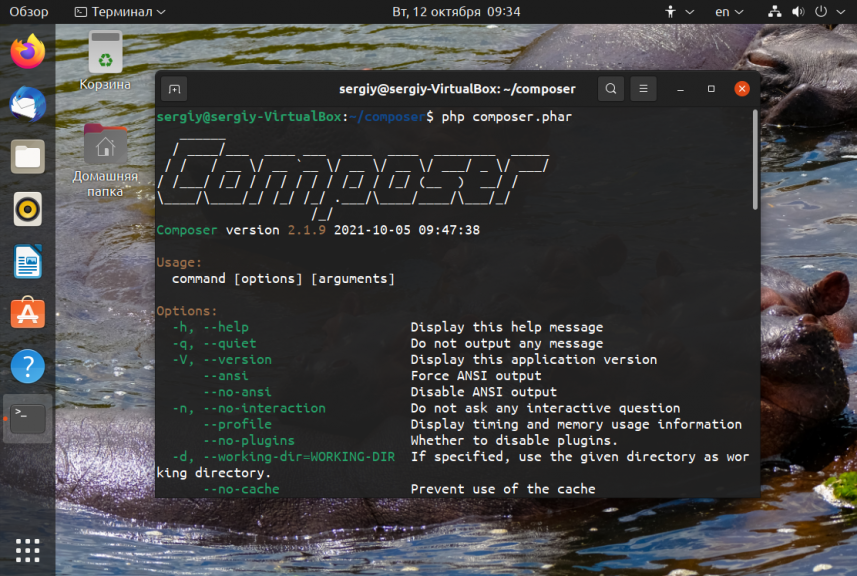
Теперь вы можете проверить работает ли Composer:
Теперь рассмотрим как установить программу глобально для всей системы. Вы можете скачивать файл установщика в любую папку, например, домашнюю:
curl -sS https://getcomposer.org/installer -o composer-setup.php
Только команда установки будет отличаться, в ней мы указываем папку, куда нужно установить скрипт:
sudo php composer-setup.php —install-dir=/usr/local/bin —filename=composer

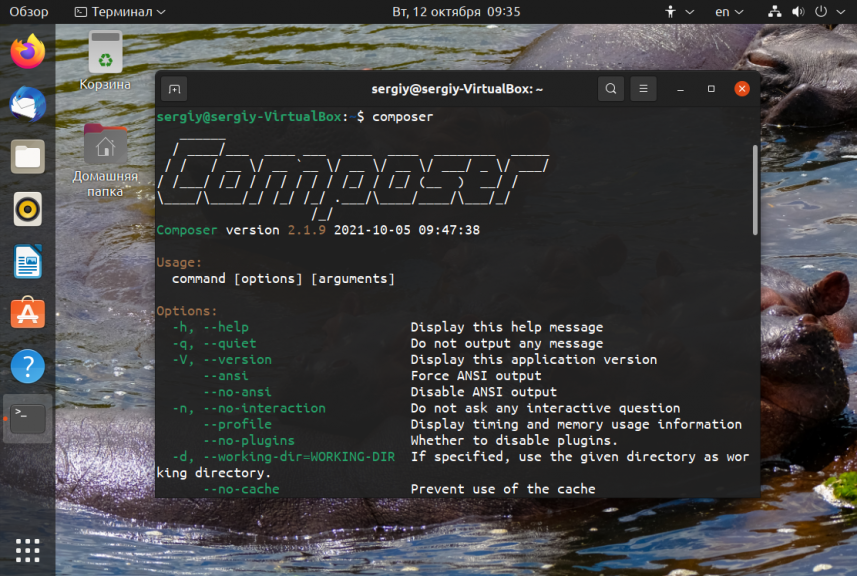
Для проверки работы, вы можете выполнить команду:
Использование Composer
Для того чтобы указать какие пакеты нужно устанавливать используется конфигурационный файл composer.json. Сначала нужно его инициализировать в папке проекта. Для этого выполните:
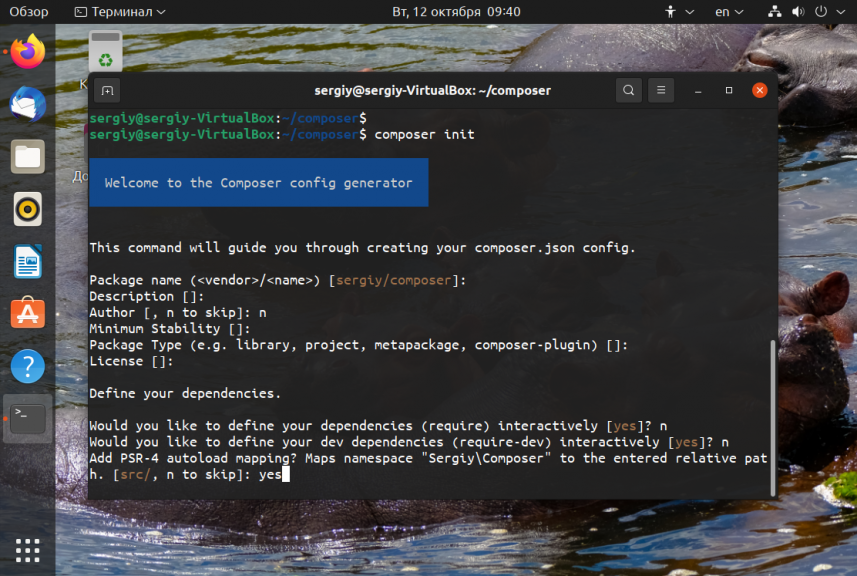
Затем ответьте на вопросы программы. Можно оставить ответы по умолчанию. В файле сообщаются зависимости вашего проекта, а также их версии. Создайте этот файл в корневой папке вашего проекта. Синтаксис записей очень прост, и если вы раньше имели дело с JSON, то без проблем разберетесь:
«require»:
«производитель/пакет»: «версия»
>
«require-dev»:
«производитель/пакет»: «версия»
>
>
Секция require отвечает за пакеты, необходимые для работы программы, а require-dev — только за пакеты для разработки. Например, для проекта необходимо установить библиотеку работы с RSS Atom — picofeed. Для этого сначала откройте сайт https://packagist.org и найдите этот пакет:
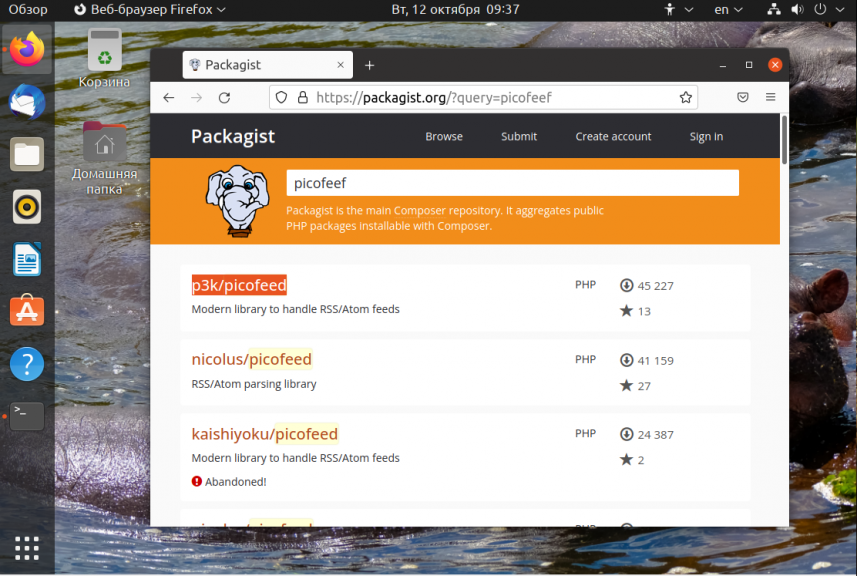
На его странице вы можете видеть команду composer, которой его можно установить, в ней полное имя, а чуть ниже последнюю версию.
Для установки пакета выполните команду со страницы:
composer require p3k/picofeed
После установки пакет появится в секции require. Если во время установки вы получаете ошибку, например, такую:
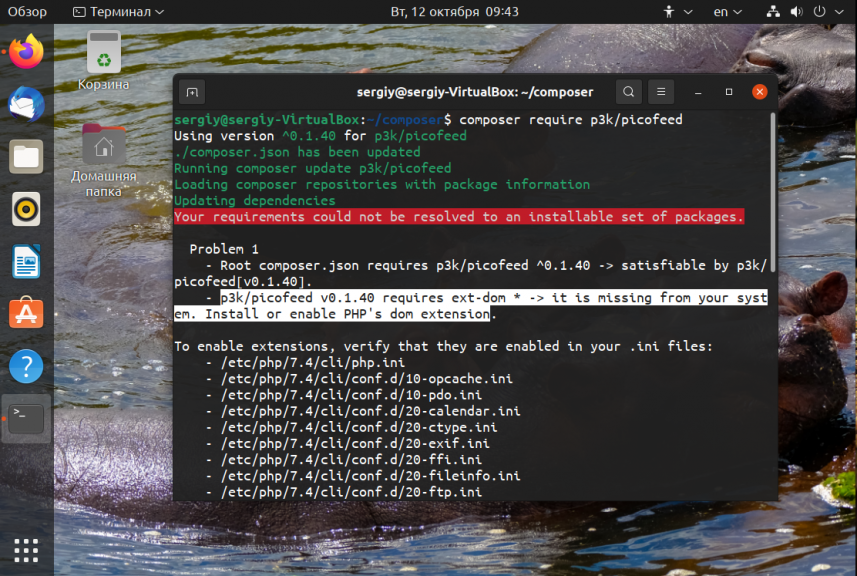
Это означает, что пакету не хватает каких-либо зависимостей или возникли конфликты с уже установленными пакетами. В данном случае не хватает расширения PHP Dom. Вы можете установить его командой:
Для того чтобы установить все пакеты, описанные в файле конфигурации, используйте команду:
После установки пакетов composer создает файл autoload.php в папке vendor вашего проекта, с помощью него можно включить в проект все библиотеки, которые были установлены. Для этого достаточно подключить этот файл к проекту с помощью инструкции include или require:
Например, возьмем небольшой пример чтения ленты rss с GitHub:
download('https://losst.pro/feed/'); // Return the right parser instance according to the feed format $parser = $reader->getParser( $resource->getUrl(), $resource->getContent(), $resource->getEncoding() ); // Return a Feed object $feed = $parser->execute(); // Print the feed properties with the magic method __toString() echo $feed; >catch (PicoFeedException $e) < // Do Something. >?> 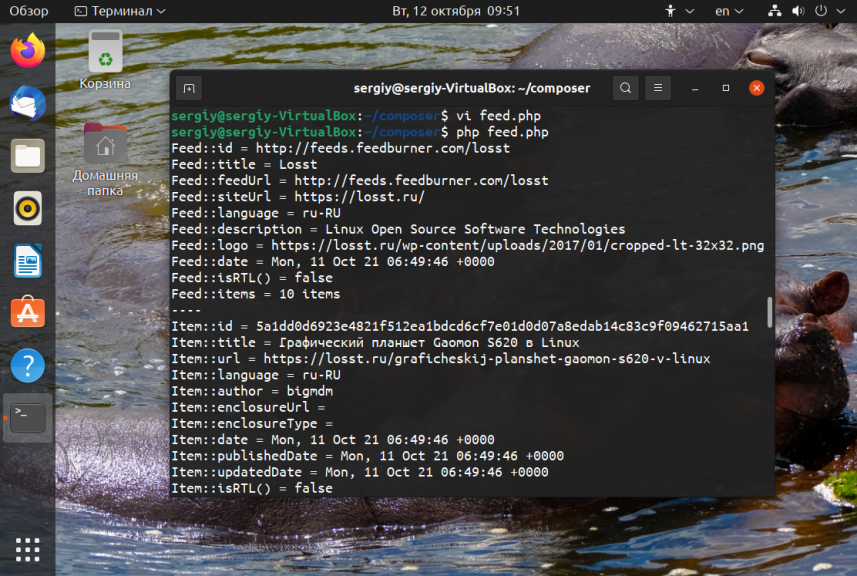
Установленные пакеты можно удалить. Например:
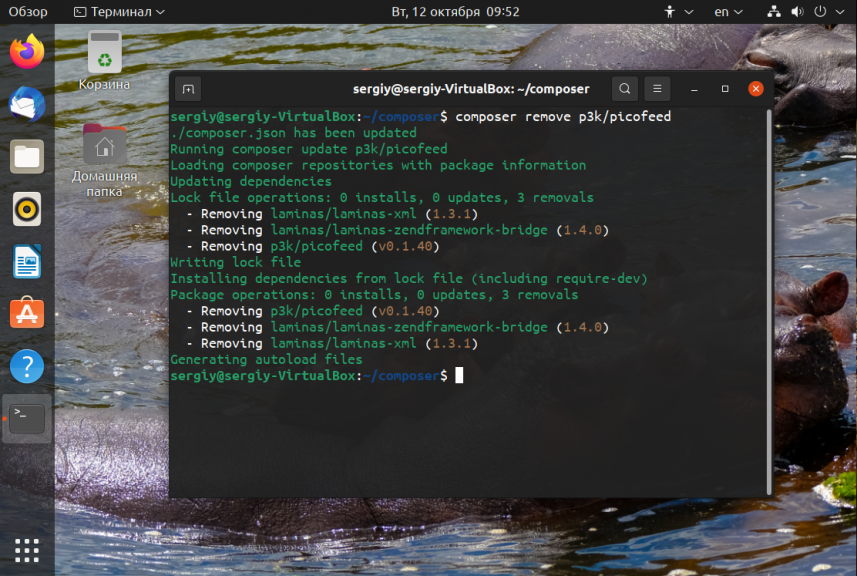
Если версии пакетов устарели, то вы можете их обновить с помощью одной команды:
Выводы
В этой небольшой статье мы рассмотрели как выполняется установка Composer Ubuntu 20.04 и 18.04, а также как использовать эту утилиту в своем проекте для разрешения зависимостей. Это очень удобно, когда вы можете один раз указать нужные пакеты и больше не заботиться об их установке и обновлении на других машинах.

Обнаружили ошибку в тексте? Сообщите мне об этом. Выделите текст с ошибкой и нажмите Ctrl+Enter.