- Saved searches
- Use saved searches to filter your results more quickly
- feyil/Linux-Mint-Nvidia-Driver-Cuda
- Name already in use
- Sign In Required
- Launching GitHub Desktop
- Launching GitHub Desktop
- Launching Xcode
- Launching Visual Studio Code
- Latest commit
- Git stats
- Files
- README.md
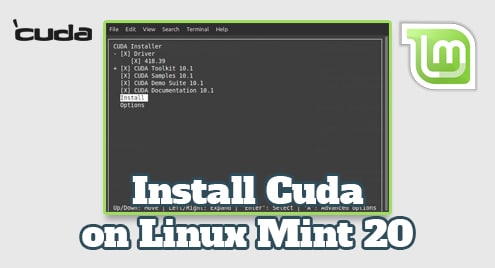
- How To Install CUDA on Linux Mint 20
- Install CUDA on Linux Mint 20
- Install Cuda on Linux Mint 20
- Installing Cuda on Linux Mint 20:
- Step # 1: Update your Linux Mint 20 Machine:
- Step # 2: Install Cuda on your System:
- Step # 3: Verify the Successful Installation of Cuda:
- Removing Cuda from Linux Mint 20:
- Conclusion:
- Install Cuda on Linux Mint 20 — Step by step guide ?
- Steps to install Cuda on Linux Mint 20 ?
- How to Uninstall Cuda from Linux Mint 20 ?
- [Need assistance in installing Open-source Software on your Linux system ? We can help you . ]
- Conclusion
Saved searches
Use saved searches to filter your results more quickly
You signed in with another tab or window. Reload to refresh your session. You signed out in another tab or window. Reload to refresh your session. You switched accounts on another tab or window. Reload to refresh your session.
Set of instructions to successful installation of NVIDIA official driver and CUDA Toolkit
feyil/Linux-Mint-Nvidia-Driver-Cuda
This commit does not belong to any branch on this repository, and may belong to a fork outside of the repository.
Name already in use
A tag already exists with the provided branch name. Many Git commands accept both tag and branch names, so creating this branch may cause unexpected behavior. Are you sure you want to create this branch?
Sign In Required
Please sign in to use Codespaces.
Launching GitHub Desktop
If nothing happens, download GitHub Desktop and try again.
Launching GitHub Desktop
If nothing happens, download GitHub Desktop and try again.
Launching Xcode
If nothing happens, download Xcode and try again.
Launching Visual Studio Code
Your codespace will open once ready.
There was a problem preparing your codespace, please try again.
Latest commit
Git stats
Files
Failed to load latest commit information.
README.md
Linux Mint 19.2 Cinnamon NVIDIA 940M Driver Installation & CUDA 10.2 Toolkit Installation Instructions
- This repo includes set of steps to successfully install NVIDIA Driver and CUDA 10.2 in Mint 19.2 Cinnamon
Official Driver Installation for NVIDIA 940M
$ sudo dpkg --add-architecture i386 $ sudo apt update $ sudo apt install build-essential libc6:i386
- Second dowload offical NVIDIA driver from NVIDIA driver websites. It is a .run file which includes necessary scripts to install driver.
- Disable Nouveau Nvidia driver
$ sudo bash -c "echo blacklist nouveau > /etc/modprobe.d/blacklist-nvidia-nouveau.conf" $ sudo bash -c "echo options nouveau modeset=0 >> /etc/modprobe.d/blacklist-nvidia-nouveau.conf"
$ cat /etc/modprobe.d/blacklist-nvidia-nouveau.conf blacklist nouveau options nouveau modeset=0
- Stop Desktop Manager. After executing the following linux command the display server will stop, therefore make sure you save all your current work ( if any ) before you proceed:
- Hit CTRL+ALT+F1 and login with your username and password to open a new TTY1 session or perform the Nvidia driver installation via SSH bash.
- Install Nvidia Driver
$ sudo bash NVIDIA-Linux-x86_64-xxx.xx.run
- Accept License - Would you like to register the kernel module sources with DKMS? This will allow DKMS to automatically build a new module, if you install a different kernel later. -> **YES** - Install NVIDIA's 32-bit compatibility libraries? -> **YES** - The distribution-provided pre-install script failed! Are you sure you want to continue? -> CONTINUE INSTALLATION An incomplete installation of libglvnd was found. Do you want to install a full copy of libglvnd? This will overwrite any existing libglvnd libraries. -> **Install and overwrite existing files** - Would you like to run the nvidia-xconfig utility? -> **YES** - After NVIDIA Driver installation when the splash screen pop-up. Screen will go black hit CTRL+ALT+F1 and login with username and password
- Initialize a new X session for the system. GUI Interface will open.
- So, we are back to the GUI now we know that our GPU is NVIDIA Optimus capable so will install nvidia-prime
$ sudo apt-get install nvidia-prime
- Reboot the system when the reboot succeed GUI will appear without typing startx or following step 12
- Thats it we successfully installed latest Nvidia offical driver to the system. You can configure NVIDIA settings from NVIDIA X Server
- Go to the NVIDIA Offical website and dowload CUDA 10.2 Toolkit with following instruction for .deb installation method
$ wget https://developer.download.nvidia.com/compute/cuda/repos/ubuntu1804/x86_64/cuda-ubuntu1804.pin $ sudo mv cuda-ubuntu1804.pin /etc/apt/preferences.d/cuda-repository-pin-600 $ wget http://developer.download.nvidia.com/compute/cuda/10.2/Prod/local_installers/cuda-repo-ubuntu1804-10-2-local-10.2.89-440.33.01_1.0-1_amd64.deb $ sudo dpkg -i cuda-repo-ubuntu1804-10-2-local-10.2.89-440.33.01_1.0-1_amd64.deb $ sudo apt-key add /var/cuda-repo-10-2-local-10.2.89-440.33.01/7fa2af80.pub $ sudo apt-get update $ sudo apt-get -y install cuda
$ cd /etc/usr/local/cuda-10-2/bin $ ./nvcc --version nvcc: NVIDIA (R) Cuda compiler driver Copyright (c) 2005-2019 NVIDIA Corporation Built on Wed_Oct_23_19:24:38_PDT_2019 Cuda compilation tools, release 10.2, V10.2.89 $ cd /etc/usr/local/cuda/samples/0_Simple/matrixMul $ make $ ./matrxiMul [Matrix Multiply Using CUDA] - Starting. GPU Device 0: "Maxwell" with compute capability 5.0 MatrixA(320,320), MatrixB(640,320) Computing result using CUDA Kernel. done Performance= 105.24 GFlop/s, Time= 1.245 msec, Size= 131072000 Ops, WorkgroupSize= 1024 threads/block Checking computed result for correctness: Result = PASS NOTE: The CUDA Samples are not meant for performancemeasurements. Results may vary when GPU Boost is enabled.
- Lets configure our environment variables to access CUDA compiler in the system wide. Add followings to the end of .bashrc file.
export PATH=/usr/local/cuda-10.2/bin$:+:$ >$ export LD_LIBRARY_PATH=/usr/local/cuda-10.2/lib64$:+:$ >
$ nvcc --version nvcc: NVIDIA (R) Cuda compiler driver Copyright (c) 2005-2019 NVIDIA Corporation Built on Wed_Oct_23_19:24:38_PDT_2019 Cuda compilation tools, release 10.2, V10.2.89
- That’s it we successfully installed CUDA 10.2 Toolkit we can compile our programs with nvcc command.
How To Install CUDA on Linux Mint 20
In this tutorial, we will show you how to install CUDA on Linux Mint 20. For those of you who didn’t know, The Nvidia CUDA toolkit is an extension of the GPU parallel computing platform and programming model. It allows your applications to use different types of GPUs very conveniently.
This article assumes you have at least basic knowledge of Linux, know how to use the shell, and most importantly, you host your site on your own VPS. The installation is quite simple and assumes you are running in the root account, if not you may need to add ‘ sudo ‘ to the commands to get root privileges. I will show you the step-by-step installation of a CUDA Nvidia on a Linux Mint 20 (Ulyana).
Prerequisites
- A server running one of the following operating systems: Linux Mint 20.
- It’s recommended that you use a fresh OS install to prevent any potential issues.
- SSH access to the server (or just open Terminal if you’re on a desktop).
- A non-root sudo user or access to the root user . We recommend acting as a non-root sudo user , however, as you can harm your system if you’re not careful when acting as the root.
Install CUDA on Linux Mint 20
Step 1. Before running the tutorial below, it’s important to make sure your system is up to date by running the following apt commands in the terminal:
sudo apt update sudo apt install apt-transport-https ca-certificates gnupg
Step 2. Installing CUDA on Linux Mint 20.
By default, CUDA is available on the Linux Mint 20 base repository. Now install Cuda using the following command below:
sudo apt install nvidia-cuda-tookit
Once Cuda has been installed successfully on your Linux Mint system, you can find out its version by running the command below:
nvcc: NVIDIA (R) Cuda compiler driver Copyright (c) 2005-2019 NVIDIA Corporation Built on Sun_Nov_15_16:46:16_PDT_2021 Cuda compilation tools, release 11.3, V11.1.456
Congratulations! You have successfully installed CUDA. Thanks for using this tutorial for installing the latest version of CUDA Nvidia on the Linux Mint system. For additional help or useful information, we recommend you check the official Nvidia website.
If you don’t have time to do all of this stuff, or if this is not your area of expertise, we offer a service to do “VPS Manage Service Offer”, starting from $10 (Paypal payment). Please contact us to get the best deal!
Install Cuda on Linux Mint 20
CUDA stands for Compute Unified Device Architecture and it is a platform designed for parallel computing. It allows your applications to use different types of GPUs very conveniently. In this article, we will be highlighting all the steps for installing Cuda on a Linux Mint 20 system. Moreover, we will also share with you the command executing which you can easily uninstall this platform from your Linux Mint 20 system.
Installing Cuda on Linux Mint 20:
To install Cuda on your Linux Mint 20 machine, you should go on with the following steps:
Step # 1: Update your Linux Mint 20 Machine:
First, you have to carry out a system update by executing the command shown below:
$ sudo apt update

Step # 2: Install Cuda on your System:
Then, you can install Cuda on your system with the following command:
$ sudo apt install nvidia-cuda-tookit

Step # 3: Verify the Successful Installation of Cuda:
Once Cuda has been installed successfully on your system, you can find out its version by running the command mentioned below:
$ nvcc --version

Removing Cuda from Linux Mint 20:
Whenever you want to uninstall Cuda from your Linux Mint 20 system, you can execute the following command:
$ sudo apt-get purge --autoremove nvidia-cuda-toolkit

Conclusion:
Cuda can be installed within a few minutes using this method if you have a sufficient amount of storage space available on your system. Once it is installed, it can be conveniently used for parallel processing. Moreover, it can also be uninstalled from your system by running a single Linux command.
Karim Buzdar holds a degree in telecommunication engineering and holds several sysadmin certifications including CCNA RS, SCP, and ACE. As an IT engineer and technical author, he writes for various websites.
Install Cuda on Linux Mint 20 — Step by step guide ?

CUDA stands for Compute Unified Device Architecture and it is a platform designed for parallel computing. It allows your applications to use different types of GPUs very conveniently.
Here at LinuxAPT , as part of our Server Management Services , we regularly help our Customers to perform related Linux Mint system Software Installation queries.
In this context, we shall look into how to install Cuda on a Linux Mint 20 system.
Steps to install Cuda on Linux Mint 20 ?
First, you have to carry out a system update by executing the below command:
2. Install Cuda on your System
Then, you can install Cuda on your system with the following command:
$ sudo apt install nvidia-cuda-tookit 3. Verify Cuda Installation
Once Cuda has been installed successfully on your system, you can find out its version by running the command mentioned below:
How to Uninstall Cuda from Linux Mint 20 ?
Whenever you want to uninstall Cuda from your Linux Mint 20 system, you can execute the following command:
$ sudo apt-get purge --autoremove nvidia-cuda-toolkit [Need assistance in installing Open-source Software on your Linux system ? We can help you . ]
Conclusion
This article covers the process of installing Cuda on your Linux Mint 20 system. In fact, the Nvidia CUDA toolkit is an extension of the GPU parallel computing platform and programming model.