- Installation of Linux Mint 21 [Cinnamon Edition] Desktop
- Step 1: Download Linux Mint 21 ISO Images
- Step 2: Installation of Linux Mint 21 Cinnamon Edition
- Install Linux Mint Cinnamon
- Cinnamon desktop
- Installing Cinnamon
- Installing Cinnamon only
- Installing Linux Mint Cinnamon
- Switching to Cinnamon
- Final thoughts
- About the author
- Sidratul Muntaha
Installation of Linux Mint 21 [Cinnamon Edition] Desktop
Linux Mint is a modern, polished, easy-to-use, and comfortable community-driven GNU/Linux desktop distribution based on the popular Ubuntu Linux distribution. It is a great and recommended distribution for computer users switching from Windows or Mac OS X operating system to the Linux platform.
Linux Mint 21 code-named “Vanessa” is the latest version of the popular Linux Mint desktop operating system that is available in three versions, namely Cinnamon, Xfce, and MATE. It is an LTS (Long Term Support) release that is built atop Ubuntu 22.04 and will be supported until 2027.
Linux Mint 21 ships with several updated software, improvements, and many new features that will offer you a more pleasant desktop experience:
This guide will walk you through the steps to install Linux Mint 21 Cinnamon edition, but the steps below also work for Mate and XFCE editions.
Before you proceed, ensure that you have a 4 GB USB drive for the installation medium and a stable broadband internet connection to download the ISO image.
Step 1: Download Linux Mint 21 ISO Images
First of all, you need to download the ISO image from the links below:
Once you downloaded the preferred desktop edition, make sure to verify the ISO image by generating the SHS256 sum as shown:
$ sha256sum -b linuxmint-21-cinnamon-64bit.iso [for Cinnamon] $ sha256sum -b linuxmint-21-mate-64bit.iso [for Mate] $ sha256sum -b linuxmint-21-xfce-64bit.iso [for XFCE]

Compare it with the sum presented in the sha256sum.txt which you can download from the ISO download page as highlighted in the following screenshot.

Next, you need to create a bootable media-USB flash/DVD using the Rufus utility or these useful USB creator tools in order to create a Linux Mint bootable USB drive.
Step 2: Installation of Linux Mint 21 Cinnamon Edition
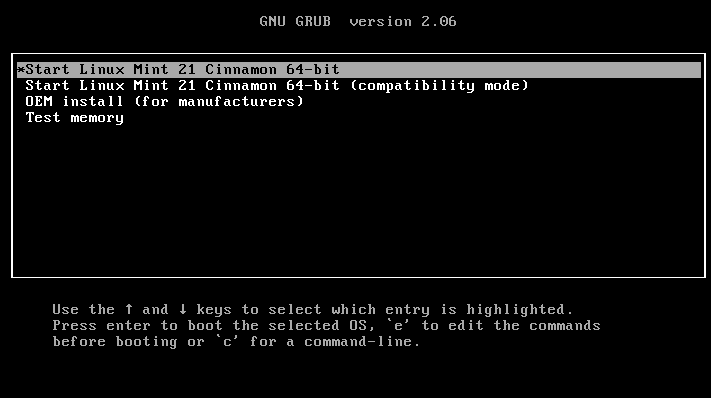
Now plug in the bootable USB flash drive into your computer and reboot. Once the system has rebooted, press your BIOS key for selecting the boot device and select the USB drive to boot from it. Once the system has booted, from the grub menu, select the first option and click enter to load Linux Mint.
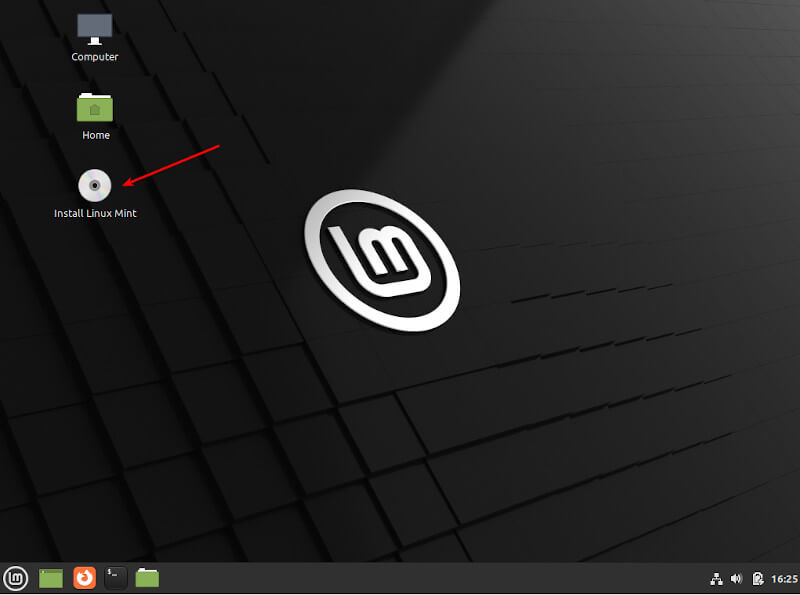
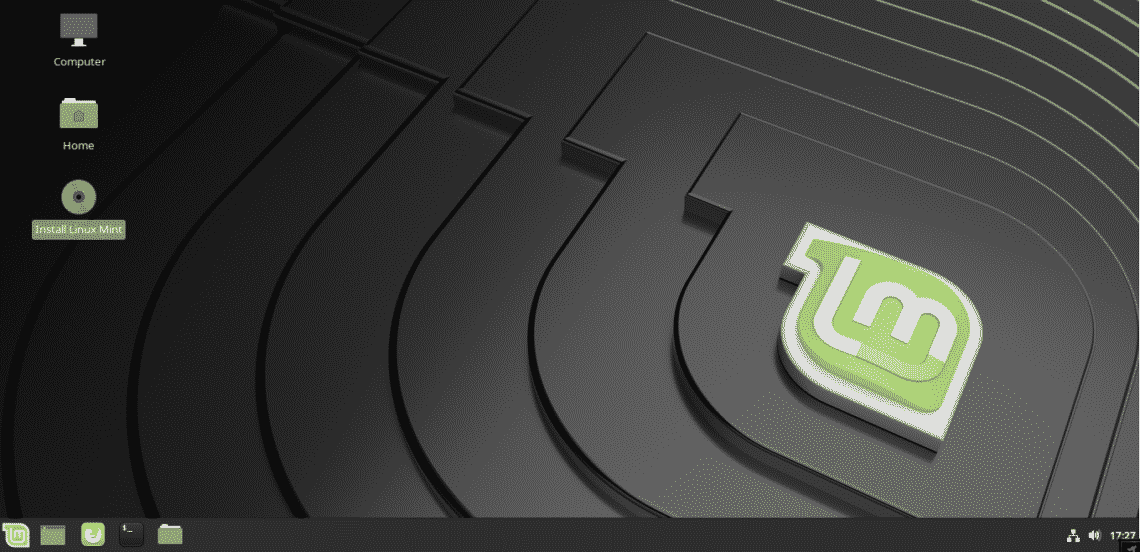
From the desktop, click Install Linux Mint to launch the installation wizard as highlighted in the following screenshot.
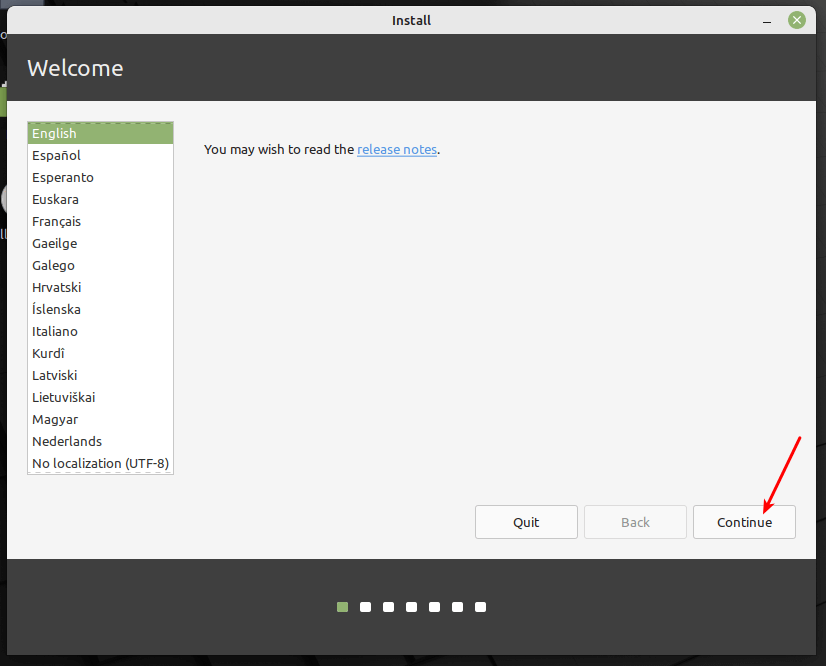
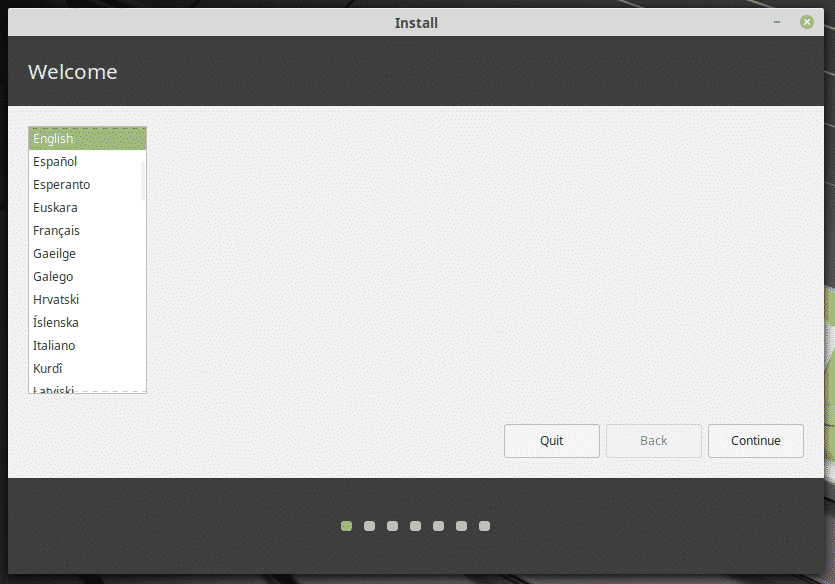
After the installation wizard opens up, you can optionally read the release note, then click Continue.
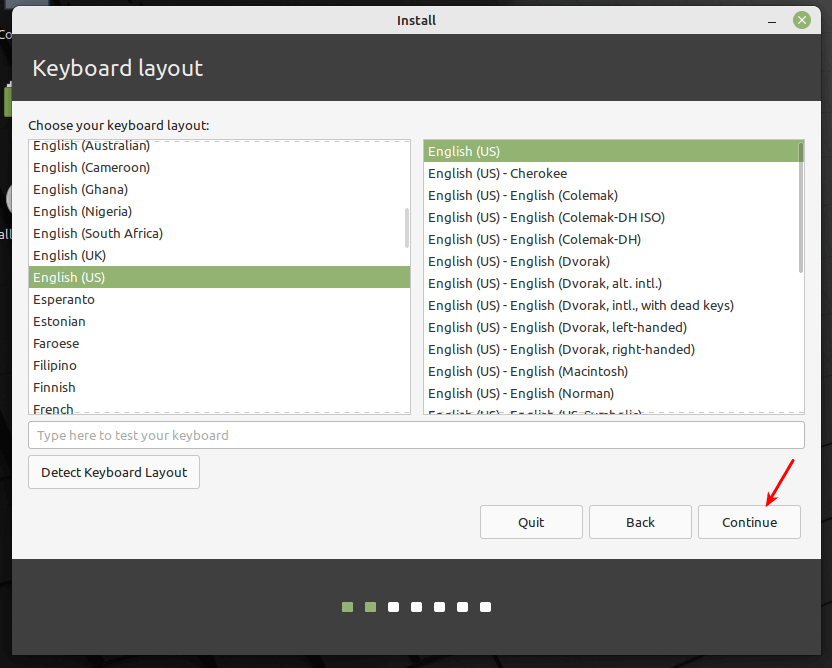
Next, select the keyboard layout and click Continue.
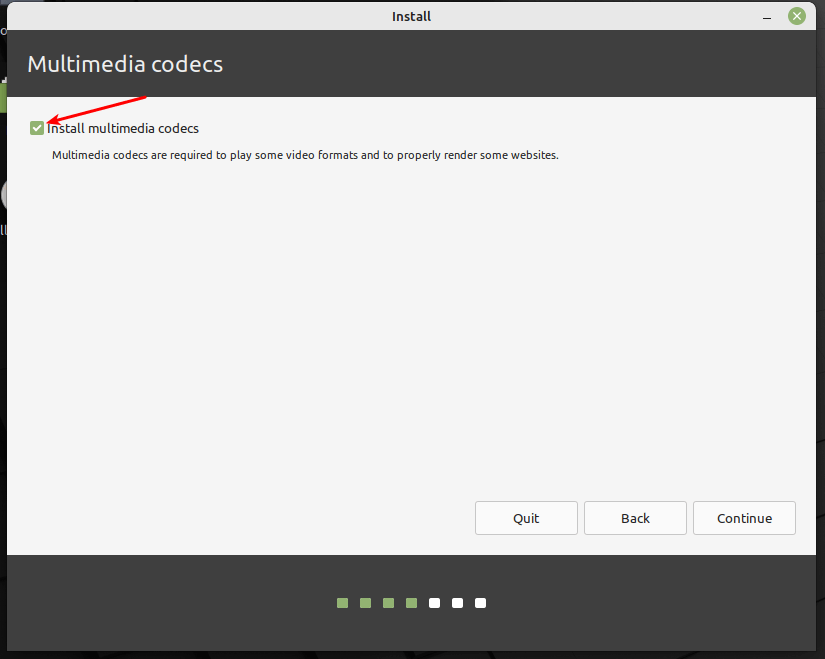
In the next windows, check the option Install Multimedia codes (which are required to play certain video formats and more), and click Continue.
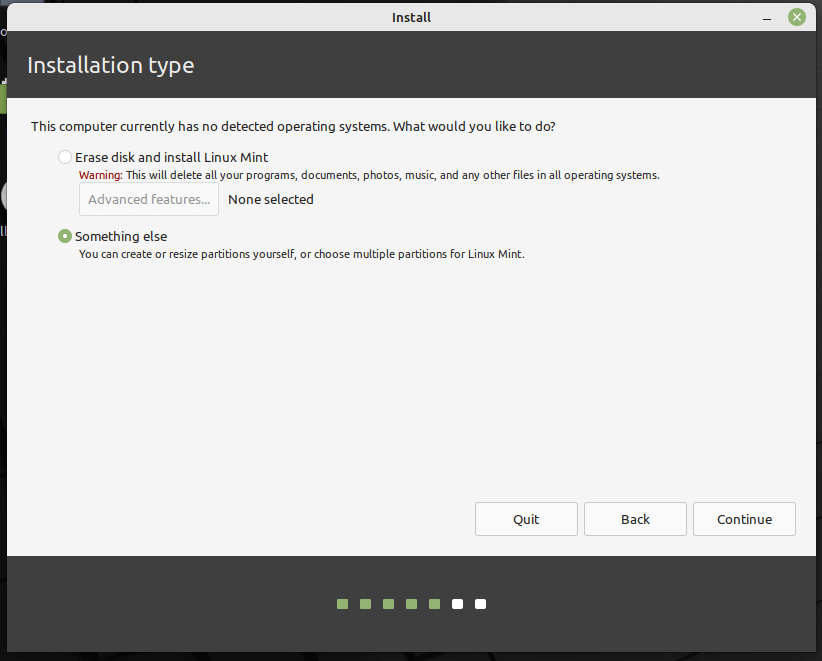
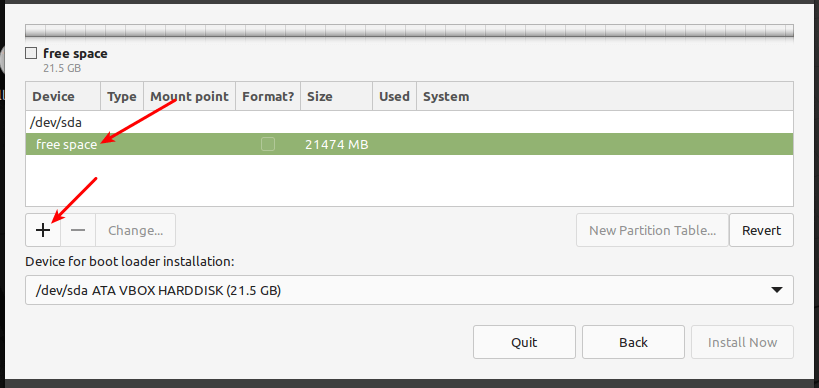
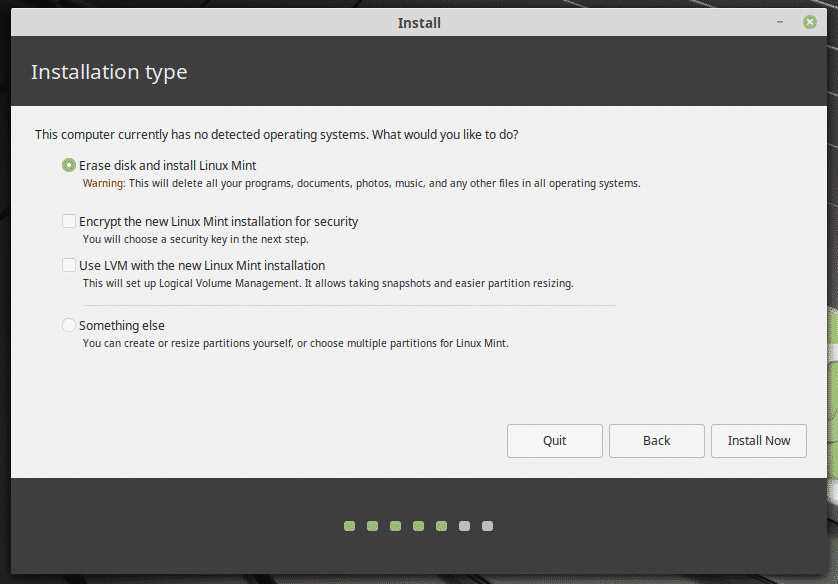
Now pick the installation type by selecting the second option, Something else to enable you to manage partitions for installing Linux Mint.
Note: If you already have existing partitions where you wish to install Linux Mint, for example, a partition with an existing installation of another Linux Mint version installation or Linux distribution, simply ignore the partition creation steps, simply select the root, and swap partitions and set the properties.
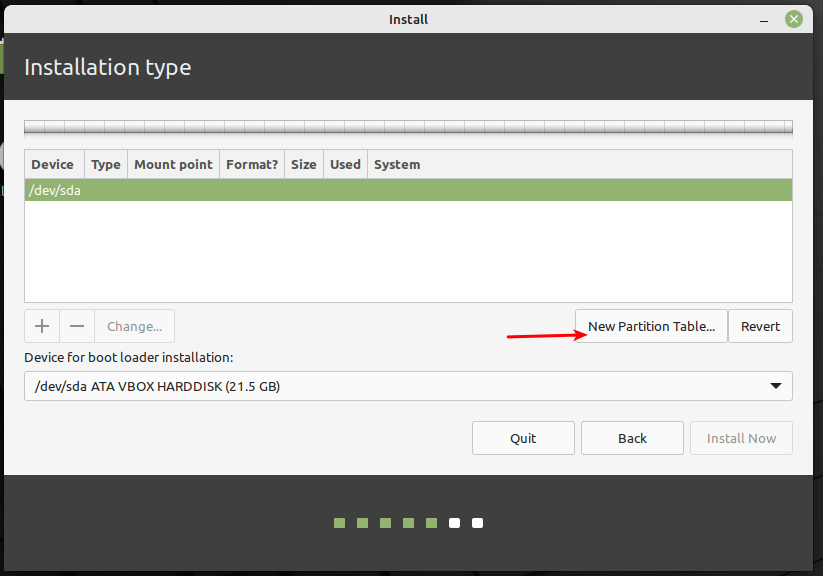
Next, in the partition setup window, click New Partition Table.
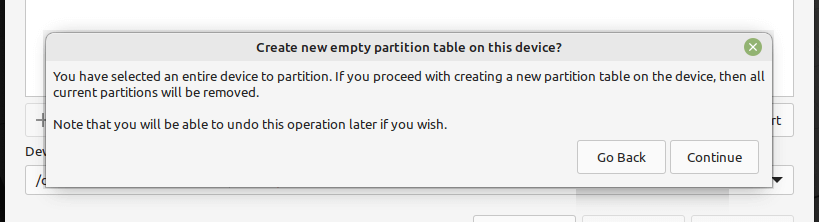
And confirm the new partition table creation step by clicking Continue in the pop-up window.
Next, you need to create the EFI system partition, a mandatory partition for UEFI systems. It will hold the EFI bootloaders and drivers to be launched by the UEFI firmware. Select the free space, and click the add (+) button to create a new partition.
And set the EFI partition properties:
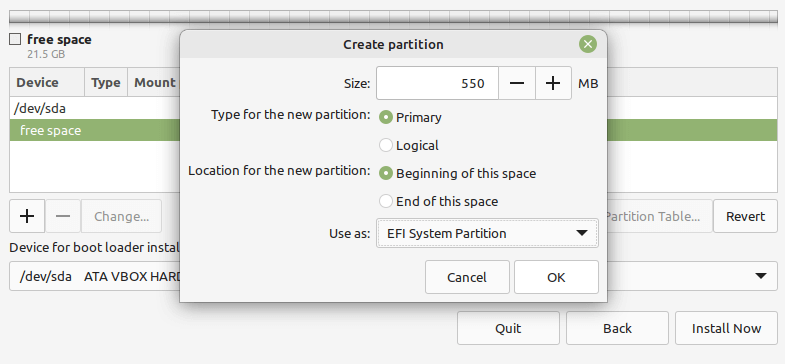
- Size – you can set a size between 100 to 550 MB, and
- Use as – set to EFI System Partition and click OK.
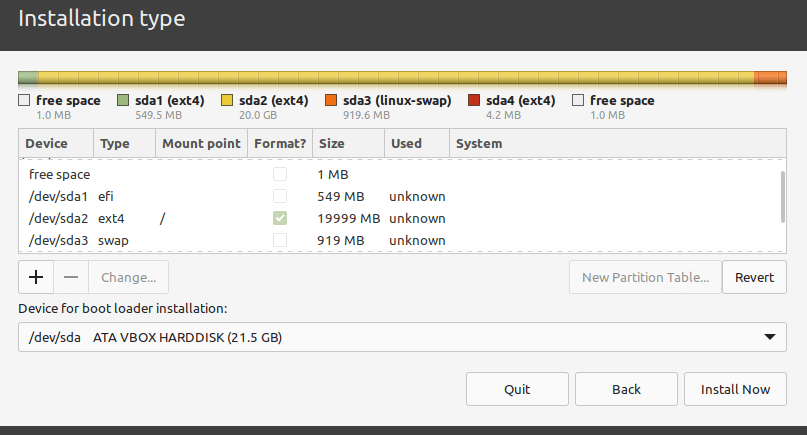
Next, create the root partition which will store the system files. Select the free space again, and click the add (+) button to create a new partition with the following properties:
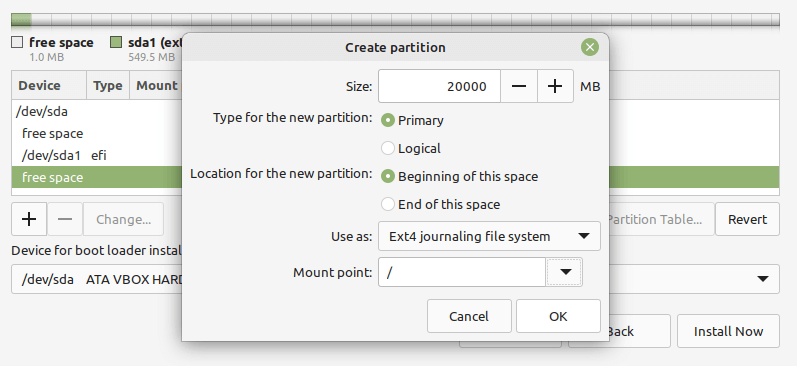
- Size – minimum size should be 20 GB but recommended is 100 or more GB
- Use as – file system type you wish the partition to use e.g EXT4, and
- Mount point – should be / (for root partition) and click OK.
Next, create the swap space by selecting the free space and clicking on the plus (+) sign to create a new partition with the following properties:
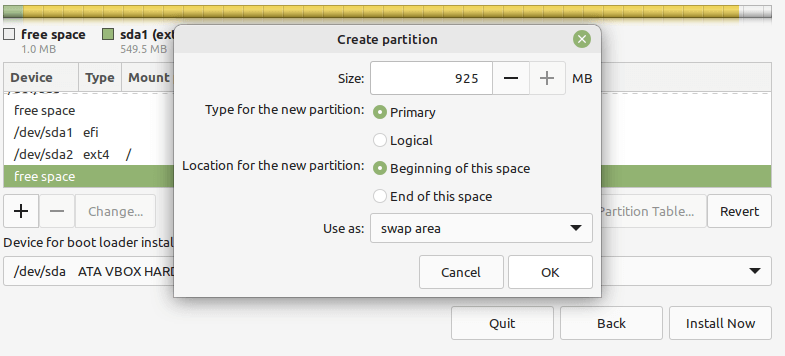
- Size – you can set a size of 500 MB or more if you have more free space, and
- Use as – set value to swap area.
Finally, create a “Reserved BIOS Boot area” partition of at least 1 MB, which will store the boot loader code.
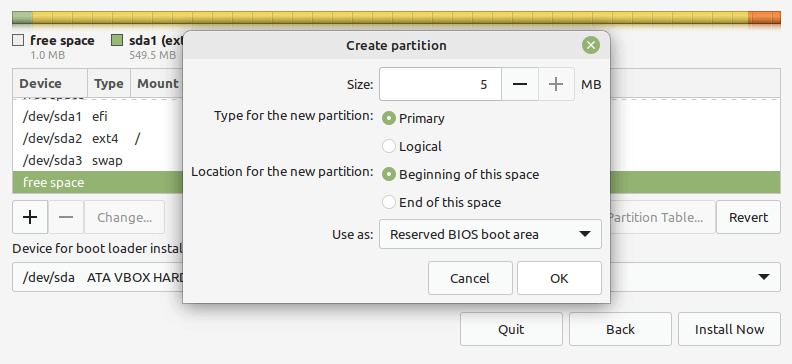
After creating all your partitions as shown in the following screenshot, click Install Now.
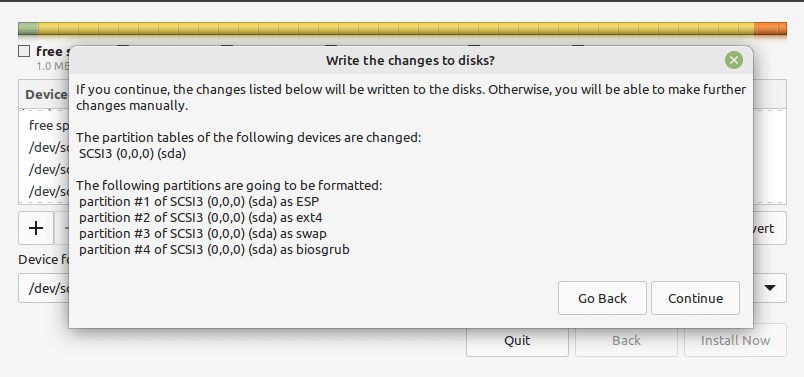
In the pop-up window, click Continue to accept the new partition table setup.
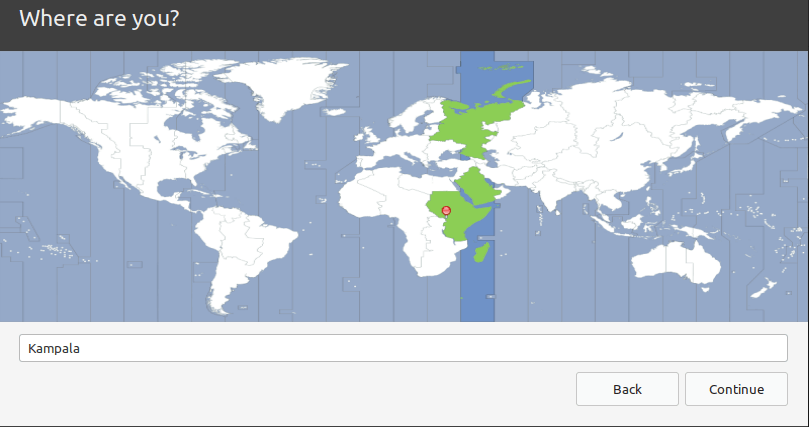
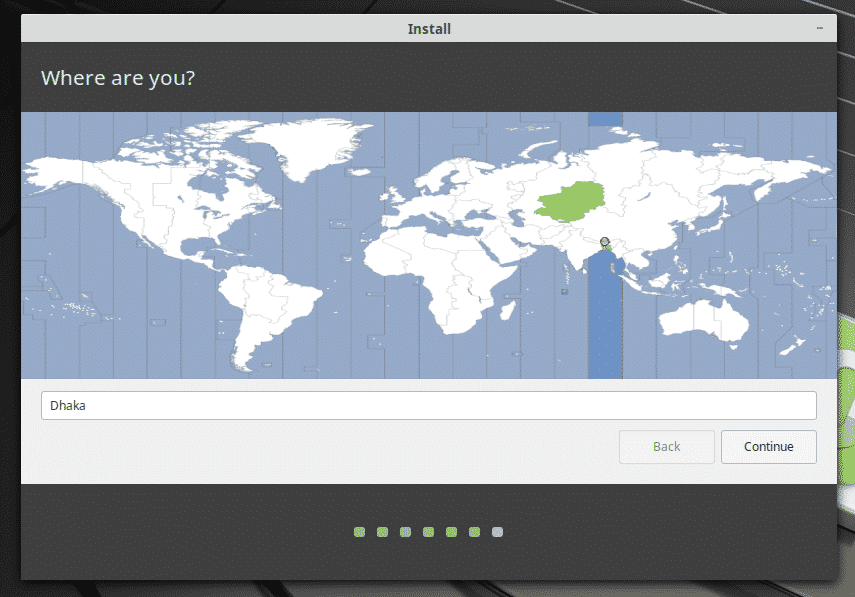
Now select your location and click Continue.
Next, create a user account with a password and set the computer name as shown in the following screenshot. Then click Continue to start the actual installation of system files and packages to the root partition.

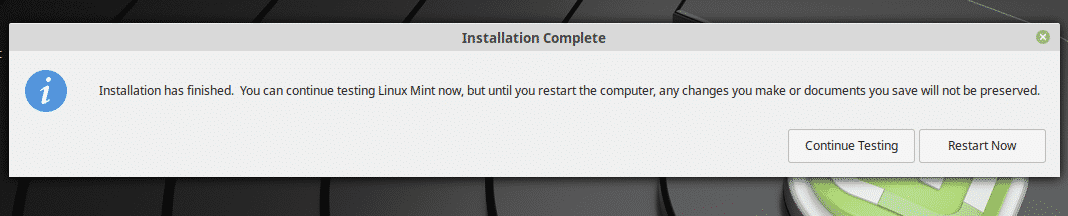
Wait for the installation of the system files and packages to complete. Once all is done, click on Restart Now.
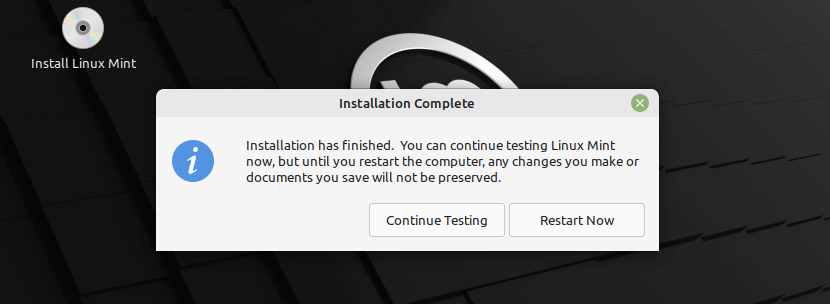
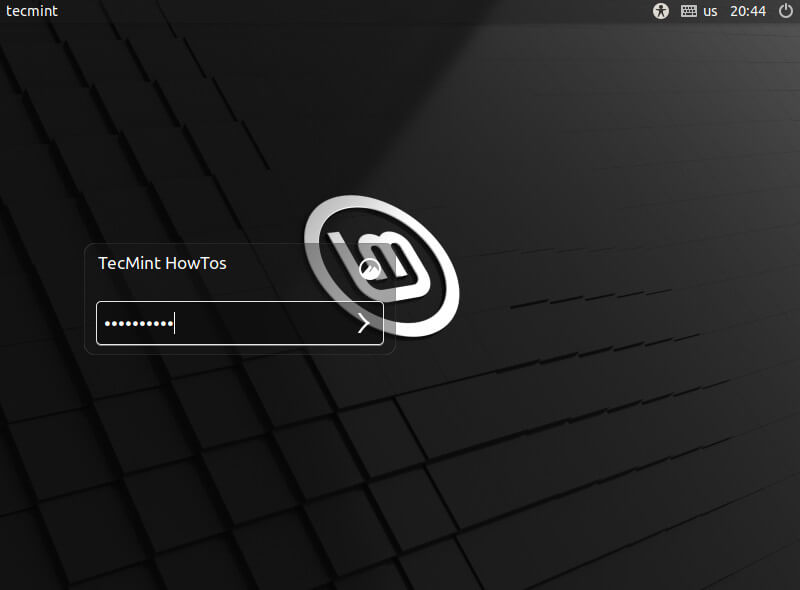
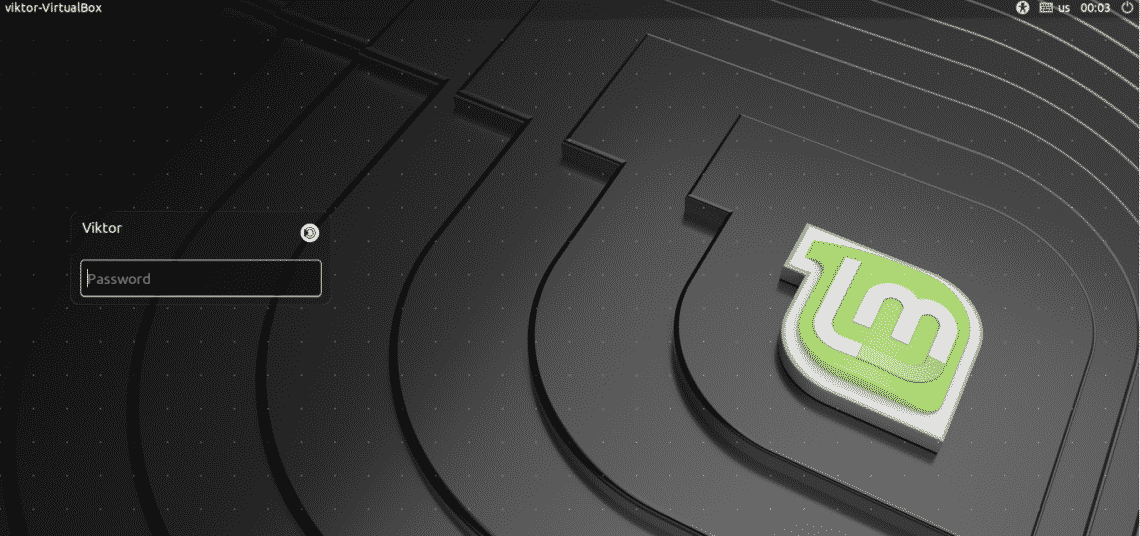
Once the system has rebooted, log into your new Linux Mint 21 Cinnamon edition installation.
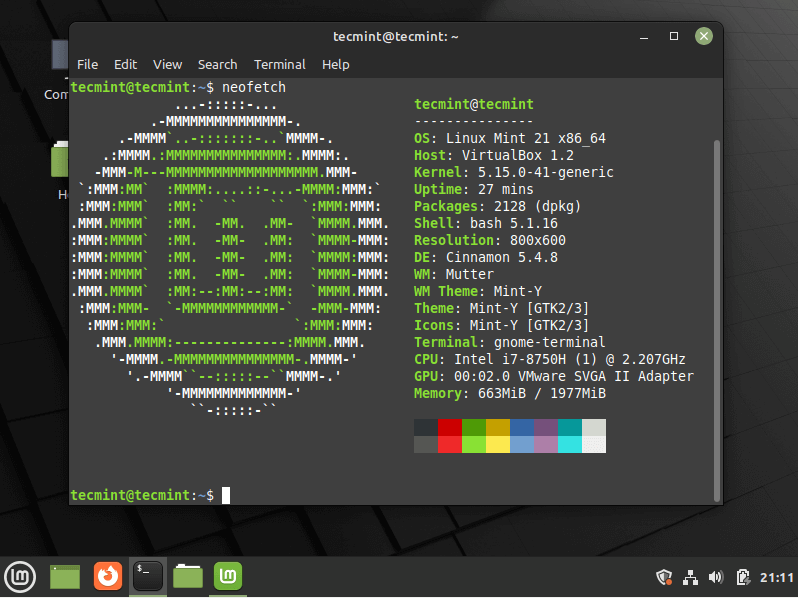
Congratulations! You have just successfully installed Linux Mint 21 Cinnamon edition on your computer. For any questions or additional information, you can use the comment section below.
Install Linux Mint Cinnamon
![]()
Within the maze of Linux distributions, Linux Mint is one of the top ones. Personally, I love Linux Mint. Linux Mint is my daily driver (dual boot with Windows for playing games). It’s user-friendly, simple yet powerful enough to perform complex tasks. Another important part of Linux Mint is its desktop environment. The Cinnamon desktop environment helped me so much! When I first made the switch to Linux, the Cinnamon desktop created a comfortable environment. Almost all the arrangements are quite similar to Windows. That’s why I recommend Linux Mint with Cinnamon to new Windows users.
Cinnamon desktop
Linux Mint is a nice distro that’s based on Ubuntu. This feature allows Linux Mint to enjoy the support from one of the largest Linux communities of all. Moreover, as it’s based on Ubuntu, it’s stable and fluent. Now, on top of Ubuntu, Linux Mint comes up in different desktop environments. The Cinnamon desktop is a unique one by nature. It mimics the functionality of Windows. Moreover, it’s homemade. Linux Mint is primarily focused on Cinnamon. The Cinnamon desktop is derived from the modern GNOME 3. However, it prefers to tweak the system to meet the traditional “desktop metaphor” conventions.
If you happen to have Linux Mint with any other desktop environment, then the following guide will help you to smoothly shift to the Cinnamon desktop. It’s super simple and there’s really nothing tough about it.
Installing Cinnamon
There are 2 ways we can enjoy the Cinnamon desktop: installing the Cinnamon desktop only or reinstalling Linux Mint with Cinnamon desktop.
Installing Cinnamon only
This is the easiest way of enjoying Cinnamon. However, having 2 or more desktop environment on the same system is a risky move. In cases, desktop environments clash and cause compatibility issues, resulting in weird glitches and bugs. That’s why you’ll see that Linux Mint offers standalone Linux Mint installation with Cinnamon and other desktop environments. Ubuntu offers different Ubuntu flavors like Xubuntu (Xfce), Kubuntu (KDE Plasma), Lubuntu (LXQt), etc.
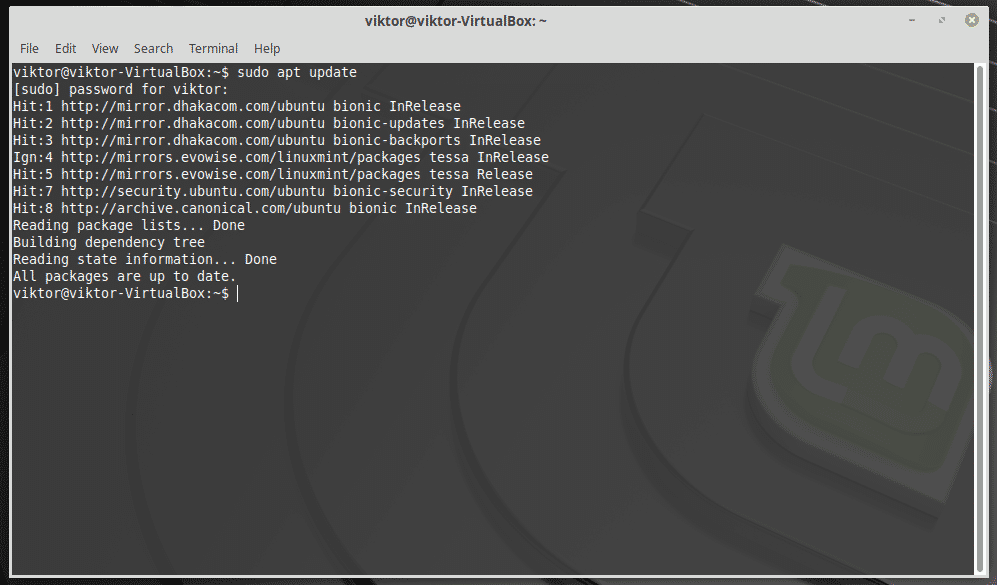
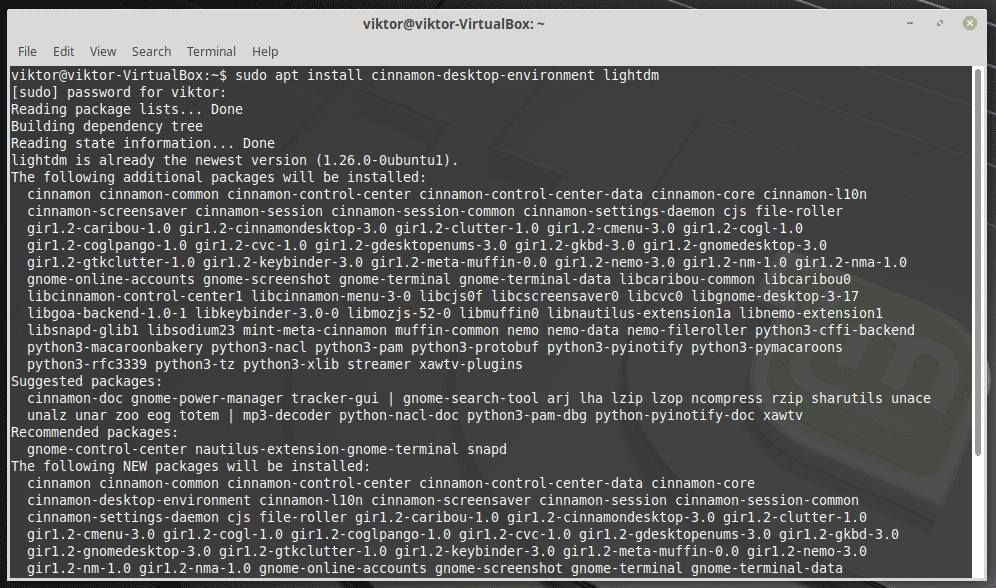
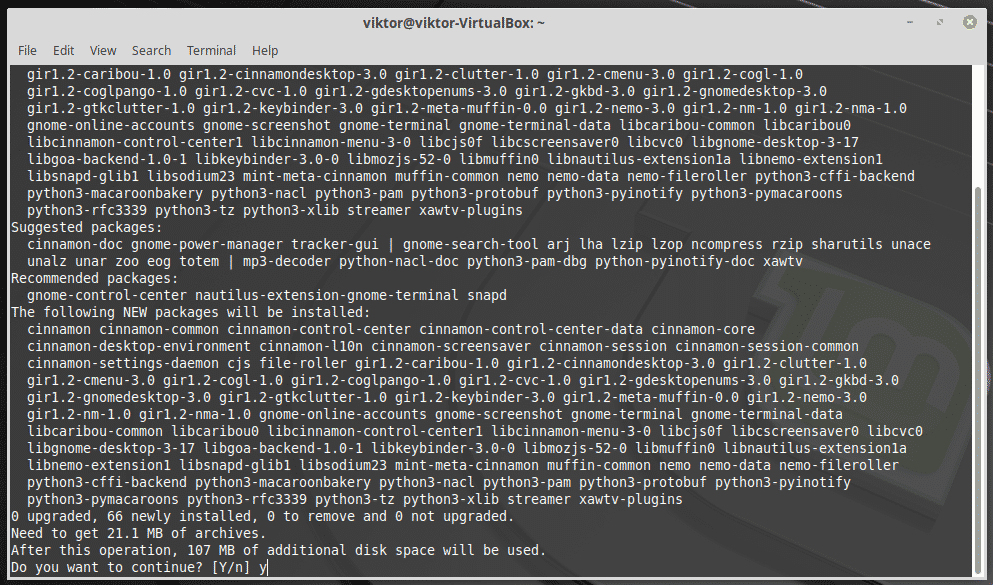
Fire up the terminal and refresh the APT cache.
Run the next command for installing Cinnamon and LightDM. LightDM is the default
Note: My current system is running MATE desktop.
Installing Linux Mint Cinnamon
This is the best way to avoid any potential conflict and remain stable. However, all the tweaks and changes you made previously won’t be available in your new system. If you prioritize stability and decide to go through this way, then make sure that you backup all the file(s) and tweaks in a safe place.
Ready? Grab the latest Linux Mint ISO with Cinnamon desktop.
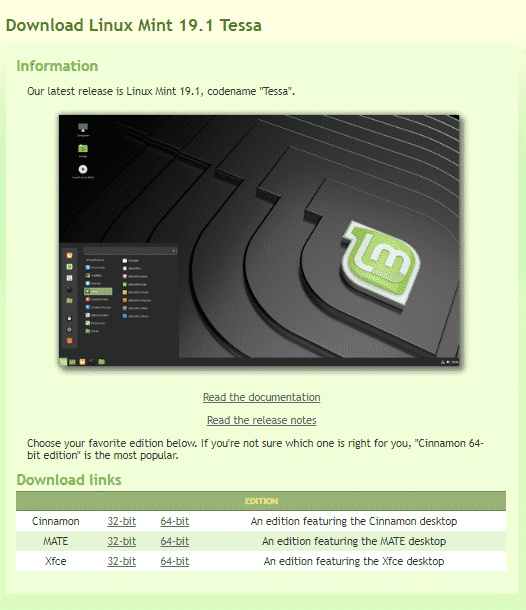
Download complete? Make sure that the ISO file is not corrupted. Verify the SHA-256 hash of the downloaded file against the official SHA-256 hash. Learn how to check SHA-256 checksum of a file. Here are the official SHA-256 hashes for Linux Mint Cinnamon ISOs as of this writing.
- linuxmint-19.1-cinnamon-32bit.iso: b580052c4652ac8f1cbcd9057a0395642a722707d17e1a77844ff7fb4db36b70
- linuxmint-19.1-cinnamon-64bit.iso: bb4b3ad584f2fec1d91ad60fe57ad4044e5c0934a5e3d229da129c9513862eb0

Is your ISO file okay? If alright, then proceed to the next step. Otherwise, you have to download it again.
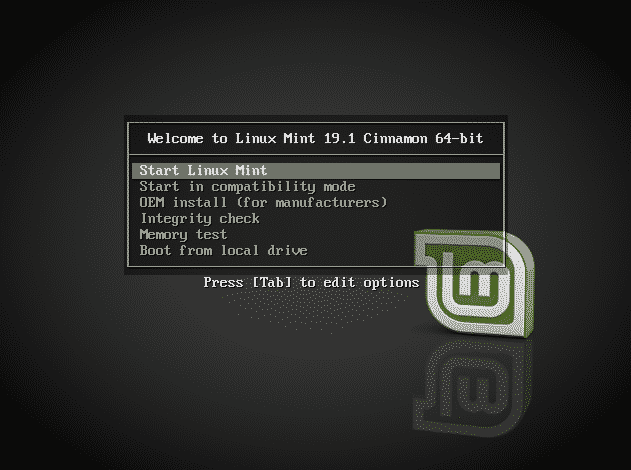
Make a bootable USB flash drive using Etcher or dd. Once ready, reboot the system and boot the USB flash drive.
Select the option “Start Linux Mint”. This will start a live session of Linux Mint Cinnamon.
Once the system is ready, you’ll be able to roam freely throughout the entire system and feel the change. For this guide, we’ll be proceeding with the installation procedure. Fire up the installer!
The first option is to choose a language. Select your native one for comfort or go with “English”.
Now, it’s time to choose the keyboard layout. If you’re using any specific keyboard layout, make sure to research on the internet and find out which layout to choose for your keyboard. In my case, I’m using a general QWERTY keyboard, so my layout of choice would be “English (US)”.
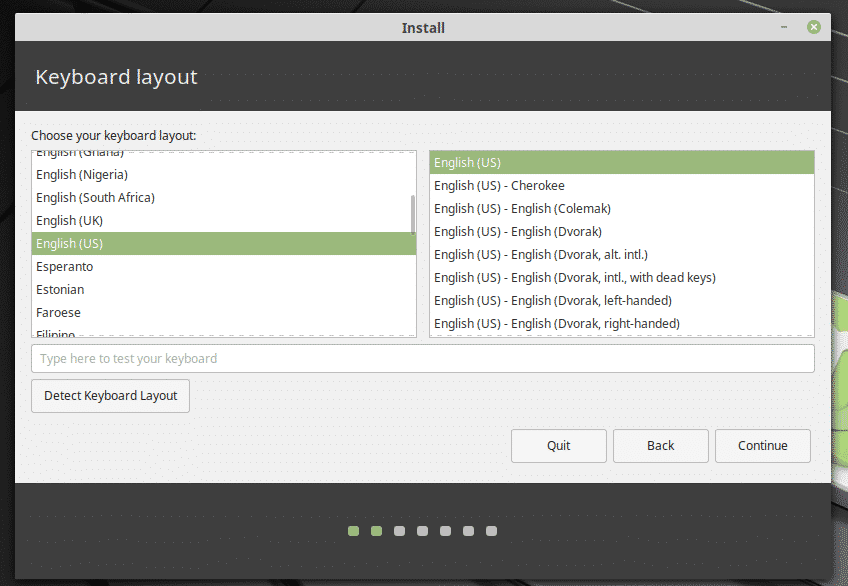
Note: You can also enjoy other keyboard layouts on QWERTY or other keyboard layouts. For that, choose the desired layout. Be careful; things will be tougher for you!
You’ll be asked to choose whether you want to install additional software and 3 rd -party apps right now. I always recommend checking the box. This will make things easier after completing the OS installation.

Next up, the partitioning. The recommended setup would be a separate partition with 20-30GB of space dedicated to the OS. Depending on your situation, things can change.
Choose the right region for your current position. It’ll be the crucial factor for deciding the time zone of your system, location, and others.
Enter the credentials for the new user account. This user will be the main admin account. The password will also be the default password for “root”. You can change it later, though. Learn how to change the root password. The tutorial is for Debian but remember: Linux Mint is Ubuntu-based and Ubuntu is Debian-based. Everything will work just fine.

All you have to do now is enjoy your cup of coffee and let the installer do its job.

Installation complete? Restart the system from the prompt!
Switching to Cinnamon
In either case, restart your system and reach the login page.
From the icon, you can choose which desktop environment to choose. If you’ve installed Cinnamon now, then choose Cinnamon. Don’t worry; from this time on, Linux Mint will always load Cinnamon desktop by default (unless you change it again).

Final thoughts
The Cinnamon desktop is a phenomenal one. It holds the potential to attract any new and even veteran Linux user. It’s lightweight but modern; simple and intuitive. Give it a try if you’re on Linux Mint. After all, it’s one of the most powerful features of Linux Mint family!
About the author
Sidratul Muntaha
Student of CSE. I love Linux and playing with tech and gadgets. I use both Ubuntu and Linux Mint.