- How to Install a DHCP Server in Ubuntu and Debian
- How Does DHCP Work?
- Testing Environment Setup
- Step 1: Installing DHCP Server in Ubuntu
- Step 2: Configuring DHCP Server in Ubuntu
- Step 3: Configure Static IP on DHCP Client Machine
- Step 4: Configuring DHCP Client Machines
- Related Posts
- 14 thoughts on “How to Install a DHCP Server in Ubuntu and Debian”
- Установка и базовая настройка DHCP сервера на Ubuntu
- Установка и настройка
- Возможные проблемы
- Not configured to listen on any interfaces!
- Читайте также
How to Install a DHCP Server in Ubuntu and Debian
Dynamic Host Configuration Protocol (DHCP) is a network protocol that is used to enable host computers to be automatically assigned IP addresses and related network configurations from a server.
The IP address assigned by a DHCP server to DHCP client is on a “lease”, the lease time normally varies depending on how long a client computer is likely to require the connection or DHCP configuration.
How Does DHCP Work?
The following is a quick description of how DHCP actually works:
- Once a client (that is configured to use DHCP) and connected to a network boots up, it sends a DHCPDISCOVER packet to the DHCP server.
- When the DHCP server receives the DHCPDISCOVER request packet, it replies with a DHCPOFFER packet.
- Then the client gets the DHCPOFFER packet, and it sends a DHCPREQUEST packet to the server showing it is ready to receive the network configuration information provided in the DHCPOFFER packet.
- Finally, after the DHCP server receives the DHCPREQUEST packet from the client, it sends the DHCPACK packet showing that the client is now permitted to use the IP address assigned to it.
In this article, we will show you how to setup a DHCP server in Ubuntu/Debian Linux, and we will run all the commands with the sudo command to gain root user privileges.
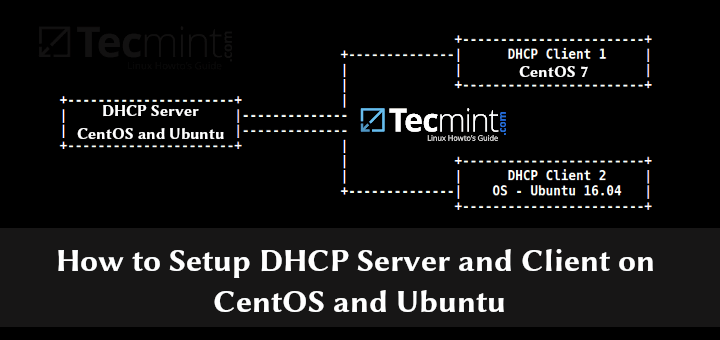
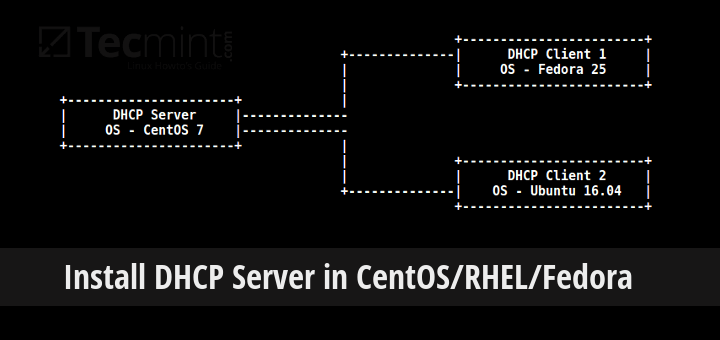
Testing Environment Setup
We are going to use following testing environment for this setup.
DHCP Server - Ubuntu 16.04 DHCP Clients - CentOS 7 and Fedora 25
Step 1: Installing DHCP Server in Ubuntu
1. Run the command below to install the DCHP server package, which was formerly known as dhcp3-server.
$ sudo apt install isc-dhcp-server
2. When the installation completes, edit the file /etc/default/isc-dhcp-server to define the interfaces DHCPD should use to serve DHCP requests, with the INTERFACES option.
For example, if you want the DHCPD daemon to listen on eth0 , set it like so:
And also learn how to configure a static IP address for the interface above.
Step 2: Configuring DHCP Server in Ubuntu
3. The main DHCP configuration file is /etc/dhcp/dhcpd.conf , you must add all your network information to be sent to clients here.
And, there are two types of statements defined in the DHCP configuration file, these are:
- parameters – specify how to perform a task, whether to carry out a task, or what network configuration options to send to the DHCP client.
- declarations – define the network topology, state the clients, offer addresses for the clients, or apply a group of parameters to a group of declarations.
4. Now, open and modify the main configuration file, define your DHCP server options:
Set the following global parameters at the top of the file, they will apply to all the declarations below (do specify values that apply to your scenario):
option domain-name "tecmint.lan"; option domain-name-servers ns1.tecmint.lan, ns2.tecmint.lan; default-lease-time 3600; max-lease-time 7200; authoritative;
5. Now, define a subnetwork; here, we’ll setup DHCP for 192.168.10.0/24 LAN network (use parameters that apply to your scenario).
subnet 192.168.10.0 netmask 255.255.255.0 < option routers 192.168.10.1; option subnet-mask 255.255.255.0; option domain-search "tecmint.lan"; option domain-name-servers 192.168.10.1; range 192.168.10.10 192.168.10.100; range 192.168.10.110 192.168.10.200; >
Step 3: Configure Static IP on DHCP Client Machine
6. To assign a fixed (static) IP address to a particular client computer, add the section below where you need to explicitly specify it’s MAC addresses and the IP to be statically assigned:
host centos-node < hardware ethernet 00:f0:m4:6y:89:0g; fixed-address 192.168.10.105; >host fedora-node
Save the file and close it.
7. Next, start the DHCP service for the time being, and enable it to start automatically from the next system boot, like so:
------------ SystemD ------------ $ sudo systemctl start isc-dhcp-server.service $ sudo systemctl enable isc-dhcp-server.service ------------ SysVinit ------------ $ sudo service isc-dhcp-server.service start $ sudo service isc-dhcp-server.service enable
8. Next, do not forget to permit DHCP service (DHCPD daemon listens on port 67/UDP) on firewall as below:
$ sudo ufw allow 67/udp $ sudo ufw reload $ sudo ufw show
Step 4: Configuring DHCP Client Machines
9. At this point, you can configure your clients computers on the network to automatically receive IP addresses from the DHCP server.
Login to the client computers and edit the Ethernet interface configuration file as follows (take note of the interface name/number):
$ sudo vi /etc/network/interfaces
And define the options below:
auto eth0 iface eth0 inet dhcp
Save the file and exit. And restart network services like so (or reboot the system):
------------ SystemD ------------ $ sudo systemctl restart networking ------------ SysVinit ------------ $ sudo service networking restart
Alternatively, use the GUI on a desktop machine to perform the settings, set the Method to Automatic (DHCP) as shown in the screenshot below (Fedora 25 desktop).

At this point, if all settings are correctly configured, your client machine should be receiving IP addresses automatically from the DHCP server.
That’s it! In this tutorial, we showed you how to setup a DHCP server in Ubuntu/Debian. Share your thoughts with us via the feedback section below. If you are using Fedora based distribution, go through how to setup a DHCP server in CentOS/RHEL.
Aaron Kili is a Linux and F.O.S.S enthusiast, an upcoming Linux SysAdmin, web developer, and currently a content creator for TecMint who loves working with computers and strongly believes in sharing knowledge.
Each tutorial at TecMint is created by a team of experienced Linux system administrators so that it meets our high-quality standards.
Related Posts


14 thoughts on “How to Install a DHCP Server in Ubuntu and Debian”
Hi, Sir I have some problem I can run my application on ubuntu on vmware ESXi but i can’t access it from another computer on the same network with IP and port first I think ufw is blocked my port but when I allow and disable it still not work Reply
Thank you this article helped me a lot, I found no problems after following the steps in this post. it’s just that I’m configuring wrong interfaces.. Reply
subnet 192.168.10.0 netmask 255.255.255.0
Note: I like to add this because I have over 400 mobile/laptop user so I was thing if filter with different IP series it will be very easy to maintain. Please let me know is it possible ? Reply
You could do that, but your configuration is wrong. You need to learn about subnet masking. Your netmask would need to allow for all those clients to fit in the range. After that you could add all the subnets you want and need. Another issue you will run into is broadcast storms with that many clients on the same network partition. This will be even worse if you are using wireless comms. If you want to carry on then something like this should do the trick: A subnet of 255.255.252.0 will yield = 192.168.16.1 – 192.168.19.254 No you can’t just start from .10.x because that subnet is in the middle of another one.
subnet 192.168.16.0 netmask 255.255.252.0
It looks weird to most people but 192.168.16.255 is a usable address in this subnet. This will give you the first 10 IP address in each number range to be static if you want but maximises on usable address in the dhcp server. I would also recommend looking into splitting this into 2 maybe 4 servers. DHCP works on a race. The first server to respond can issue the IP address. Therefore if one of your servers breaks, then the others can still service your clients.
People don’t like it when “the internet” breaks. Reply
Hello, I installed a Debian 9 on a machine, then I configured my network to be able to download on the internet the packets for the DCHP and the DNS I installed the 2 packets, then I changed dns to pass on my local network and not that of the company. After I started the network card, now I want to know if we configure the DNS server well before the DHCP server? Reply
Установка и базовая настройка DHCP сервера на Ubuntu

Опубликовано: 12.03.2023
Установка и настройка
Сервер DHCP в Ubuntu может быть реализован с помощью пакета isc-dhcp-server. Его можно установить из стандартных репозиториев системы. Выполняем обновления кэша пакетов и установку:
subnet 192.168.0.0 netmask 255.255.255.0 <
range 192.168.0.100 192.168.0.200;
option domain-name-servers 192.168.0.10, 192.168.0.11;
option domain-name «dmosk.local»;
option routers 192.168.0.1;
option broadcast-address 192.168.0.255;
default-lease-time 600;
max-lease-time 7200;
>
- subnet — сеть, для которой будет работать данная группа настроек.
- range — диапазон, из которого будут браться IP-адреса.
- option domain-name-servers — через запятую перечисленные DNS-сервера.
- option domain-name — суффикс доменного имени.
- option routers — шлюз по умолчанию.
- option broadcast-address — адрес сети для широковещательных запросов.
- default-lease-time и max-lease-time — время и максимальное время в секундах, на которое клиент получит адрес, по его истечению будет выполнено продление срока.
Проверить корректность конфигурационного файла можно командой:
dhcpd -t -cf /etc/dhcp/dhcpd.conf
Разрешаем автозапуск сервиса:
systemctl enable isc-dhcp-server
systemctl restart isc-dhcp-server
Добавляем правило в firewall:
iptables -I INPUT -p udp —dport 67 -j ACCEPT
Возможные проблемы
Not configured to listen on any interfaces!
Сервис dhcp не запускается, а в логе можно увидеть ошибки, на подобие:
No subnet declaration for ens18 (192.168.1.10).
.
** Ignoring requests on ens18. If this is not what
you want, please write a subnet declaration
in your dhcpd.conf file for the network segment
to which interface ens18 is attached. **
.
Not configured to listen on any interfaces
Причина: в конфигурационном файле описана подсеть, которая не настроена ни на одном из сетевых интерфейсов сервера.
Решение: конфигурация subnet должна включать только те подсети, в которых настроен сам сервер DHCP. Посмотреть сетевые настройки можно командой:
После чего необходимо проверить настройки в конфигурационном файле сервера dhcp.
Читайте также
Другие инструкции, связанные с DHCP: