How to Setup Git Server on Ubuntu?
Git is a popular version control system that is widely used for software development and other collaborative projects. Setting up a Git server on Ubuntu allows you to host Git repositories on your own server, which can be useful for collaborating with a team or hosting open-source projects that others can contribute to. Here, we will walk through the steps of setting up a Git server on Ubuntu 20.04 LTS. We will install Git, create a new user to manage the repositories, create a repository directory, initialize a new bare repository, and set the correct permissions on the repository so that other users can access it.
Steps to Setup Git Server on Ubuntu
Before we begin, make sure we have a clean installation of Ubuntu 20.04 LTS and that you are logged in as a user with Sudo privileges.
Step 1: Install Git.
The first step is to install Git on your Ubuntu server. To do this, open a terminal and enter the following command:


This will install the latest version of Git on your server. You can check that Git has been installed correctly by running the following command:

This should display the version number of Git that has been installed.
Step 2: Create a Git User.
Next, you need to create a new user account that will be used to manage the Git repositories. This is a best practice as it helps to keep the repositories separate from your main user account. To create a new user, enter the following command:

You will be prompted to enter a password and provide some personal information for the user. Once you have completed these steps, a new user will be created.
Step 3: Create a Repository Directory.
Next, you’ll need to create a new directory on your server where you can store your Git repositories. This is typically done in the /usr/local/ directory. You can create a new directory by running the following command:

Step 4: Change the ownership of the directory to the git user.
Now that you’ve created the directory for the Git repositories, you’ll need to change the ownership of the directory to the git user. This will ensure that the git user has the necessary permissions to read, write, and execute files in the directory. You can change the ownership of the directory by running the following command:

Step 5: Switch to the git user.
To complete the setup of the Git server, you’ll need to switch to the git user account. This can be done by running the following command:

You should now see the command prompt change to the git user’s account.
Step 6: Initialize a new bare repository.
A bare repository is a type of Git repository that does not contain a working tree (i.e. the files that you’re tracking in your repository). Instead, it only contains the Git metadata and history of the repository. This is the type of repository that you’ll use for your Git server. To initialize a new bare repository, run the following command in the /usr/local/git directory:

This command will create a new bare repository named “myproject.git” in the /usr/local/git directory.
Step 7: Configure SSH access for the git user.
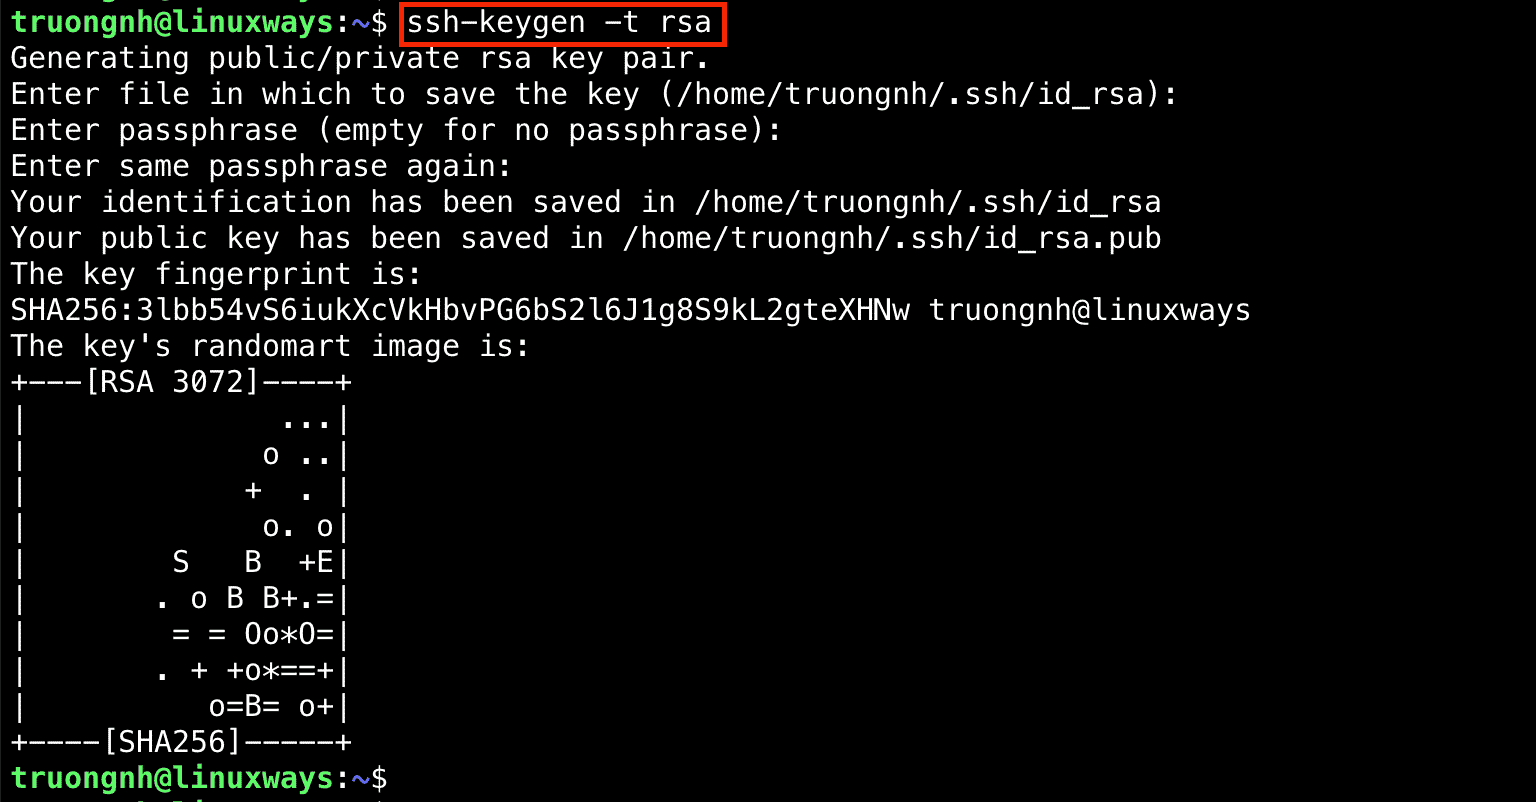
In order to clone and push to the repository, you need to configure SSH access for the git user. To configure SSH access, you’ll need to add the git user’s public key to the authorized_keys file in the git user’s .ssh directory. You can generate a new ssh key by running ssh-keygen -t rsa -b 4096 on your local machine, type the command:

In the above image you can see that we have created a ssh_public_key on your local system, this key is saved in /home/git/.ssh/id_rsa.pub. we will use this public key to authorize our server for the login. Now you need to go to the location where this key is present and using the cp command or clipboard simply copy the key and use the key in the next command as follows:
Then copy the contents of the public key file `~/.ssh/id_rsa.pub to the authorized keys file on the server by running the following command:

This will add your public key to the authorized_keys file, allowing you to connect to the server via SSH.
Step 8: Allow the git user to connect to the server via SSH.
Next, you will need to allow the git user to connect to the server via SSH. You can do this by adding the git user to the SSH AllowUsers list in the /etc/ssh/sshd_config file. Open the file by running sudo nano /etc/ssh/sshd_config and add the following line at the end of the file:

Step 9: Restart the SSH service.
After making the changes to the SSH configuration file, you’ll need to restart the SSH service for the changes to take effect. You can restart the SSH service by running the following command:

Step 10: Clone the repository from the server.
Finally, you can clone the repository from the server by running the following command on your local machine:
git clone git@server:/usr/local/git/myproject.git

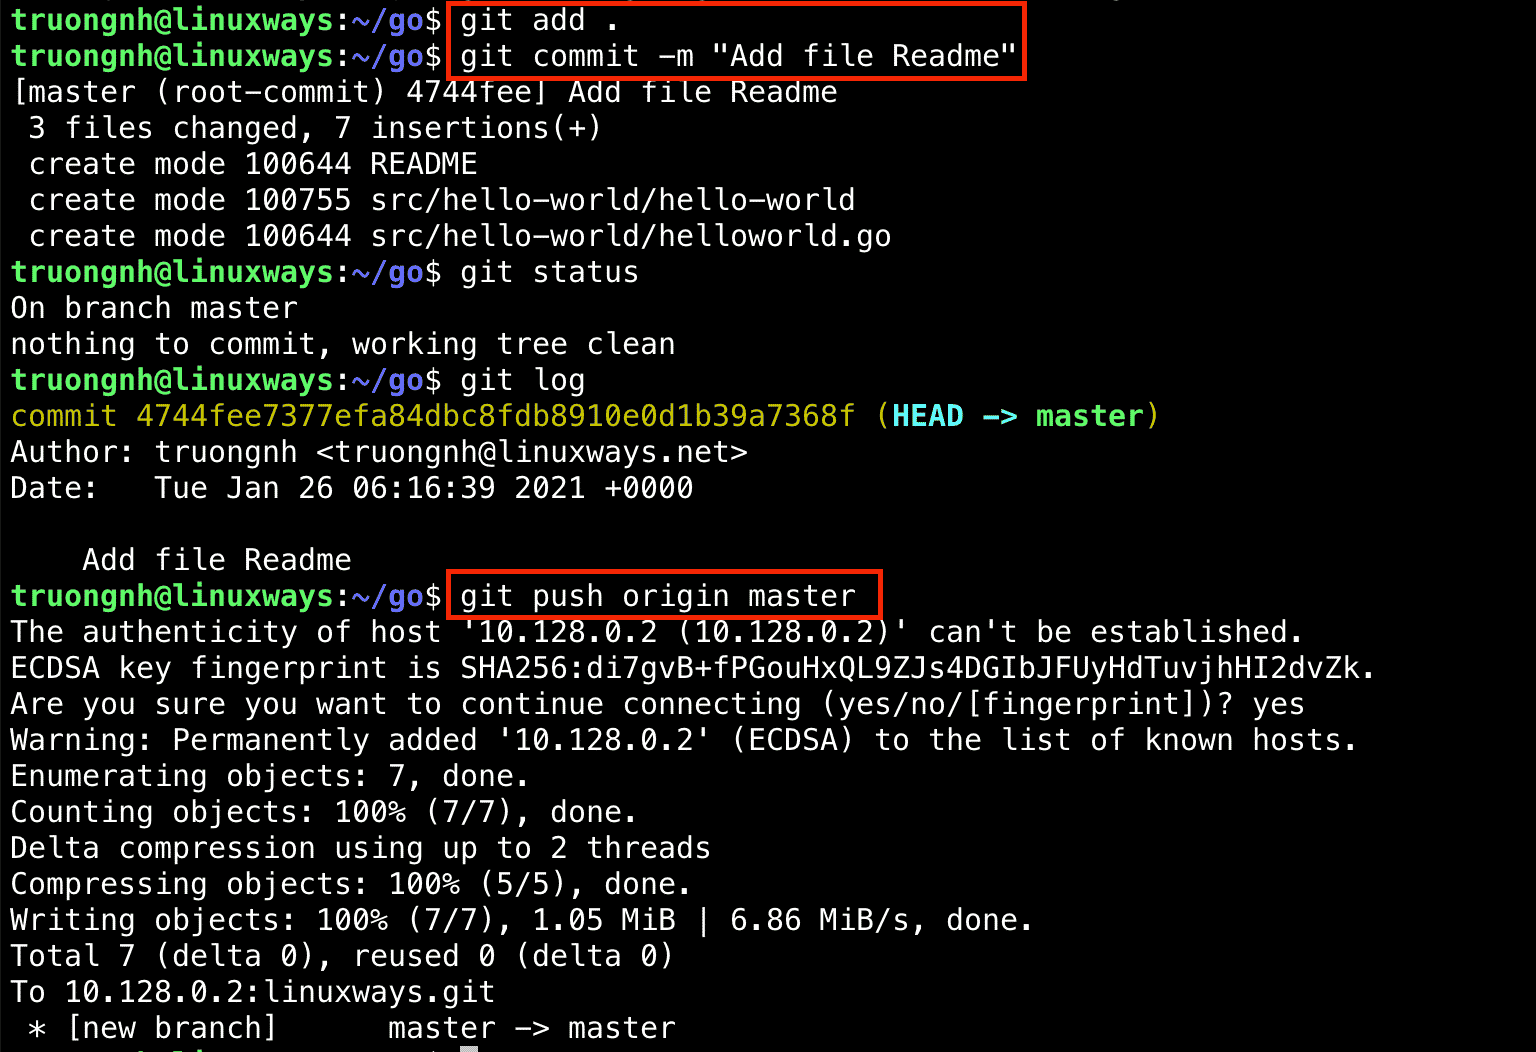
In the above image, I have used my server IP address instead of the server name you can use it as per your choice. This command will clone the “myproject.git” repository from the server to your local machine. You can now make changes to the files in the repository and push those changes back to the server using the standard Git commands (i.e. git add, git commit, git push).
And that’s it! You have now successfully set up a Git server on your Ubuntu machine. You can now use this server to manage your own code repositories or share code with others. Keep in mind that you should secure your git server by configuring a firewall and other security measures, and you should also back up your git repositories regularly.
Conclusion
In this tutorial, we learned how to set up a Git server on Ubuntu 20.04 LTS. We installed Git, created a new user to manage the repositories, created a repository directory, initialized a new bare repository, and set the correct permissions on the repository so that other users can access it. By following these steps, you can host your own Git repositories on your Ubuntu server and collaborate with others on projects. setting up a Git server on Ubuntu is a relatively straightforward process that allows you to host Git repositories on your own server. By following the steps outlined in this tutorial, you can set up a Git server and start hosting your own repositories.
It’s important to note that This guide is meant as a starting point, and there are many other configurations and options that you can explore to customize your Git server to your specific needs. For example, you may want to consider using Git hooks to automate certain tasks or use Git over SSH for secure communication. Additionally, for a big and more secure environment, it would be recommended to use Git server software like Gitlab, Gogs, and Bitbucket which are more feature rich and provide access control and other features out of the box.
How to Setup Git Server on Ubuntu 20.04

When working with the Git version control system, you have many choices such as Github, Bitbucket, or Gitlab. If you want to avoid depending on third-party providers, you can run your own Git server.
Setting up a Git server by yourself allows you to no longer be restricted by public providers’ free plans such as maximum repository size, creating unlimited private repositories, and so on.
This tutorial will show you the way to set up a Git server on your Ubuntu 20.04 machine.
Installing Git server
Firstly, update your packages list by running:
To install Git, run the following command:
Verify that Git was successfully installed on your system:

It’s highly recommended that you should create a new Linux user for managing the Git repositories, run:
$ sudo useradd -m -r -U -d /home/git-repos git
The home directory of git user is located at /home/git-repos. To increase security, we’ll create an ssh key to log in to the git user.
Switch to the log-in session of git user by running:
To create the SSH directory and file for holding the authorized ssh key for git user, run the following commands:
$ chmod 600 ~/.ssh/authorized_keys

Once, the server was successfully set-up, it’s time to create a new git repository:
$ git init --bare ~/linuxways.git

Configuring Git repository
Now, you have to add your local user’s public SSH key to the authorized_keys file of the git user.
If you already have generated an SSH key for your local user, you can skip the following step:
Now, you can retrieve your public SSH key by running:

Copy the above public SSH key then paste it into the authorized_keys file of the git user.
On your local Ubuntu 20.04 machine, assuming that you already had an unversioned directory, for example, ~/go. Change the current directory to it:
Next, you have to add a git remote to track your local repository on Git server:
Verify that your Git server was successfully installed and configured, run the following command:
$ git commit -m "Add file Readme"
Conclusion
In this tutorial, we’ve described the detailed steps of installing and configuring a Git server.
If you encounter any problems, please let me know.
System Engineer with 6 years of experience in software development, specializes in Embedded Linux, C/C++, Python, Go, and Shell Scripts. He has a solid background in Computer Networking, OpenStack, Kubernetes, Docker/Container, CI/CD, and Google Cloud as well. Now, he is Head of GDG Cloud Hanoi – a non-profit community of cloud developers who meet/share ideas on everything Google Cloud Platform related.