- Как установить Gradle в Ubuntu 20.04
- Подготовка
- Установка OpenJDK
- Скачивание Gradle
- Настройка переменных среды
- Проверка установки Gradle
- Выводы
- How to Install Gradle on Ubuntu 22.04
- How to install Gradle on Ubuntu 22.04 from its official website
- Step 1: Install Java on Ubuntu
- Step 2: Download Gradle package
- Step 3: Unzip the downloaded package of Gradle
- Step 4: Set up environment variables
- Step 5: Change the permissions of file
- Step 6: Install the Gradle
- How to install Gradle on Ubuntu 22.04 using the snap
- Conclusion
- About the author
- Hammad Zahid
- Installation
- Prerequisites
- Additional resources
- Installing with a package manager
- › Additional helpful information
- Installing manually
- Step 1. Download the latest Gradle distribution
- Step 2. Unpack the distribution
- Step 3. Configure your system environment
- Step 4. Verify your installation
- › Additional helpful information
- Upgrade with the Gradle Wrapper
- › Additional helpful information
- Older Releases
- Command-Line Completion
Как установить Gradle в Ubuntu 20.04
Gradle — это универсальный инструмент, используемый для создания, автоматизации и доставки программного обеспечения. В основном он используется для проектов Java, C ++ и Swift.
Gradle сочетает в себе лучшие возможности Ant и Maven . В отличие от своих предшественников, которые использовали XML для написания сценариев, Gradle использует Groovy , динамический объектно-ориентированный язык программирования для платформы Java, чтобы определять проект и создавать сценарии.
В этом руководстве объясняется, как установить Gradle в Ubuntu 20.04. Мы загрузим последнюю версию Gradle с их официального сайта.
Подготовка
В инструкциях предполагается, что вы вошли в систему как пользователь root или пользователь с привилегиями sudo .
Установка OpenJDK
Gradle требует, чтобы на компьютере была установлена Java SE 8 или новее.
Введите следующие команды для установки OpenJDK 11 :
sudo apt updatesudo apt install openjdk-11-jdk
Проверьте установку Java, распечатав версию Java :
Результат должен выглядеть примерно так:
openjdk version "11.0.7" 2020-04-14 OpenJDK Runtime Environment (build 11.0.7+10-post-Ubuntu-3ubuntu1) OpenJDK 64-Bit Server VM (build 11.0.7+10-post-Ubuntu-3ubuntu1, mixed mode, sharing) Скачивание Gradle
На момент написания этой статьи последняя версия Gradle — 6.5.1 . Прежде чем перейти к следующему шагу, проверьте страницу выпусков Gradle, чтобы узнать, доступна ли более новая версия.
Загрузите zip-файл Gradle, содержащий только двоичный файл, в каталог /tmp с помощью следующей команды wget :
VERSION=6.5.1wget https://services.gradle.org/distributions/gradle-$-bin.zip -P /tmp
По завершении загрузки распакуйте файл в каталог /opt/gradle :
sudo unzip -d /opt/gradle /tmp/gradle-$-bin.zipЕсли вы получаете сообщение об ошибке «sudo: unzip: command not found», установите пакет unzip с помощью sudo apt install unzip .
Gradle регулярно обновляется исправлениями безопасности и новыми функциями. Чтобы иметь больший контроль над версиями и обновлениями, мы создадим символическую ссылку с именем latest , которая указывает на каталог установки Gradle:
sudo ln -s /opt/gradle/gradle-$ /opt/gradle/latestПозже, при обновлении Gradle, распакуйте более новую версию и измените символическую ссылку, чтобы она указывала на нее.
Настройка переменных среды
Нам нужно добавить каталог bin Gradle в системную PATH среды PATH . Для этого откройте текстовый редактор и создайте новый файл с именем gradle.sh внутри каталога /etc/profile.d/ .
sudo nano /etc/profile.d/gradle.shВставьте следующую конфигурацию:
export GRADLE_HOME=/opt/gradle/latest export PATH=$GRADLE_HOME>/bin:$PATH> Сохраните и закройте файл. Этот сценарий будет получен при запуске оболочки.
sudo chmod +x /etc/profile.d/gradle.shЗагрузите переменные среды в текущий сеанс оболочки, используя source команду:
source /etc/profile.d/gradle.shПроверка установки Gradle
Чтобы проверить правильность установки Gradle, используйте команду gradle -v которая отобразит версию Gradle:
Вы должны увидеть что-то вроде следующего:
Welcome to Gradle 6.5.1! Here are the highlights of this release: - Experimental file-system watching - Improved version ordering - New samples For more details see https://docs.gradle.org/6.5.1/release-notes.html ------------------------------------------------------------ Gradle 6.5.1 ------------------------------------------------------------ Build time: 2020-06-30 06:32:47 UTC Revision: 66bc713f7169626a7f0134bf452abde51550ea0a Kotlin: 1.3.72 Groovy: 2.5.11 Ant: Apache Ant(TM) version 1.10.7 compiled on September 1 2019 JVM: 11.0.7 (Ubuntu 11.0.7+10-post-Ubuntu-3ubuntu1) OS: Linux 5.4.0-26-generic amd64 Вот и все. Вы установили последнюю версию Gradle в свою систему Ubuntu и можете начать ее использовать.
Выводы
Мы показали вам, как установить Gradle в Ubuntu 20.04. Теперь вы можете посетить официальную страницу документации Gradle и узнать, как начать работу с Gradle.
Если вы столкнулись с проблемой или хотите оставить отзыв, оставьте комментарий ниже.
How to Install Gradle on Ubuntu 22.04
![]()
Gradle is a build automation tool that is used to build different applications, from mobile applications to microservices. Gradle provides a platform to build, test, and maintain the applications; moreover, if you are working on a multi-build project, Gradle looks continuously at the project, and if you made any changes, even the minor changes, Gradle provides the output according to those changes.
Gradle improves the performance of applications by allowing the parallel execution of tasks and intra-tasks through a worker API, and every time can be limited to the execution time as these tasks have their own timeout property.
Gradle can be installed on different distributions of Linux, but in this guide, we are focusing on discovering the installation of Gradle on Ubuntu.
How to install Gradle on Ubuntu 22.04 from its official website
We will install Gradle by downloading its package from its official website, for this purpose, we will execute the following steps.
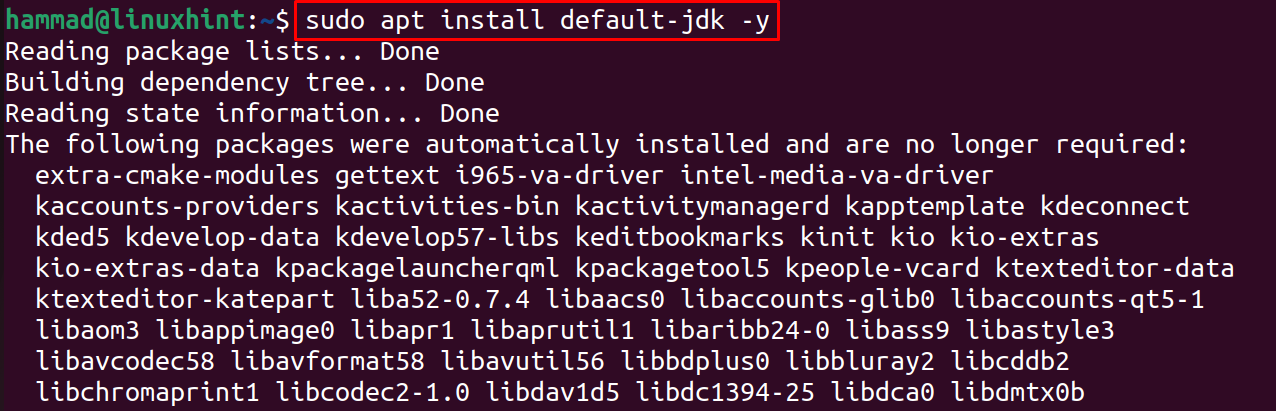
Step 1: Install Java on Ubuntu
Gradle is dependent on the Java, so we will first install the latest version of Java available in the default repository of Ubuntu using the command:
We will check out the version of an installed package of Java:

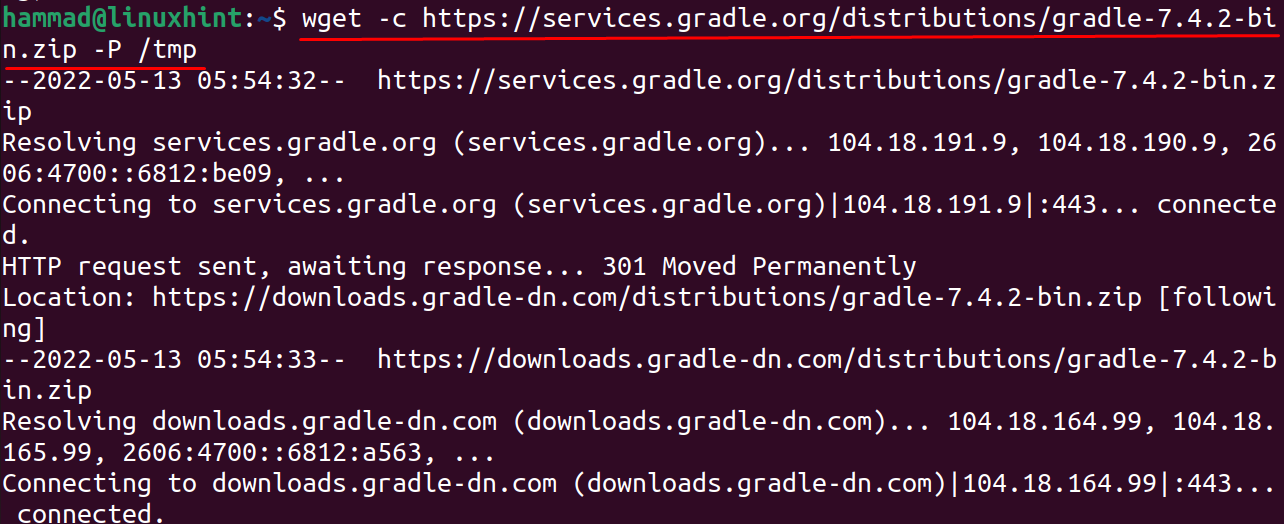
Step 2: Download Gradle package
Now after installing the Java, we will download the package of Gradle from its official website in the tmp directory of Ubuntu using the wget command:
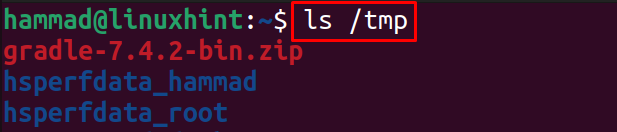
We will list down the downloaded package to confirm its downloading:
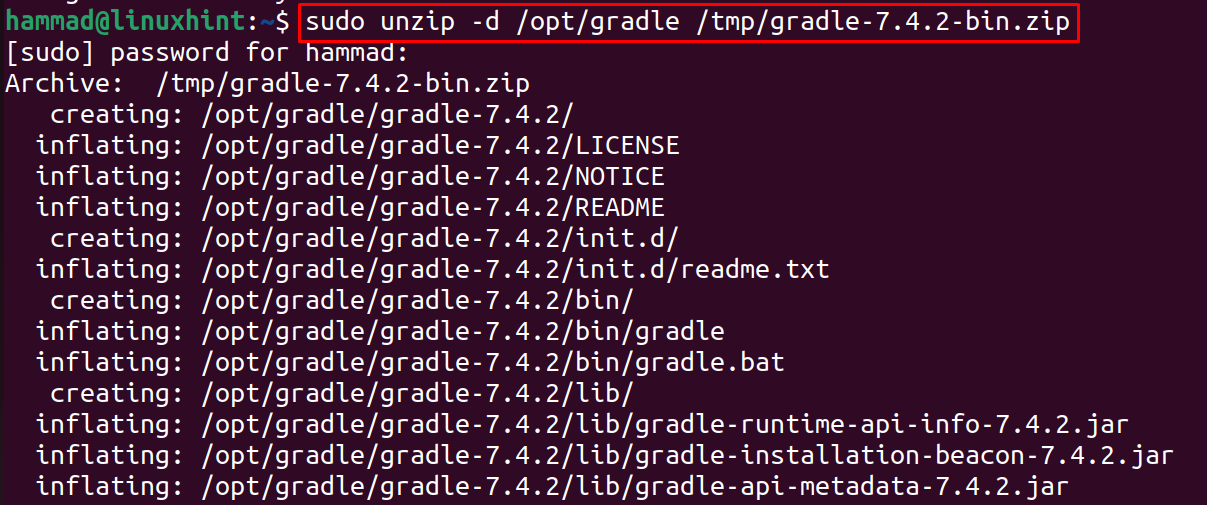
Step 3: Unzip the downloaded package of Gradle
The downloaded package is zipped, we will unzip it using the command:
Now again list down the unzipped files by executing the ls command:

Step 4: Set up environment variables
Next step is to set up the environment variables, for this we will make some changes in the “sh” file of Gradle and for this we have to open it with the nano text editor:

In the opened file, add the below-mentioned two lines and then exit the editor by saving the changes made in the file:
export GRADLE_HOME = / opt / gradle / gradle-7.4.2

Step 5: Change the permissions of file
To make the “sh” file executable, we will change its permissions using the chmod command:

Step 6: Install the Gradle
Finally, load the environment variables using:

To confirm the installation, we will check the version of installed Gradle:

How to install Gradle on Ubuntu 22.04 using the snap
Another method to install Gradle on Ubuntu is by downloading and installing it from the snapcraft, and for this purpose, we need a snapd utility which can be installed by using the command:

To download and install the snap of Gradle from snapcraft, execute the command:

To remove the installed package of Gradle, use the command:

Conclusion
Gradle is a tool used to build, automate, test, and maintain the applications, whether they are mobile applications or applications designed to provide microservices. In this guide, Gradle’s installation method on Ubuntu has been explored by downloading its package from its official website.
About the author
Hammad Zahid
I’m an Engineering graduate and my passion for IT has brought me to Linux. Now here I’m learning and sharing my knowledge with the world.
Installation
The current Gradle release is 8.2.1. You can download binaries and view docs for all Gradle versions from the releases page.
Prerequisites
Gradle runs on all major operating systems and requires only a Java JDK version 8 or higher to be installed. To check, run java -version :
$ java -version java version "1.8.0_121" Additional resources
- On-demand and live online training is available for free to Gradle users.
- Self-paced tutorials are a good place to try Gradle with a variety of languages in addition to the docs.
- Gradle has a visual build inspection tool: Build Scan™.
- Finally, the Gradle Newsletter is a great way to keep UP-TO-DATE , with issues crafted monthly.
Installing with a package manager
SDKMAN! is a tool for managing parallel versions of multiple Software Development Kits on most Unix-based systems.
Homebrew is “the missing package manager for macOS”.
Other package managers are available, but the version of Gradle distributed by them is not controlled by Gradle, Inc. Linux package managers may distribute a modified version of Gradle that is incompatible or incomplete when compared to the official version (available from SDKMAN! or below).
› Additional helpful information
Installing manually
Step 1. Download the latest Gradle distribution
The current Gradle release is version 8.2.1, released on 10 Jul 2023. The distribution zip file comes in two flavors:
If in doubt, choose the binary-only version and browse docs and sources online.
Need to work with an older version? See the releases page.
Step 2. Unpack the distribution
Linux & MacOS users
Unzip the distribution zip file in the directory of your choosing, e.g.:
$ mkdir /opt/gradle $ unzip -d /opt/gradle gradle-8.2.1-bin.zip $ ls /opt/gradle/gradle-8.2.1 LICENSE NOTICE bin getting-started.html init.d lib media Microsoft Windows users
Create a new directory C:\Gradle with File Explorer.
Open a second File Explorer window and go to the directory where the Gradle distribution was downloaded. Double-click the ZIP archive to expose the content. Drag the content folder gradle-8.2.1 to your newly created C:\Gradle folder.
Alternatively you can unpack the Gradle distribution ZIP into C:\Gradle using an archiver tool of your choice.
Step 3. Configure your system environment
Linux & MacOS users
Configure your PATH environment variable to include the bin directory of the unzipped distribution, e.g.:
$ export PATH=$PATH:/opt/gradle/gradle-8.2.1/bin Microsoft Windows users
In File Explorer right-click on the This PC (or Computer ) icon, then click Properties -> Advanced System Settings -> Environmental Variables .
Under System Variables select Path , then click Edit . Add an entry for C:\Gradle\gradle-8.2.1\bin . Click OK to save.
Step 4. Verify your installation
Open a console (or a Windows command prompt) and run gradle -v to run gradle and display the version, e.g.:
› Additional helpful information
Upgrade with the Gradle Wrapper
If your existing Gradle-based build uses the Gradle Wrapper, you can easily upgrade by running the wrapper task, specifying the desired Gradle version:
$ ./gradlew wrapper --gradle-version=8.2.1 --distribution-type=bin Note that it is not necessary for Gradle to be installed to use the Gradle wrapper. The next invocation of gradlew or gradlew.bat will download and cache the specified version of Gradle.
$ ./gradlew tasks Downloading https://services.gradle.org/distributions/gradle-8.2.1-bin.zip . › Additional helpful information
Older Releases
You can find all releases and their checksums on the releases page.
Command-Line Completion
Command-line completion scripts are available for bash and zsh. This provides completion for Gradle tasks and command-line options.