- I2P (Русский)
- Установка
- Использование
- Создание eepsite
- Смотрите также
- Debian I2P Packages
- Instructions for Ubuntu and derivatives like Linux Mint & Trisquel
- Instructions for Debian
- Post-install work
- Пакеты I2P для Debian
- Инструкции для Ubuntu и основанных на ней системах, таких как Linux Mint и Trisquel
- Инструкции для Debian
- Действия после установки
I2P (Русский)
Состояние перевода: На этой странице представлен перевод статьи I2P. Дата последней синхронизации: 18 марта 2022. Вы можете помочь синхронизировать перевод, если в английской версии произошли изменения.
I2P — анонимная сеть, предоставляющая чувствительным в плане конфиденциальности приложениям простой способ создания безопасных соединений. Пересылаемые данные «заворачиваются» в несколько слоёв шифрования и передаются по сети, которая является одновременно распределённой и динамической, без доверенных участников. Через I2P может работать целый ряд приложений, в том числе электронная почта, peer-to-peer программы, IRC-чаты и другие.
Актуальны две реализации I2P:
- I2P — Написано на Java. Изначальная разработка. Интерактивный и дружелюбный Web-GUI интерфейс со встроенным почтовым клиентом (SusiMail) и торрент клиентом (I2PShark).
- i2pd — Написано на C++. Альтернативная разработка. Взаимодействие возможно посредством интерфейса командной строки (Command-Line-Interface) или конфигурационных файлов. Минималистичный, лёгкий, быстрый.
Установка
Пакет i2pd содержит демон, который написан на C++ и хорошо подходит для систем с ограниченными ресурсами. Также доступна разрабатываемая версия i2pd-git AUR .
Стандартный I2P-набор доступен в пакетах i2p AUR и i2p-bin AUR . Обоим для работы необходима среда выполнения Java, например, OpenJDK.
На сайте проекта I2P можно скачать скомпилированный бинарный файл, который может быть установлен в домашнем каталоге пользователя и использован через интерфейс командной строки (Command-Line-Interface). В этом случае I2P будет обновляться автоматически через сеть I2P.
Использование
Если вы установили i2pd , запустите и по желанию включите службу i2pd.service . Настройки демона находятся в файле /etc/i2pd/i2pd.conf . Если же вы установили i2p AUR , то вместо этого запустите и по желанию включите службу i2prouter.service .
Откройте браузер и посетите приветственную страницу I2P по адресу 127.0.0.1:7070 (для демона) или 127.0.0.1:7657 (для официальной версии, см. FAQ). Отсюда можно перейти к настройкам I2P, статистике и ссылкам на I2P-сайты. Учтите, что сайты I2P будут недоступны некоторое время — демон должен сначала «подгрузить» сеть, что может занять несколько минут.
Чтобы посещать I2P-сайты, настройте браузер использовать локальный прокси:
HTTP 127.0.0.1 4444 SOCKS 127.0.0.1 4447
Создание eepsite
Создание I2P-сайта (т.н. eepsite) описано в инструкции. Учтите, что под домашним каталогом понимается домашний каталог пользователя i2p, /opt/i2p (см., например, файл i2p.install в AUR).
Смотрите также
Debian I2P Packages
Instructions for Ubuntu and derivatives like Linux Mint & Trisquel
Adding the PPA via the command line and installing I2P
- Open a terminal and enter:
sudo apt-add-repository ppa:i2p-maintainers/i2p
This command will add the PPA to /etc/apt/sources.list.d and fetch the gpg key that the repository has been signed with. The GPG key ensures that the packages have not been tampered with since being built. - Notify your package manager of the new PPA by entering:
sudo apt-get update
This command will retrieve the latest list of software from each repository that is enabled on your system, including the I2P PPA that was added with the earlier command. - You are now ready to install I2P!
sudo apt-get install i2p
Adding the PPA Using the Software Center
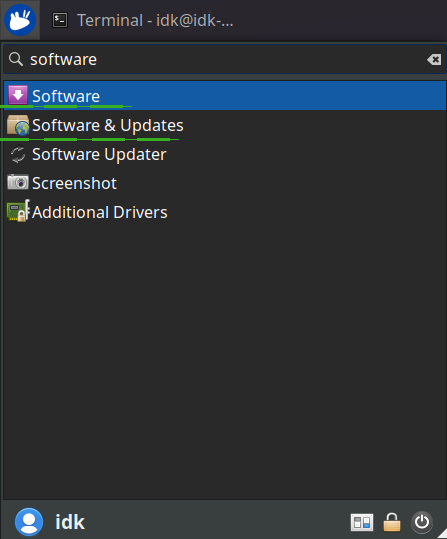
- Open «Software and Updates» via the applications menu.

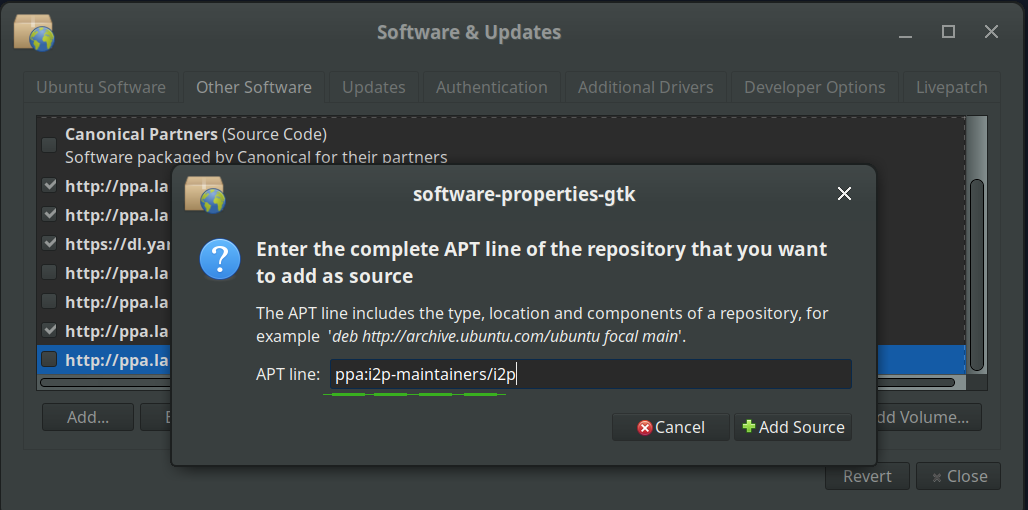
- Select the «Other Software» tab and click the «Add» button at the bottom to configure the PPA.
- Add the PPA by pasting the URL: ppa:i2p-maintainers/i2p into the PPA dialog.
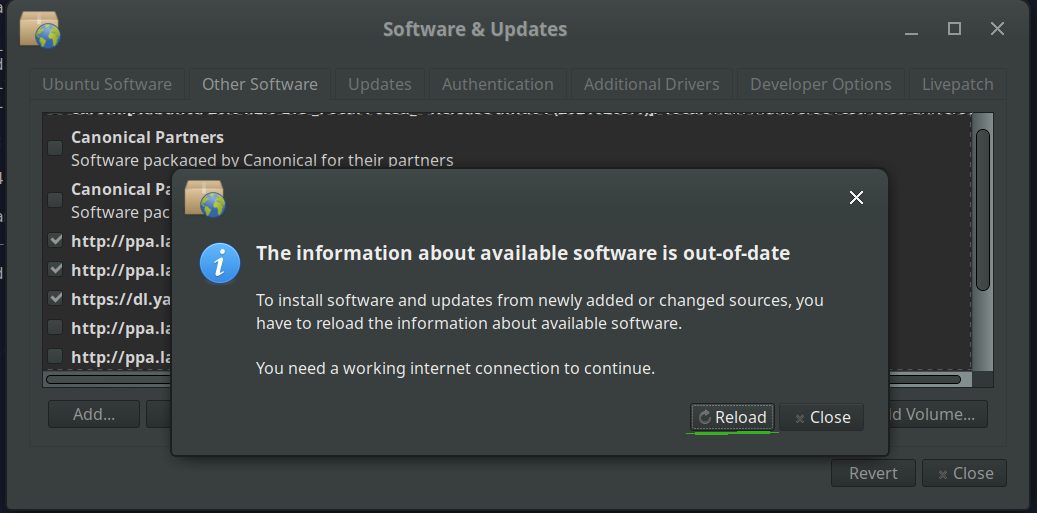
- Download the repository information with the «Reload» button.
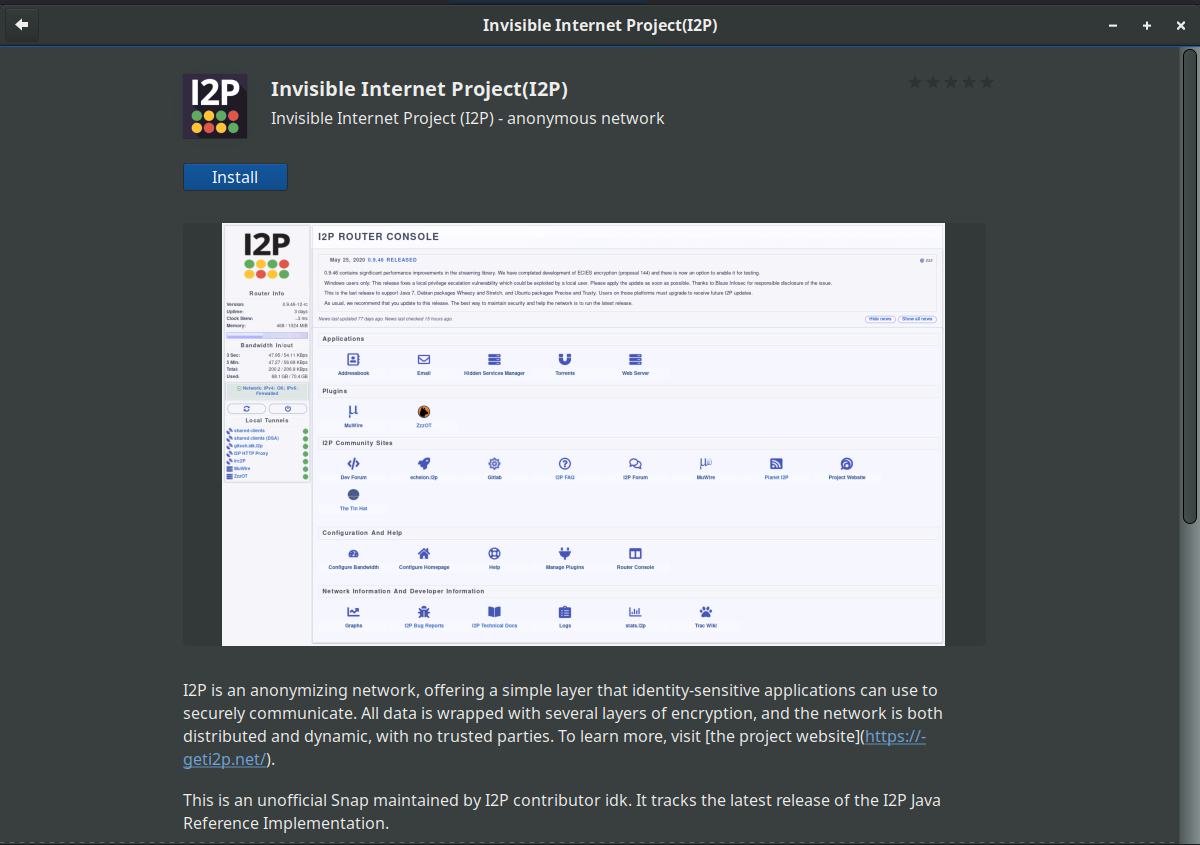
- Install the I2P software using the «Software» tool from the applications menu.

After the installation process completes you can move on to the next part of starting I2P and configuring it for your system.
Instructions for Debian
Note: The steps below should be performed with root access (i.e., switching user to root with su or by prefixing each command with sudo ).
- ,
Ensure that apt-transport-https , curl , lsb-release are installed.
sudo apt-get update sudo apt-get install apt-transport-https lsb-release curl # Use this command on Debian Bullseye or newer only. echo "deb [signed-by=/usr/share/keyrings/i2p-archive-keyring.gpg] https://deb.i2p2.de/ $(lsb_release -sc) main" \ | sudo tee /etc/apt/sources.list.d/i2p.list If you’re using a downstream variant of Debian like LMDE or Kali Linux, the following command fill find the correct version for your distribution:
# Use this command on Debian Downstreams like LMDE or ParrotOS only. echo "deb [signed-by=/usr/share/keyrings/i2p-archive-keyring.gpg] https://deb.i2p2.de/ $(dpkg --status tzdata | grep Provides | cut -f2 -d'-') main" \ | sudo tee /etc/apt/sources.list.d/i2p.list If you are using Debian Buster or older official Debian distributons, use the following command instead:
# Use this command on Debian Buster or older only. echo "deb https://deb.i2p2.de/ $(lsb_release -sc) main" \ | sudo tee /etc/apt/sources.list.d/i2p.list If you’re using a downstream variant of Debian like LMDE or Kali Linux, the following command fill find the correct version for your distribution:
# Use this command on Debian Buster or older only. echo "deb https://deb.i2p2.de/ $(dpkg --status tzdata | grep Provides | cut -f2 -d'-') main" \ | sudo tee /etc/apt/sources.list.d/i2p.list curl -o i2p-archive-keyring.gpg https://geti2p.net/_static/i2p-archive-keyring.gpg gpg --keyid-format long --import --import-options show-only --with-fingerprint i2p-archive-keyring.gpg 7840 E761 0F28 B904 7535 49D7 67EC E560 5BCF 1346 sudo cp i2p-archive-keyring.gpg /usr/share/keyrings If you are using a distribution older than Debian Buster, you will also need to symlink that key to /etc/apt/trusted.gpg.d .
sudo ln -sf /usr/share/keyrings/i2p-archive-keyring.gpg /etc/apt/trusted.gpg.d/i2p-archive-keyring.gpg sudo apt-get install i2p i2p-keyring After the installation process completes you can move on to the next part of starting I2P and configuring it for your system.
Post-install work
- «on demand» using the i2prouter script. Simply run » i2prouter start » from a command prompt. (Note: Do not use sudo or run it as root!)
- «on demand» without the java service wrapper (needed on non-Linux/non-x86 systems) by running » i2prouter-nowrapper «. (Note: Do not use sudo or run it as root!)
- as a service that automatically runs when your system boots, even before logging in. The service can be enabled with » dpkg-reconfigure i2p » as root or using sudo. This is the recommended means of operation.
When installing for the first time, please remember to adjust your NAT/firewall if you can. The ports to forward can be found on the network configuration page in the router console. If guidance with respect to forwarding ports is needed, you may find portforward.com to be helpful.
Please review and adjust the bandwidth settings on the configuration page, as the default settings of 96 KB/s down / 40 KB/s up are fairly conservative.
If you want to reach I2P Sites via your browser, have a look on the browser proxy setup page for an easy howto.

Mastodon


Пакеты I2P для Debian
Инструкции для Ubuntu и основанных на ней системах, таких как Linux Mint и Trisquel
Добавление PPA через командную строку и установка I2P
- Откройте консоль и введите:
sudo apt-add-repository ppa:i2p-maintainers/i2p
Эта команда добавит PPA к /etc/apt/sources.list.d и извлечет ключ gpg, которым был подписан репозиторий. Ключ GPG гарантирует, что пакеты не были подделаны после сборки. - Теперь нужно уведомить пакетный менеджер о новом репозитории, введя:
sudo apt-get update
Эта команда заберет списки последних версий из каждого репозитория, что настроен для вашей системы, включая репозиторий I2P, который мы добавили предыдущей командой. - Теперь вы готовы к установке I2P!
sudo apt-get install i2p
Добавление PPA с помощью Центра ПО
- Откройте «ПО и обновления» через меню приложений.
- Выберите вкладку «Другое ПО» и нажмите кнопку «Добавить» в нижней части страницы чтобы настроить PPA.
- Добавьте PPA, вставив URL-адрес: ppa:i2p-maintainers/i2p в диалоговое окно PPA.
- Скачайте информацию о репозитории с помощью кнопки «Перезагрузка».
- Установите ПО I2P, используя инструмент «ПО» из меню приложений.
После завершения установки вы можете приступать к следующей части запуска I2P и его настройки для вашей системы.
Инструкции для Debian
Примечание: Следующие шаги должны быть выполнены с root-правами доступа (напр., переключение на пользователя root с помощью su или с помощью добавления в начало каждой команды sudo ).
- ,
Убедитесь, что установлены apt-transport-https , curl , lsb-release3 .
sudo apt-get update sudo apt-get install apt-transport-https lsb-release curl # Use this command on Debian Bullseye or newer only. echo "deb [signed-by=/usr/share/keyrings/i2p-archive-keyring.gpg] https://deb.i2p2.de/ $(lsb_release -sc) main" \ | sudo tee /etc/apt/sources.list.d/i2p.list If you’re using a downstream variant of Debian like LMDE or Kali Linux, the following command fill find the correct version for your distribution:
# Use this command on Debian Downstreams like LMDE or ParrotOS only. echo "deb [signed-by=/usr/share/keyrings/i2p-archive-keyring.gpg] https://deb.i2p2.de/ $(dpkg --status tzdata | grep Provides | cut -f2 -d'-') main" \ | sudo tee /etc/apt/sources.list.d/i2p.list If you are using Debian Buster or older official Debian distributons, use the following command instead:
# Use this command on Debian Buster or older only. echo "deb https://deb.i2p2.de/ $(lsb_release -sc) main" \ | sudo tee /etc/apt/sources.list.d/i2p.list If you’re using a downstream variant of Debian like LMDE or Kali Linux, the following command fill find the correct version for your distribution:
# Use this command on Debian Buster or older only. echo "deb https://deb.i2p2.de/ $(dpkg --status tzdata | grep Provides | cut -f2 -d'-') main" \ | sudo tee /etc/apt/sources.list.d/i2p.list curl -o i2p-archive-keyring.gpg https://geti2p.net/_static/i2p-archive-keyring.gpg gpg --keyid-format long --import --import-options show-only --with-fingerprint i2p-archive-keyring.gpg 7840 E761 0F28 B904 7535 49D7 67EC E560 5BCF 1346 sudo cp i2p-archive-keyring.gpg /usr/share/keyrings If you are using a distribution older than Debian Buster, you will also need to symlink that key to /etc/apt/trusted.gpg.d .
sudo ln -sf /usr/share/keyrings/i2p-archive-keyring.gpg /etc/apt/trusted.gpg.d/i2p-archive-keyring.gpg sudo apt-get install i2p i2p-keyring После завершения установки вы можете приступать к следующей части запуска I2P и его настройки для вашей системы.
Действия после установки
- «по требованию» используя скрипт i2prouter. Просто запустите » i2prouter start » из командной строки. (Важно: НЕ НАДО использовать sudo или запускать его от root!)
- «по требованию» без java service wrapper (он нужен для non-Linux/non-x86 систем), запуская » i2prouter-nowrapper «. (Важно: НЕ НАДО использовать sudo или запускать от root!)
- как сервис, который автоматически стартует при запуске системы, даже до входа пользователя. Сервис может быть активирован командой » dpkg-reconfigure i2p » от root или с помощью sudo. Этот вариант рекомендован для использования.
При первой инсталляции не забудьте поправить настройки NAT/firewall, если это возможно. Порты, которые нужно пробросить, указаны на странице конфигурации сетив консоли маршрутизатора. Если вам нужно разобраться, что такое проброс портов, про это можно прочитать на portforward.com.
Проверьте и поправьте настройки полосы пропускания на странице настроек, так как значения по умолчанию 96 KB/s down / 40 KB/s up довольно консервативны.
Если вы хотите получить доступ к I2P-сайтам через браузер, посмотрите на странице browser proxy setup простую инструкцию.
Mastodon