- How to Install or Execute a .bin File in Ubuntu Linux
- Install Or Execute Bin File
- Conclusion
- Install Linux Kernel 6.2 in Ubuntu 22.04 | 20.04 Linux
- Update Ubuntu 22.04 | 20.04 Linux Kernel to version 6.2
- 1. Check the Current Ubuntu Kernel version
- 2. Update Ubuntu 22.04 or 20.04
- 3. Download Ubuntu mainline kernel installer
- 4. Find the latest version of the Linux Kernel
- 5. Installing Linux 6.2 Kernel on Ubuntu
- 6. Reboot your system
- 7. Change or Set the Default Kernel Version
- 8. Uninstall Linux kernel v6.2.0
- FAQ
- What is Ubuntu mainline?
- How to install Mainline in Ubuntu?
- What are the three types of kernels?
- Как устанавливать bin файлы в Linux
- Установка bin файлов в Linux
- Консольный вариант
- Графический вариант
How to Install or Execute a .bin File in Ubuntu Linux
Binary Files can be in .bin or .run files under Ubuntu Linux. and the .bin or .run is the only file types, and you need to mark as executable permission to install it on your Ubuntu system. You can install it either in terminal or through GUI.
Install Or Execute Bin File
This guide will introduce two methods to install executable file under Ubuntu Linux. And executable files can also be recognized by the extension .bin and .run.
Terminall Installation
Here are the steps to install .bin files via terminal on Ubuntu:
#1 you need to download the .bin file that you want to install.
#2 Open a terminal window by clicking the Ubuntu terminal icon located on the Launcher taskbar. and then searching for “Terminal” and then clicking Terminal icon on the result page. or you can right click on the desktop, and select Terminal from the popup menu list to open one terminal window.
#3 change the current directory to your directory where the executable file is stored. for example, you have downloaded .bin files into the /tmp directory. Then type the following command:
#4 You need to mark the file permission as executable with the following chmod command, type:
Then type the required password for root, and press Enter key. And the file can be executed by the current user with root privileges now.
#5 the bin file can be run in the terminal by typing the following command:
If you hit an error message such as “permission denied”, and you can try to execute the file by adding sudo before the above command.
GUI Installation
You can also install the executable binary files via Ubuntu Desktop GUI. Here are the steps:
#1 Click the Files icon on the Ubuntu Launcher to start the File Manger and then change to the directory in which the executable file is stored.
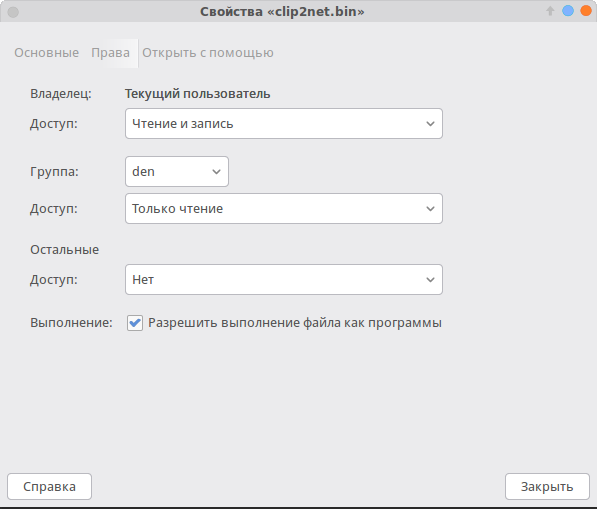
#2 right click on the BIN file and select Properties from the popup menu list, and the Properties dialog will appear. then switch to Permissions tab, and check the Allow Executing File as Program. then click the Close button.
#3 double-click on the .run or .bin file. and if there is no any action appears to be happening, and you need to run it in the terminal.
Conclusion
You should know that how to install the executable binary file (.bin or .run) on your Ubuntu 14.04 or 16.04 or 18.04 Linux from this guide.
Install Linux Kernel 6.2 in Ubuntu 22.04 | 20.04 Linux
Ubuntu is one of the most popular operating systems built on top of the Linux kernel, developed by Linus Torvalds. However, installing the kernel on Ubuntu OS is not as straightforward, therefore in this article, we will learn the steps to install any latest available Linux kernel version on Ubuntu OS.
The Linux Kernel is the main part of any operating system and is responsible for bridging hardware and software together. Developers can use Kernel to modify operating systems to suit specific needs or tasks. Therefore, it’s a valuable part required for the proper functioning of the complete Ubuntu Linux OS.
Note: “The mainline kernel builds are produced for debugging purposes and therefore come with no support. Use them at your own risk”
In this article, we learn how to install Linux Kernel 6.2 on Ubuntu 22.04 or 20.04 Linux to get the advantages and improvements of this Kernel version on an existing system.
Update Ubuntu 22.04 | 20.04 Linux Kernel to version 6.2
The given steps in this tutorial are not just limited to Ubuntu only, even we can use them for Linux Mint, Debian, POP OS, and other similar Linux systems.
1. Check the Current Ubuntu Kernel version
Well, it is good to know which version of the Kernel is on our Ubuntu system before installing a new one. To do that, on your Ubuntu access the command terminal. The GUI desktop users can use the keyboard shortcut Ctrl+Alt+T to open the terminal app. After that run the given command:
2. Update Ubuntu 22.04 or 20.04
It is a good practice to make your system always up to date. However, if you haven’t then first run the system update command to ensure all the system packages are up to date. After that also install wget which we require later in this article.
sudo apt update && sudo apt upgrade
3. Download Ubuntu mainline kernel installer
Well, we don’t need to use any script to install the latest Linux kernel package on Ubuntu, because it is available as Debian binary to install.
However, to easily install, update and uninstall Linux Kernels on Ubuntu 22.04 | 20.04 LTS, we can use the Ubuntu Mainline Kernel script available on GitHub. Use the given command to download it on your Ubuntu system.
wget https://raw.githubusercontent.com/pimlie/ubuntu-mainline-kernel.sh/master/ubuntu-mainline-kernel.sh
Once the script is on your system, make it executable and move it to /usr/local/bin to easily use it in the future to get the latest version of the kernel.
chmod +x ubuntu-mainline-kernel.sh
sudo mv ubuntu-mainline-kernel.sh /usr/local/bin/
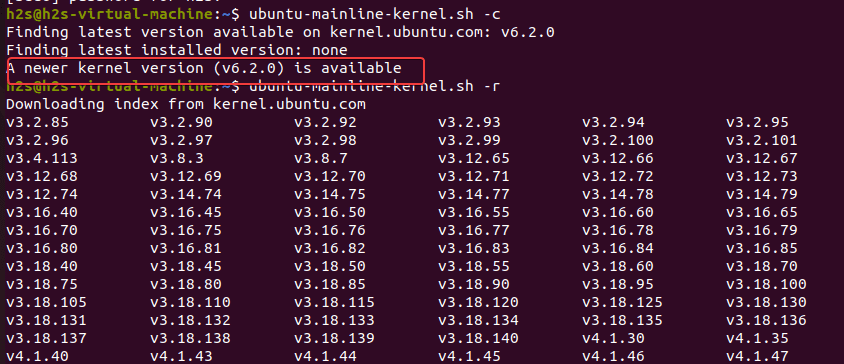
4. Find the latest version of the Linux Kernel
We can use the Ubuntu Mainline Kernel script to find what is the latest available version of the Linux kernel to install on our Ubuntu system. For that on your command terminal run:
If the latest version is different from the one installed on your system, the script will display that.
Whereas to list available Kernel series (versions) that you can install using the script, use this terminal command:
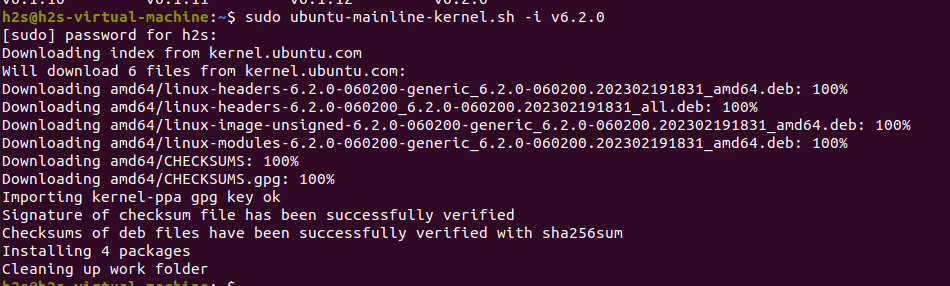
5. Installing Linux 6.2 Kernel on Ubuntu
To install the latest Linux kernel package which is available in the repository of kernel.ubnut.com, we can use
sudo ubuntu-mainline-kernel.sh -i
However, if you have some special requirements and looking for some specific kernel version then after the -i parameter mention the exact version you want. For example: for 6.2, we can use:
sudo ubuntu-mainline-kernel.sh -i v6.2.0
If you have installed multiple Linux kernel versions on our Ubuntu using this script then to list all of them we can use:
sudo ubuntu-mainline-kernel.sh -l
6. Reboot your system
Restart your system to let it use the kernel version you have just configured.
After the system reboots, check your current version by using:
This time you will see the latest one.
7. Change or Set the Default Kernel Version
Ubuntu is configured to use the latest available Linux version on the system, by default. However, due to any reason, if you want to change that, then edit the Grub file.
Add the following two lines, to get an idea you can see the screenshot.
GRUB_SAVEDEFAULT=true GRUB_DEFAULT=saved
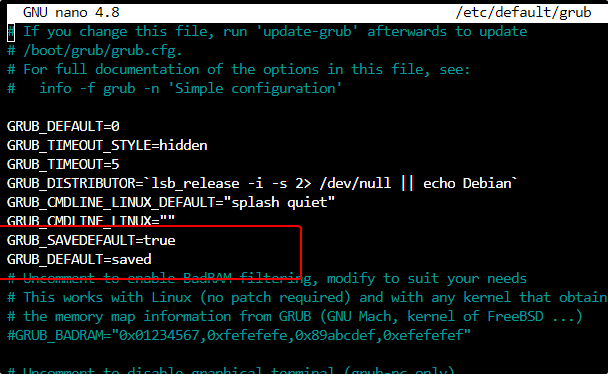
Save the file Ctrl+O, hit the Enter Key, and then exit it Ctrl+X. This will save our preference of the default kernel in the Boot menu and will not reset it with the system reboot until we change it.
Update Grub:
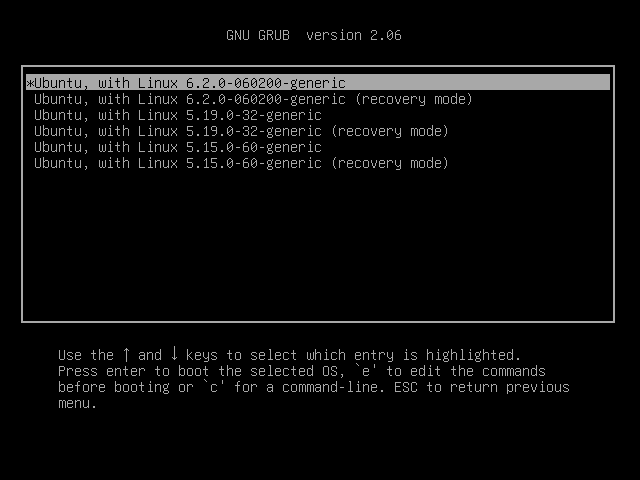
Now reboot your system:
As you start your system, press the Esc button to get the Grub menu. Select “Advanced options for Ubuntu” and then select the Kernel version you want to set as the default one on your system.

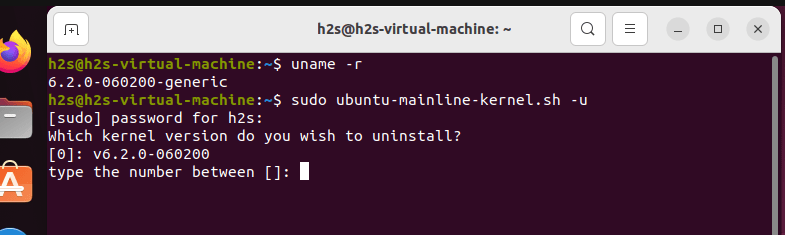
8. Uninstall Linux kernel v6.2.0
To remove any existing Ubuntu Linux kernel from your system you have installed using the script, run again mainline tool command:
sudo ubuntu-mainline-kernel.sh -u
Select the serial number of the version you want to completely remove from your system.
You can even use the PPA of Ubuntu Mainline to update or downgrade the Ubuntu Linux kernel.
FAQ
What is Ubuntu mainline?
The Mainline kernel is a term used for the latest available version of the Linux kernel that has recently been released by the developers but is still under development. Whereas Ubuntu mainline is a script that is available on GitHub and allows users to install the latest mainline and even the old or previous kernel versions from the kernel.ubuntu.com repository.
How to install Mainline in Ubuntu?
- Open the Ubuntu command terminal window.
- Download Ubuntu mainline script, the command is given in this article for that.
- After that use the sudo ubuntu-mainline-kernel.sh -i command.
- This will install the latest Mainlin version on your Ubuntu Linux.
What are the three types of kernels?
A kernel is the core of any operating system which acts as a bridge between the hardware and software in a computer.
There are three main types of kernels: monolithic kernels, microkernels, and hybrid kernels.
Monolithic Kernels are the most commonly used type of kernel. They contain all device drivers and core OS services within one large block of code which makes them more efficient and less prone to errors.
Microkernels are another type of kernel that only contains essential operating system functions, such as memory management, process scheduling, and inter-process communication. As its name suggests this arrangement reduces its size and complexity but makes it more difficult to debug.
“Hybrid Kernels” – as the name suggest it is a mixture of two kernels. Developers took the best aspects of monolithic kernels and microkernels by having both essential components and device drivers all within the same block of code. This makes such kernels more efficient and less prone to errors than microkernels but with better scalability than monolithic kernels.
Как устанавливать bin файлы в Linux
Не смотря, на то, что большинство программ в операционной системе Linux (в моем случае Ubuntu) можно установить из Центра приложений, тем самым обеспечивая совместимость с системой, иногда вам может понадобится установить новую версию программы или наоборот, старую, которой может не оказаться в списке.
Такие программы чаще всего распространяются, в формате .bin также известные как бинарные файлы. Бывает, что они запакованы в архив, а иногда как исполняемые файлы. Установка bin linux, может быть произведена через терминал либо же через графический интерфейс. Рассмотрим оба варианта.
Установка bin файлов в Linux
Консольный вариант
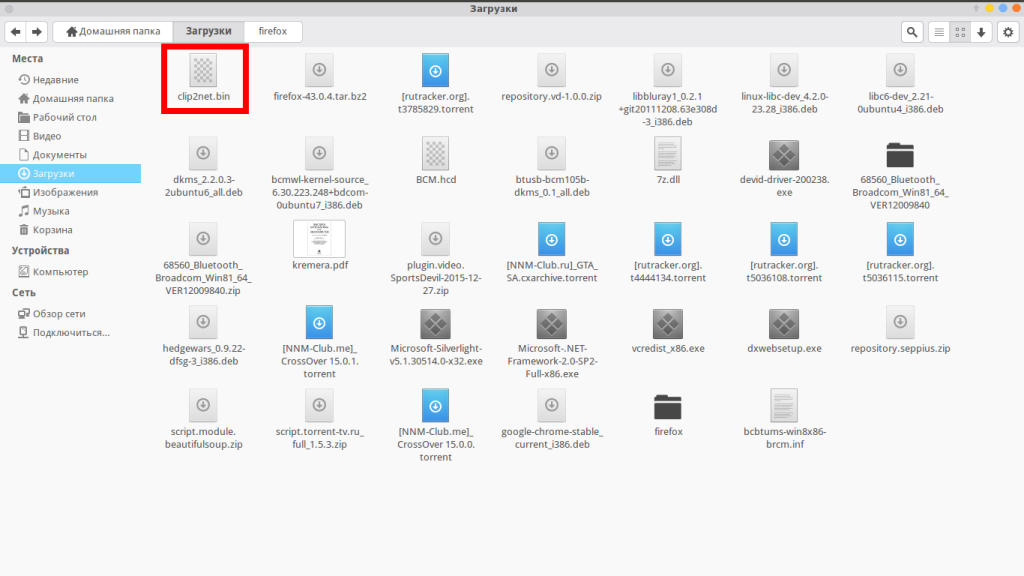
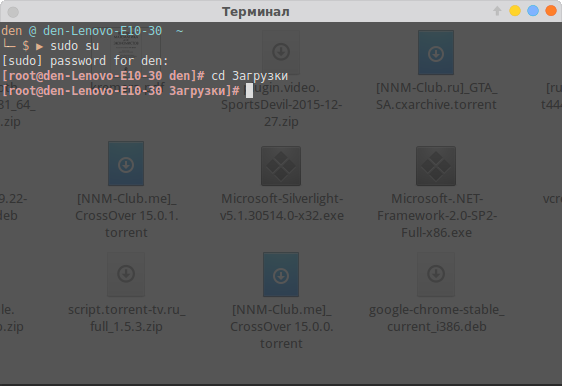
1. Для начала в файловом менеджере, нужно найти наш бинарник.
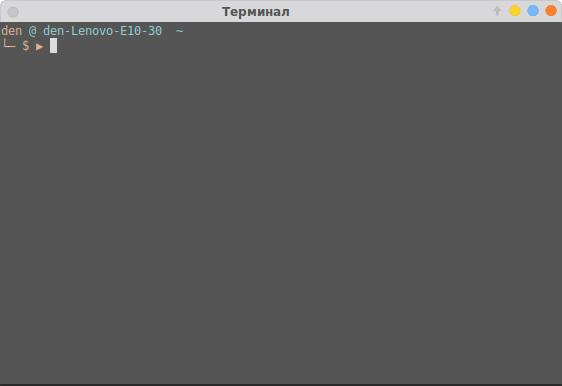
2. Откроем терминал, сочетанием клавиш Ctrl+Alt+T.
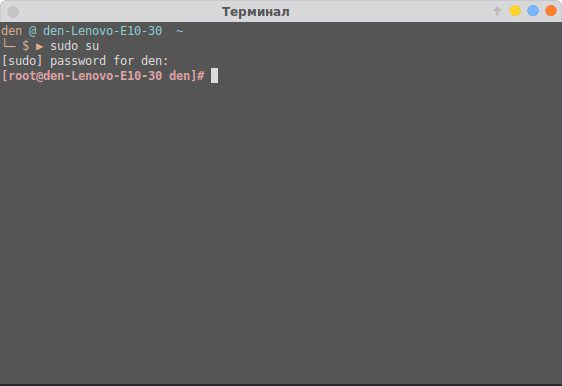
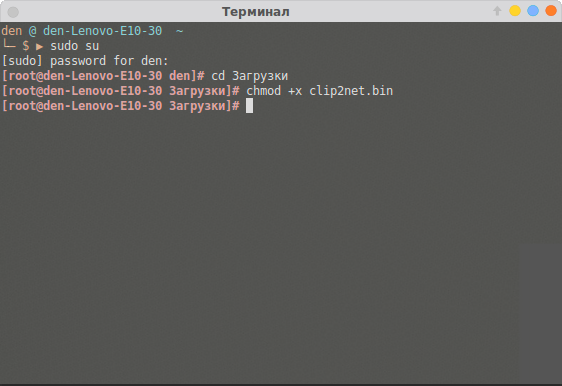
3. Зайдем в режим суперпользователя (под рутом). Для этого введем следующую команду в терминале:
Затем нужно ввести пароль.
4. Теперь, в терминале нам нужно зайти в ту директорию, где расположен наш бинарник. В моем случае это будет так:
5. Дайте права на выполнение файла .bin, командой:
В моем случае это выглядит так:
6. Теперь выполните его. Для этого находясь уже в той директории, где находится бинарный файл введем точку и слэш, затем имя файла. В случае со мной это выглядит так:
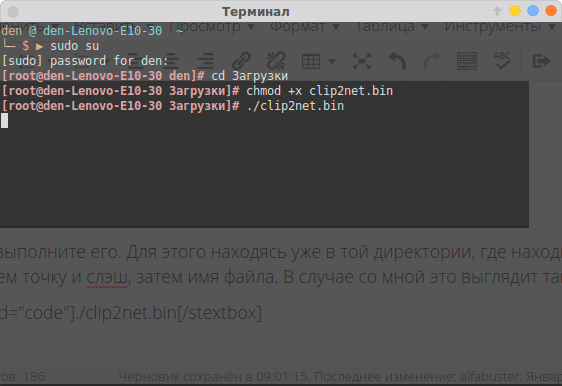
7. После этой команды, установщик программы запустился и спрашивает меня на каком языке я хотел бы установить bin файл в linux.
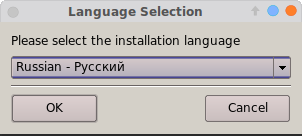
8. Далее устанавливаем программу как обычно это делается в ОС Windows.

Графический вариант
Он ненамного проще, но для новичков, которые недавно перешли с Windows будет понятнее. Первые 3 пункта из консольного варианта все же придется выполнить. Затем нужно выбрать файл, нажать правой кнопкой мыши, выбрать пункт «свойства». На вкладке права, нужно поставить галочку напротив пункта «Разрешить выполнение файла как программы».
Закрываем окно. И перетаскиваем этот файл в терминал, запущенный от суперпользователя, имя файла и путь уже впишутся автоматически, остается лишь нажать на кнопку «Enter». Далее, вы можете установить bin файл, как и в первом варианте. На этом все.
Обнаружили ошибку в тексте? Сообщите мне об этом. Выделите текст с ошибкой и нажмите Ctrl+Enter.