Is it possible to use Linux USB drivers on Mac OS X?
No. The kernel interfaces are completely different. Though MacOSX and Linux are both UNIXes-ish (in fact, Mac OS X is 100% UNIX Certified) they’re vastly different in architecture. Your best bet would be to try VMWare and use a Linux instance under VMWare to try and access it.
EDIT: I just saw your edit, saying you have source and don’t want VMWare. I’d still say no. The underpinnings of Linux and MacOSX are radically different. The source wouldn’t ‘just work’ unless someone made it work specifically for MacOSX. I’d check the source for ‘#ifdef darwin’ or something similar to that, it won’t work. You’d have to have the right version too — Apple changes it’s kernel enough between major releases that a very old port may not work.
Many years ago, there was a project for device drivers to be portable across platforms. It was called Project UDI. The theory was to have a Device Driver Environment in your kernel. The APIs would be consistent across all OSes. Device drivers were source code compatible everywhere, and binary compatible (what you would like) across machines with the same ABI (x86, AMD64, etc). There was a port I remember for Darwin, but I think it was much more theoretical on MacOSX than anything.
The environment worked technically (it actually shipped as the native Device Driver Interface for UnixWare, with the old DDI a compatibility layer on top of UDI) but flopped for human/political reasons. Having SCO/Caldera as the main push for the project didn’t help much. For an OS with good driver support (say, Solaris, Windows) having those drivers is an advantage over kernels that don’t, so the only support would come by definition from OSes that didn’t have drivers, and not a lot of influence. Stallman didn’t like it much either — binary compatibility would make it less likely (he posited) to ship source for drivers.
iMac — How to make Ubuntu work properly with iMac graphics card
I recently installed Ubuntu 16.04 64-bit on my old mid-2010 iMac, but quickly ran into some issues. When installing, the screen would go black after the grub interface, unless I added «nomodeset» to the boot commands. Now Ubuntu 16.04 is installed, but the screen will stay black or freeze on the purple start up screen unless I have «nomodeset» enabled. While it is currently in a working state, it isn’t using the GPU for graphics acceleration. I know the graphics power of this Mac is already poor, but I intend to install Steam on Ubuntu to play some basic 3D games, so I need graphics acceleration to work. I am struggling to find an answer to this problem online. While I’ve since lost the webpage, I read somewhere that the issue may have something to do with how Ubuntu wants to take over the graphics driver on the kernel in order to reduce flickering during boot, which isn’t compatable with iMacs. I am open to installing an older version of Ubuntu if necessary. Graphics card: Radeon HD 4670 CPU: Intel i3-540 Output from command «/usr/lib/nux/unity_support_test -p»:
OpenGL vendor string: VMware, Inc. OpenGL renderer string: Gallium 0.4 on llvmpipe (LLVM 4.0, 128 bits) OpenGL version string: 3.0 Mesa 17.0.7 Not software rendered: no Not blacklisted: yes GLX fbconfig: yes GLX texture from pixmap: yes GL npot or rect textures: yes GL vertex program: yes GL fragment program: yes GL vertex buffer object: yes GL framebuffer object: yes GL version is 1.4+: yes Unity 3D supported: no [ 0.000000] Command line: BOOT_IMAGE=/boot/vmlinuz-4.10.0-42-generic.efi.signed root=UUID=883068b9-9317-47a9-98e6-202c75b7d2f2 ro quiet splash radeon.modeset=0 vt.handoff=7 [ 0.000000] Kernel command line: BOOT_IMAGE=/boot/vmlinuz-4.10.0-42-generic.efi.signed root=UUID=883068b9-9317-47a9-98e6-202c75b7d2f2 ro quiet splash radeon.modeset=0 vt.handoff=7 [ 1.381779] [drm] Initialized [ 1.412144] [drm:radeon_init [radeon]] *ERROR* No UMS support in radeon module! [ 10.490259] [drm:radeon_init [radeon]] *ERROR* No UMS support in radeon module! Is it possible to install Linux packages on OS X?
I know that the Mac commandline is very similar to that of Linux operating systems, so it would be nice to use some features of Linux in my Mac, specially installing Linux packages. For example, in Linux we can install a package by simply typing sudo apt-get install «package name» at the prompt. Is it possible to do something like this on Mac?
3 Answers 3
Yes, it is possible to install and run a variety of UNIX applications on OS X. There are a few solutions out there, my choice and recommendation is Homebrew. I’ve found other solutions to be overly complex and unwieldy.
in linux terminal installing command does any thing automatically it downloads files and . how about Homebrew? is it required to download files manually?
@peaceman once you’ve set up Homebrew, it downloads all the dependencies and files you need for any package you install from its repository. It’s a beautiful thing, really.
@CajunLuke for one MacPorts will install duplicates of everything it needs. Don’t want another bzip2? Too bad, you’re getting one. Brew on the other hand leverages the existing system. I have 23 packages I like to install. With Macports that balloons with dependancies to 144 packages. With Homebrew, only 44. That’s what I call «overly complex». You should seriously try Homebrew. You’ll like it better.
Like I said, you should seriously try it. It’s easier to manage, it’s easier to use, it’s easier to fix and it’s easier to contribute. I’m not trying to win. Just see for yourself, then pick the one you prefer.
Guide to Installing Linux on a Mac
![]()
In modern times, Linux-based distributions have become one of the most widely used operating systems, competing with the likes of Windows and macOS. If you’re someone working in the field of Networking or anything related to Information Technology, the chances are that your workspace system uses a Linux distribution.
This is because Linux provides a plethora of advanced features related to security, networking, privacy, ease of access, and adaptability that aren’t readily available in its competitors.
With advantages like these, no doubt you’d want to switch to Linux as your go-to operating system.
This guide is meant to help you learn how to install Linux on a Mac PC. The tutorial will help you run a Linux-based operating system on your Mac. Bear in mind this will completely overwrite the original OS.
With that said, let’s begin!
Selecting your Linux Distribution
Before you begin, you should decide which Linux distribution you’d want to work on. This will be determined by the kind of work environment you’re looking for, along with the features it has to offer.
A list of the commonly used Linux distributions is given below.
- Ubuntu: One of the most popular operating systems based on Debian. It is great for newcomers and offers a visual environment that is similar to macOS.
- Linux Mint: Released in 2006, Linux Mint is more Windows-like in terms of appearance and comes in with a range of options (Cinnamon, Mate, etc.) for users to choose from.
- Debian: This is perfect for people working in the networking sector. Although Debian is a little complicated to set up and use, it offers more features than Ubuntu and Mint. Overall, it’s perfect for someone that has experience with using Linux.
- Fedora Linux: This distro is based on various packages such as DNF, RPM, and GNOME. It is not recommended for beginners because of the complex work environment. However, advanced users can make the most out of this, as Fedora is the first out of all Linux distributions to receive gnome-shell updates.
Try to get familiar with the distribution you want to install, so you don’t have any issues later. We recommend starting with Ubuntu since it is the most used and offers plenty of community support if you get stuck somewhere.
We’ll be using Ubuntu for this guide; however, the process is no different for other Linux distributions.
Installing Linux on a Mac
There are options to run Linux temporarily on a Mac, for example, by using Virtual Box. However, if you’re looking for a more permanent solution, you can overwrite your current operating system with the Linux distro of your choice.
To install Linux on a Mac, you’ll need a formatted USB flash drive with storage up to 8GB. Remember, this process will wipe out your current macOS/OS X, and there is little chance to recover it back.
Also, dual-booting on a Mac isn’t recommended as it can lead to problems with hardware integration for your Linux distribution.
Follow the steps below for a seamless installation.
1. Start by downloading Ubuntu or any other Linux distro you want to use. Save it in your Downloads folder.

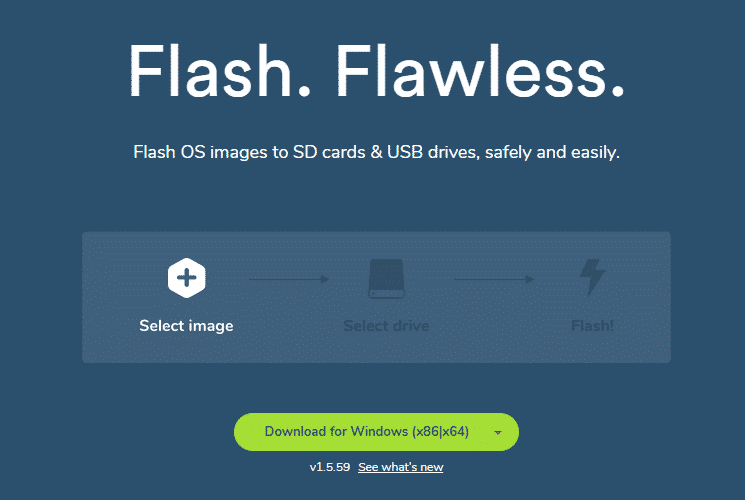
2. Now download and install Etcher, an app that will help you create a live USB for Linux Installation. You can download Etcher by clicking here.
3. Open the app and click on the Settings icon. Check the Unsafe Mode option and click on Yes, Continue.
4. Now Click on Select Image. Select the .iso file you downloaded in Step 1.
6. Under the Select Drive option, Click Change. Pick the drive option that matches your USB drive in size. If you have inserted one drive in your Mac, the option will show /dev/disk1. If there are two drives attached, there will be an option for /dev/disk2 and so on. Note that /dev/disk0 is your Mac’s hard drive. Do not select that option.
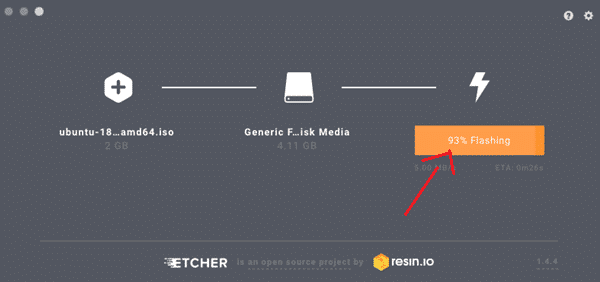
7. Now click Flash to start copying.
8. Remove the USB Flash Drive and proceed to shut down your Mac.
9. Now attach the USB drive on the Mac again or to any other PC you want to install it to.
10. Power up the PC while constantly holding the Option key.
11. From the startup screen, select the EFI Boot Option.
12. You will see a screen with Ubuntu Installation Options that will ask you to either Try Ubuntu or Install Ubuntu. Press the letter ‘E’ on your keyboard to go to the boot entry.
13. Here, you will have to edit the boot entry. Change the line starting with Linux and add the word ‘nomodeset’ after ‘quiet splash’. The result should look similar to the image below.
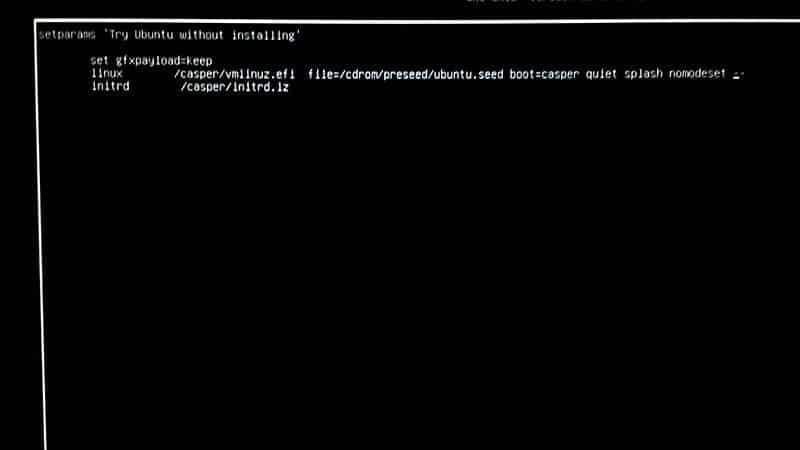
14. Now, Press F10. Ubuntu will start booting into trial mode.
15. Click on the option, ‘Install Ubuntu’
16. Select your Language and Continue.
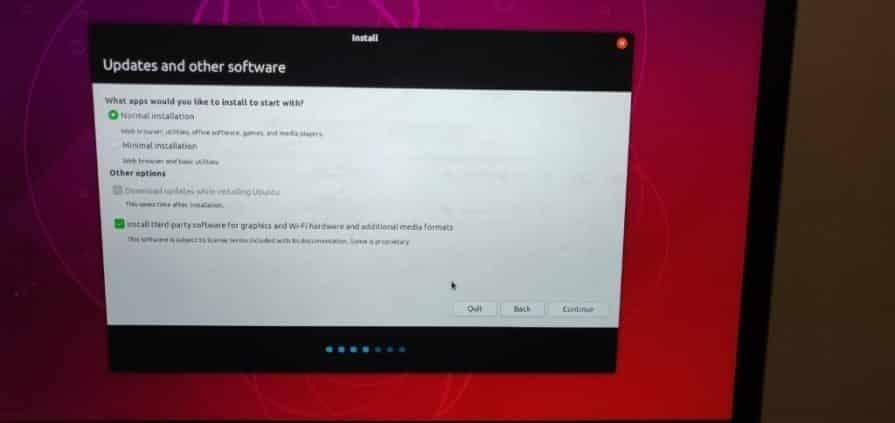
17. Now, select the option ‘Install third-party software’ and click Continue.
18. Click Yes to the alert option for /dev/sdb.
19. Now select ‘Erase Disk and Install Ubuntu’ and click on Continue.

20. Make sure you select the main hard drive and click on Install Now.
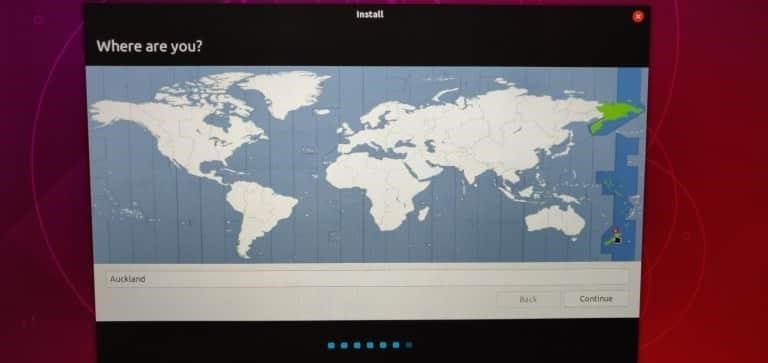
21. Select your location and then click on Continue.
22. Choose your keyboard layout and click on Continue.
23. Create a username and password that you want to use.
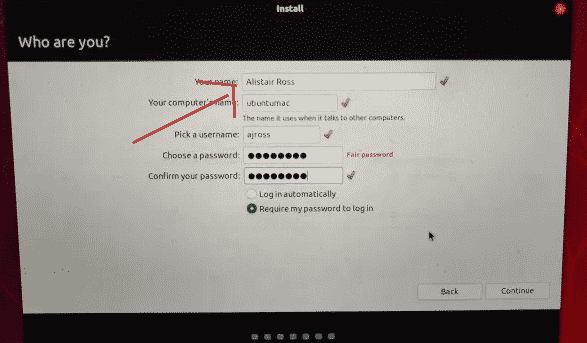
24. Click on Continue, and your Linux Distro will start installing. Once the installation is finished, you will be asked to restart your Mac.
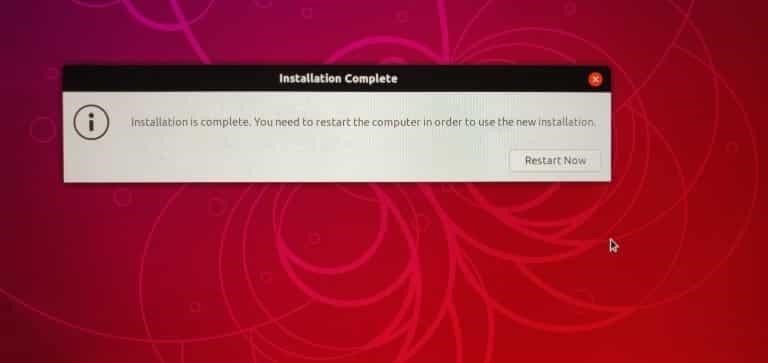
25. Lastly, log in with your username and password to complete the installation.
Note: During the installation process, the entire hard disk is used for Ubuntu in step 19, which means your MacOS will be permanently deleted. If you want to keep the MacOS, you will have to make disk partitions. You can also go to Disk Utility to create proper partitions before you start installing Linux. Have a look here.
Conclusion
We hope this guide helped you learn how to install Linux on a Mac. We talked about selecting the proper Linux distribution, creating a live USB using Etcher, and gave the step-by-step process of installing Linux on a Mac. With this, we wish you all the best on your Linux journey.