- How to Install Ubuntu 23.04
- System Requirements
- Preparing for Installation
- Step 1. Download Image
- Step 2. Write Image to USB
- Step 3. Booting Ubuntu Installer
- Installing Ubuntu 23.04
- Step 1. Starting Installer
- Step 2. Choose Language
- Step 3. Starting Installation
- Step 4. Add Keyboard Layout
- Step 5. Connect to a Network
- Step 6. Applications and Updates
- Step 7. Disk Partitioning
- Step 8. Create a Root Partition
- Step 9. Create a Home Partition
- Step 10. Confirm Installation
- Step 11. Select your Location
- Step 12. Set Up your Account
- Step 12. Choose Theme
- Step 13. Installation
- Step 14. Reboot
- Step 15. Connect Account
- Step 16. Help to Improve Ubuntu
- Step 17. Geo Location
- Step 18. Install Applications
- Step 19. Complete
- Wrapping Up
How to Install Ubuntu 23.04
It is the end of April 2023 and it means that it’s time for a new Ubuntu release. It is Ubuntu 23.04. This release does not have long-term support, so it may not be as stable. However, it ships several long-awaited improvements, such as the new Flutter installer and GNOME 44. The new version of GNOME brings an updated Quick Settings menu, reworked configuration for mouse and touchpad, tree view in Nautilus, and out-of-the-box support for WireGuard in the GUI.
In this article, I will show how to install Ubuntu 23.04 on a PC or laptop using its new installer. This article will be useful for beginners or anyone who wants to know what the new installer looks like.
System Requirements
Minimum system requirements for Ubuntu are increasing from one release to another. The latest version requires at least 25GB of storage space and an 8GB USB drive. Here are the detailed hardware requirements:
| Name | Value |
| Processor | Dual Core, 2GHz |
| RAM | 4GiB |
| Screen Resolution | 1024×768 |
| Storage | 25 GB |
There are the minimum requirements, but note, that snap applications require a lot of disk space. So, I recommend preparing at least 80GB for the root file system.
Preparing for Installation
Step 1. Download Image
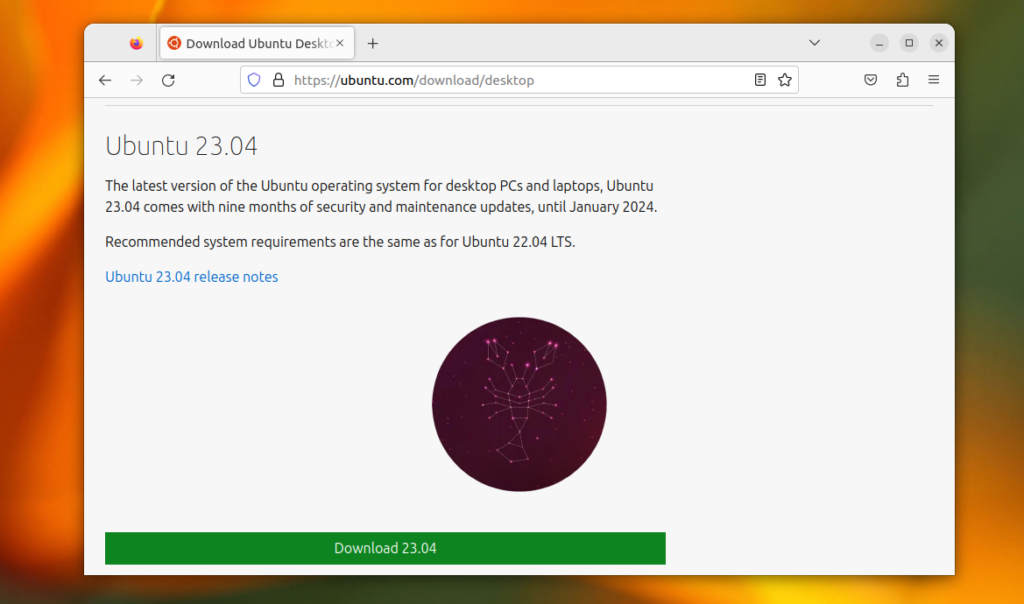
You can download the Ubuntu installation image on the official site. Expand the Download menu section, find Ubuntu Desktop, and select the 23.04 version:
Step 2. Write Image to USB
The most popular tool for flashing Linux images is balenaEtcher. It can be used on Linux, Windows, or macOS. You can download it from the official site. If you use Linux, the simplest way to get Etcher on any distribution is by downloading AppImage.
After that, run the application, choose the Ubuntu 23.04 image, select your USB drive, and press the Flash! button:
The application will flash the image and check its checksums. When the flashing process is complete you can reboot your PC.
Step 3. Booting Ubuntu Installer
Most modern PCs and laptops with UEFI have a boot menu that you can use to select a drive for booting. Simply hold the F12 key during startup, and then select your USB in the quick boot menu. If it is not working, you can still enter the BIOS/UEFI settings using the F2, F10, or Del button and configure the boot device there. I will not show how to do it in this article because it is very vendor-specific.
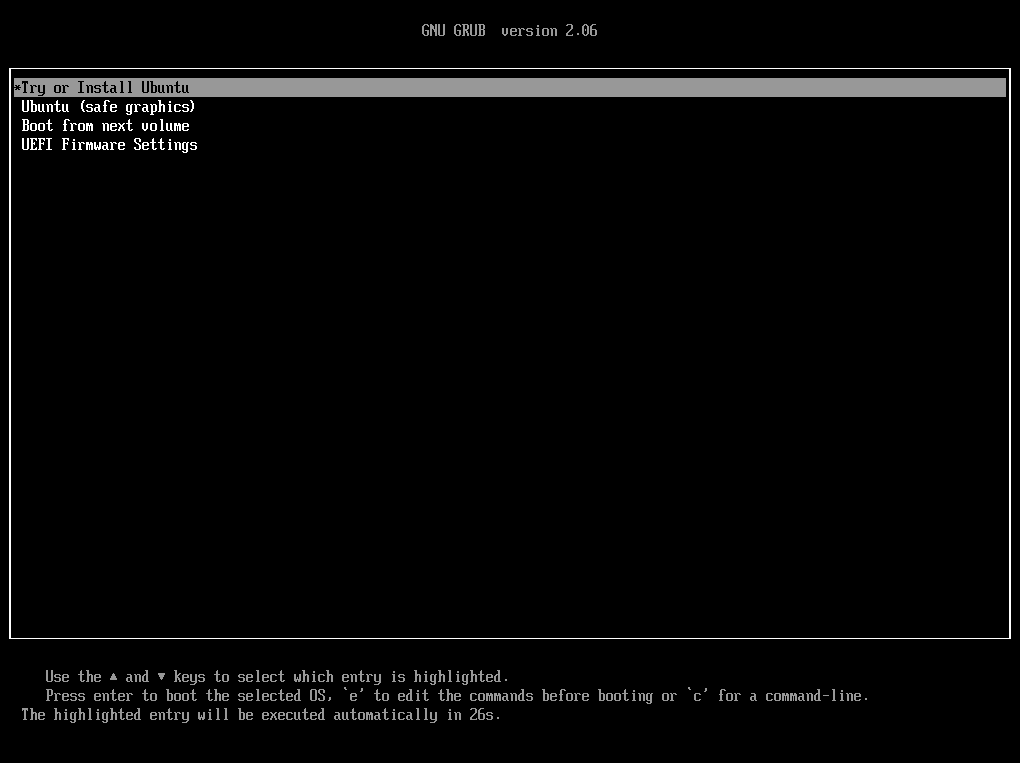
After this, you will see the Ubuntu bootloader, where you should select Try or Install Ubuntu:
The loading splash looks like this:
Installing Ubuntu 23.04
Step 1. Starting Installer
The installer will start automatically after PC boots:
Step 2. Choose Language
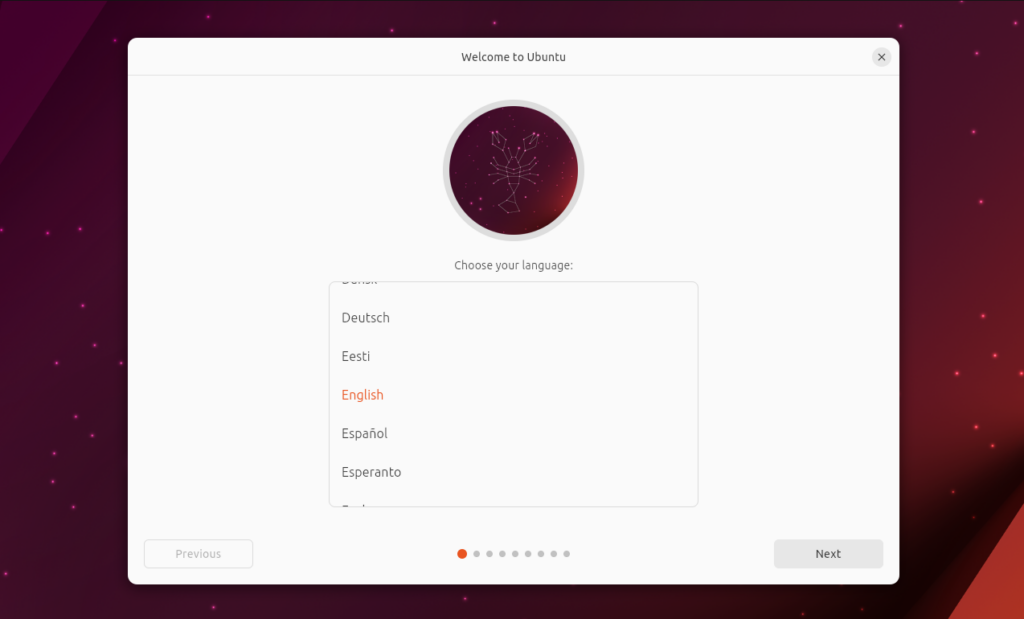
In this step, you should select a language for the installer and your system. English is the default:
Step 3. Starting Installation
At this point, you can enter the Live environment and try Ubuntu without making any changes to your PC. However, if you want to install the system, choose Install Ubuntu and press the Next button:
Step 4. Add Keyboard Layout
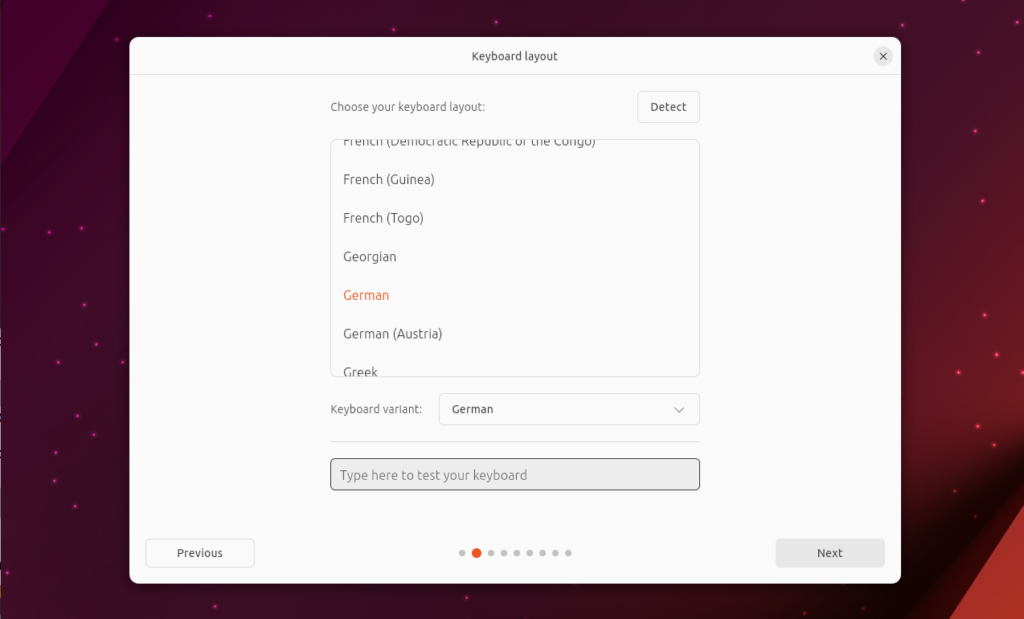
By default, there is only an English keyboard layout. You can add additional layouts in this window. For example, German:
In this case, you will have both English and German layouts in your system.
Step 5. Connect to a Network
If you use a wired connection, you can skip this step. Otherwise, you should connect to a wireless access point to be able to download additional firmware and updates during the installation process:
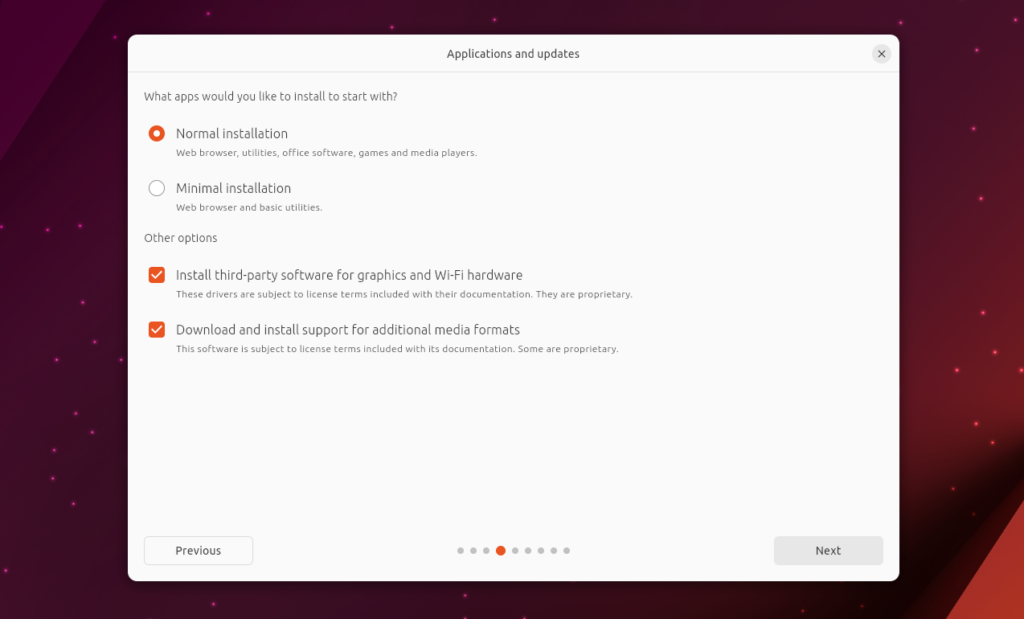
Step 6. Applications and Updates
Here you can choose between a Normal or Minimal install. The Minimal Install option allows you to install only the most important software and add other necessary applications later manually. The advantage of the new installer is that it installs only the packages you have selected, unlike the old installer, which installed everything and then uninstalled unnecessary packages.
Also, you can enable downloading and installing third-party drivers and codecs for additional media formats. I recommend turning this on.
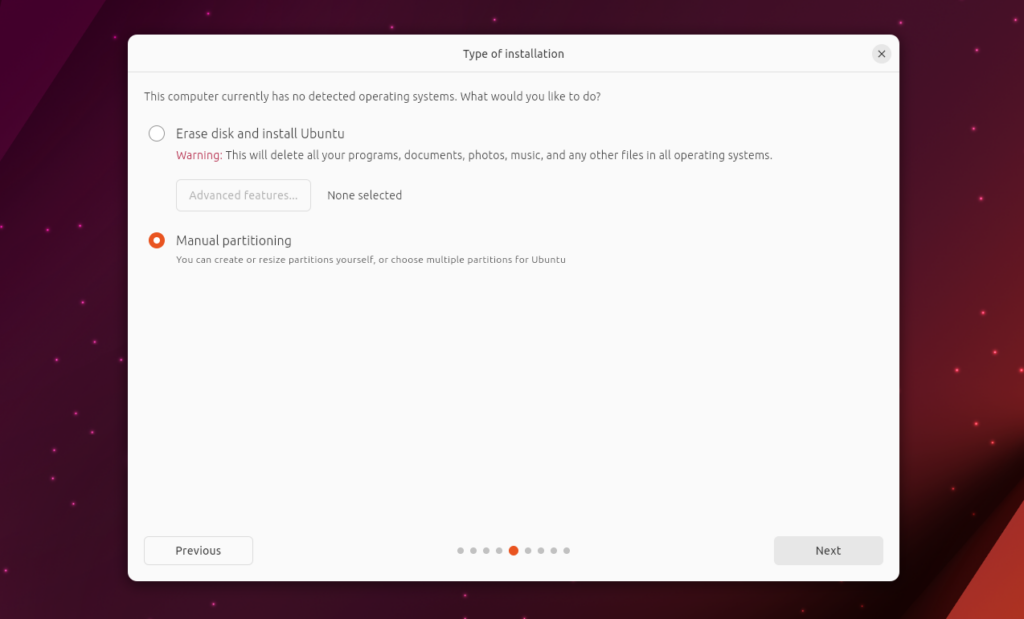
Step 7. Disk Partitioning
The installer can erase an entire drive and install Ubuntu for you automatically. Choose Erase Disk and Install Ubuntu. It can also install Ubuntu alongside another operating system automatically. However, I prefer manual partitioning as it gives more control over your storage. The option for this is Manual Partitioning:
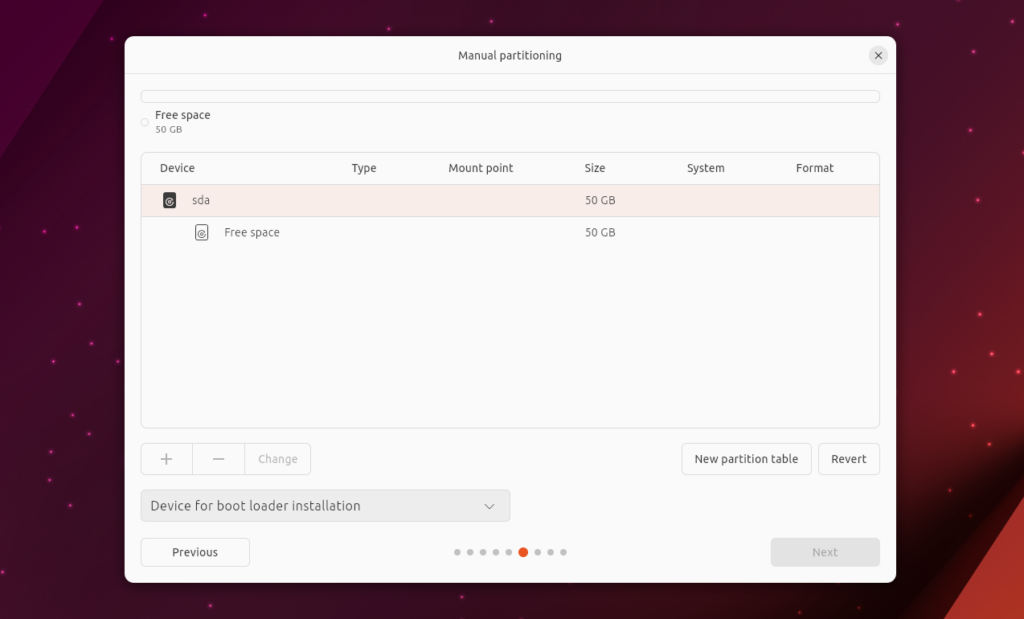
Choose it and press the Next button and you will see your drives and their free space.
Here, you can delete existing partitions and create new ones, but it is not the best solution for partition management. If you want to install Ubuntu alongside Windows or another Linux distribution, prepare free space first using GParted or another application as mentioned in the article How to Install Linux with Windows for Dual Boot.
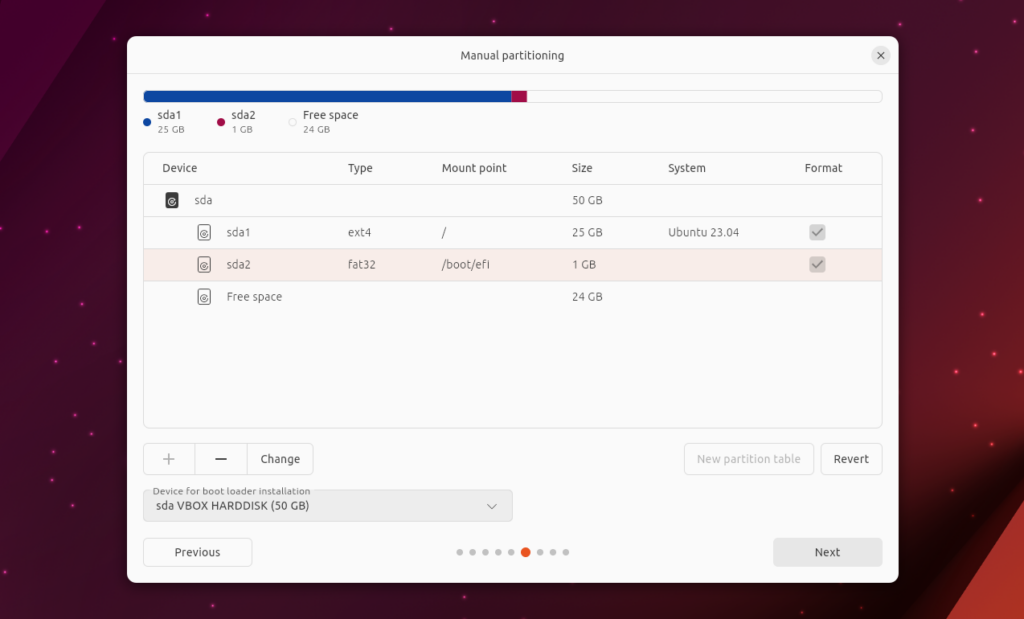
Now, let’s have a look at what partitions we should create. I assume that you use a modern PC with UEFI and a GPT partition table, so you don’t have to create a dedicated boot partition for Grub, but you do need an EFI partition if you don’t have one yet. You also need a root partition for the operating system and a home partition for your files. It used to be recommended to create a swap partition, but now, Ubuntu can create a swap file on the root partition. This allows you to disable it, move it to another drive, or change its size. I think that creating a swap as a file is a more flexible way. Here are the recommended sizes and settings for partitions
- The EFI partition can be very small, but Linux stores multiple versions of its kernel there; anyway, Ubuntu creates this partition automatically and allocates 1GB.
- The Root Partition should be at least 25 GB, but as I said before, snaps require a lot of disk space because they have all required dependencies packed into the package, and the system stores multiple versions of the same package as a backup. Thus, I recommend using 80-100 GB for the root partition.
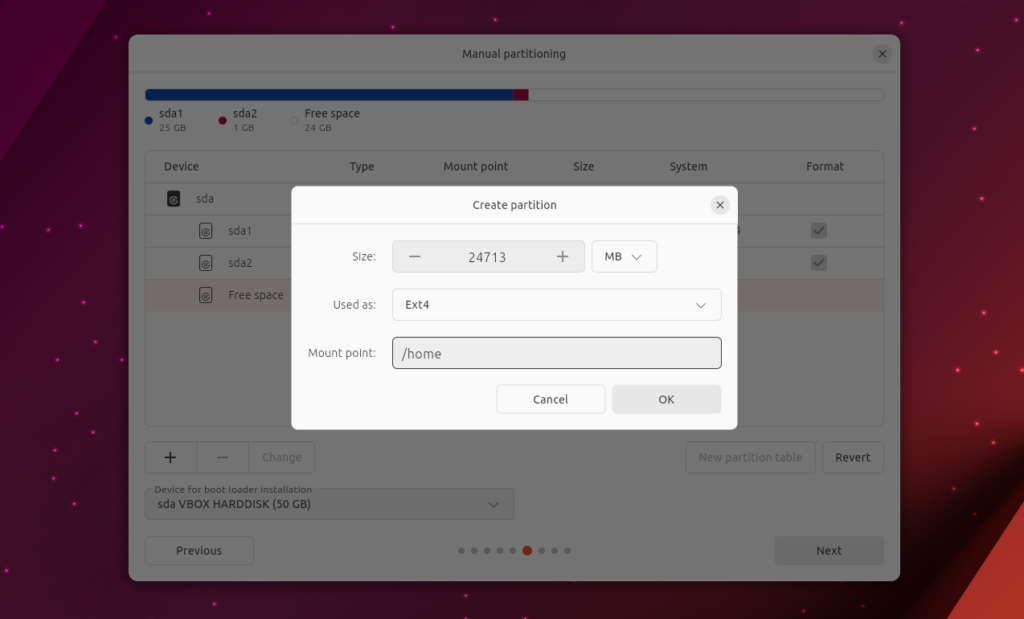
- The Home Partition will be used for your files. Usually, it is the largest partition in the system. You can allocate all the free space you have after creating the two previous partitions.
Note that in the screenshots below, the sizes may be different, because it will not be a working machine. Additionally, the new installer does not support ZFS. If you want to use this filesystem, you should use an image with the legacy installer.
Step 8. Create a Root Partition
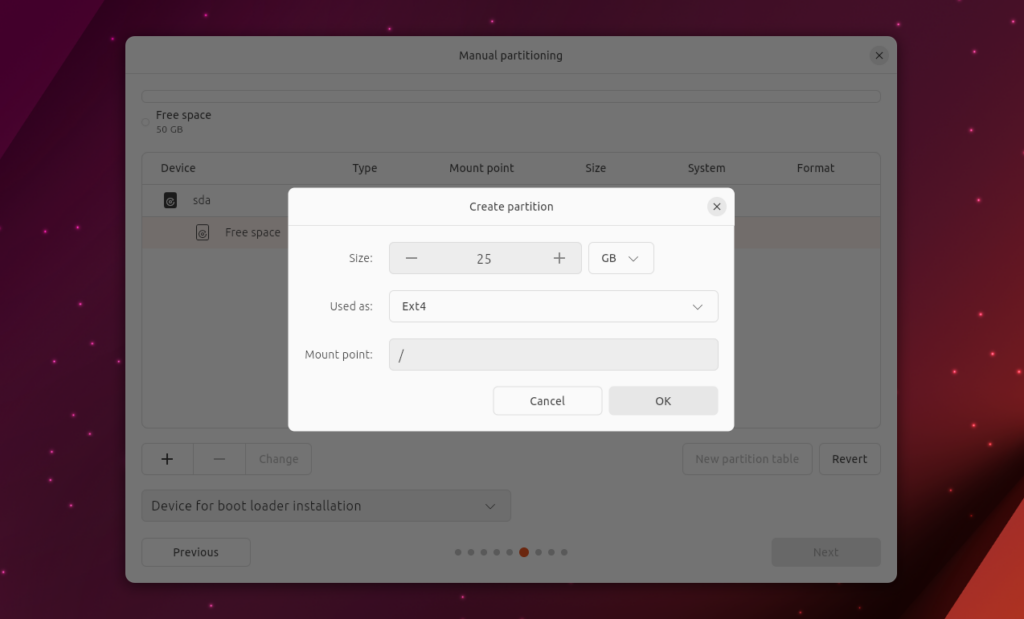
First, let’s create a Root partition. Choose Free Space and press the Plus button. After this select the size for the partition, for example, 25 GB and / as the mount point. You can use: Ext4, Btrfs, or XFS filesystems. But I recommend using Ext4 because it is proven by time and is the most stable.
After this, you will see the new partition in the list. Another interesting thing is that the new installer creates the EFI partition automatically if you are using EFI systems, so you don’t need to do it manually. This reminds me of how Windows automatically creates a recovery partition during partitioning, and it is very convenient.
Step 9. Create a Home Partition
After this, you can choose Free Space and press the Plus button again to create the partition for your data. Allocate all available space for it, choose the filesystem type (for example Ext4, as same as for the root partition), and select /home as the mount point.
Step 10. Confirm Installation
At this step, you can review the storage changes and confirm if everything is fine by pressing the Install button:
At this moment, the installation process starts, but you should configure a few more options.
Step 11. Select your Location
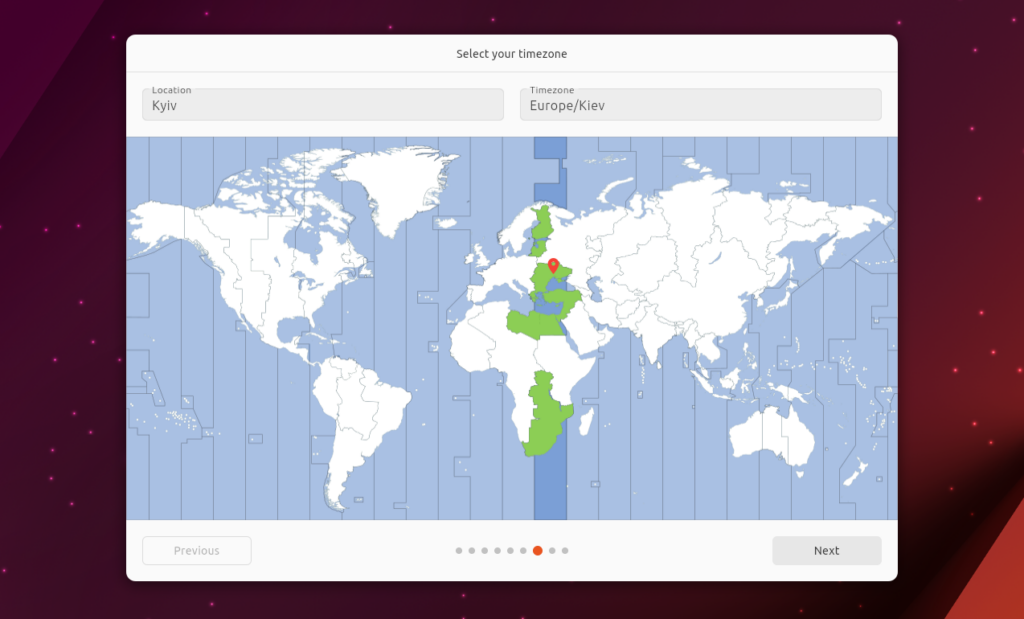
After this, you must select your location to configure the timezone:
Step 12. Set Up your Account
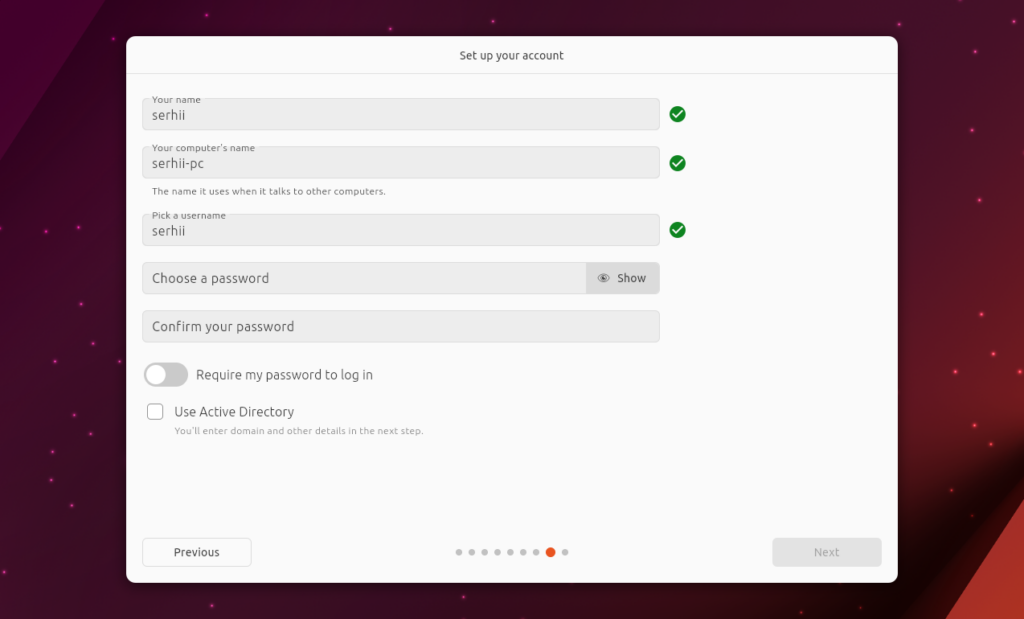
Here, you can create your user account and configure the name of the PC. Don’t forget that the password should be strong enough. Also, you can disable asking for a password to log in:
Step 12. Choose Theme
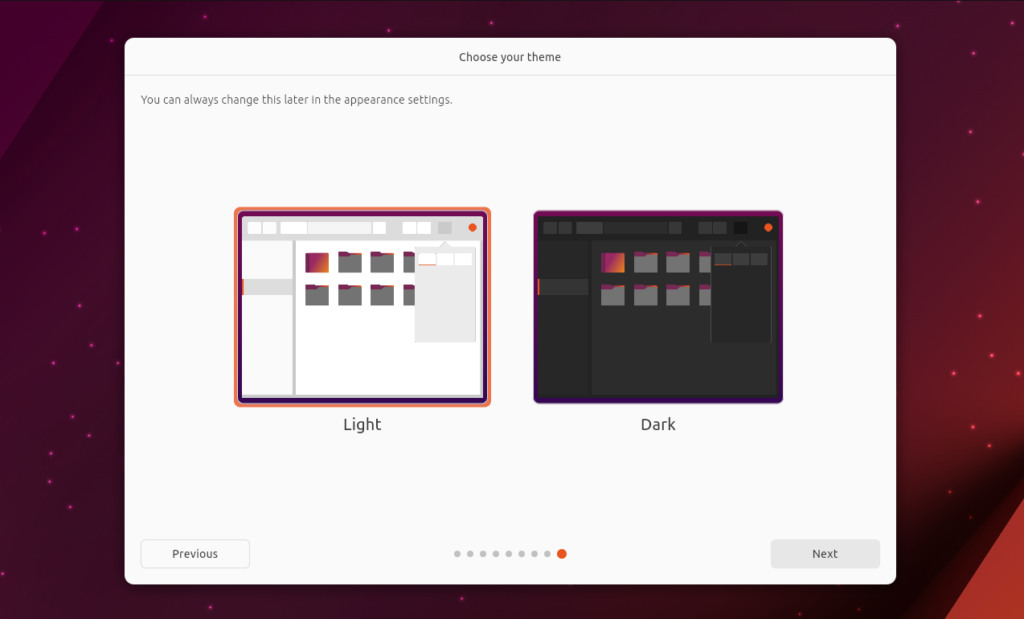
Unlike the old installer, the new one allows to choose an appearance theme during installation. You can choose between light and dark:
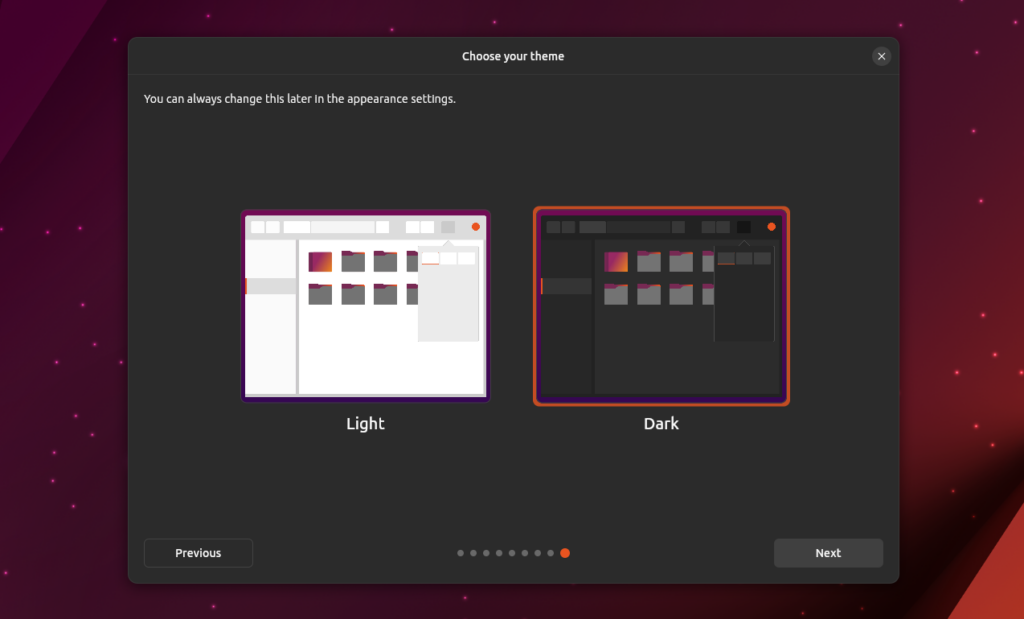
The dark theme looks like this:
Step 13. Installation
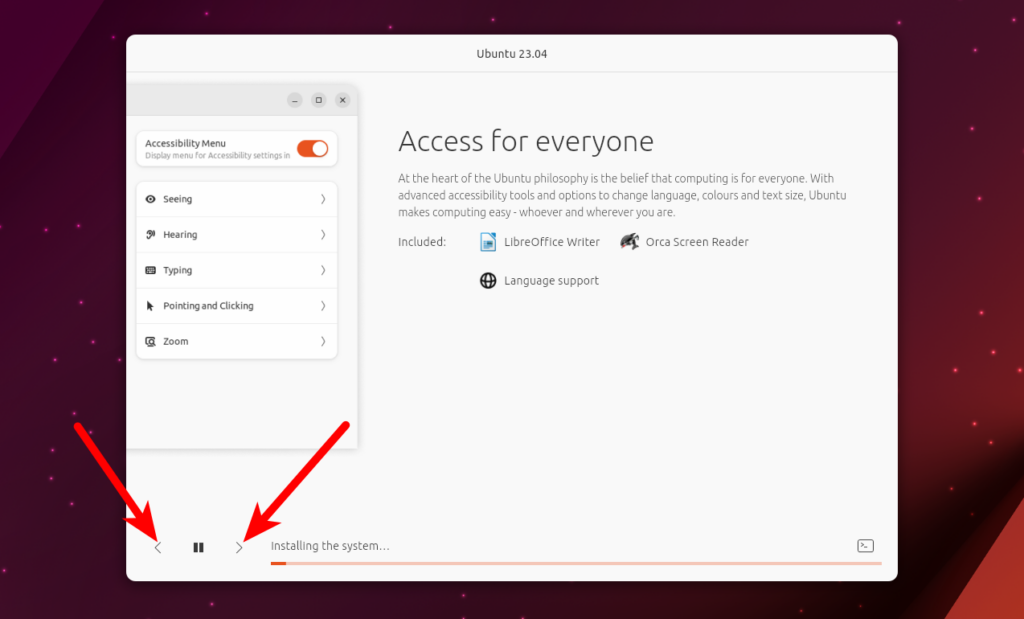
Now, you have to wait until the installation process is finished. If you are using an SSD drive, it will be very fast. While you wait, you can explore slides with information about the new release. There are buttons with arrows in the left bottom corner that you can use to scroll through the slides:
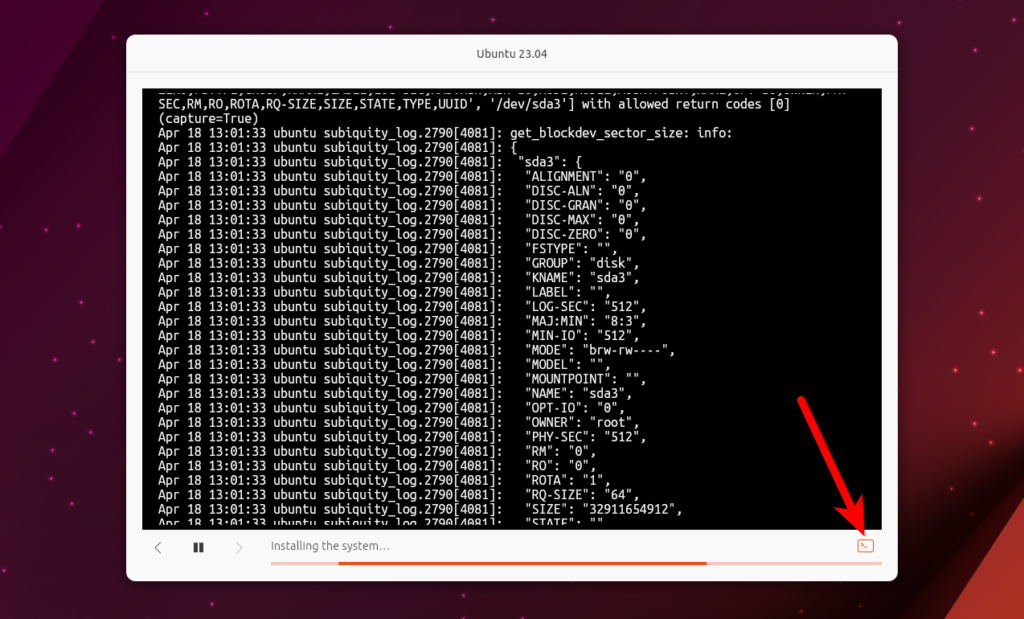
Also, the new installer provides a more convenient way to look at the installation process in the terminal. You can press the terminal button in the bottom right corner and the slides will be replaced with a terminal window:
Step 14. Reboot
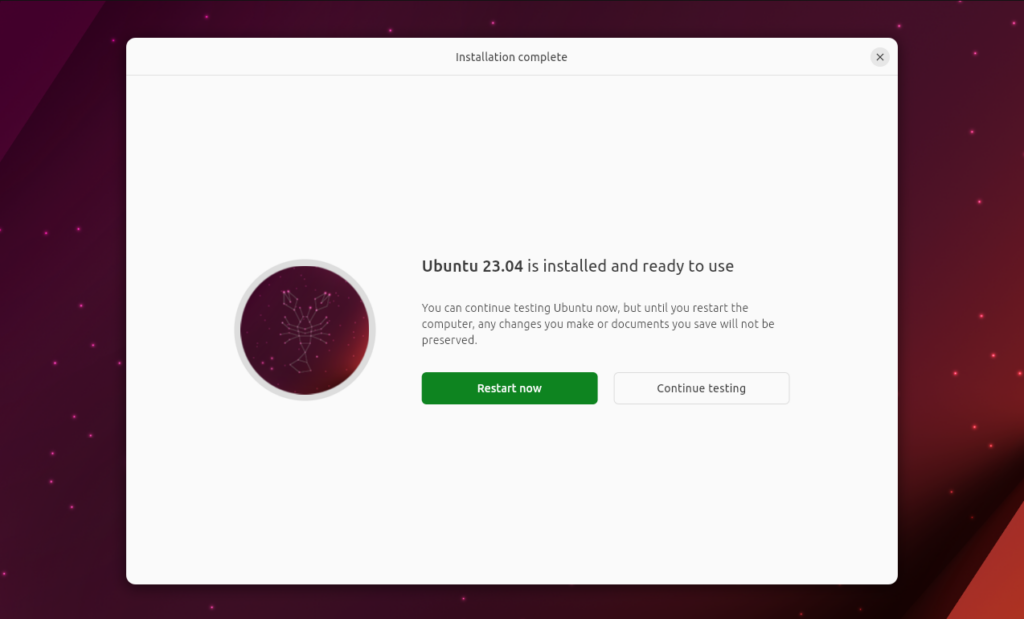
When the installation process is complete, you can reboot your PC and boot the new system:
Step 15. Connect Account
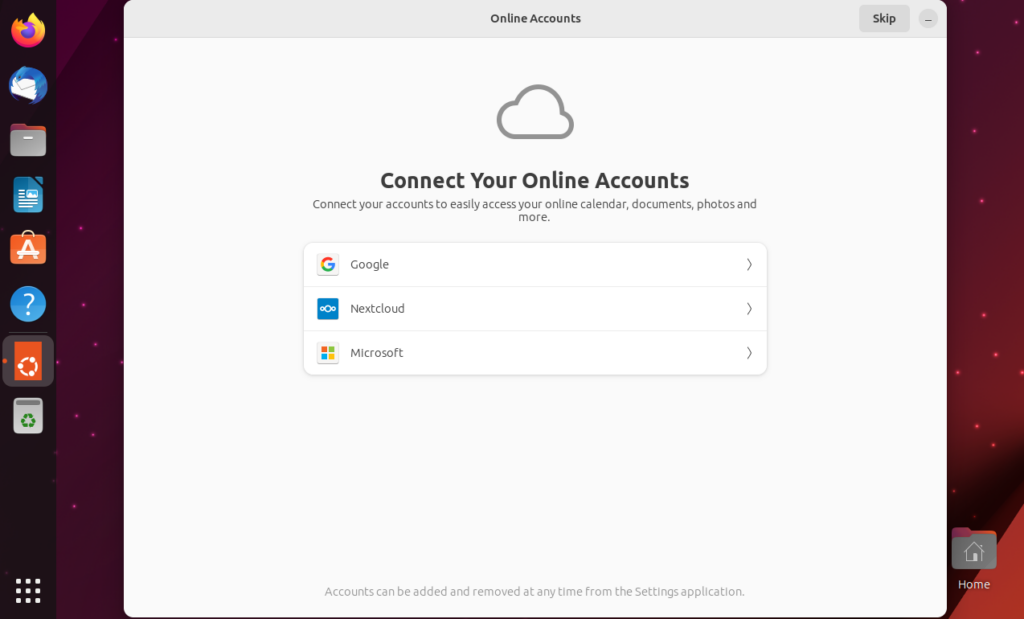
At the first boot, the system will open a quick setup wizard. In the first step, you can connect online accounts, for example, Google or Microsoft:
Step 16. Help to Improve Ubuntu
In the second step, you can disable sending debug information to Canonical:
Step 17. Geo Location
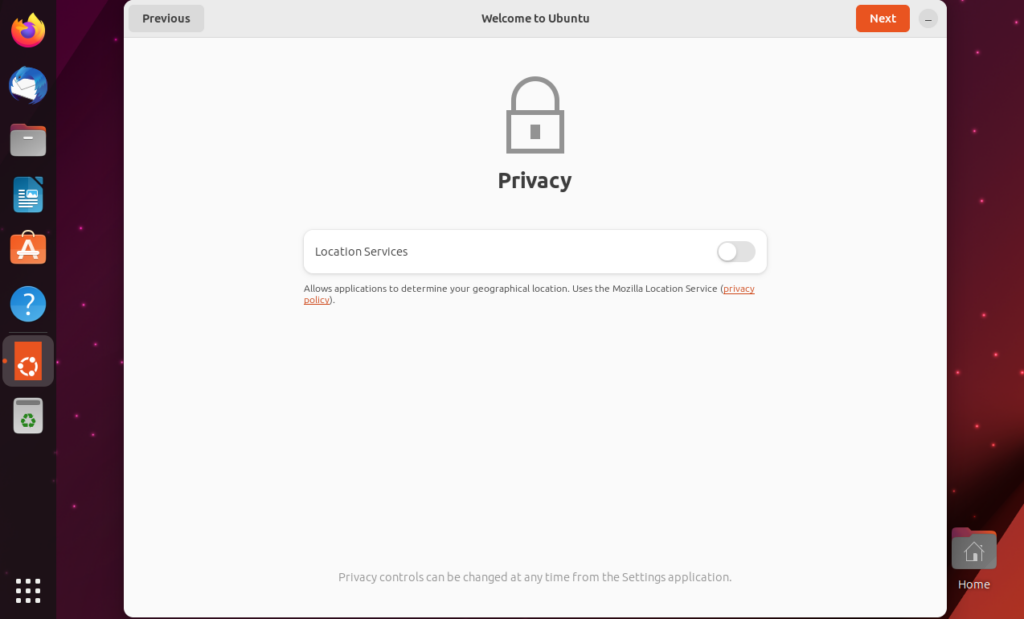
Another step allows you to enable location services, which can help applications determine where you are:
Step 18. Install Applications
In the last step, you can install a few popular applications from the Ubuntu Software. For example, VLC or Visual Studio Code:
Step 19. Complete
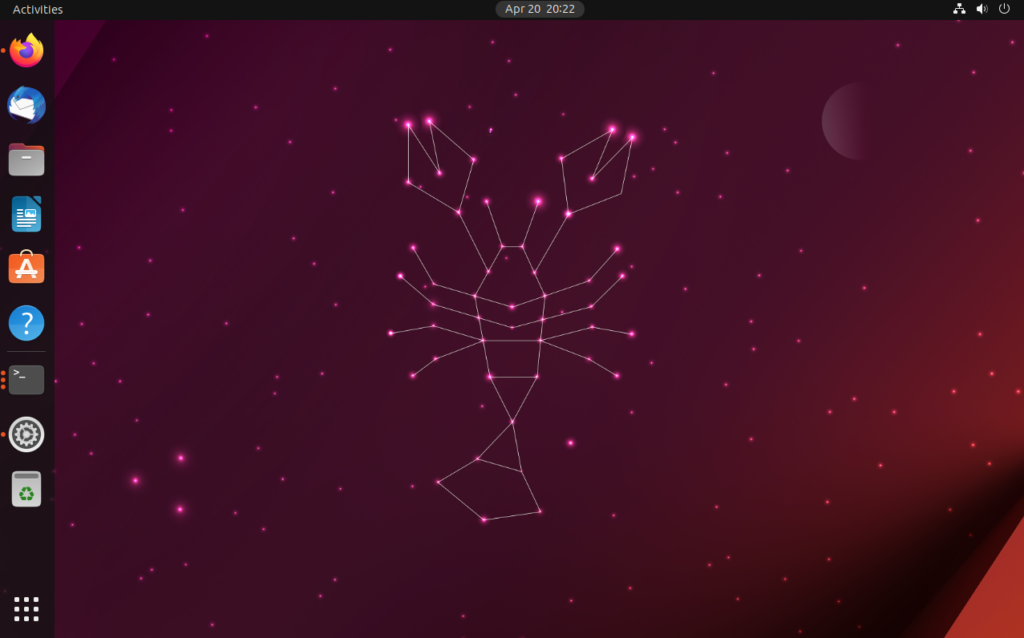
At this moment, you have Ubuntu 23.04 installed and can enjoy using it. The default wallpaper of Ubuntu 23.04 looks like this:
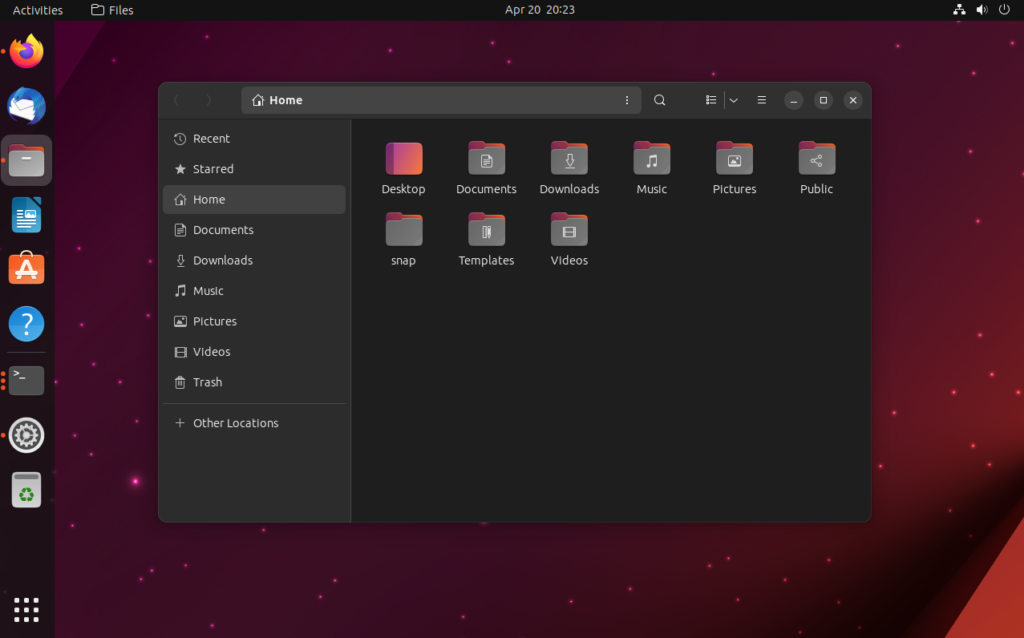
And here is the file manager in dark mode:
Wrapping Up
In this article, I have explained how to install Ubuntu 23.04 on a PC or laptop. The new installer has similar steps order, a modern look, and brings a few small but very helpful improvements, such as the automatic creation of UEFI partition and a real minimal install. I will show how to configure it after installing to make more it comfortable, in one of the next articles.
Is not an LTS release so I will not use it on my PC for at least a few months after release. I am going to wait two or three months until Canonical fixes any possible bugs and then update my system. Have you already installed Ubuntu 23.04? Do you like it? Write in the comments section below.
Found a mistake in the text? Let me know about that. Highlight the text with the mistake and press Ctrl+Enter.
