- NetFlow Analyzer: Introduction
- Why NetFlow Analyzer?
- NetFlow Analyzer Enterprise Edition — Installation and Uninstallation
- Linux:
- Collector Installation
- Windows
- Linux
- Installing NetFlow Analyzer Enterprise Edition on Linux using Console mode/ Silent mode
- Central Server
- Probe Server
- Starting NetFlow Analyzer Central Server
- Windows
- Linux
- Starting NetFlow Analyzer Collector
- Windows
- Linux
- Starting as a Service
- Windows
- Linux
NetFlow Analyzer: Introduction
ManageEngine ™ NetFlow Analyzer is a web-based bandwidth monitoring tool that performs in-depth traffic analysis using data exported from NetFlow™ / Netstream™ / cflowd™ / J-Flow™ / sFlow™ / IPFIX™/ AppFlow flows.
This data provides granular details about network traffic that has passed through an interface. NetFlow Analyzer processes this information to show you what applications are using bandwidth, who is using them, and when. Extensive graphs and intuitive reports make this information easy to analyze, and also help accelerate the troubleshooting process.
NetFlow Analyzer comes pre-loaded with a set of features that provide in-depth bandwidth usage statistics and let you drill down to see more details about a bandwidth traffic, application, or conversation etc. NetFlow Analyzer also includes other administrative options that help in managing enterprise networks and bandwidth utilization with ease.
Why NetFlow Analyzer?
ManageEngine NetFlow Analyzer comes with out of the box high performance API driven UI and highly scalable capabilities, including the following key features:
Support for multiple flow exports
Regardless of different types of flows, now you can view a complete picture of the usage, network performance, and traffic statistics of various network devices in single console. Supports NetFlow version 5 , version 7 , version 9, IPFIX, jFlow, sFlow, Netstream, Appflow etc.
Web-based API driven UI
View the status of your links, and generate reports from just a web browser that is built on a JavaScript framework powered by Ember.js. This new Fluidic web client offers 10x more productivity and performance compared to the previous UI. The new user interfaces also features keyboard navigation across interface snapshot pages, alarms and performance graphs which helps network admins to access the information they are looking for even more quickly and easily.
Real-time Traffic Graphs
View instant graphs for bandwidth utilization and traffic per link up to previous minute.
Historical Trend Reports
Generate daily, weekly, monthly, and custom time period bandwidth reports showing peak traffic patterns from the day 1.
Application-level QoS shaping
Reconfigure application QoS with ACL to filter application traffic, thus reserve bandwidth for mission critical activities. Now you can shape app traffic via service policy and allocate % to particular application and thus regulate the bandwidth usage with the help of CBQoS monitoring.
Cisco Application Visibility and Control (AVC)
Provides an detailed information from Cisco ASR1k and ISR-G2 routers with information on NBAR2, Application response time, QOS Hierarchy, HTTP URL reporting.
Cisco class-based Quality of service monitoring (CBQoS)
Validate the effectiveness of your QoS policies using CBQoS reports from NetFlow Analyzer. Prioritize your network traffic accordingly.
High Scalability
Now, NetFlow Analyzer can scale up to 250K flows per second without raw data storage and with raw data storage it can process upto 100k flow per second.
Capacity Planning & Billing
Helps you accurately measure your bandwidth growth over a period of time and helps to anticipate the changes in bandwidth with capacity planning reports. You can also generate on-demand billing for accounting and departmental chargebacks.
Network Forensics & Security Analysis
Advanced security analytics module helps to detect a broad spectrum of external and internal security threats and categorize threats/anomalies as problems such as Bad Src-Dst, DDoS, Suspect Flows.
Traffic Profiling
View bandwidth reports based on top applications, top hosts, and top conversations, DSCP, multicast.
Consolidated Reports
View bandwidth reports per Device and interfaces, showing top applications, top talkers in a single report.
Device Grouping
Categorize NetFlow devices into logical groups and grant reporting access to specific users based on hierarchy. Group IP addresses and address ranges into department wise , and monitor bandwidth usage individually.
Traffic Configuration & User Management
Identify most standard applications out-of-the-box and configure custom applications and monitor the same. Add users with different privileges, assign device groups, and selectively allow access for monitoring and reporting.
This User Guide will help you install NetFlow Analyzer, understand netflow port details, Cisco netflow configuration and other flow configuration steps and get familiar with the user interface. If you are unable to find the information you are looking for in this document, please let us know at netflowanalyzer-support@manageengine.com
NetFlow Analyzer Enterprise Edition — Installation and Uninstallation
The Windows download for NetFlow Analyzer is available as an EXE file at https://www.manageengine.com/products/netflow/download.html#ent Download the EXE file for the Central Server to your local machine, and double-click it to start installation.Follow the instructions as they appear on screen to successfully install NetFlow Analyzer on to your machine.
Step1: On the Welcome Screen, Click ‘Next’ to continue.
Step2: Read the License agreement carefully and click ‘Next’ to proceed to the next step.
Step 3: Verify the destination folder and Click ‘Next’ to continue.
Step 4: Select your desired server type.
There are two options for server-type:
1) Central Reporting Server 2) Collector Server
Step 5: Select your desired port and language and click ‘Next’ to continue
Step 6: Provide proxy server host, server port, proxy user- name and password. Click ‘Next’ to continue. Step 7: Choose your desired Program Folder
Step 8: Register for technical support by providing the information in the respective fields in the registra- tion form.
This is an optional form. Click ‘Next’ to continue.
Step 9: Review the Settings information that appears and Click ‘Next’ to begin the installation.
Step 10: Please wait till the installation is completed.
Step 11: Please wait till the files are extracted.
Step 12: The installation procedure is now complete. Click ‘Finish’ to start NetFlow Analyzer as a service.
Linux:
The Linux download for NetFlow Analyzer is available as a BIN file at https://www.manageengine.com/products/netflow/download.html#ent
Collector Installation
Windows
Step 1: On the Welcome Screen, Click ‘Next’ to continue.
Step 2: Read the License agreement carefully and click ‘Next’ to proceed to the next step.
Step 3: Verify destination folder and Click ‘Next’ to continue.
Step 4: Select your desired server type.
There are two options for server-type:
1) Central Reporting Server 2) Collector Server
Step 5: Select your desired port and language and click ‘Next’ to continue.
Step 6: Provide communication details such as Host Name, HTTPs port number etc. for both Central Server & Collector. Click ‘Next’ when you are done.
Step 7: Please enter server details such as Name, user-name and password. Click ‘Next’ to continue.
Step 8: Mention the default SNMP community and port information. This is an optional step.
Click ‘Next’ to continue.
Step 9: Provide proxy server host, server port, proxy user- name and password. Click ‘Next’ to continue.
Step 10: Choose your desired Program Folder.
Step 11: Registration for technical support. An optional form to register yourself for technical support would appear. You may choose to skip this form.
Step 12: Review the information that appears and click ‘Next’ to begin the installation.
Step 13: Please wait till the installation is completed.
Step 14: Once installation is complete, click on ‘Finish’. This will start NetFlow Analyzer as a service.
Linux
The Linux download for NetFlow Analyzer is available as a BIN file at https://www.manageengine.com/products/netflow/download.html#ent
Note: While Installing the collector please give the proper entries in the communication panel and in the proxy server settings so that the collector can communicate with the central server properly.
Once you have successfully installed NetFlow Analyzer, start the NetFlow Analyzer server for central and collector.
Installing NetFlow Analyzer Enterprise Edition on Linux using Console mode/ Silent mode
Central Server

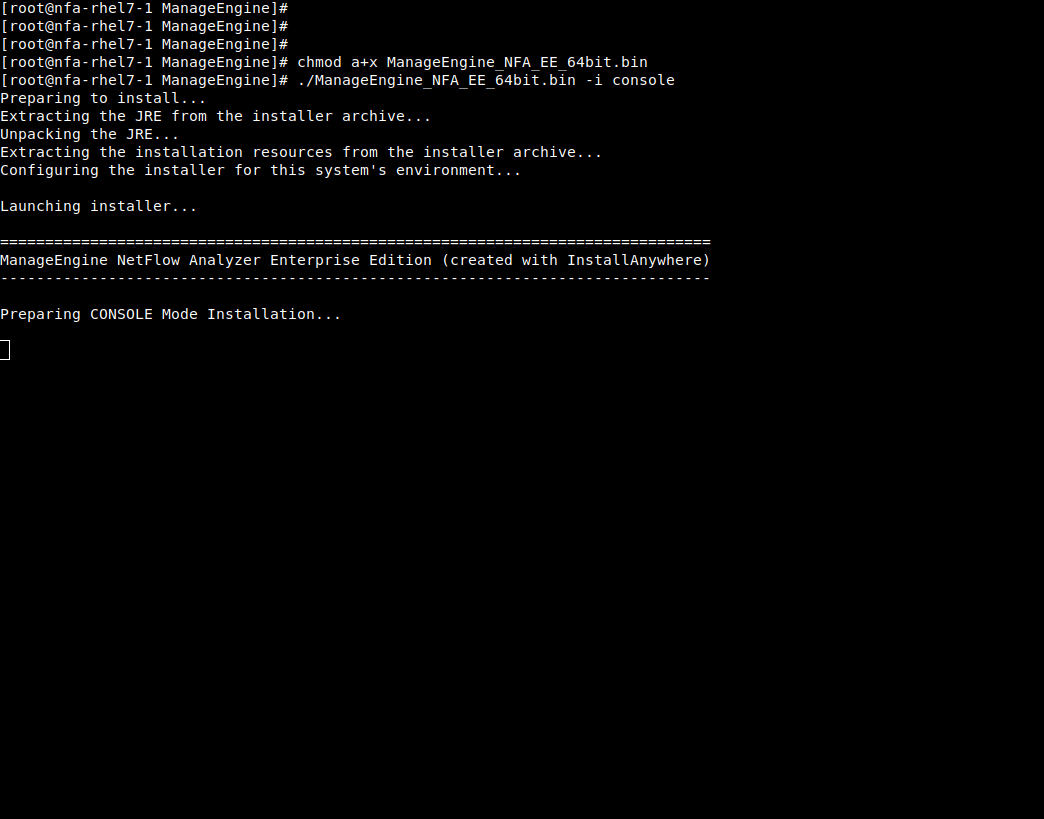
Step 1: Execute ManageEngine_NFA_DE_64.bin with administrator privileges (sudo) and -i console option.
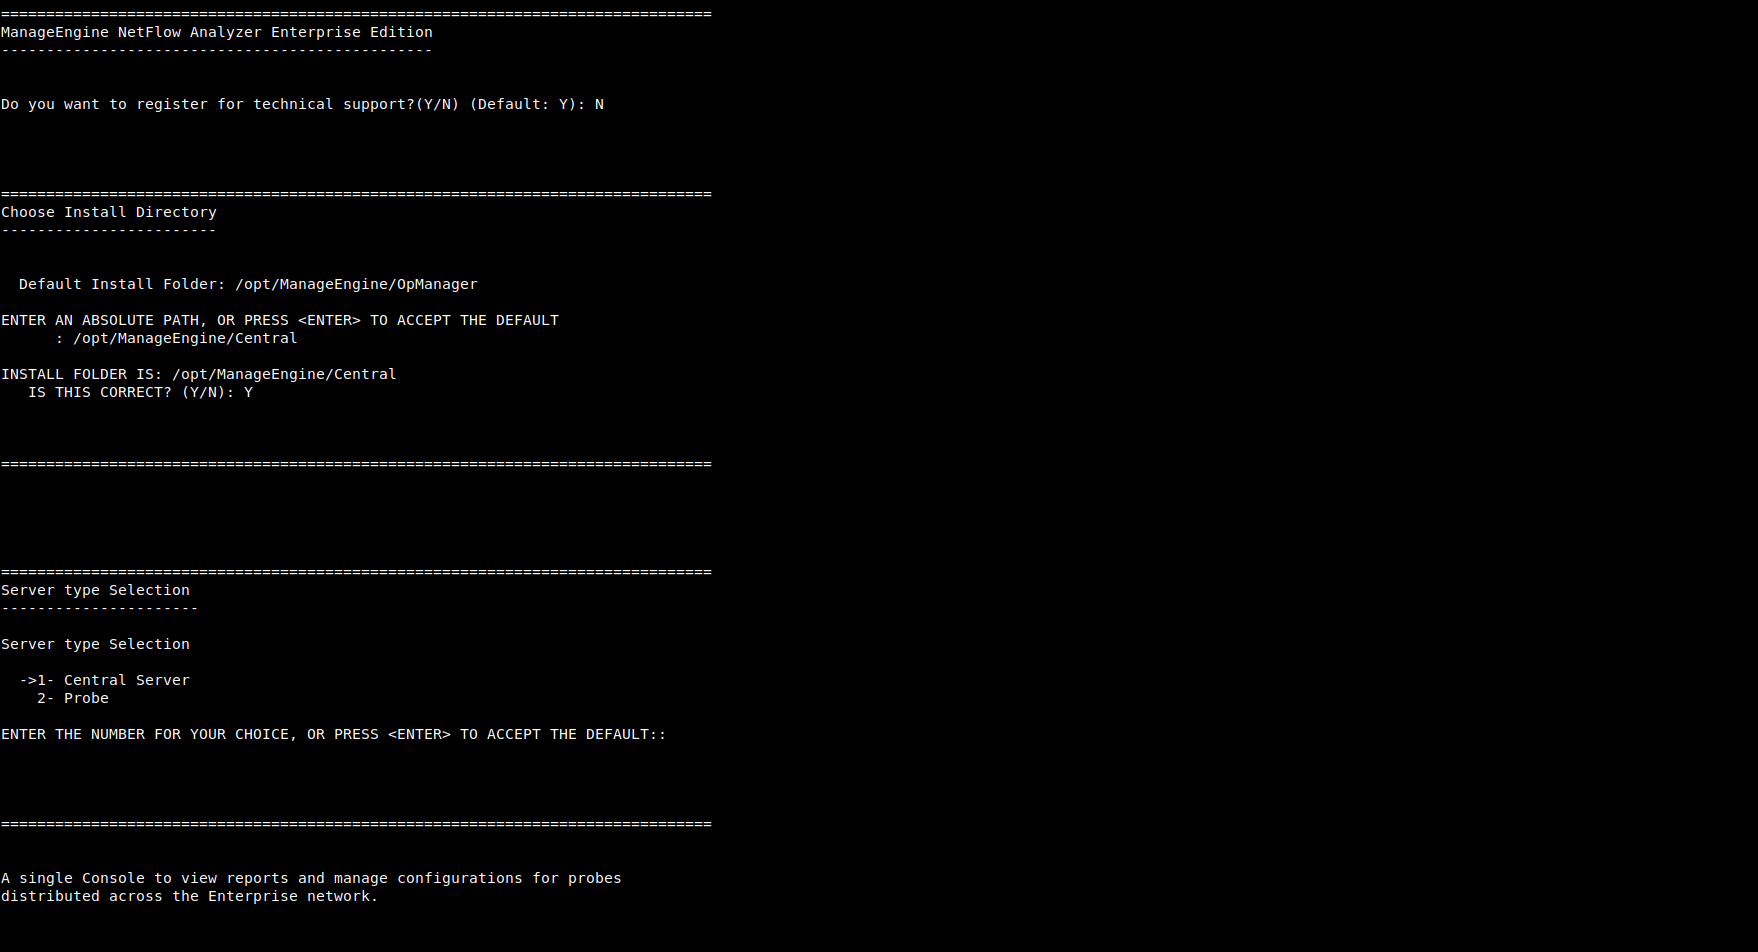
Step 2: Go through the license agreement and enter ‘Y’ to proceed. You can register for technical support by providing the required details. (Name, E-mail ID, Phone, Company Name)
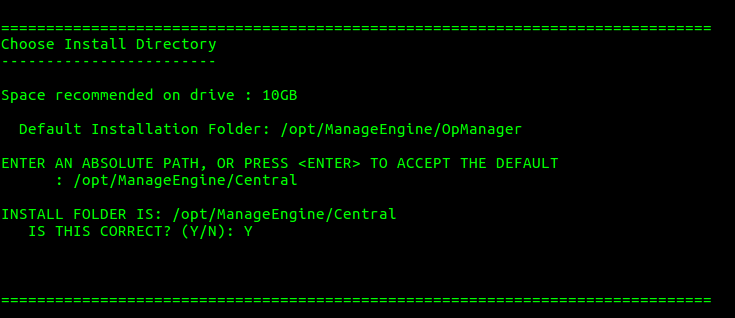
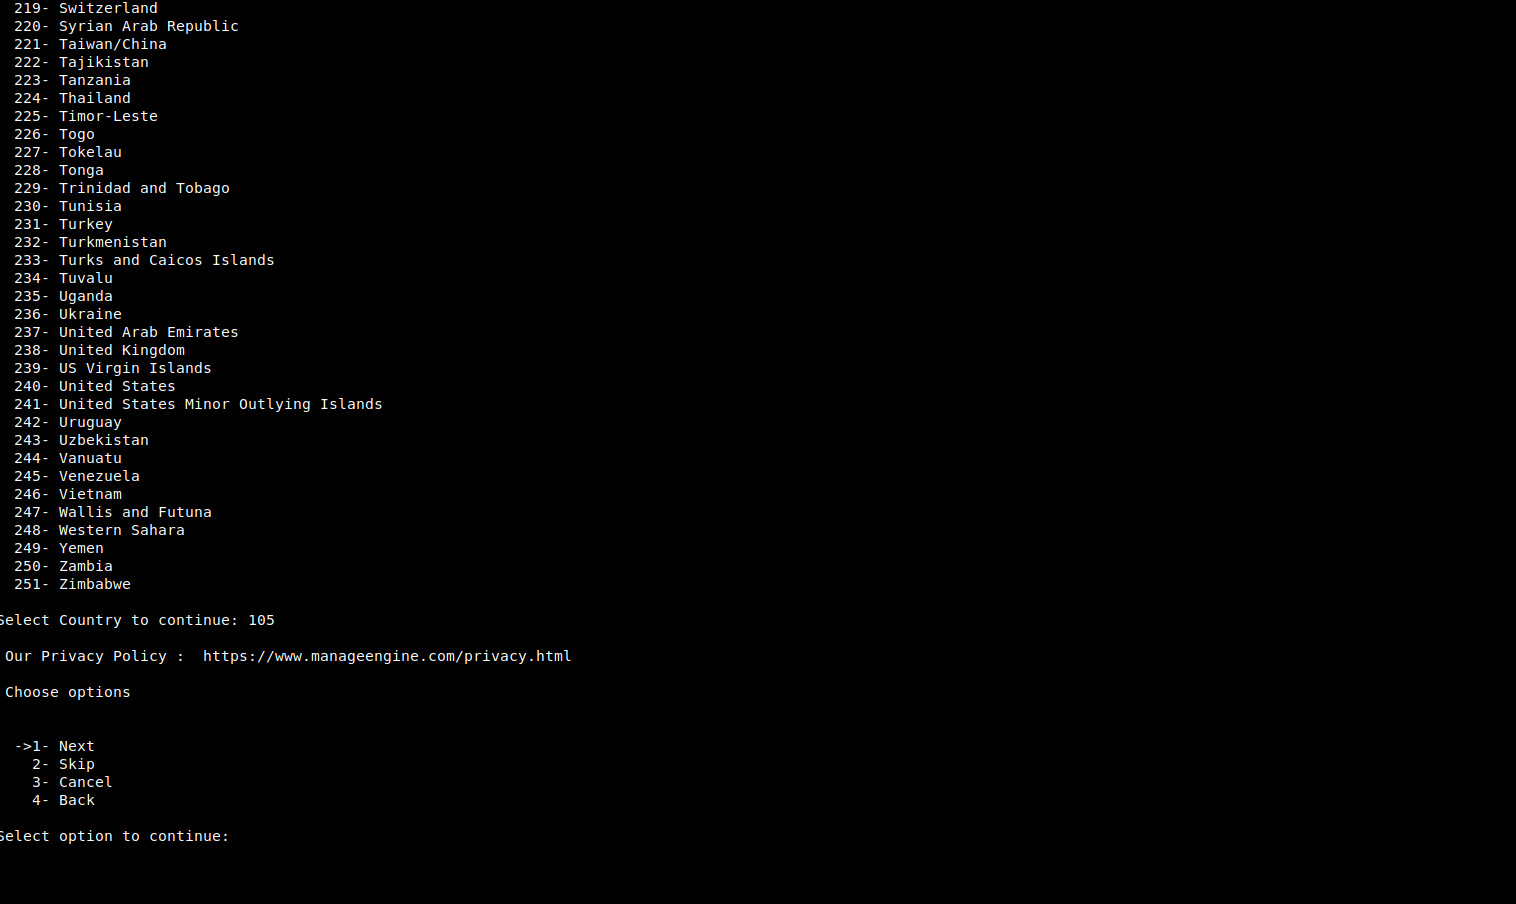
Step 3: Select the location.
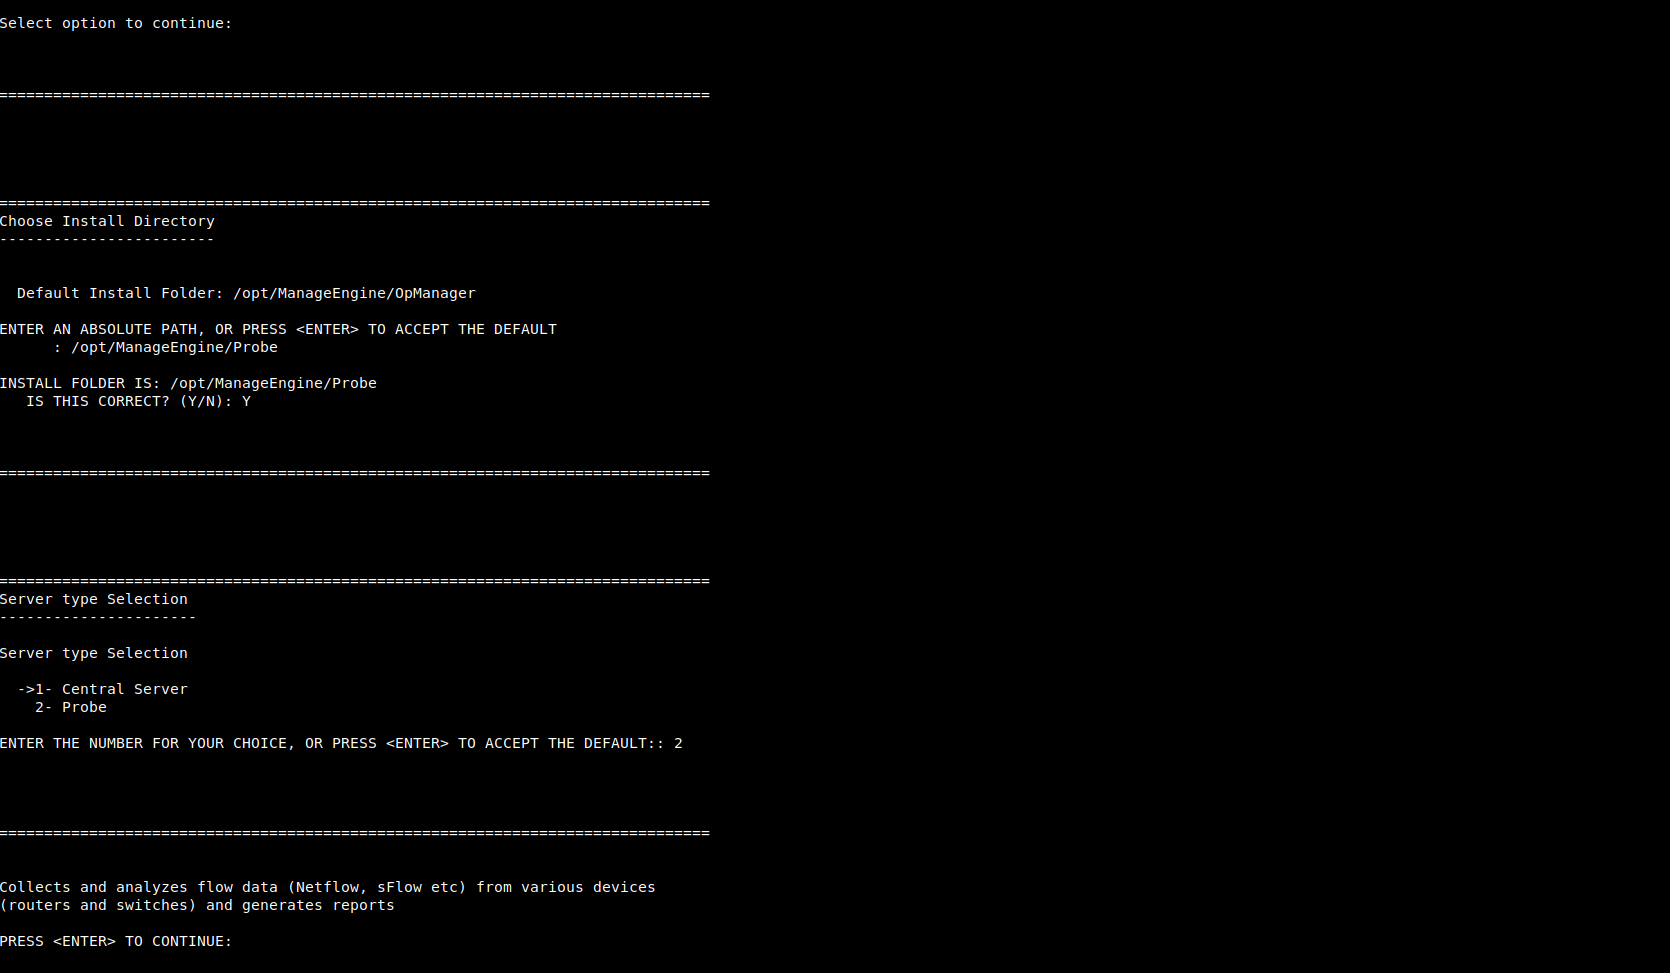
Step 4: Choose the installation directory
Step 5: Configure the Webserver and HTTP Ports
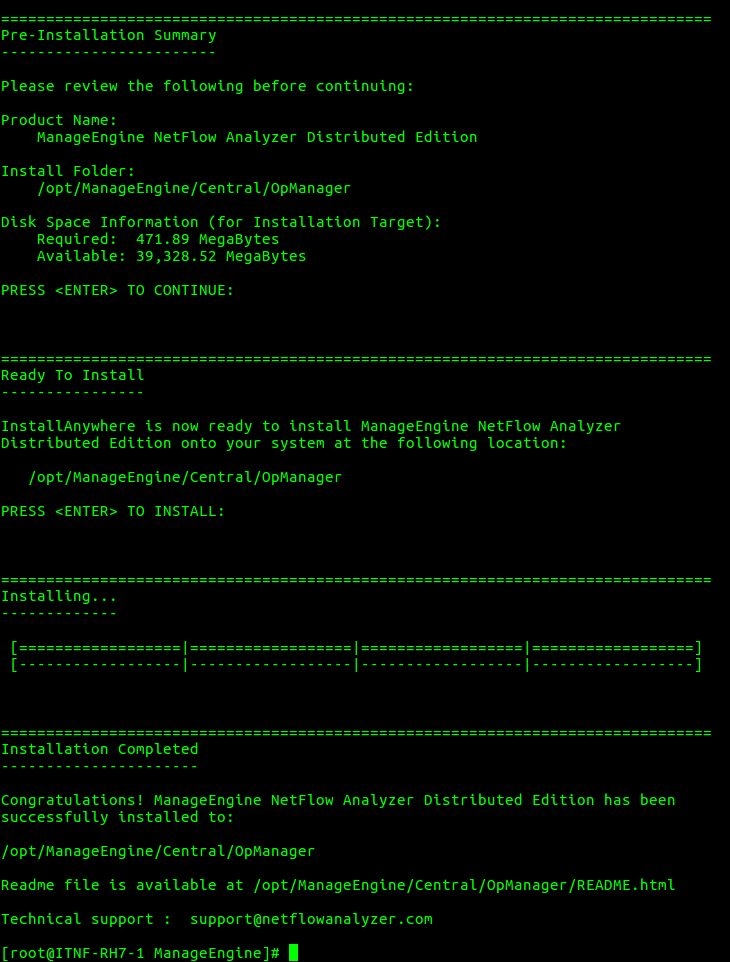
Step 6: Verify the installation details and press ‘Enter’ to complete the installation.
Probe Server
Step 1: Execute ManageEngine_NetFlowAnalyzer_Probe_64bit.bin with security privileges (sudo) and -i console option.
Step 2: Go through the license agreement and enter ‘Y’ to proceed. You can register for technical support by providing the required details. (Name, E-mail ID, Phone, Company Name)
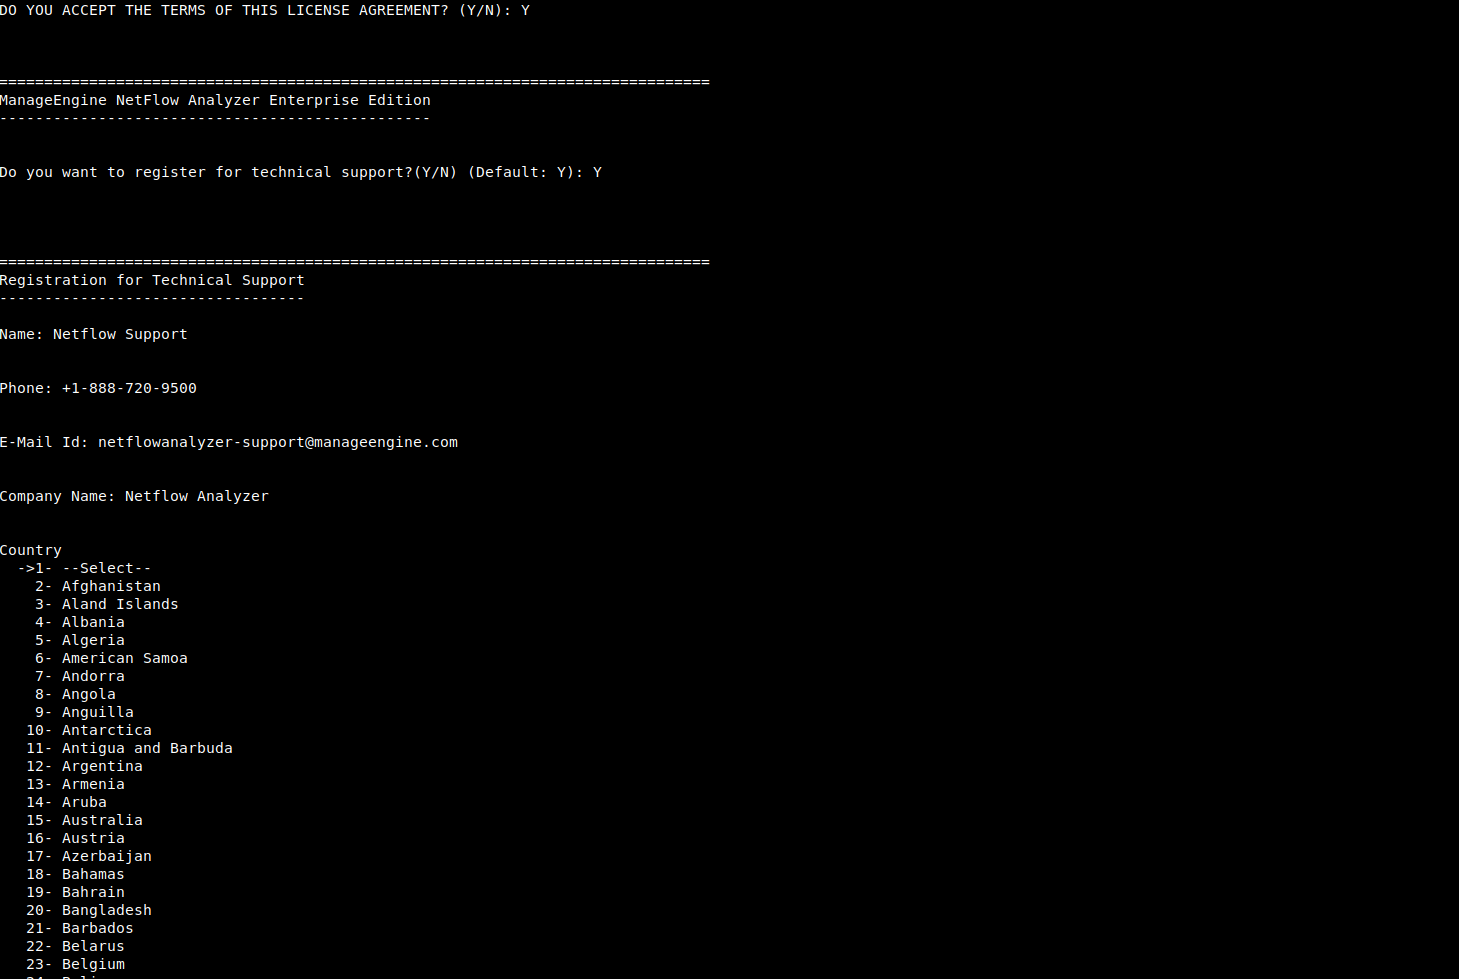
Step 3: Select the location.
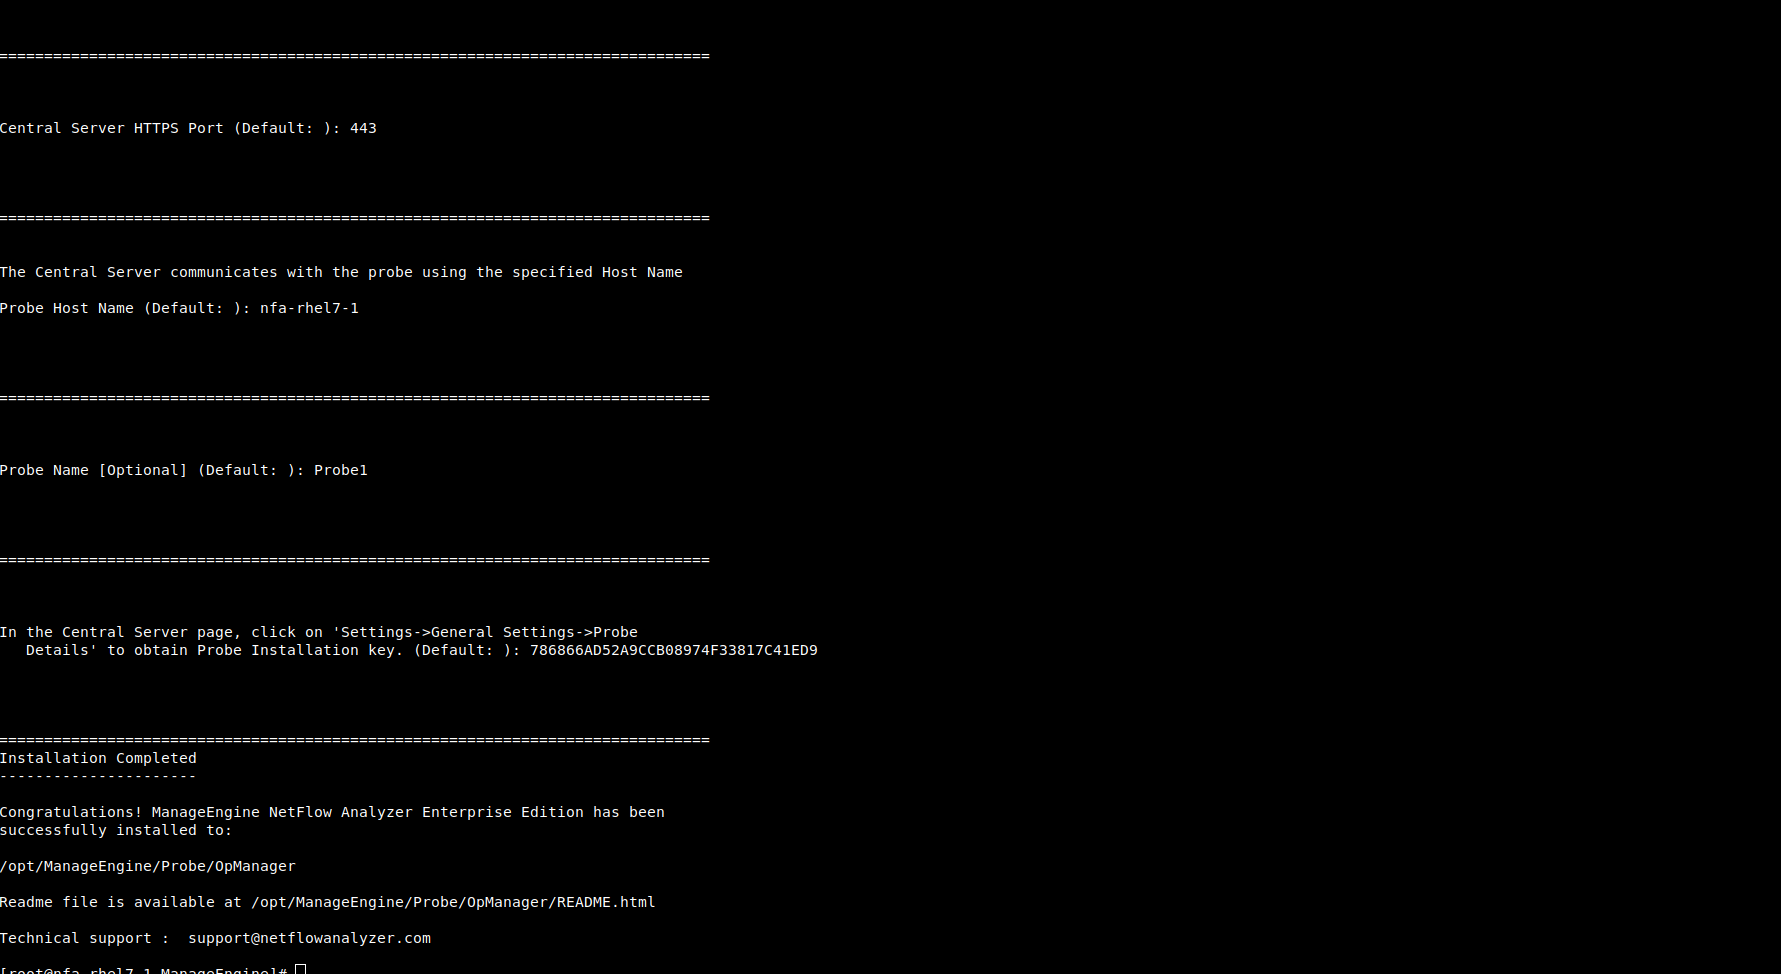
Step 4: Choose the installation directory, and configure the Webserver and Listener Ports.
Step 5: Verify the installation details, the installation status and press ‘Enter’ to complete the installation.
Starting NetFlow Analyzer Central Server
Windows
Click on Start > Programs > ManageEngine NetFlow Analyzer Central Reporting Server > Central Server.
Alternatively you can navigate to the \bin folder and invoke the run.bat file.
Linux
Navigate to the /bin directory and execute the run.sh file.
When the server is started, a command prompt window opens up showing startup information on several modules of NetFlow Analyzer. Once all the modules have been successfully created, the following message is displayed:
Server started.
Please connect your client at https://localhost
where 8060 is replaced by the port you have specified as the web server port during installation.
Starting NetFlow Analyzer Collector
Windows
Click on Start > Programs > ManageEngine NetFlow Analyzer Collector > Collector Server. Alternatively you can navigate to the \bin folder and invoke the run.bat file.
Linux
Navigate to the /bin directory and execute the run.sh file.
When the server is started, a command prompt window opens up showing startup information on several modules of NetFlow Analyzer. Once all the modules have been successfully created, the following message is displayed:
Server started.
Please connect your client at http://localhost:8060
where 8060 is replaced by the port you have specified as the web server port during installation.
Starting as a Service
Windows
If you have chosen the Start as Service option during installation, NetFlow Analyzer will run as a service on Windows.
Linux
- Login as root user.
- Navigate to the \bin directory.
- Execute the linkAsservice.sh file.
- Then execute the command systemctl start OpManager.service.
This starts NetFlow Analyzer as a service on Linux.