- Nano
- Installing Nano
- Using Nano
- Starting Nano
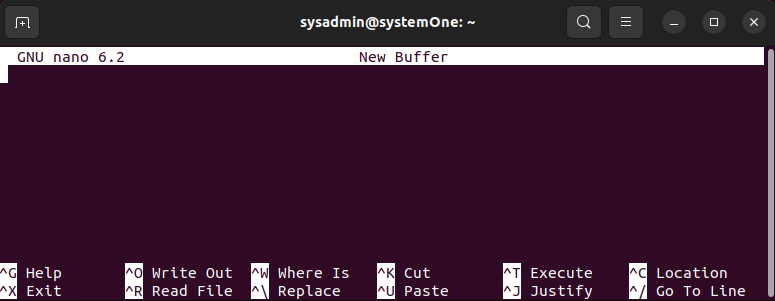
- Screen Layout
- Using The Mouse
- Using the Keyboard
- Opening, Saving, and Closing Files
- Opening Files
- Save and Save As
- Closing Files
- Editing Text
- Quitting Nano
- Resources
- How to Install Nano on Ubuntu 22.04
- Checking if already installed
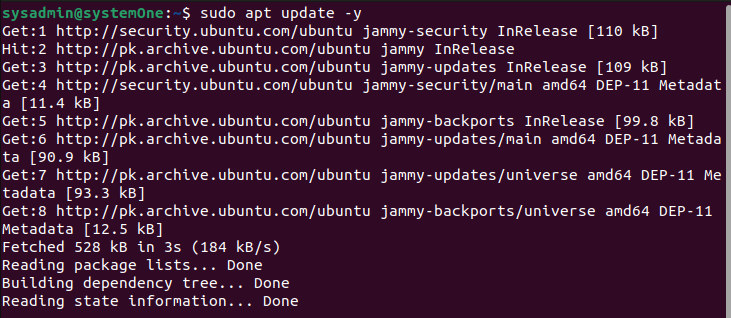
- Updating the apt repositories
- Installing Nano
- Launching Nano
- Open a file
- Editing the files
- Copying, cutting, and pasting within the files
- Running a spellcheck
- More information
- Uninstalling Nano
- Conclusion
- About the author
- Karim Buzdar
Nano
GNU nano is a simple terminal-based text editor. Though not as powerful as Emacs or Vim, it is easy to learn and use. Nano is ideal for making small changes to existing configuration files or for writing short plain text files. It was originally created as a free replacement for the non-free Pico editor. Pico is the terminal-based editor used in the Pine email suite from the University of Washington.
Nano can be used in a terminal window or at the system console.
Basic use of nano is covered here. If you want to learn more advanced techniques such as the use of multiple buffers or syntax highlighting of code, see the the nano project’s documentation.
Installing Nano
Nano is part of the standard Ubuntu installation, and should be on your system already. If for some reason it’s not, use your favorite package manager to install nano.
Using Nano
Nano is a terminal-based command-line program. Although not complicated or difficult to use, it is different than a GUI-based text editor such as gedit. The two main features that differ are the short-cut key combinations and the use of a mouse.
Starting Nano
To start nano with an empty file, open a terminal window and at the command-line type «nano» (without the quotes). For example:
To open an existing file for editing, type «nano filename» where filename is the name of the existing file. For example, to open the file that contains the list of most recently issued commands, make sure you are in your home directory, and at the command line type «nano .bash_history» as in the following example:
In the above example, if the file .bash_history does not exist in your current directory, nano will start a new blank file and use .bash_history as the name for it.
Line wrap is on by default. When line wrap is on, nano inserts end-of-line characters into your file when it wraps lines to fit the width of the terminal window. Only lines that you type or paste into the window are wrapped. Existing long lines are not wrapped until you add new text to the line or use the Ctrl+J key combination to justify the current paragraph.
Screen Layout
Figure 1: Default nano screen layout
The default nano screen layout is as shown in Figure 1. The bottom two lines show the key combinations for common operations. The ^ symbol represents the Control key on your keyboard. For example, use the Ctrl+G key combination to display a basic introduction to nano and its default screen layout.
The screen fonts and background colours are determined by your terminal settings. And when you resize the terminal window, nano adjusts itself accordingly.
Long lines that are not wrapped to fit the window are indicated by the $ symbol at the extreme right edge of the terminal window. The $ symbol is not part of your file; it just tells you that the line of text is too long to be displayed in the terminal.
Using The Mouse
By default, mouse services are provided by the terminal window. The mouse works almost the same as in a GUI editor. You can highlight text, right-click to copy and paste, and use the middle mouse button for pasting text from the buffer. However, when you use the middle mouse button to paste text, the text is pasted at the current cursor location, not at the mouse pointer location. Other limitations exist. For example, you cannot use the mouse to cut or delete text, nor can you use the mouse to scroll through the file.
Nano has its own built-in mouse services, but they are limited. They provide only the ability to move the cursor to the point where you click, and to mark the beginning and end of a section of text. Use the Alt+M key combination to toggle between using the terminal’s mouse services and nano’s built-in mouse services.
Using the Keyboard
Typing at the keyboard will insert text at the current cursor location. The Page Up and Page Down keys, the Arrow keys, and the Insert key and Delete key all work as in most other text editors. If you are at a keyboard that does not have these keys, you can use alternative Ctrl+key combinations. They are listed in nano’s online help, accessible with the Ctrl+G key combination.
Copy, paste, and cut operations are available, but they do not use the same Ctrl+key sequences as in most GUI editors. See the Editing Text section for more information.
Opening, Saving, and Closing Files
You can open a file for editing when you start nano, as discussed in the Starting Nano section. This section shows you how to open a file when nano is already started.
Opening Files
Open a file with the Read File command, Ctrl+R. The Read File command inserts a file from disk at the current cursor location.
When prompted, type the name of the file you want to open, or use the Ctrl+T key combination to use nano’s built-in file browser to navigate to the file you want to open.
If a file is already open, nano will insert the new file into it at the current cursor location; it will not close the existing file, nor will it open a new screen for the new file.
Save and Save As
Save and Save As are both accomplished with the Write Out command, Ctrl+O.
When prompted, press enter to accept the existing file name. To save as another file name, type in the new name and press Enter, or use the Ctrl+T key combination to use nano’s built-in file browser.
Closing Files
Close a file with the Ctrl+X key combination. If the file you are working on has been modified since the last time you saved it, you will be prompted to save the file first. Type y to save the file, or n to exit nano without saving the file.
Closing a file also closes nano.
Editing Text
As is normal in most text editors, text that you type into nano is inserted at the current cursor position. The Delete and Backspace keys also work the same as in other editors.
Use the Alt+6 key combination to copy text to the «cut buffer». Similarly, use the Ctrl+K key combination to delete text (it is cut to the «cut buffer»). If no text is marked, these two commands copy or cut the entire line of text.
Use the Ctrl+U key combination to paste the text in the «cut buffer» into the file.
To cut or copy specific text, you must first mark the start and end points of the text you want to select. You can do this with the either keyboard or the mouse, but to use the mouse for marking you must first turn on nano’s built-in mouse services.
To use the keyboard to select text, move the cursor to the start of the text you want to select, press the Alt+A key combination to mark the start, then move the cursor to the end of the section you want to select.
To use the mouse to mark the start of a selection, first make sure that nano’s built-in mouse services are turned on. Use the Alt+M key combination to toggle between nano’s mouse and the terminal’s mouse. Click on the location where you want to mark the start of the selection, move to the end of the section you want to select, and click the mouse again. You might need to use the keyboard to scroll the screen up or down because nano does not support scrolling with the mouse.
Once you have marked the beginning and end of text, the Alt+6 and Ctrl+K key combinations can be used to copy or cut it, respectively.
If you are using nano in a terminal window you can use the mouse to copy and paste text to and from other windows on your desktop. You cannot use the mouse to cut or delete text.
Quitting Nano
To quit nano, use the Ctrl+X key combination. If the file you are working on has been modified since the last time you saved it, you will be prompted to save the file first. Type y to save the file, or n to exit nano without saving the file.
Resources
- The GNU nano Homepage: http://www.nano-editor.org/
- GNU nano Documentation: http://www.nano-editor.org/docs.php
- Basic Introduction to Emacs: EmacsHowto
- Introduction to Vim: VimHowto
- Using a terminal and the command line: HowToUseTheTerminal and CommandlineHowto
Nano (последним исправлял пользователь fitojb 2022-04-03 19:47:01)
The material on this wiki is available under a free license, see Copyright / License for details
You can contribute to this wiki, see Wiki Guide for details
How to Install Nano on Ubuntu 22.04
![]()
Anyone who’s ever worked with a Linux system knows that the terminal lies at the center of the ecosystem. You can control your whole system with it, navigate the filesystem, monitor your network, and create text files along with anything else you might think. So basically, you can do anything you want from the terminal. Deep in your crunch sessions, switching between applications can hit productivity. So, when you’re working with text or configuration files, sticking within the terminal is the best option.
Vim and Emacs are two of the most powerful command-line editors for Ubuntu, but they have a steep learning curve. Taking a look at the learning resources can overwhelm new users. For such users, there is nano. It is an easy-to-use command-line editor for Linux. So how do you get your hands on a nano text editor? Let’s see how you can install it on Ubuntu 22.04.
Checking if already installed
Like many distributions, nano comes pre-installed with Ubuntu if you opt to download and install updates during the operating system installation. You can run this command to see if nano is already installed on your Ubuntu 22.04.
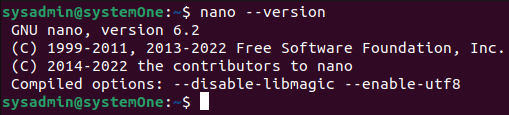
If you see out similar to the screenshot above, it means that you have nano installed on your machine. If it’s not installed, you will see the following:

Now let’s get started with the nano installation.
Updating the apt repositories
Running the following will resolve any dependency conflicts and ensure that the installation runs smoothly.
Once this is done, you can use “apt” to start the installation.
Installing Nano
Run this in your terminal to get started with the installation.
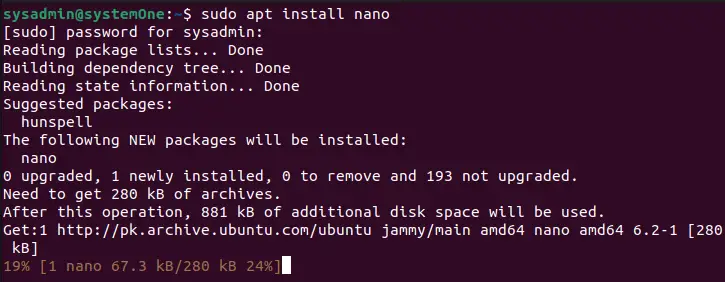
When the prompt returns, your installation has been completed.
Launching Nano
Once the installation has been completed you can simply launch nano by typing the name in the terminal.

Pressing “Return” on this will launch a nano and open a new file.
You’ll see a handful of useful shortcuts at the bottom of the terminal window. As it’s been around for longer than many of the computing conventions, you’ll see that the shortcuts for copy and paste are very different. Now, this window shows us a new file. We can simply go ahead and start editing the file.
Open a file
When you want to open a file, you can start up the terminal in the directory containing your file or navigate to your desired directory and use the nano command to open up your file using the nano editor. As we named the file “test file”, we can open the file using this:

Pressing return with this command will open up the file in nano editor.
Editing the files
Unlike vi and vim, nano doesn’t feature any modes. It means that you can simply open up any file and start editing it right away.
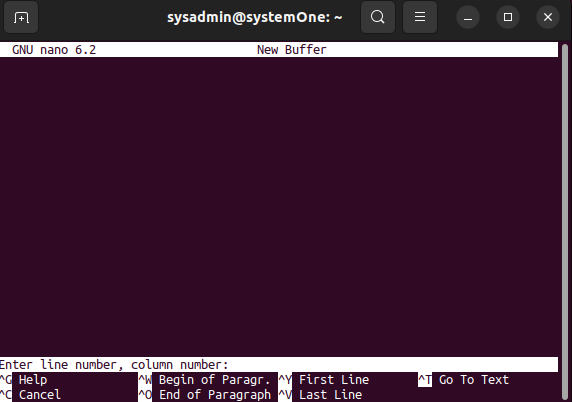
You can press the “Ctrl+_” to navigate the cursor to a specific character number or line. You’ll see the options at the bottom changed and you get a prompt asking you to “Enter line number, column number”.
Copying, cutting, and pasting within the files
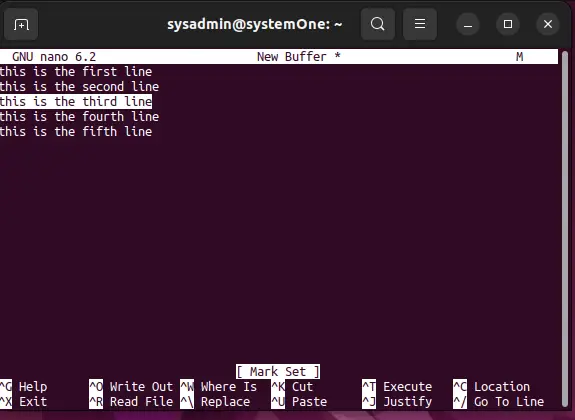
To perform any of the heading functions, you need to select some text. Move your cursor to the start of your desired text and press “Alt+a”. This will add a selection mark to the start. Now, navigate to the end of the text using the arrow keys. Let’s copy the third line:
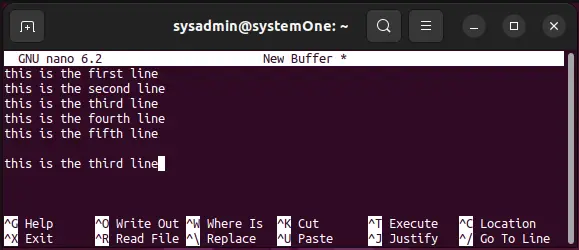
Now, press “Alt+6” to copy the text, doing so will remove the selection. Move your cursor to the location where you want to copy the text and press “Ctrl+U” to paste the text there.
Similarly, you can use the “Ctrl+K” and “Ctrl+U” combinations to cut and paste your desired content.
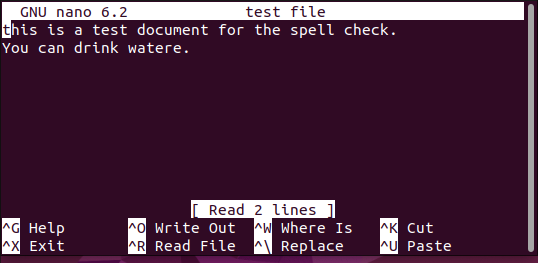
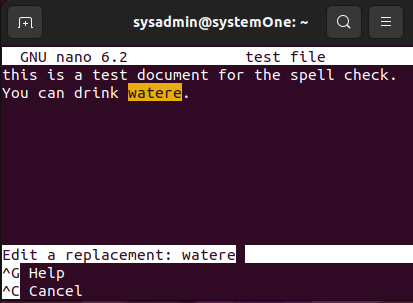
Running a spellcheck
Unlike Microsoft Word, you don’t get everything bundled with the base installation. If you want to spell-check your document, you’ll need to install the package for it. Run this to install the spell-checking package:
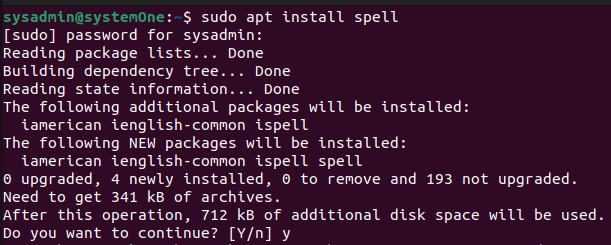
Once this is completed, you can simply open any text document and press “Ctrl+T” to initiate a command session and, then press “Ctrl+S” to spellcheck your document.
More information
If you want to learn more about nano on Ubuntu 22.04, you can press “Ctrl+G” to access the help section.
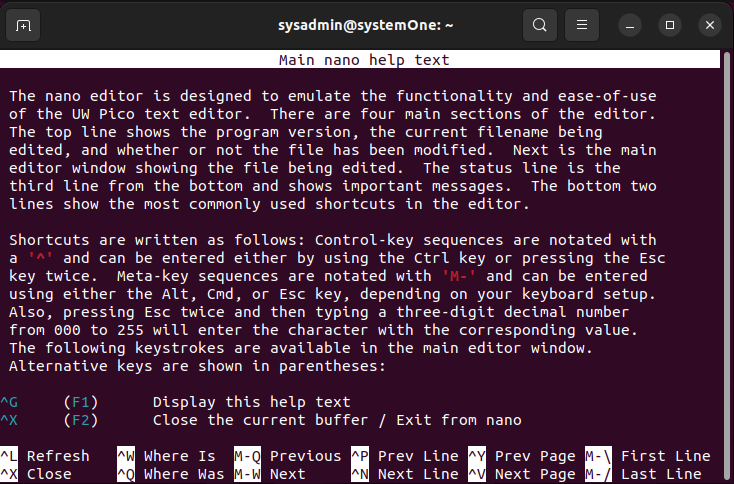
Using the shortcuts at the bottom, you can navigate through it and learn more about how can you employ the plethora of features and functions to get better at it.
Uninstalling Nano
If you feel like you are done with nano and want to remove it from your Ubuntu 22.04, you can use this to remove nano:
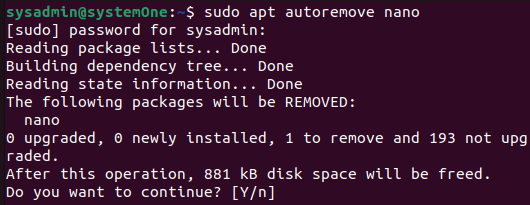
This will trigger the uninstallation process and remove nano along with the dependencies.
Conclusion
If you followed the tutorial through and through, you now know how to install nano, how to navigate through the basics of nano and how can you uninstall it. If you run into any issues installing or uninstalling it, feel free to drop a comment below and I will help you out.
About the author
Karim Buzdar
Karim Buzdar holds a degree in telecommunication engineering and holds several sysadmin certifications. As an IT engineer and technical author, he writes for various web sites. He blogs at LinuxWays.