- Netbeans
- Installing the Latest Version Directly from Binaries
- Quick and Easy way to install Netbeans
- Download the Binaries
- Missing Java
- The Installer or NetBeans Window is All White or Blank: Problems with Compiz
- NetBeans blank when maximised on Ubuntu Netbook Remix (9.04)
- Installation of NetBeans from Ubuntu Packages
- Post-Installation Setup
- How to Install NetBeans IDE 12 in Debian, Ubuntu and Linux Mint
- NetBeans Tools and Capabilities
- Requirements:
- How to Install Latest NetBeans IDE On Ubuntu, Mint & Debian
- How to Install NetBeans Using Snap On Ubuntu, Mint & Debian
- How to Install NetBeans Using APT On Ubuntu, Mint & Debian
Netbeans
The NetBeans IDE is an open-source, fast and feature full tool for developing Java software. It is standards compliant and runs on any operating system where a Java Virtual Machine is available.
Installing the Latest Version Directly from Binaries
The version of NetBeans available from synaptic or apt-get is usually out-of-date from the version available directly from NetBeans. For example Ubuntu Jaunty 9.04 contains Netbeans 6.5 in repository while release 6.7 is pending. If you are required to run the latest release please proceed in reading the rest of this section. This section covers the installation of NetBeans 6.5 from binaries downloaded directly from the NetBeans website but it can most likely be applied to future release so it is left here for reference.
Quick and Easy way to install Netbeans
Install Netbeans 6.5 — This downloads directly from www.netbeans.org. It also configures Ubuntu rubygems to work inside Netbeans.
Download the Binaries
You can get the binaries at the NetBeans download page. Download the appropriate version depending on what language(s) you want to develop in. I chose Java. Download the file and save it to your home directory, /home/yourusername.
cd $HOME sudo sh ./netbeans-6.5-ml-java-linux.sh
Create a script to run netbeans (skip this if you want to invoke it from Applications -> Programming -> NetBeans IDE 6.5 in the Ubuntu menu bar):
cd $HOME mkdir bin cd bin # Create a file called netbeans in the current dir and make its contents exactly as # follows in the next two lines and then save it and then quit your editor: #!/bin/bash /usr/local/netbeans-6.5/bin/netbeans # Make it executable chmod u+x netbeans # Put this in your path for this shell session # (add this line to your .bashrc or .zshrc file in /home/yourusername # to see the path in all future shells; be sure to exit the shell to see the changes though) export PATH=/home/yourusername/bin:$PATH # Run NetBeans! netbeans
Alternatively, you can just add /usr/local/netbeans-6.5/bin to your PATH, or you can run the following if you don’t even want to mess with your PATH:
ln -s /usr/local/netbeans-6.5/bin/netbeans /usr/local/bin/netbeans
Missing Java
If the installer fails or cannot find the Java JDK, try
If those both return values, perhaps the installer missed them and you can browse for them manually yourself in the installer. If one of those does not return a value, you need to install Java:
sudo apt-get install sun-java6-bin sun-java6-jdk
The Installer or NetBeans Window is All White or Blank: Problems with Compiz
Although I did not have any problems with NetBeans and Compiz in Ubuntu 8.10, if you are experincing problems you may try changing your netbeans shell file above to be:
AWT_TOOLKIT=MToolkit /usr/local/netbeans-6.5/bin/netbeans
This makes NetBeans run with the MToolKit windowing toolkit but leaves the rest of your desktop running in Compiz. This was claimed to work on Ubuntu 7.10.
NetBeans blank when maximised on Ubuntu Netbook Remix (9.04)
NetBeans appears blank when run maximised in Ubuntu Netbook Remix Ubuntu 9.04.
NetBeans displays correctly unmaximised (right click on the NetBeans window title bar and select unmaximise) at the cost of a little screen space. Selecting View > Full Screen in NetBeans (Alt-Shift-Enter) also displays NetBeans correctly.
NetBeans 6.8 displays correctly when maximised in Ubuntu Remix 9.10 using Java 1.6 from Sun. No problems were experienced with the installer.
Installation of NetBeans from Ubuntu Packages
To install NetBeans you can run Synaptic Packet Manager and install the package named netbeans, or open a terminal and type
sudo apt-get install netbeans
Java SDK will will be automatically installed as dependency if it’s not installed. If you want the latest version of NetBeans, you must install it manually.
Post-Installation Setup
If you install system-wide a Netbeans bundled with Sun’s J2EE Application Server, you will not be able to use the default domain (domain1) from a non-privileged user account. The installed files are owned by the root account and some are read/write protected. An easy solution is to give all the files in the domain1 directory to your user.
sudo chown -R : /domains/domain1
In Netbeans, in the «Runtime» right-click to the «Server» item to «Add Server. «. In the wizard, use your SUNWappserver directory as «Platform Location» and choose yhe default domain in the drop-down box. After clicking «Next», enter the default admin user (admin) and password (adminadmin) and click «Finish».
A more cleaner solution, is to make a copy of domain1 and then give files in this copy to your user. Because they contain path specific information, you will have to edit the following files: bin/starserv and bin/stopserv.
sudo cp -R /domains/domain1 sudo chown -R : /domain1 cd /domain1 gedit bin/startserv bin/stopserv
in each file, search the line that looks like
INSTANCE_ROOT=/domains/domain1
In Netbeans, in the «Runtime» right-click to the «Server» item to «Add Server. «. In the wizard, use your SUNWappserver directory as «Platform Location», choose «Register Local Domain» and click «Next». Use your copy of domain1 as «Domain Folder» and, after clicking «Next», enter the default admin user (admin) and password (adminadmin) and click «Finish».
Netbeans (последним исправлял пользователь ckimes 2017-08-30 21:25:57)
The material on this wiki is available under a free license, see Copyright / License for details
You can contribute to this wiki, see Wiki Guide for details
How to Install NetBeans IDE 12 in Debian, Ubuntu and Linux Mint
The NetBeans (also known as Apache Netbeans) is an open-source and award-winning IDE (integrated development environment) application for Windows, Linux, Solaris, and Mac. The NetBeans IDE provides a much powerful Java application framework platform that allows programmers to easily develop Java-based web applications, mobile applications, and desktops. It is one of the best IDEs for C/C++ programming, and also it provides vital tools for PHP programmers.
The IDE is the only first editor, that provides support for many languages like PHP, C/C++, XML, HTML, Groovy, Grails, Ajax, Javadoc, JavaFX, and JSP, Ruby, and Ruby on Rails.
The editor is feature-rich and provides an extensive range of tools, templates, and samples; and it’s highly extensible using community developed plugins, thus making it well suited for software development.
NetBeans Tools and Capabilities
Netbeans IDE ships with the following features that take your application development to a whole new level.
- A drag and drop GUI design tool for rapid UI development.
- A feature-rich code editor with code templates & refactoring tools.
- Integration tools such as GIT and mercurial.
- Support for the latest Java technologies.
- A rich set of community plugins.
In this article, we will show you different ways that you can use to install Apache NetBeans in Debian, Ubuntu and Linux Mint distributions. By the time of penning down this article, the latest release is Apache NetBeans 12 LTS.
On this page:
Requirements:
- A Desktop machine with a minimum of 2GB of RAM.
- The Java SE Development Kit (JDK) 8, 11 or 14 is required to install NetBeans IDE (NetBeans does not run on JDK9).
How to Install Latest NetBeans IDE On Ubuntu, Mint & Debian
1. To install the most recent stable version of NetBeans IDE 12, first, you need to install Java JDK from the default repositories as shown.
$ sudo apt update $ sudo apt install default-jdk
Next, verify the Java JDK version.
3. Now open a browser, navigate to NetBeans IDE download page and download the latest NetBeans IDE installer script (Apache-NetBeans-12.0-bin-linux-x64.sh) for your installed Linux distribution.
Alternatively, you can also download NetBeans IDE installer script in your system via wget utility, by issuing the below command.
$ wget -c https://downloads.apache.org/netbeans/netbeans/12.0/Apache-NetBeans-12.0-bin-linux-x64.sh
4. After the download completes, navigate to the directory where the NetBeans IDE installer has been downloaded and issue the below command to make the installer script executable and start installing it.
$ chmod +x Apache-NetBeans-12.0-bin-linux-x64.sh $ ./Apache-NetBeans-12.0-bin-linux-x64.sh
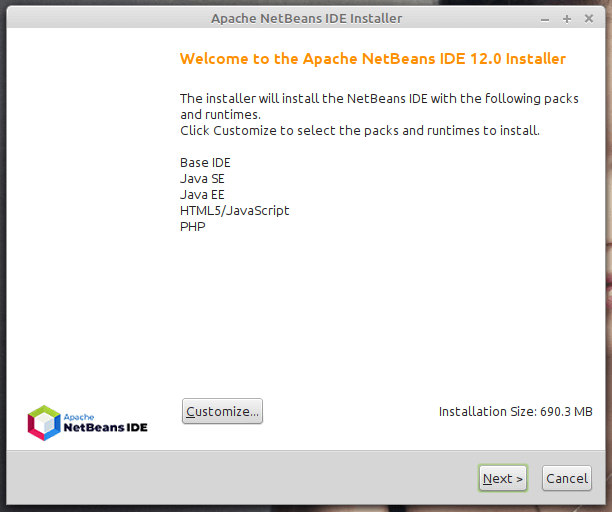
5. After running the installer script above, the installer “Welcome page” will show up as follows, click Next to continue (or customize your installation by clicking on Customize) to follow the installation wizard.
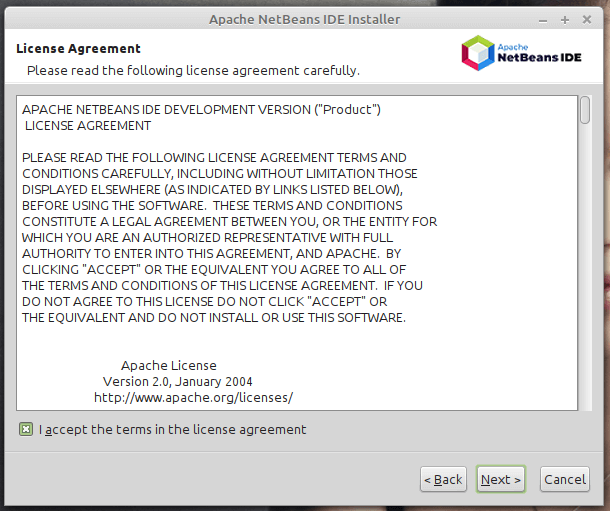
6. Then read and accept the terms in the license agreement, and click on Next to continue.
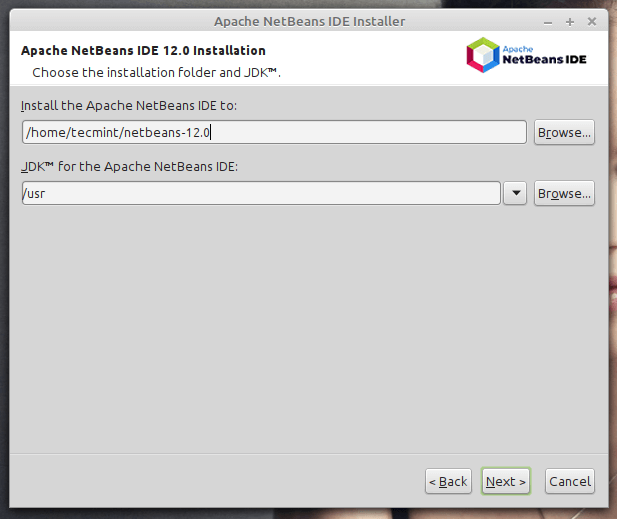
7. Next, select the NetBeans IDE 12.0 installation folder from the following interface, then click Next to continue.
8. Next, enable auto-updates for installed plugins via the checkbox in the following screen which shows the installation summary, and click Install to install the NetBeans IDE and runtimes.

9. When the installation is complete, click on Finish and restart the machine to enjoy NetBeans IDE.
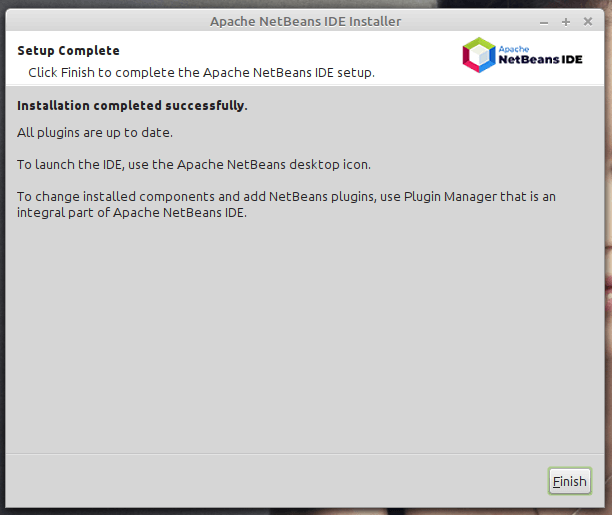

And voila! The dashboard will come into view and you can start creating a project and building your applications.
How to Install NetBeans Using Snap On Ubuntu, Mint & Debian
Installing NetBeans using a snap package manager is the most recommended way because you get to install the latest version of software packages.
To get started, update your system’s package list by running the following command:
To install Netbeans using the snap package manager, execute the command below. This downloads the NetBeans snap on your system.
$ sudo snap install netbeans --classic
Upon successful installation, you will get a confirmation that Apache NetBeans has been successfully installed.
Once installed, use the application manager to search for Netbeans as shown below. Click on the icon to launch it.
How to Install NetBeans Using APT On Ubuntu, Mint & Debian
An alternative option to using snap is using the good old APT package manager which is native across all Debian-based distributions. However, this does not install the latest version of NetBeans. As discussed earlier, Netbeans installer and snap is the recommended option if you desire to install the latest version.
Nevertheless, run the following command to install Netbeans:
$ sudo apt install netbeans
This downloads a whole bunch of packages including JDK, Java interpreter and compiler, and many other associated dependencies. When the installation is complete, again, locate NetBeans using the application manager and launch it.
Congratulations! You’ve successfully installed the latest version of NetBeans IDE 12 in your Debian/Ubuntu and Mint Linux based systems. If you have queries use the comment form below to ask any questions or share your thoughts with us.