- How to QUICKLY Install Fonts in Linux [GUI and CLI]
- Install Fonts in Linux with Desktop Environment
- Gnome Desktop
- KDE Desktop
- Install Fonts in Linux Terminal
- Personal Fonts
- System Fonts
- Uninstall Fonts
- Summary
- References
- How to Install New Fonts in Ubuntu and Other Linux Distributions
- Installing a new font in Ubuntu Linux
- Step 1: Get fonts
- Step 2: Install the new fonts
- Install several fonts at once in Linux
- Step 1: Create .fonts directory in your home directory
- Step 2: Put fonts files in the .fonts directory
- Alternative: Use Font Manager for managing fonts in Ubuntu and other Linux
- More ways to customize
How to QUICKLY Install Fonts in Linux [GUI and CLI]
Linux is Freedom, we all know that. As the end user, we have the freedom to make any changes to the system, including changing the fonts. Every Linux distribution comes with some fonts installed. So, How to install fonts in Linux other than what is already there?
Install Fonts in Linux with Desktop Environment
On Linux, some desktop environments allow installing fonts with a graphical interface. Let’s examine the font installation steps for the Gnome(Fedora OS) and KDE(Debian, Pardus OS) desktop environments.
Gnome Desktop
If you have Gnome desktop installed on your system, it comes with the gnome-font-viewer application installed. You can call it by typing «fonts» from the menu.
![How to QUICKLY Install Fonts in Linux [GUI and CLI]](https://www.golinuxcloud.com/wp-content/uploads/gnome-fonts.jpg)
All fonts are listed on this screen. Click on the font you want to install. If the button on the top right of the screen is «Installed«, the font you have chosen is already installed. If “Install” is active, you can click and install it on your system.
![How to QUICKLY Install Fonts in Linux [GUI and CLI]](https://www.golinuxcloud.com/wp-content/uploads/gnome-fonts-montserrat.jpg)
By clicking on Info, you can see where the package is installed and all the information about the package. You can install fonts that are not in Gnome Fonts and exist in the package repository.
For example, the saab-fonts package is not installed on the system, so it did not appear in Gnome fonts.
![How to QUICKLY Install Fonts in Linux [GUI and CLI]](https://www.golinuxcloud.com/wp-content/uploads/gnome-fonts-saab.jpg)
Then let’s install the package;
foc@fedora:~$ sudo dnf install saab-fonts
Now let’s look at Gnome Fonts again.
![How to QUICKLY Install Fonts in Linux [GUI and CLI]](https://www.golinuxcloud.com/wp-content/uploads/gnome-saab-2.jpg)
You can see it loaded into the system.
To remove the font you have installed from the system, let’s first find the font name;
foc@fedora:~$ sudo dnf list installed | grep saab saab-fonts.noarch 0.91-24.fc35 @fedora
Let’s remove it from the system;
foc@fedora:~$ sudo dnf remove saab-fonts
Then when you search for the font on Gnome Fonts, you can see that it is deleted.
KDE Desktop
Open the Font Management application from the menu. System fonts and personal fonts are listed on this screen.
![How to QUICKLY Install Fonts in Linux [GUI and CLI]](https://www.golinuxcloud.com/wp-content/uploads/kde-fm.jpg)
Then click the Add button. On the screen that comes up, select the fonts you have downloaded from the internet and click the Open button.
![How to QUICKLY Install Fonts in Linux [GUI and CLI]](https://www.golinuxcloud.com/wp-content/uploads/kde-fm-1.jpg)
What types of fonts should be installed?
![How to QUICKLY Install Fonts in Linux [GUI and CLI]](https://www.golinuxcloud.com/wp-content/uploads/kde-fm-2.jpg)
For example, we choose the Personal/System font. Then the fonts are loaded into the system.
![How to QUICKLY Install Fonts in Linux [GUI and CLI]](https://www.golinuxcloud.com/wp-content/uploads/kde-fm-3.jpg)
To remove the font from the system, simply press the Delete button on the screen.
Install Fonts in Linux Terminal
In Linux, system fonts and personal fonts are in different directories. Let’s talk about the font installation steps in two options.
Personal Fonts
Fonts are located in the following directory under each user’s home directory;
foc@fedora:~$ ls -l ~/.local/share/fonts total 120 -rw-r--r--. 1 foc foc 58940 Jul 24 2021 1Waree-Oblique.otf -rw-r--r--. 1 foc foc 58940 Jul 24 2021 Waree-Oblique.otf
Create [font_family] name for newly downloaded fonts;
foc@fedora:~$ mkdir -p ~/.local/share/fonts/linux-biolinum
Do not use the sudo command or operate as root when installing the custom font. Otherwise, there may be an authorization problem, fonts may not appear.
Copy the fonts you downloaded to this directory;
foc@fedora:~$ cp ~/Downloads/linux-biolinum/*.ttf ~/.local/share/fonts/linux-biolinum/
Update font cache with fc-cache;
System Fonts
System fonts are located in the following directory;
foc@fedora:~$ ls -l /usr/share/fonts/ total 0 drwxr-xr-x. 1 root root 232 Apr 21 00:03 aajohan-comfortaa-fonts drwxr-xr-x. 1 root root 698 Oct 26 2021 adobe-source-code-pro drwxr-xr-x. 1 root root 550 Jul 21 16:28 adobe-source-sans-pro-fonts
Create the family directory in the main fonts directory as in Personal fonts. But this time run the command with sudo or apply as root user;
foc@fedora:~$ sudo mkdir -p /usr/share/fonts/linux-biolinum
Then copy the files to this directory;
foc@fedora:~$ sudo cp ~/Downloads/linux-biolinum/*.ttf /usr/share/fonts/linux-biolinum/
Clear and regenerate font cache with the following command:
After these steps, you can see these fonts on your system with the following commands;
foc@fedora:~$ fc-list | grep linux-biolinum /usr/share/fonts/linux-biolinum/LinBiolinum_RIah.ttf: Linux Biolinum:style=Italic /usr/share/fonts/linux-biolinum/LinBiolinum_RBah.ttf: Linux Biolinum:style=Bold /usr/share/fonts/linux-biolinum/LinBiolinum_Rah.ttf: Linux Biolinum:style=Regular /usr/share/fonts/linux-biolinum/LinBiolinum_Kah.ttf: Linux Biolinum Keyboard:style=Regular
Uninstall Fonts
To remove the font from your system, the file path where the font is located must first be known;
foc@fedora:~$ fc-list | grep biolinum /usr/share/fonts/linux-biolinum/LinBiolinum_RIah.ttf: Linux Biolinum:style=Italic /usr/share/fonts/linux-biolinum/LinBiolinum_RBah.ttf: Linux Biolinum:style=Bold
Then type the font you want to delete after the rm command. To delete a single font belonging to the font family;
foc@fedora:~$ sudo rm /usr/share/fonts/linux-biolinum/LinBiolinum_Rıah.ttf
To completely delete the font family;
foc@fedora:~$ sudo rm -rf /usr/share/fonts/linux-biolinum/
Now let’s list the fonts again;
foc@fedora:~$ fc-list | grep biolinum
After this command, you can see that the fonts are not installed in the system.
Summary
In Linux, the fonts brought by the system and found in the repositories are always stable ones. 3rd party installed fonts can sometimes be a problem. Our recommendation is to use the fonts that are available in the system or that are available for download in the repository for you.
References
Related Keywords: install fonts in linux terminal, install font ubuntu command line, linux install ttf font command line, install fonts ubuntu, ubuntu fonts folder, linux fonts, centos install fonts, font manager ubuntu
Didn’t find what you were looking for? Perform a quick search across GoLinuxCloud
If my articles on GoLinuxCloud has helped you, kindly consider buying me a coffee as a token of appreciation.

For any other feedbacks or questions you can either use the comments section or contact me form.
Thank You for your support!!
How to Install New Fonts in Ubuntu and Other Linux Distributions
Wondering how to install additional fonts in Ubuntu Linux? Here is a screenshot tutorial to show you how to easily install new fonts.
- How to install a font in Linux
- How to install multiple fonts at once
- How to use a GUI tool for managing fonts in Ubuntu-based distributions
Installing a new font in Ubuntu Linux
The fonts usually come in True Type (TTF) or Open Type (OTF) file formats. You can use either of them in Linux.
Step 1: Get fonts
First, download fonts of your choice. You can get some free fonts on Google Fonts website.

Step 2: Install the new fonts
The downloaded fonts are usually in a zipped file. Extract the zip file in Linux by right-clicking and selecting extract.

Now go to this extracted folder and look for .ttf (TrueType Fonts) or .otf (openType Fonts) files.
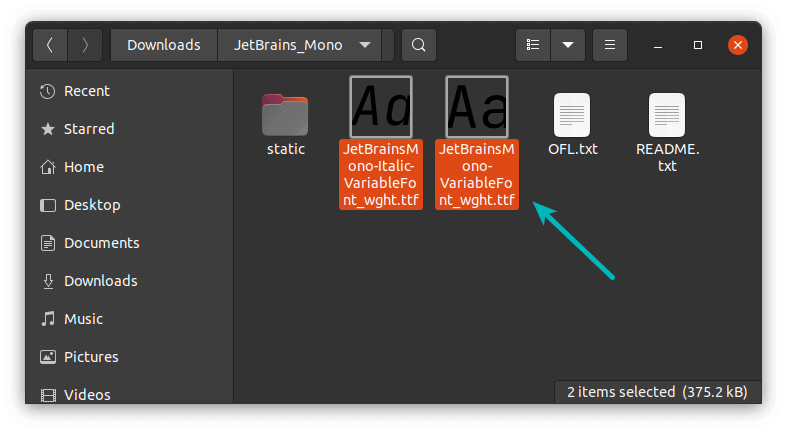
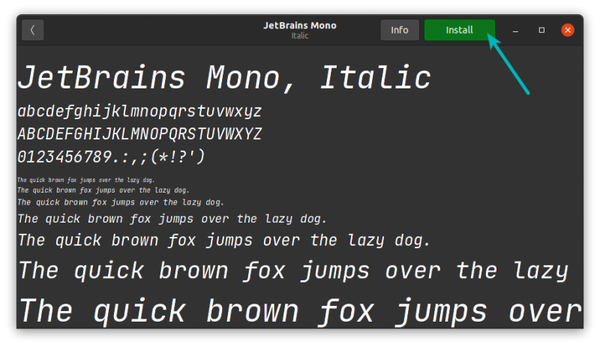
Whichever it may be, just double-click on the font file. It will open it in Font Viewer application. In here, you can see the option to install the font in the top-right corner:
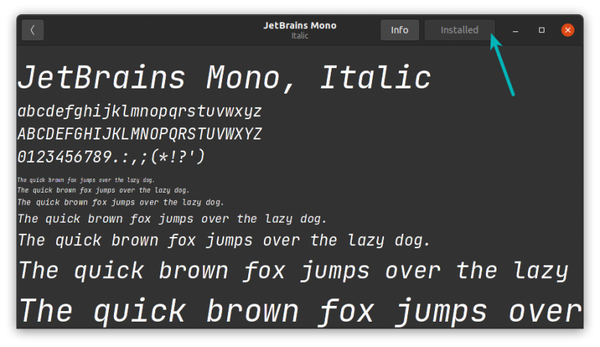
You won’t really see anything being installed as you see when installing a software. Couple of seconds later, you’ll see the status has been changed to “Installed“. No prizes for guessing that the font has been now installed.
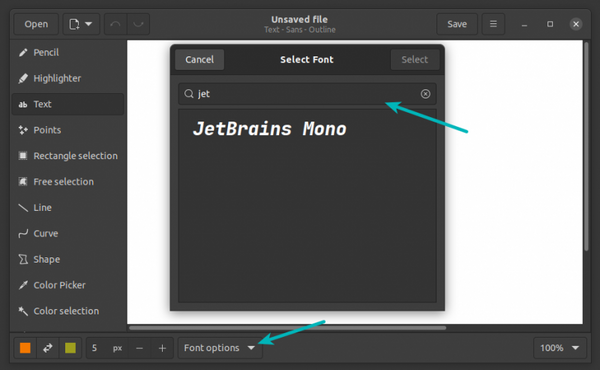
Once installed, you can see the newly installed fonts in any application that uses fonts such as GIMP, Pinta etc.
Install several fonts at once in Linux
No, it is not a typo. This is an alternative to step 2 that I mentioned above. Imagine you have 20 new fonts to install. Installing all these fonts, one by one, by double-clicking on them is cumbersome and inconvenient. Don’t you think so?
To install several fonts at once in Ubuntu, all you need to do is to create .fonts directory, if it doesn’t exist already, in your Home directory. And extract or copy paste all those TTF or OTF files in this directory.
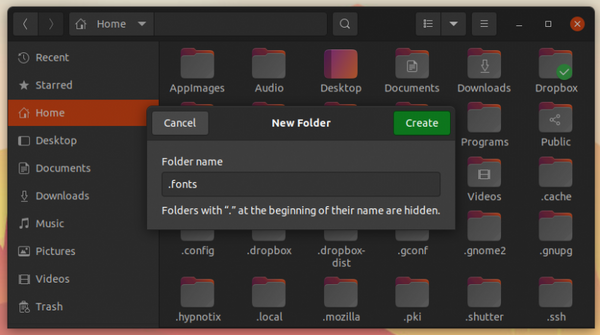
Step 1: Create .fonts directory in your home directory
Go to your Home directory in File manager. Press Ctrl+H to show hidden files in Ubuntu. Right click to make a new folder and name it .fonts. That dot at the beginning is important. In Linux, if you put dot ahead of the file name, it hides the file from normal view.
Step 2: Put fonts files in the .fonts directory
Copy your fonts files and paste those in the .fonts directory that you have created in the previous step. You don’t need to do anything else. These fonts will now be available for you.

Alternative: Use Font Manager for managing fonts in Ubuntu and other Linux
Alternatively, you can install Font Manager application and manage fonts using a GUI application. This tool also allows you to delete an existing font.
Please check your distribution’s package manager and see if Font Manager is available to install.
On Ubuntu and Debian-based distributions, you can use the apt command to install it:
sudo apt install font-managerOnce installed, look for Font Manager in the system menu and start it:
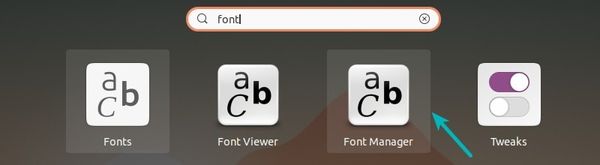
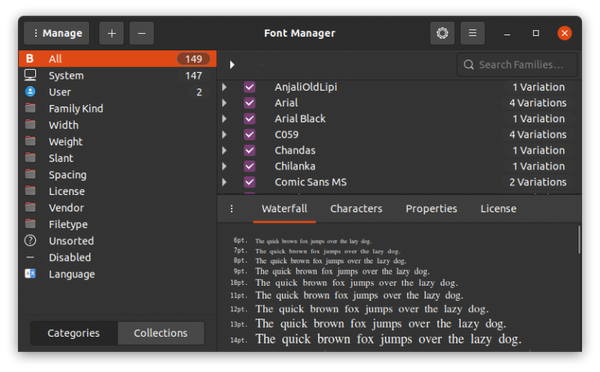
Open the Font Manager. You can see installed fonts and option to install new fonts, remove existing fonts etc here. It’s quite a versatile tool for managing fonts in your Linux system.
To remove Font Manager, use the command below:
sudo apt-get remove font-managerMore ways to customize
Fonts are one of the many ways you can customize your Ubuntu system. Here are a few more:
I hope this quick helped you to install fonts in Ubuntu and other Linux systems. Do let me know if you have questions or suggestions.