- How to Install Perl Modules
- Check installed
- Scenario 1: you’re a ROOT user OR use your own perl
- Use cpan -i module_name
- Use perl -MCPAN -e shell
- Scenario 2: you’re a common user but want to use the system perl
- Install packages from source
- Use cpanm
- Footnote
- Change log
- How To Install Perl Modules on Debian 11
- Installing Pearl Modules on Debian 11
- Step 1: Become root
- Step 2: Install Pearl on Debian 11
- Step 3: Update the System Repositories
- Step 4: Install CPAN
- Step 5: Launch CPAN
- Step 6: Install the Required Pearl Module.
- Step 7: Exit the Wizard
- Conclusion
- About the author
- Karim Buzdar
How to Install Perl Modules
Installing perl modules can be troublesome, especially when you’re not a ROOT user. After a lot of “pain”, I decide to document the two ways to install perl modules (it’s not my creation, just for a memo).
Check installed
# system perl
$ which perl
/usr/bin/perl
$ perl -e ‘use DBD::Oracle; print $DBD::Oracle::VERSION;’
Can’t locate DBD/Oracle.pm in @INC (@INC contains: /home/niuyw/software/perl.5.24.0/lib/site_perl/5.24.0/x86_64-linux /home/software/lib64/perl5 /home/software/share/perl5/ /home/software/vcftools-0.1.15/src/perl /home/niuyw/bin/perl_lib/share/perl5 /home/software/lib64/perl5 /home/software/share/perl5/ /home/software/vcftools-0.1.15/src/perl /home/niuyw/bin/perl_lib/share/perl5 /usr/local/lib64/perl5 /usr/local/share/perl5 /usr/lib64/perl5/vendor_perl /usr/share/perl5/vendor_perl /usr/lib64/perl5 /usr/share/perl5 .) at -e line 1.
# perl installed under my own dirctory
$ ~/software/perl.5.24.0/bin/perl -e ‘use DBD::Oracle; print $DBD::Oracle::VERSION;’
Can’t locate DBD/Oracle.pm in @INC (you may need to install the DBD::Oracle module) (@INC contains: /home/niuyw/software/perl.5.24.0/lib/site_perl/5.24.0/x86_64-linux /home/software/lib64/perl5 /home/software/share/perl5/ /home/software/vcftools-0.1.15/src/perl /home/niuyw/bin/perl_lib/share/perl5 /home/software/lib64/perl5 /home/software/share/perl5/ /home/software/vcftools-0.1.15/src/perl /home/niuyw/bin/perl_lib/share/perl5 /home/niuyw/software/perl.5.24.0/lib/site_perl/5.24.0/x86_64-linux /home/niuyw/software/perl.5.24.0/lib/site_perl/5.24.0 /home/niuyw/software/perl.5.24.0/lib/5.24.0/x86_64-linux /home/niuyw/software/perl.5.24.0/lib/5.24.0 .) at -e line 1.
BEGIN failed—compilation aborted at -e line 1.
# if the module has been installed
$ ~/software/perl.5.24.0/bin/perl -e ‘use URI::Escape; print $URI::Escape::VERSION;\n’
3.31
Scenario 1: you’re a ROOT user OR use your own perl
Use cpan -i module_name
$ ~/software/perl.5.24.0/bin/cpan -i Net::Server
Use perl -MCPAN -e shell
1
2
3
4
5
6
7
8
9
10
11
12
13
14
15
16
17
18
19
20
21
22
23
24
25
26
27
28
29
30
31
32
33
34
35
36
37
38
39
40
41
42
43
44
45
46
47
48
$ ~/software/perl.5.24.0/bin/perl -MCPAN -e shell
Terminal does not support AddHistory.
cpan shell — CPAN exploration and modules installation (v2.16)
Enter ‘h’ for help.
cpan[1]> h
Display Information (ver 2.16)
command argument description
a,b,d,m WORD or /REGEXP/ about authors, bundles, distributions, modules
i WORD or /REGEXP/ about any of the above
ls AUTHOR or GLOB about files in the author’s directory
(with WORD being a module, bundle or author name or a distribution
name of the form AUTHOR/DISTRIBUTION)
Download, Test, Make, Install.
get download clean make clean
make make (implies get) look open subshell in dist directory
test make test (implies make) readme display these README files
install make install (implies test) perldoc display POD documentation
Upgrade installed modules
r WORDs or /REGEXP/ or NONE report updates for some/matching/all
upgrade WORDs or /REGEXP/ or NONE upgrade some/matching/all modules
Pragmas
force CMD try hard to do command fforce CMD try harder
notest CMD skip testing
Other
h,? display this menu ! perl-code eval a perl command
o conf [opt] set and query options q quit the cpan shell
reload cpan load CPAN.pm again reload index load newer indices
autobundle Snapshot recent latest CPAN uploads
# search modules using keyword
cpan[2]> i /scws/
Distribution XUERON/Text-Scws-0.01.tar.gz
Module < Text::Scws (XUERON/Text-Scws-0.01.tar.gz)
2 items found
# install modules
cpan[3]> install Net::Server
Net::Server is up to date (2.009).
# quit
cpan[5]> q/quit/exit
Scenario 2: you’re a common user but want to use the system perl
Install packages from source
mkdir -p /home/niuyw/bin/perl_lib
1
2
3
4
5
6
7
8
9
10
11
12
13
14
15
16
17
18
19
20
$ tar zxf Capture-Tiny-0.46.tar.gz && cd Capture-Tiny-0.46
$ which perl
/usr/bin/perl
# specify the path to install
$ perl Makefile.PL PREFIX=/home/niuyw/bin/perl_lib
Checking if your kit is complete.
Looks good
Generating a Unix-style Makefile
Writing Makefile for Capture::Tiny
Writing MYMETA.yml and MYMETA.json
$ make && make install
cp lib/Capture/Tiny.pm blib/lib/Capture/Tiny.pm
Manifying 1 pod document
Manifying 1 pod document
Appending installation info to /home/niuyw/bin/perl_lib/lib64/perl5/perllocal.pod
$ perl -e ‘use Capture::Tiny; print $Capture::Tiny::VERSION;’
0.46
export PERL5LIB=$PERL5LIB:/home/niuyw/bin/perl_lib/share/perl5:/home/niuyw/bin/perl_lib/lib64/perl5
Use cpanm
# download
$ wget https://cpan.metacpan.org/authors/id/M/MI/MIYAGAWA/App-cpanminus-1.7044.tar.gz
# install
$ tar zxf App-cpanminus-1.7044.tar.gz
$ cd App-cpanminus-1.7044
$ perl Makefile.PL PREFIX=/home/niuyw/bin/perl_lib
$ make && make install
1
2
3
4
5
6
7
8
9
10
11
12
13
14
15
16
17
18
19
20
21
22
23
24
25
26
27
28
29
30
31
32
33
34
35
36
37
38
39
40
41
42
43
44
45
46
47
48
$ ~/bin/perl_lib/bin/cpanm -h
Usage: cpanm [options] Module [. ]
Options:
-v,—verbose Turns on chatty output
-q,—quiet Turns off the most output
—interactive Turns on interactive configure (required for Task:: modules)
-f,—force force install
-n,—notest Do not run unit tests
—test-only Run tests only, do not install
-S,—sudo sudo to run install commands
—installdeps Only install dependencies
—showdeps Only display direct dependencies
—reinstall Reinstall the distribution even if you already have the latest version installed
—mirror Specify the base URL for the mirror (e.g. http://cpan.cpantesters.org/)
—mirror-only Use the mirror’s index file instead of the CPAN Meta DB
-M,—from Use only this mirror base URL and its index file
—prompt Prompt when configure/build/test fails
-l,—local-lib Specify the install base to install modules
-L,—local-lib-contained Specify the install base to install all non-core modules
—self-contained Install all non-core modules, even if they’re already installed.
—auto-cleanup Number of days that cpanm’s work directories expire in. Defaults to 7
Commands:
—self-upgrade upgrades itself
—info Displays distribution info on CPAN
—look Opens the distribution with your SHELL
-U,—uninstall Uninstalls the modules (EXPERIMENTAL)
-V,—version Displays software version
Examples:
cpanm Test::More # install Test::More
cpanm MIYAGAWA/Plack-0.99_05.tar.gz # full distribution path
cpanm http://example.org/LDS/CGI.pm-3.20.tar.gz # install from URL
cpanm ~/dists/MyCompany-Enterprise-1.00.tar.gz # install from a local file
cpanm —interactive Task::Kensho # Configure interactively
cpanm . # install from local directory
cpanm —installdeps . # install all the deps for the current directory
cpanm -L extlib Plack # install Plack and all non-core deps into extlib
cpanm —mirror http://cpan.cpantesters.org/ DBI # use the fast-syncing mirror
cpanm -M https://cpan.metacpan.org App::perlbrew # use only this secure mirror and its index
You can also specify the default options in PERL_CPANM_OPT environment variable in the shell rc:
export PERL_CPANM_OPT=»—prompt —reinstall -l ~/perl —mirror http://cpan.cpantesters.org»
Type `man cpanm` or `perldoc cpanm` for the more detailed explanation of the options.
~/bin/perl_lib/bin/cpanm -l /home/niuyw/bin/perl_lib Log::Log4perl Math::CDF
Footnote
Change log
- 20180413: create the note
- 20180414: change the setting of PERL5LIB
- 20190402: add the section “use cpanm”
How To Install Perl Modules on Debian 11
![]()
Pearl is one of the most simplified high level-programming languages that quite resembles C and C++. Still, it is somehow better because of its rapid development cycle and downloadable pearl modules, which are the same as libraries in Java and C++. You must install the relative function on your system to use a particular function.
In this article, we will discuss the only method used wherein the Pearl Modules could be installed on your system.
Installing Pearl Modules on Debian 11
To install the Pearl Modules on your system, follow these steps.
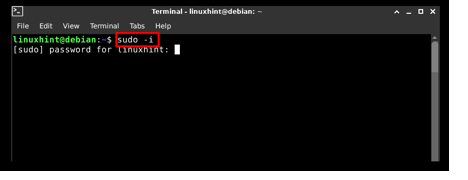
Step 1: Become root
To avoid complications like permissions, use the following command to become root and then insert the user password. Don’t worry if you can’t see anything being typed because it may not show the typing, but it is being done. So enter your password, then hit the “enter” button.
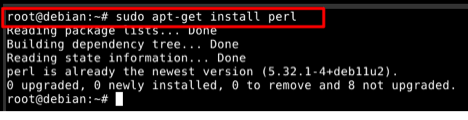
Step 2: Install Pearl on Debian 11
By executing the following command in the terminal, you can install Pearl on Debian 11.
And it will download and install the Pearl on your system if it is not yet installed.
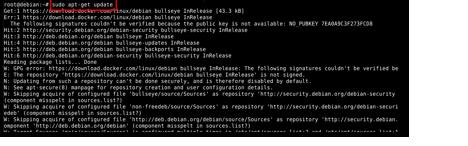
Step 3: Update the System Repositories
The System Repositories need to be updated, and it can be done by using the following command:
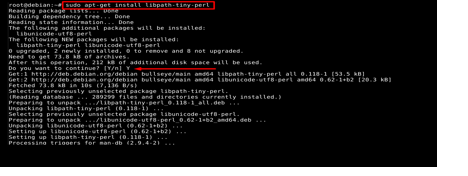
Step 4: Install CPAN
CPAN is a repository through which you can install all Pearl Modules on your system, which can be installed using this command.
You need to press “Y” and then the Enter button to begin the process when prompted, as seen in the following image:
Step 5: Launch CPAN
When you execute the command provided, the CPAN interface will open.
Once you execute the command above, a message will appear asking for automatic configuration. It is highly recommended to keep it automatic unless you are an expert; type “Yes” and then press “Enter” to go with the default configuration.
It will take a few seconds and will become ready to be used.
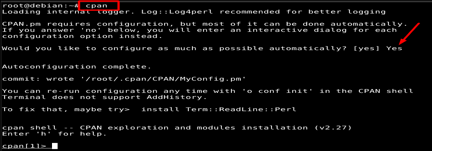
You can get more help by Entering “as seen in the image”.
Step 6: Install the Required Pearl Module.
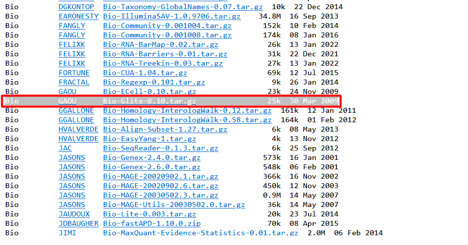
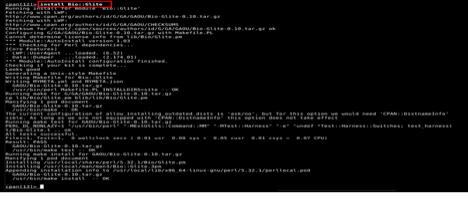
There is a wide variety of Pearl Modules available at http://www.cpan.org/modules/index.html. All you need to do is select anything from it and type the name of it as shown below:
We chose Bio-Glite, and the method to type the name shown below:
It would be best to be careful while typing because mistakes will lead to errors until you correctly add the name.
Step 7: Exit the Wizard
Once you install the required Pearl modules, type “exit” and press Enter key to exit the wizard.

Conclusion
Almost every high-level programming language has libraries or modules, and Pearl is one of them. Using these modules, you can do wonders as they provide you with functions that are required in different aspects, and their number is enormous, which makes the Pearl one of the easiest to learn out there.
Today, we installed Pearl and shed light on the installation of Pearl Modules. Following the step-by-step guide makes it easy to install any module using the CPAN repository.
About the author
Karim Buzdar
Karim Buzdar holds a degree in telecommunication engineering and holds several sysadmin certifications. As an IT engineer and technical author, he writes for various web sites. He blogs at LinuxWays.