How to install Python in Linux correctly
Let’s explore Python and Pip in this post and learn «How to install python in Linux«. We will discuss the latest version available today for Python (3.9.1) and pip (20.3.3) . Also, I will explain about risks of uninstalling Python packages shipped by default with ubuntu 20.04.
I am confident, even if you are new to Python, you will be able to install it easily, following this post step by step. So let’s deep dive in.
- What are Python and pip
- Pre-requisite to install Python 3.9
- How to check Python and pip version
- 1.) Open Terminal in Ubuntu
- 2.) Run python3 command to check the default version
- 3.) Check for existing pip version in ubuntu 20.04
- How to install Python on Linux using apt
- Step1- Install supporting additional packages
- Step2- Add deadsnakes ppa repository to install latest Python 3.9
- Step3- Update ubuntu repository
- Step4- Install latest Python 3 (Version 3.9.1)
- Step5- Check python version
- Step6- Open python and run your first program
- How to install the latest python3-pip in Linux
- Step7- Install python3-pip package using apt command
- Step8- Check python3-pip version
- Step9- Install curl command first.
- Step10- Download pip from bootstrap.pypa.io website
- Step11- Upgrade python3-pip version to pip-20.3.3
- Step12 (optional)- Add pip3.9 directory to PATH.
- Step13- Check pip version
- How to uninstall Python3 from Ubuntu 20.04
- How to Fix or restore, if you have broken your system already while removing the default python package?
- Video Tutorial
- Conclusion
- About The Author
- Dev
- Установка Python 3 в Ubuntu
- Установка Python в Ubuntu 20.04
- Установка Python 3.10 в Ubuntu
- Выводы
What are Python and pip
Python is a simple, Object-oriented, interpreted, high-level programming language with dynamic semantics. Due to its non-complicated syntax and fast edit-test-debug cycle, the Programmer community loves it. Python also reduces the cost of software management due to its simple nature.
Pip is a package manager for python, it allows you to install and manage additional libraries and dependencies that are not distributed or part of the standard library.
Pre-requisite to install Python 3.9
- A system with Ubuntu 20.04
- Internet access
- A user account with sudo root access
How to check Python and pip version
Approximately all Linux versions are shipped with python by default. Earlier it was Python2.x but now everyone is moving towards Python3. Depending upon your distro, it may be the n-1 or older version of Python. I will recommend you to check the existing version of Python already installed in ubuntu 20.04.
The same doesn’t apply to the pip package. You may need to install pip in Ubuntu 20.04 or your Linux distro. Let’s first start with checking the existing version of python and pip as follows —
1.) Open Terminal in Ubuntu
Press Ctrl + Alt + t> on your keyboard to open terminal.
2.) Run python3 command to check the default version
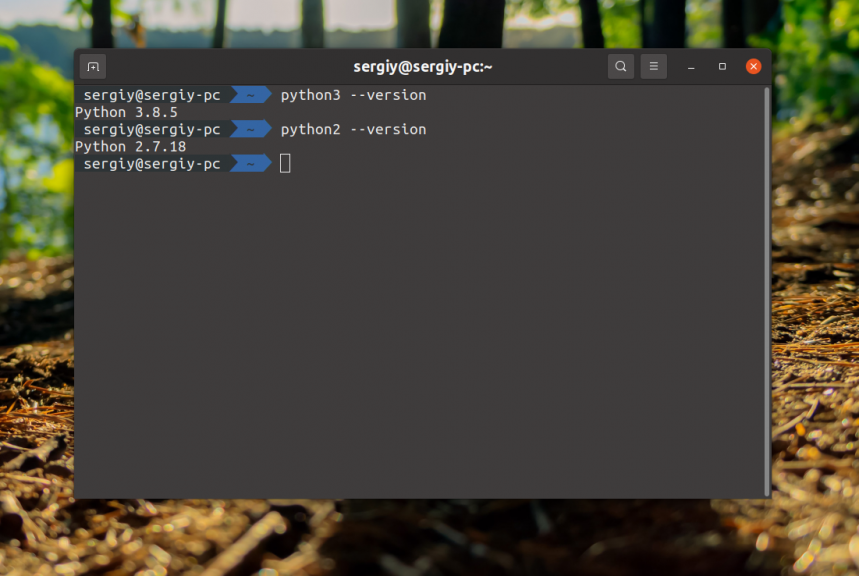
Run python3 —version command in ubuntu terminal.

As you can see in image, Python 3.8.5 is already installed in my Ubuntu 20.04.
3.) Check for existing pip version in ubuntu 20.04
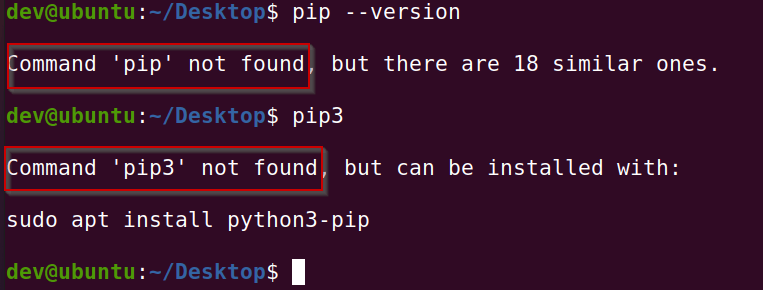
Run pip —version command to check, whether pip is also installed.
$ pip --version OR $ pip3 --version
So pip is not installed by default in Ubuntu . The error reported as «command pip not found» or command ‘pip3’ not found in our example.
While writing this article, Python 3.9.1 is the latest version available. I will show you the correct way to install Python 3.9.1 and pip 20.3.3 in Linux.
How to install Python on Linux using apt
Step1- Install supporting additional packages
Install software-properties-common package, which provides an abstraction of used apt repositories. It allows you to manage distribution and independent software vendors by adding or removing PPAs.
$ sudo apt install software-properties-common

Step2- Add deadsnakes ppa repository to install latest Python 3.9
Deadsnakes repository contains the latest Python version. Run add-apt-repository command to add deadsnakes ppa to ubuntu 20.04.
$ sudo add-apt-repository ppa:deadsnakes/ppa
Press Enter to continue adding the repository.
Step3- Update ubuntu repository
Run apt command to update or refresh ubuntu repository after adding new deadsnakes ppa.

Step4- Install latest Python 3 (Version 3.9.1)
$ sudo apt install python3.9

Type «Y» and press Enter to install the package.
Step5- Check python version

Step6- Open python and run your first program
Open python and type print(«My First Python Program») in python3.9 console and check the output. It will print the statement «My First Python Program«.
Python 3.9.1 (default, Dec 8 2020, 02:26:20)
[GCC 9.3.0] on linux
Type «help», «copyright», «credits» or «license» for more information.
print(«My First Python Program»)
My First Python Program

Type exit() or press Ctrl + D> to come out from python shell.
How to install the latest python3-pip in Linux
By default, python3-pip is not installed in Ubuntu 20.04 and installing it from apt will install the old pip package. So let’s see step by step installation of the latest python3-pip version (20.3.3). It will be a two-step process, first, we will install pip 20.0.2 using the apt repository. Then, download and install the latest pip package i.e. 20.3.3 version.
Step7- Install python3-pip package using apt command
$ sudo apt install python3-pip

Step8- Check python3-pip version

Here pip version 20.0.2 got installed and we need to upgrade it to version 20.3.3. Installing package 3.8 from apt will help to meet all dependent packages and libraries which will be required for pip 20.3.3. If you will skip this step, you may get dependent modules error.
Step9- Install curl command first.
If curl is already installed in your system, you can skip this step. Most of the Ubuntu 20.04 don’t have curl installed by default. So use apt install command to install it. Curl is required to execute step 10.

Step10- Download pip from bootstrap.pypa.io website
Now you need to download get-pip from the bootstrap.pypa.io website using the curl command as shown in the image.
$ curl https://bootstrap.pypa.io/get-pip.py -o get-pip.py
Step11- Upgrade python3-pip version to pip-20.3.3
Run the python3.9 command to execute the » get-pip.py » package file you downloaded. It will automatically download and install the latest pip in your Ubuntu.

Step12 (optional)- Add pip3.9 directory to PATH.
This can be achieved by editing /etc/environment files using your favourite editor. Otherwise, exporting and appending the «PATH» variable for the local user profile will also do the trick. Make sure you add ~/.local/bin/ in PATH variable.
Step13- Check pip version

Congrats!! till this point, you have installed the latest Python 3.9.1 and pip 20.3.3 successfully.
Further, I want to draw your attention to the problems of uninstalling the default python package. So keep reading, it will definitely save your from breaking your system in future.
How to uninstall Python3 from Ubuntu 20.04
I always provide uninstallation steps of all software in my posts. But I will ask you to avoid this in the case of python. If you will try removing the default python shipped with ubuntu, it will break your system.
Don’t uninstall default python shipped with ubuntu
It’s my recommendation, not to uninstall default python released with your Ubuntu Linux distro. In my case, python3.8 got shipped with my ubuntu 20.04. Running «sudo apt-get remove python*» can break your system. A lot of packages including firefox, gnome and many core packages are dependent on python.
Below mentioned is the list of dependent packages shown in the image. These packages will also remove with the uninstall of default Python 3.8. Which is shipped with Ubuntu 20.04 and it will break our system.
$ sudo apt-get remove python3.8

You can keep more than one version of python in your Linux distro. So there is no problem keeping the default Python3.8 and the latest Python3.9 version. You can simply change the default path or alias if required. Additionally, if you work on different projects which, require a different version of Python. I will recommend using a virtual environment (Python—venv).
To avoid all kinds of mess with your system and to perform testing like me. I will suggest you install VMware workstation player in your system and install ubuntu 20.04 on it.
How to Fix or restore, if you have broken your system already while removing the default python package?
In case you have tried removal of python using the «apt-get remove python» command and broke your system. Follow these steps to restore —
- Press Ctrl + Alt + F1> to get shell or boot from ubuntu iso image into rescue mode with networking.
- Then try reinstalling python and gnome again.
$ sudo apt-get install python3-all
$ sudo apt-get install python3-all
sudo apt-get install --reinstall ubuntu-desktopVideo Tutorial
If you don’t like reading, watch out for this quick video on «How to install the latest Python and pip in Ubuntu 20.04«.
Conclusion
You have learned «How to install Python in Linux«. We used ubuntu 20.04 as a Linux host and installed the latest Python 3.9.1 and PIP 20.3.3. Also learned about risks and aftermath of uninstalling default Python shipped with ubuntu 20.04. Nowadays, Microsoft also recommends installing development software on WSL (windows subsystem for Linux).
About The Author
Dev
Hi, My Name is Dev and as an Information Technology professional, My Life revolves around Gadgets, Servers, Storage, Software, Operating system, Internet and Cloud computing. My philosophy is “being healthy” and follow your “passion or hobbies” to make your life interesting. Please feel free to contact me for any questions, feedback and suggestions.
Установка Python 3 в Ubuntu
Python — это один из самых популярных языков программирования для Linux. На нем написано множество различных инструментов и библиотек. Кроме того, Python популярен среди разработчиков, потому что на нем очень просто и быстро программировать, и вообще, его просто освоить.
По умолчанию в Ubuntu уже поставляется интерпретатор Python, но сейчас в официальных репозиториях доступна только версия 3.5 и версия 2.7 для совместимости со старыми скриптами. Но самая новая версия на данный момент — 3.8. Однако уже доступны и более новые версии. В этой статье мы рассмотрим как установить Python 3 в Ubuntu 20.04.
Установка Python в Ubuntu 20.04
Сначала посмотрите какая версия Python установлена в вашей системе. Для этого выполните команду:
Новая версия, Python 3.9 доступна в репозиториях universe. Поэтому вам нет необходимости добавлять PPA, достаточно просто обновить систему и установить пакет нужной версии. Для этого наберите:
sudo apt update
sudo apt install python3.9
После завершения установки снова можно проверить версию:
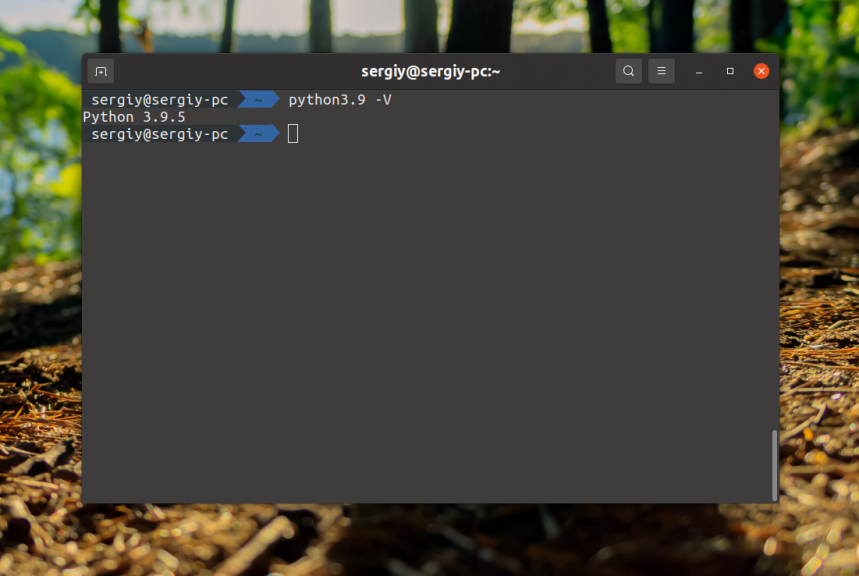
Обратите внимание, что старая версия никуда не делась, она по-прежнему доступна по имени python3, а новая теперь может быть загружена командой python 3.9. Если вы хотите использовать эту версию вместо 3.8 для запуска всех программ нужно выбрать её в качестве версии по умолчанию. Но я бы не рекомендовал этого делать. Множество системных программ написаны на Python и протестированы именно с версией, поставляемой по умолчанию. Если вы измените версию что-то может перестать работать. Если вы всё же решились надо сначала добавить альтернативы:
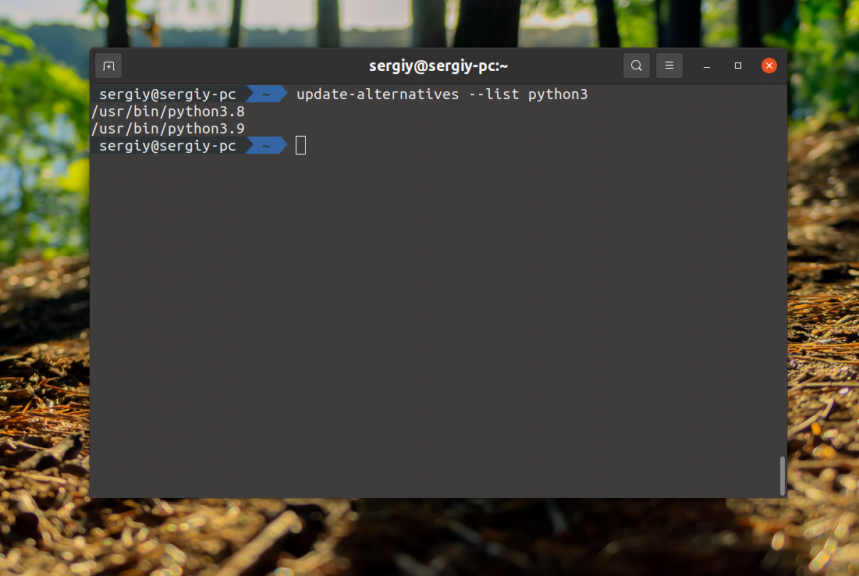
sudo update-alternatives —install /usr/bin/python3 python3 /usr/bin/python3.8 1
sudo update-alternatives —install /usr/bin/python3 python3 /usr/bin/python3.9 2
update-alternatives —list python3
Теперь мы можем выбрать нужную нам версию и переключаться по необходимости. Для настройки используйте команду config:
sudo update-alternatives —config python3
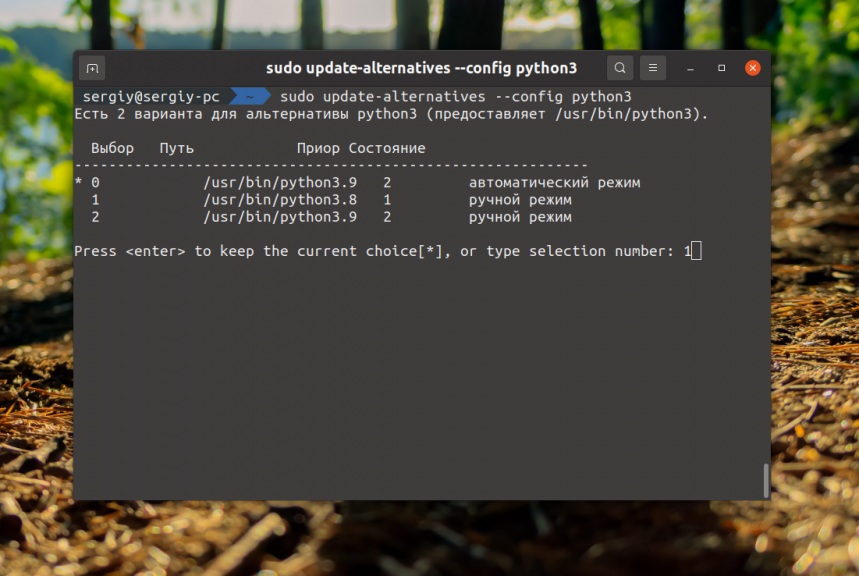
В запросе ввода нужно указать номер программы, которую следует использовать по умолчанию.
Установка Python 3.10 в Ubuntu
На момент написания статьи Python 3.10 ещё находится в разработке и дата выпуска намечена на октябрь 2021 года. Однако альфа версия уже доступна и вы можете её установить и потестировать если захотите.
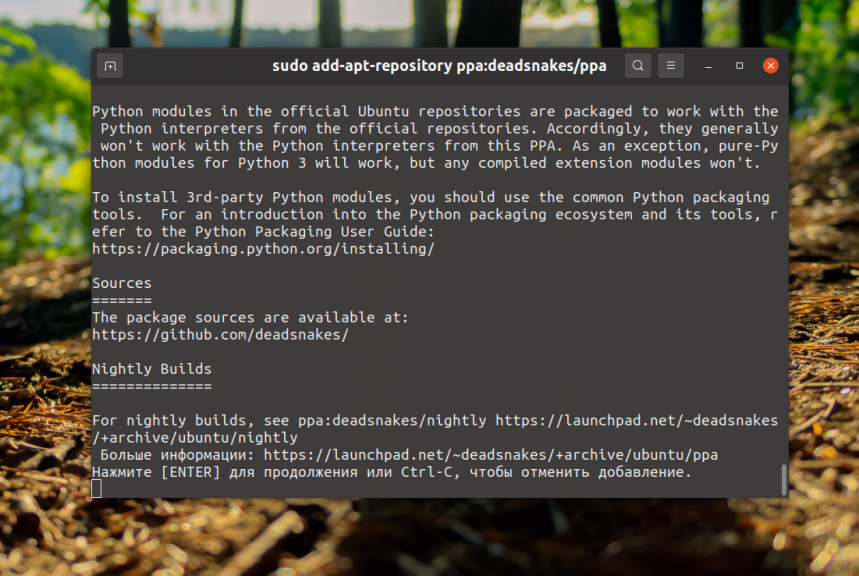
sudo add-apt-repository ppa:deadsnakes/ppa
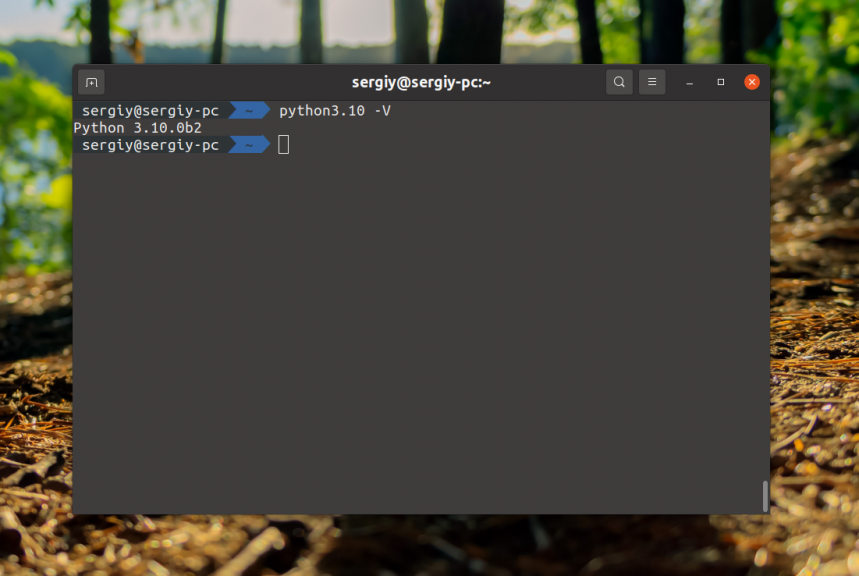
Установка Python 3.10 в Ubuntu 20.04 выполняется командой:
sudo apt install python3.10
Готово, Python установлен и вы можете тестировать его и настраивать версии как описано выше. Для правильно ли прошла установка Python 3 Ubuntu, опять же выполните:
Выводы
В этой статье мы рассмотрели как установить Python на Ubuntu 20.04 и более ранних версий. Рассмотрели как выполняется установка из официальных репозиториев, из PPA и выбор версии. С выбором версии будьте аккуратны, не трогайте python, только python3, как я уже говорил, на Python 2.7 написано множество системных инструментов, и если вы попытаетесь запустить их не той версией интерпретатора, то ничего не получится. Если у вас остались вопросы, спрашивайте в комментариях!
Обнаружили ошибку в тексте? Сообщите мне об этом. Выделите текст с ошибкой и нажмите Ctrl+Enter.