- Install and Use Rsync on Ubuntu
- Install Rsync on Ubuntu
- Use Rsync on Ubuntu
- Sync Files Only: No option
- Sync Files and Directories Recursively: -r Option
- Sync Everything: -a Option
- Sync Data Remotely
- Step 1: Verify the reachability of the remote machine
- Step 2: Sync the Directories
- Step 3: Verify the Successful Process
- Uninstall Rsync on Ubuntu
- Conclusion
Install and Use Rsync on Ubuntu
The rsync command is an open source utility that provides fast and versatile file transfer and synchronization.
It is widely used as part of backup systems, for mirroring, as well as for file synchronization across different systems. Rsync uses a delta-transfer algorithm to minimize network traffic, making it very efficient over slow links.
This tutorial teaches you how to install and use the rsync command to sync files locally or remotely. Let’s start by installing and uninstalling the tool.
Table of Contents
Install Rsync on Ubuntu
The first step toward using the rsync tool is to check whether it exists on your system.
Otherwise, install the tool using apt, apt-get, or aptitude.
First we’ll have to update our package index:
sudo apt update sudo apt upgrade
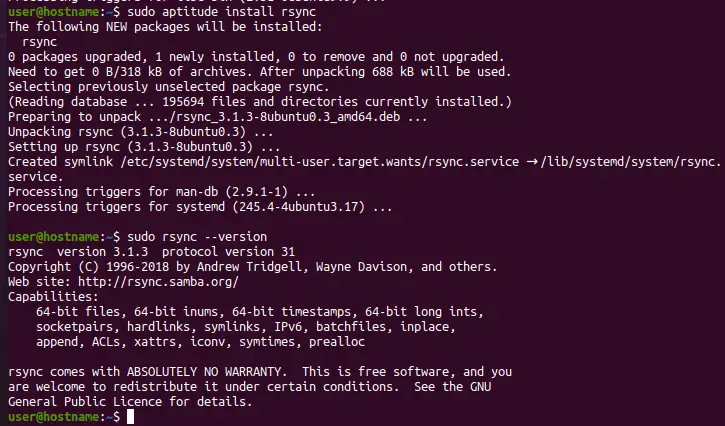
Next we’ll install rsync using the APT package manager.
Use Rsync on Ubuntu
You can backup files across local directories or between a directory on a local machine and another on a remote machine.
rsync [source directory]/* [destination directory] rsync [option] [source directory] [destination directory]
rsync [option] [source directory] [remote user]@[remote IP address or hostname]:[destination directory]
rsync [option] [remote user]@[remote IP address or hostname]:[source directory]:[destination directory]
rsync options control the depth of resource transfer. For example,
- -n or —dry-run : run the rsync command without making changes,
- -r : transfer subdirectories and files recursively.
- -a : transfer subdirectories and files with configurations.
- -z : compress massive data during transfer and decompress it on reaching the destination directory.
- -P : show the progress of the sync process.
- —delete : remove data from the destination directory before syncing the source and destination directories.
Sync Files Only: No option
First, create a directory with two files and a subdirectory with a file.
mkdir sourceDirectory cd sourceDirectory touch file1 file2 mkdir subDirectory && cd subDirectory touch file3
Next, create the destination directory: a sibling to the source directory.
cd mkdir destinationDirectory
Now sync the sourceDirectory and destinationDirectory directories. Before that it, would be best to dry-run the process to confirm the resources we are about to sync.
rsync --dry-run sourceDirectory/* destinationDirectory rsync sourceDirectory/* destinationDirectory ls destinationDirectory
On running the rsync command with the —dry-run option, the system reports it is about to sync files between the two directories but skip the subDir subdirectory. It transfers the files, excluding the subdirectory and its contents on running the rsync command without the —dry-run option.
The asterisk * tells the system to sync the file inside the source directory.
rsync --dry-run sourceDirectory/* destinationDirectory
skipping directory subDirectory
rsync sourceDirectory/* destinationDirectory
skipping directory subDirectory

Here is how you can sync all files and subdirectories recursively.
Sync Files and Directories Recursively: -r Option
Let’s delete and recreate the destination directory before recursively copying all source directory’s content into it. Before that, we can verify the resources we are about to sync.
rsync -r --dry-run [source directory] [destination directory]
We can also introduce the verbose -v option to echo the resources we are about to back up or just backed up.
rsync -rv --dry-run [source directory] [destination directory]
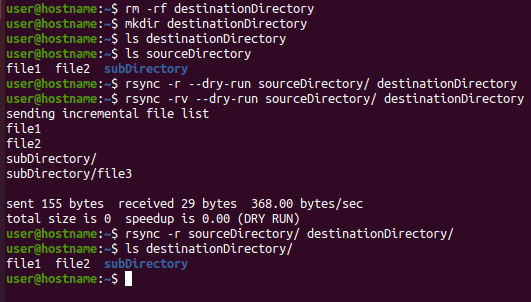
This time around, even the subdirectory was transferred.
rm -rf destinationDirectory mkdir destinationDirectory ls destinationDirectory ls sourceDirectory
rsync -r --dry-run sourceDirectory/ destinationDirectory rsync -rv --dry-run sourceDirectory/ destinationDirectory
sending incremental file list file1 file2 subDirectory/ subDirectory/file3 sent 155 bytes received 29 bytes 368.00 bytes/sec total size is 0 speedup is 0.00 (DRY RUN)
rsync -r sourceDirectory/ destinationDirectory/ ls destinationDirectory/
Note: Ignoring the slash / after the source sourceDirectory directory syncs even the source directory.
Sync Everything: -a Option
The most familiar way to use rsync on Ubuntu is copying files and directories into another location using the -a (archive) option.
The -a option preserves the resource configurations like modifications, groups, owners, and timestamps when syncing files and directories between directories.
Let’s create a directory with two text files, then copy the first file into a temporary location.
mkdir dir && cd dir touch first.txt second.txt cd .. rsync -av dir/first.txt /tmp/
sending incremental file list first.txt sent 102 bytes received 35 bytes 274.00 bytes/sec total size is 0 speedup is 0.00
We can then verify the effect of the copy action using ls and the grep commands.
Likewise, we can copy an entire directory with files into another directory.
sending incremental file list dir/ dir/first.txt dir/second.txt sent 192 bytes received 58 bytes 500.00 bytes/sec total size is 0 speedup is 0.00
Sync Data Remotely
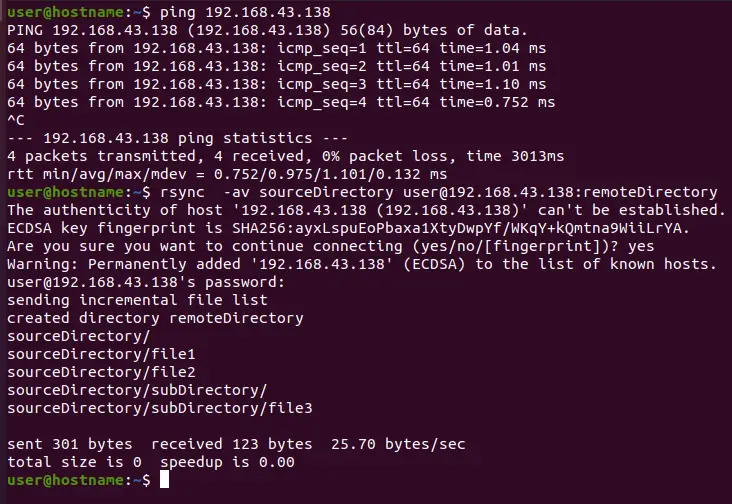
You can also use the rsync tool to sync files between your machine and a remote machine running the Ubuntu server. For example, I have configured a second Ubuntu machine called username2 with IP address 192.168.43.138 . Here is how to copy the sourceDirectory ‘s content into a new directory on the remote machine.
Step 1: Verify the reachability of the remote machine
First, verify the reachability of the remote machine.
ping [hostname or ip address]
The next step is to transfer the source directory into a folder in the remote machine.
Step 2: Sync the Directories
Transfer the source directory into a remote machine’s directory.
I am transferring the directory we created in example 1 above into a new remote directory called remoteDirectory .
The local machine checks whether the remote machine is reachable via SSH. It then prompts to create an SSH connection between the two machines before echoing the transferred resources.
Step 3: Verify the Successful Process
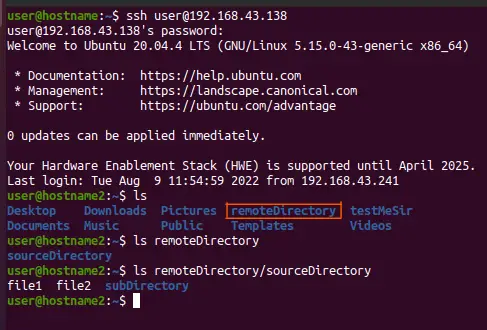
Lastly, let’s confirm the successful transfer. SSH into the remote machine and inspect if you created a directory remoteDirectory with some content.
ssh [email protected] ls ls remoteDirectory ls remoteDirectory/sourceDirectory
And voila, the entire source directory was transferred with its contents!
Uninstall Rsync on Ubuntu
We can easily uninstall rsync using a few methods:
sudo apt -y autoremove rsync
sudo apt -y autoremove --purge rsync
Now that you know to get or remove the rsync tool, let’s dive into using it.
Conclusion
You can backup files locally or remotely on Ubuntu using the rsync command with options like -a and -r . Before that, you should install the tool, as shown in this tutorial.