- How to Install Kernel Headers in Ubuntu and Debian
- Install Kernel Headers in Ubuntu and Debian
- How to install kernel headers on Debian
- Installing kernel headers on Debian 11:
- What is the Linux kernel?
- What are Linux Kernel Headers?
- Conclusion:
- About the author
- David Adams
- How to Install Kernel Headers in CentOS 7
- Install Kernel Headers in CentOS 7
- How to Install Linux Headers on Kali Linux
- Installing Linux Headers Using APT
- Installing Kernel Headers Manually
- Conclusion
- About the author
- John Otieno
How to Install Kernel Headers in Ubuntu and Debian
In our last article, we have explained how to install kernel headers in CentOS 7. Kernel Headers contain the C header files for the Linux kernel, which offers the various function and structure definitions required when compiling any code that interfaces with the kernel, such as kernel modules or device drivers and some user programs.
It is very important to note that the kernel headers package you install should match with the currently installed kernel version on your system. If your kernel version ships with the default distribution installation or you have upgraded your Kernel using dpkg or apt package manager from the Ubuntu or Debian base repositories, then you must install matching kernel headers using package manager only. And if you’ve compiled kernel from sources, you must also install kernel headers from sources.
In this article, we will explain how to install Kernel Headers in Ubuntu and Debian Linux distributions using default package manager.
Install Kernel Headers in Ubuntu and Debian
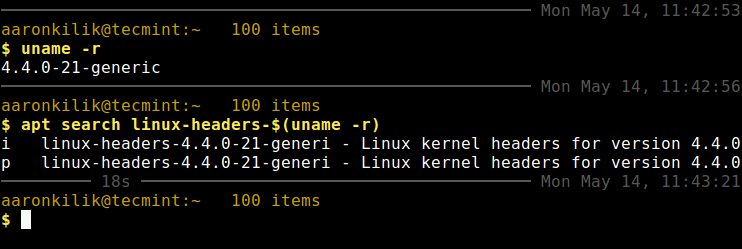
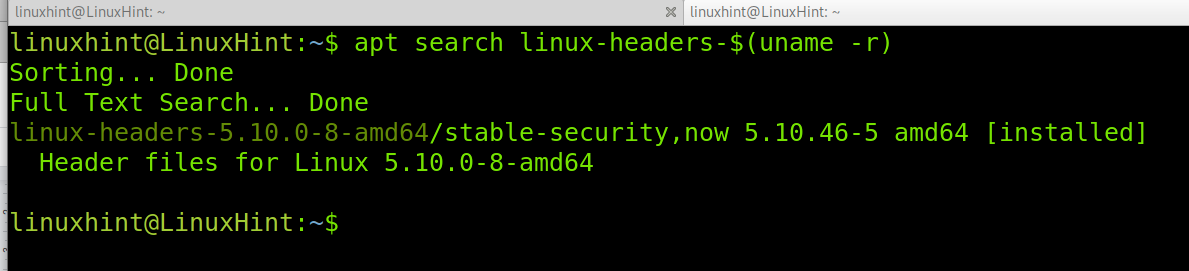
First check your installed kernel version as well as kernel header package that matches your kernel version using following commands.
$ uname -r $ apt search linux-headers-$(uname -r)
On Debian, Ubuntu and their derivatives, all kernel header files can be found under /usr/src directory. You can check if the matching kernel headers for your kernel version are already installed on your system using the following command.
$ ls -l /usr/src/linux-headers-$(uname -r)

From the above output, it’s clear that the matching kernel header directory doesn’t exist, meaning the package is not yet installed.
Before you can install the appropriate kernel headers, update your packages index, in order to grab information about the latest package releases, using the following command.
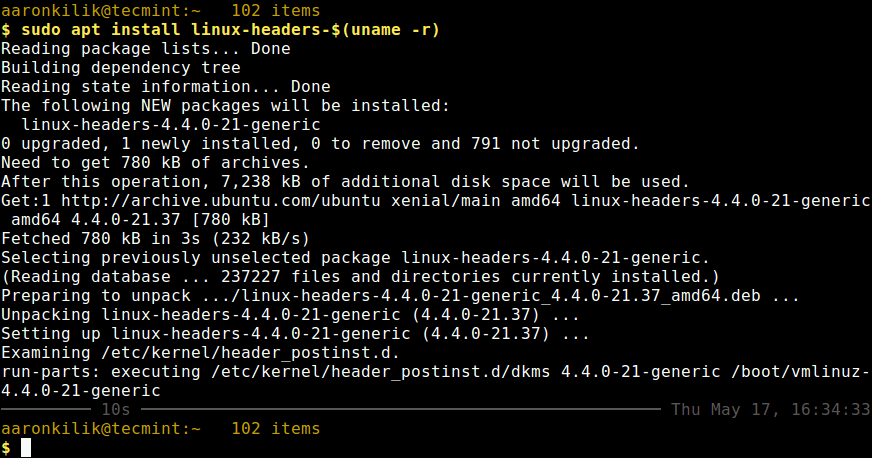
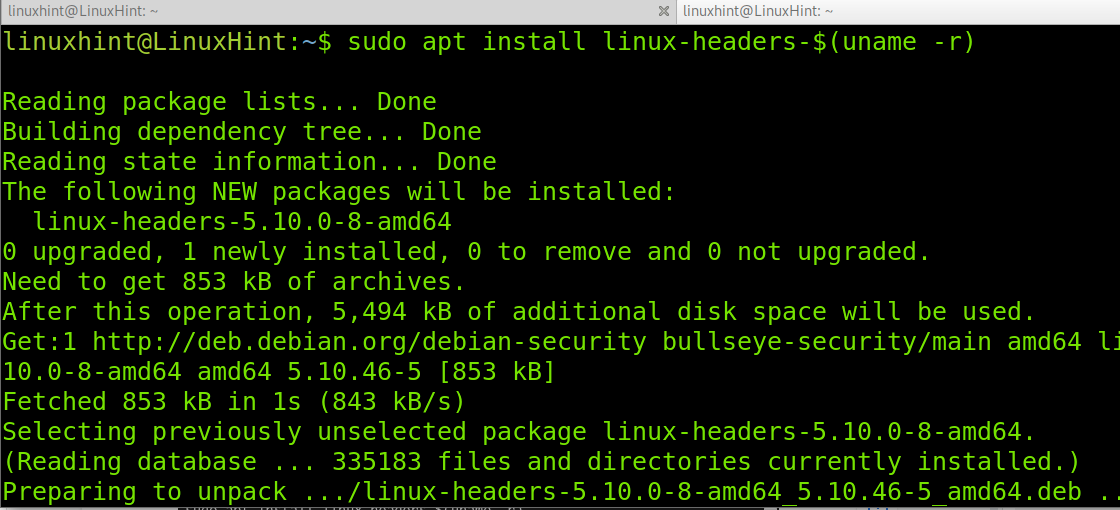
Then run the following command that follows to install the Linux Kernel headers package for your kernel version.
$ sudo apt install linux-headers-$(uname -r)
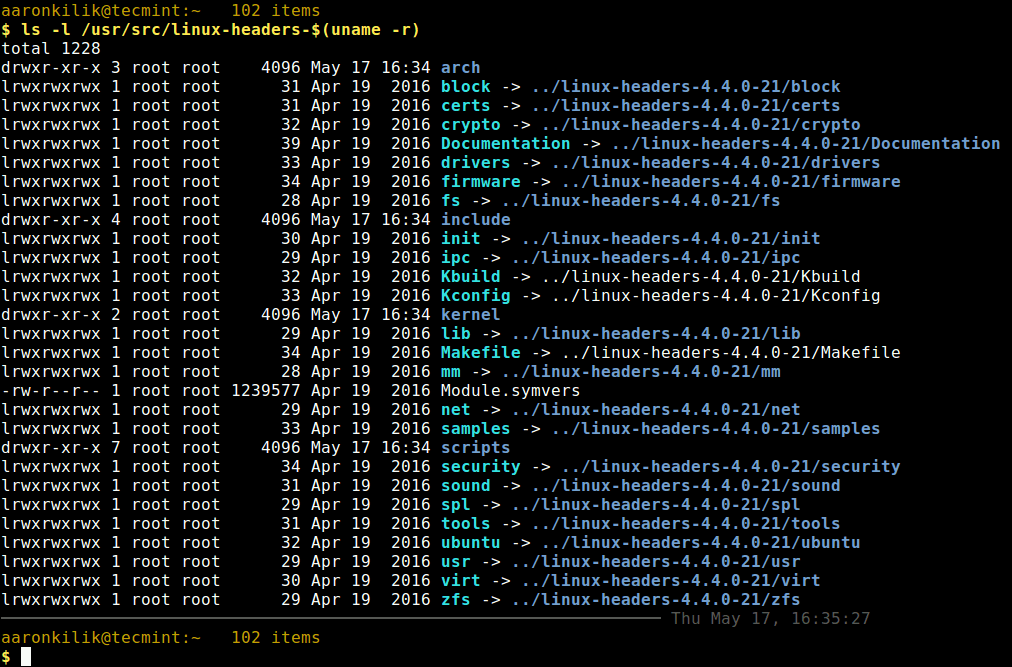
Next, check if the matching kernel headers have been installed on your system using the following command
$ ls -l /usr/src/linux-headers-$(uname -r)
That’s all! In this article, we have explained how to install kernel headers in Ubuntu and Debian Linux and other distributions in the Debian family tree.
Always keep in mind that to compile a kernel module, you will need the Linux kernel headers. If you have any quires, or thoughts to share, use the comment form below to reach us.
How to install kernel headers on Debian
![]()
All instructions in this tutorial are also useful for other Debian-based Linux distributions such as Ubuntu.
Installing kernel headers on Debian 11:
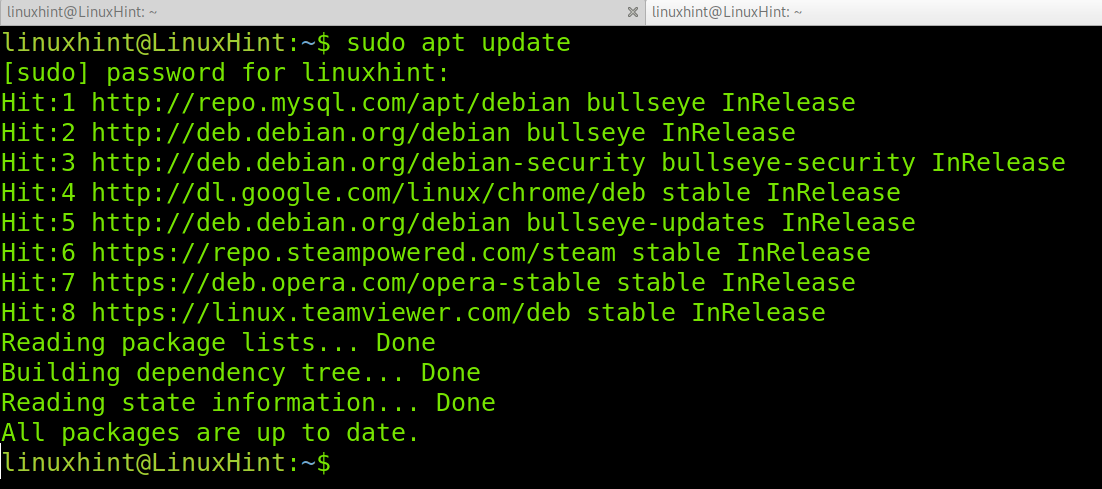
First, update the information on your software using apt, as shown in the example below.
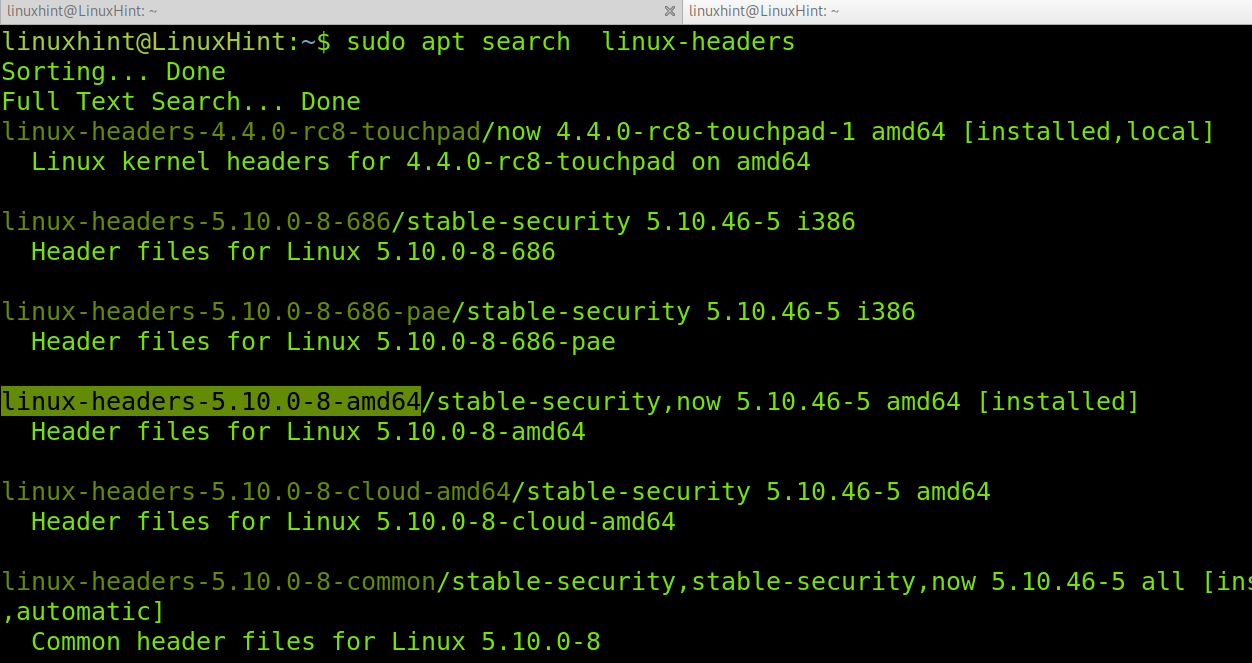
Check for available Linux kernel headers by running the following command.
For a different simple way to list available headers, run the command below.
To install the Linux kernel headers, run the command shown in the screenshot below.
Using Debian 11 x64 or using the second method to find the header, you can also run the following command.

In my case, the headers were installed in the previous example, so the output says it’s already properly installed.
What is the Linux kernel?
Some experts say the kernel is the core component of an Operating System; others disagree and say the kernel is not part of the OS but a vital component needed by any OS. The function of the kernel is to manage the device resources for them to interact with the operating system and applications. We can think about the kernel as a translator allowing communication between the hardware and the software. In order to manage resources properly, the kernel has full privileges. In some cases, the installed kernel may lack the proper code to allow the hardware and software interaction; that’s when we need to install kernel headers.
What are Linux Kernel Headers?
Linux kernel headers are components usually used to compile drivers and loadable modules adding support to the kernel. For this purpose, kernel headers include C headers with functions and structures needed to compile modules. Thanks to kernel headers, modules or drivers can interact with the kernel. It is important to clarify the kernel headers are part of the kernel, despite being distributed separately.
Dealing with kernel headers is easier than dealing with whole kernel sources. If you are looking for drivers for a device, you’ll use kernel headers, while to rebuild the whole kernel, you will need whole kernel sources. By default, some Linux distributions, including Debian, include the kernel headers to be used if needed (this tutorial assumes you discarded or removed the headers). If all your hardware works properly, you probably won’t need to deal with kernel headers.
Conclusion:
As you can see, installing Linux kernel headers on Debian or Ubuntu is pretty easy. Any Linux-level user should know the function of kernel headers and how to install them. Users must pay attention to the kernel headers they download that are compatible with their system, not only the architecture but also the version.
Thank you for reading this tutorial explaining how to install kernel headers on Debian. Keep following Linux Hint for additional Linux tips and tutorials.
About the author
David Adams
David Adams is a System Admin and writer that is focused on open source technologies, security software, and computer systems.
How to Install Kernel Headers in CentOS 7
When you compile a custom kernel module such as a device driver on a CentOS system, you need to have kernel header files installed on the system, which include the C header files for the Linux kernel. Kernel header files provide different kinds of function and structure definitions required when installing or compiling any code that interfaces with the kernel.
When you install Kernel Headers, make sure it matches with the currently installed kernel version on the system. If your Kernel version comes with the default distribution installation or you have upgraded your Kernel using yum package manager from system base repositories, then you must install matching kernel headers using package manager only. If you’ve compiled Kernel from sources, you can install kernel headers from sources only.
In this article, we will explain how to install Kernel Headers in CentOS/RHEL 7 and Fedora distributions using default package manager.
Install Kernel Headers in CentOS 7
First confirm that the matching kernel headers are already installed under /usr/src/kernels/ location on your system using following commands.

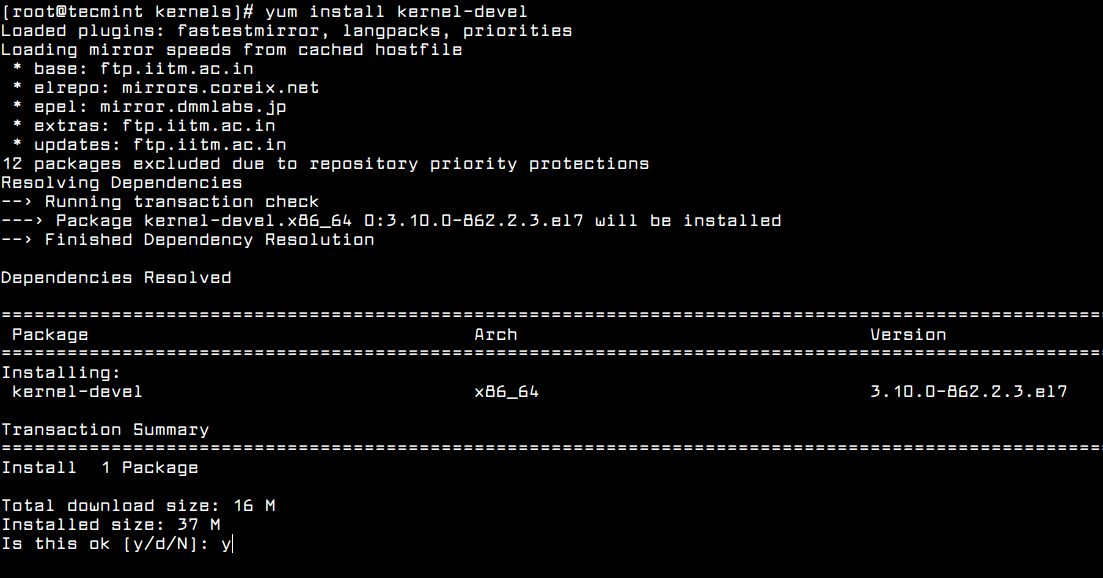
If no matching kernel headers are located in the /usr/src/kernels/ directory, go ahead and install kernel headers, which is provided by the kernel-devel package that can be installed using default package manager as shown.
# yum install kernel-devel [On CentOS/RHEL 7] # dnf install kernel-devel [On Fedora 22+]
After installing the kernel-devel package, you can find all the kernel headers files in /usr/src/kernels directory using following command.
# ls -l /usr/src/kernels/$(uname -r)
Note on a VPS (for instance a Linode VPS), a kernel may have a customized version name, in such scenario, you have to identify the kernel version manually and check the installed kernel header files using following commands.
# uname -r # ls -l /usr/src/kernels/3.10.0-862.2.3.el7.x86_64
![]()
Sample Output
total 4544 drwxr-xr-x. 32 root root 4096 May 16 12:48 arch drwxr-xr-x. 3 root root 4096 May 16 12:48 block drwxr-xr-x. 4 root root 4096 May 16 12:48 crypto drwxr-xr-x. 119 root root 4096 May 16 12:48 drivers drwxr-xr-x. 2 root root 4096 May 16 12:48 firmware drwxr-xr-x. 75 root root 4096 May 16 12:48 fs drwxr-xr-x. 28 root root 4096 May 16 12:48 include drwxr-xr-x. 2 root root 4096 May 16 12:48 init drwxr-xr-x. 2 root root 4096 May 16 12:48 ipc -rw-r--r--. 1 root root 505 May 9 19:21 Kconfig drwxr-xr-x. 12 root root 4096 May 16 12:48 kernel drwxr-xr-x. 10 root root 4096 May 16 12:48 lib -rw-r--r--. 1 root root 51205 May 9 19:21 Makefile -rw-r--r--. 1 root root 2305 May 9 19:21 Makefile.qlock drwxr-xr-x. 2 root root 4096 May 16 12:48 mm -rw-r--r--. 1 root root 1093137 May 9 19:21 Module.symvers drwxr-xr-x. 60 root root 4096 May 16 12:48 net drwxr-xr-x. 14 root root 4096 May 16 12:48 samples drwxr-xr-x. 13 root root 4096 May 16 12:48 scripts drwxr-xr-x. 9 root root 4096 May 16 12:48 security drwxr-xr-x. 24 root root 4096 May 16 12:48 sound -rw-r--r--. 1 root root 3409102 May 9 19:21 System.map drwxr-xr-x. 17 root root 4096 May 16 12:48 tools drwxr-xr-x. 2 root root 4096 May 16 12:48 usr drwxr-xr-x. 4 root root 4096 May 16 12:48 virt -rw-r--r--. 1 root root 41 May 9 19:21 vmlinux.id
In addition, if you need header files for the Linux kernel for use by glibc, install the kernel-header package using following command.
# yum install kernel-headers [On CentOS/RHEL 7] # dnf install kernel-headers [On Fedora 22+]
Now you are good to go with compiling your own or existing kernel modules for software such as VirtualBox and many more.
That’s it! In this article, we have explained how to install kernel-devel and kernel-header packages in CentOS/RHEL 7 and Fedora systems. Remember that before you can compile kernel modules such as device driver on a Linux system, you should have necessary kernel header files installed. If you have queries, please use the comment form below to reach us.
How to Install Linux Headers on Kali Linux
![]()
Welcome to this concise article discussing how to install Linux headers on Kali Linux.
Linux header files are used in interface definition between various components of the kernel. They are also used to define interfaces between the kernel and userspace. A typical case where Linux headers are required is running a Hypervisor because the tools require modules that interact with the kernel.
By default, Kali Linux does not ship with Linux headers installed; you will have to do it manually.
Installing Linux Headers Using APT
One of the methods you can use to install Kernel Headers is to use the Debian package manager with Kali Linux repositories.
You may require to run a full system upgrade before installing the Kernel Headers successfully.
Edit your sources.list file, and add the correct repositories provided in the following resource,
Next, refresh the repositories and run a full distribution upgrade
Once completed, reboot your Kali Linux installation, and install the headers.
Enter the command below to install Linux headers for your kernel version. We will use the uname –r command to grab the kernel version directly.
This command should run successfully and install the required headers for your Kernel version. However, if the method above does not work, you can install them manually.
Installing Kernel Headers Manually
Before installing the Kernel headers manually, run a full distribution update and reboot to ensure you have the latest kernel version.
Open your browser and navigate to
Download the appropriate kernel headers you require in the form of a deb package.
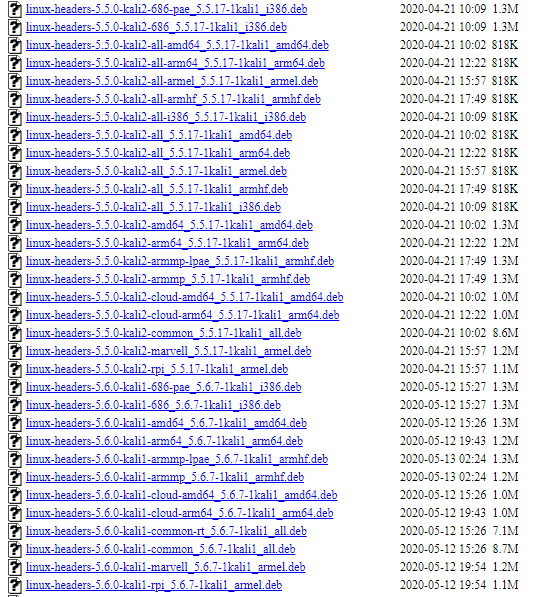
Next, use the dpkg command to install the headers:
That should install the required Kernel headers.
Conclusion
This tutorial has shown you the manual way of installing Kernel headers on Kali Linux and using the apt package manager.
NOTE: To ensure you don’t run into issues, update your system before performing header installation.
About the author
John Otieno
My name is John and am a fellow geek like you. I am passionate about all things computers from Hardware, Operating systems to Programming. My dream is to share my knowledge with the world and help out fellow geeks. Follow my content by subscribing to LinuxHint mailing list