- How to Install and Use Thunderbird in Linux
- Thunderbird Features
- Install Thunderbird Email Client in Linux
- Getting Started with Thunderbird Email Client in Linux
- Getting a New Thunderbird Email Address
- Setting Up Gmail in Thunderbird
- Как установить Thunderbird в Linux
- Руководство
- Вариант №1: Использование менеджера приложений Ubuntu
- Вариант №2: Использование терминала
- Вариант №3: Использование заранее скачанного пакета
- Заключение
- Install Latest ‘Thunderbird’ Email Client in Linux Systems
- Thunderbird 78.0 Features
- Install Thunderbird Email Client in Linux
- Thunderbird Preview
How to Install and Use Thunderbird in Linux
Mozilla Foundation’s dedication and effort in developing the Thunderbird mail client application software paid off in a big way. Other than being a renowned mail client, Thunderbird also functions perfectly as news and chat client on top of being an effective RSS feeder. However, most Linux users associate with it as a free email application because of its customizable and easy-to-setup footprints.
Thunderbird Features
With speed, privacy, and the inclusion of the latest technological milestones as part of Thunderbird’s emailing mantra, expect to reap the following prime features:
- Mail account setup wizard
- Attachment reminder
- Large files management
- Add-ons manager
- Automated updates
- phishing protection
- Robust privacy
Install Thunderbird Email Client in Linux
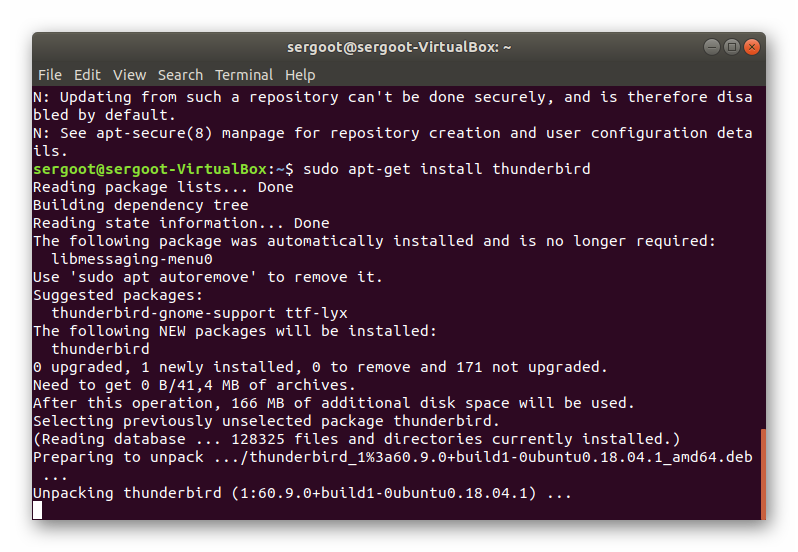
Depending on the default package manager of the Linux operating system distribution you are using, you can quickly install Thunderbird from either of the following terminal commands implementation.
$ sudo apt-get install thunderbird [On Debian, Ubuntu and Mint] $ sudo yum install thunderbird [On RHEL/CentOS/Fedora and Rocky Linux/AlmaLinux] $ sudo emerge -a sys-apps/thunderbird [On Gentoo Linux] $ sudo pacman -S thunderbird [On Arch Linux] $ sudo zypper install thunderbird [On OpenSUSE]
Getting Started with Thunderbird Email Client in Linux
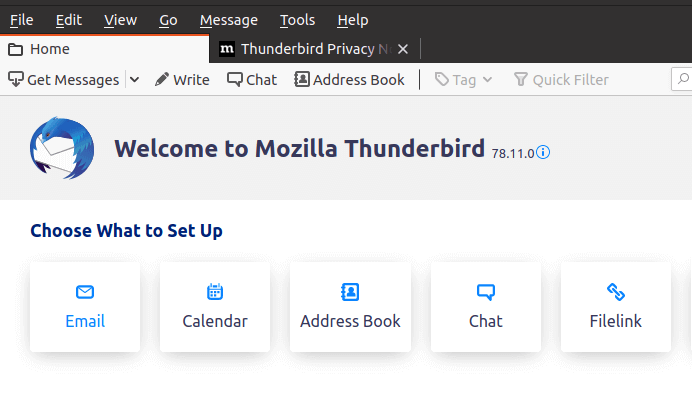
After the installation of the Thunderbird mail client has successfully completed on your end, launch it from the Linux terminal or the system app launcher.
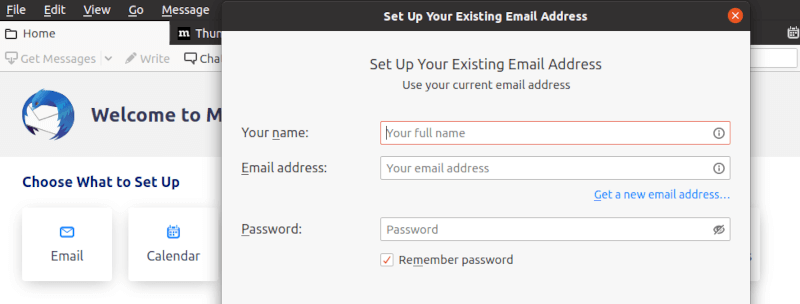
You will be met with a screen prompt that asks you to set up an email address to use under this mail client. You can either choose to “Get a new email address…” or set up an existing email address to use with thunderbird as its mail client.
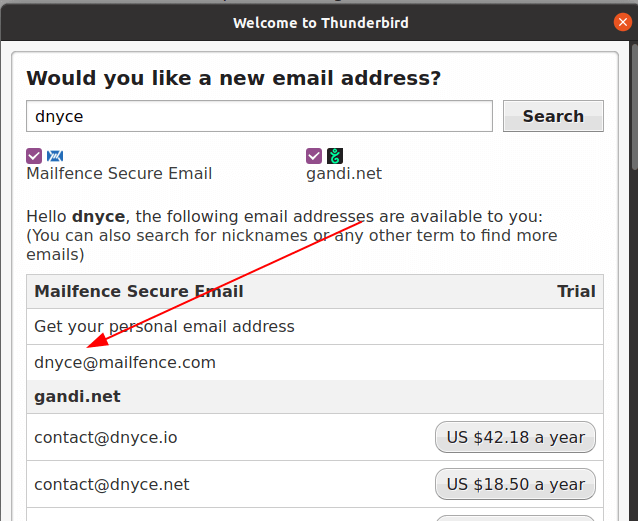
Getting a New Thunderbird Email Address
You will have to key in your preferred username and search for an email address match. Afterward, you will choose one of the email address results based on a price plan preference. You will then follow the screen prompt guides to finalize any necessary steps that will lead to the full acquisition of your new email address.
Setting Up Gmail in Thunderbird
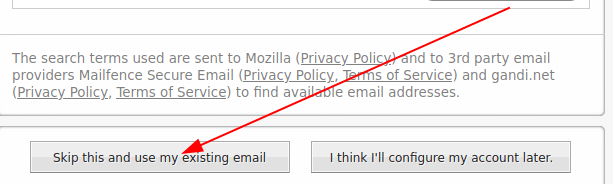
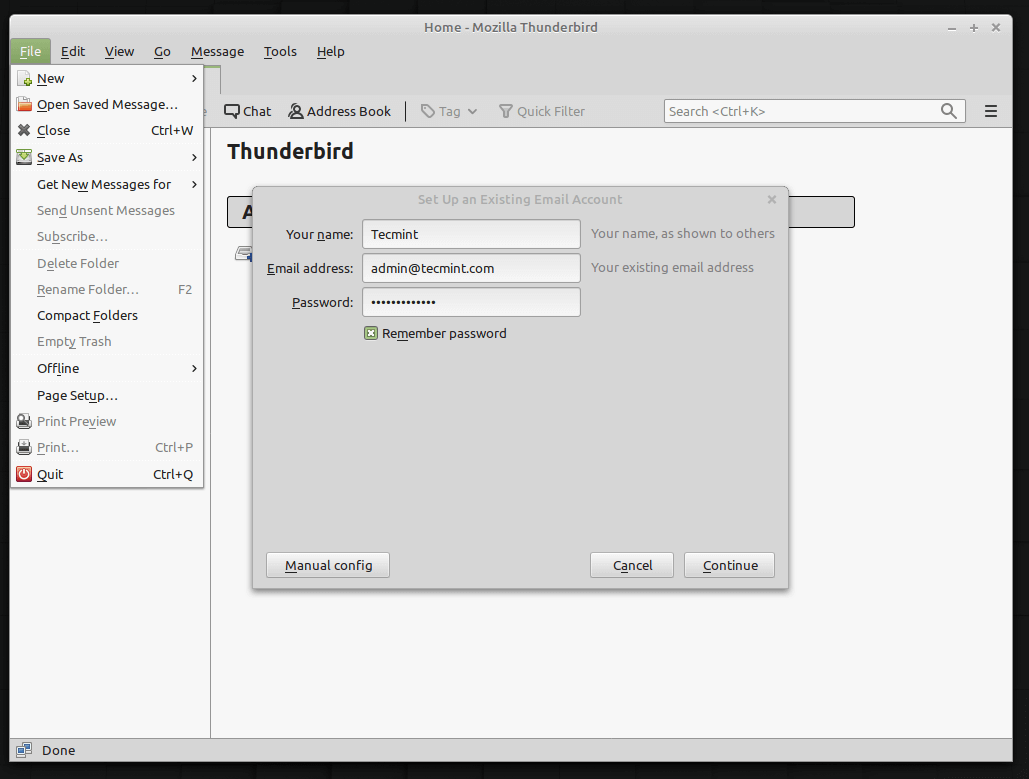
This tutorial assumes that you can comfortably acquire a new email address if you need one. We can therefore skip to the step of using an existing email address.
Populate the resulting page with the needed user information.
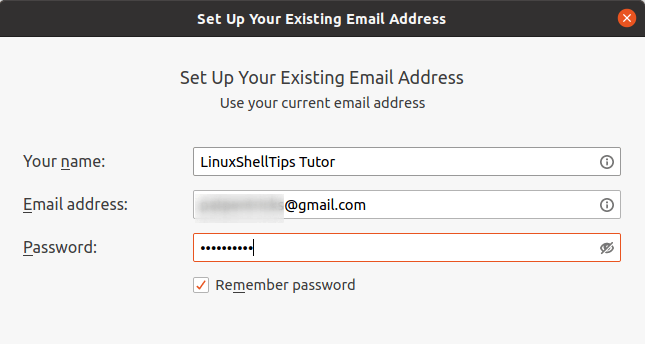
It will lead to the following screen capture.
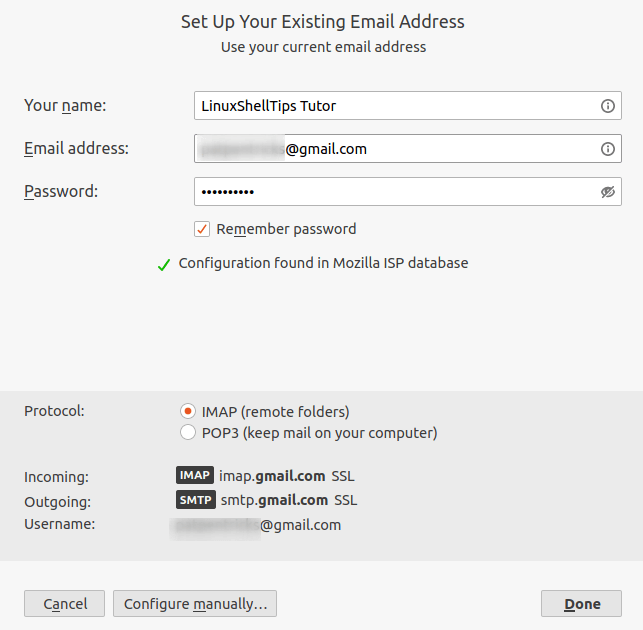
Thunderbird will auto-generate and configure the needed mail protocols for your incoming and outgoing mails; with inclusion to SSL (Secure Socket Layer). It will also let you choose whether you want to keep your mails on a local folder (POP3 protocol) on your local computer or on a remote folder (IMAP protocol) on the mail server you will be using.
If you are satisfied with your configurations, click on the [Done] button. Since am using a Gmail email ID, I will be redirected to the following prompt.

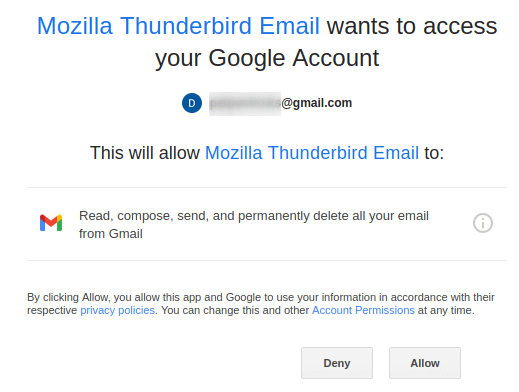
Thunderbird will then take some time to configure itself as your new mail client.
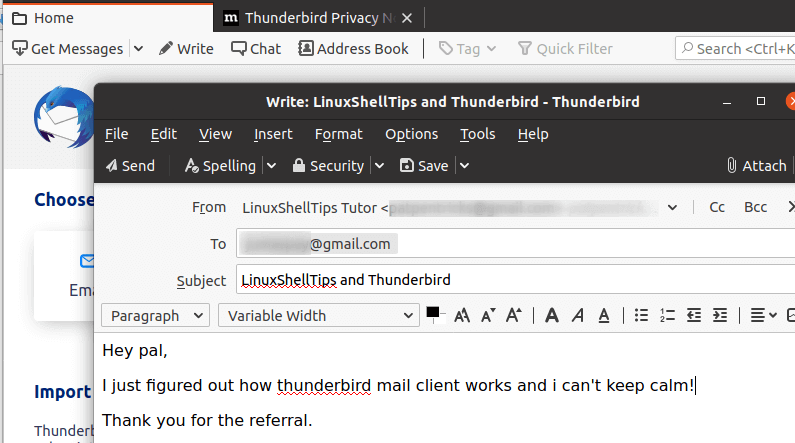
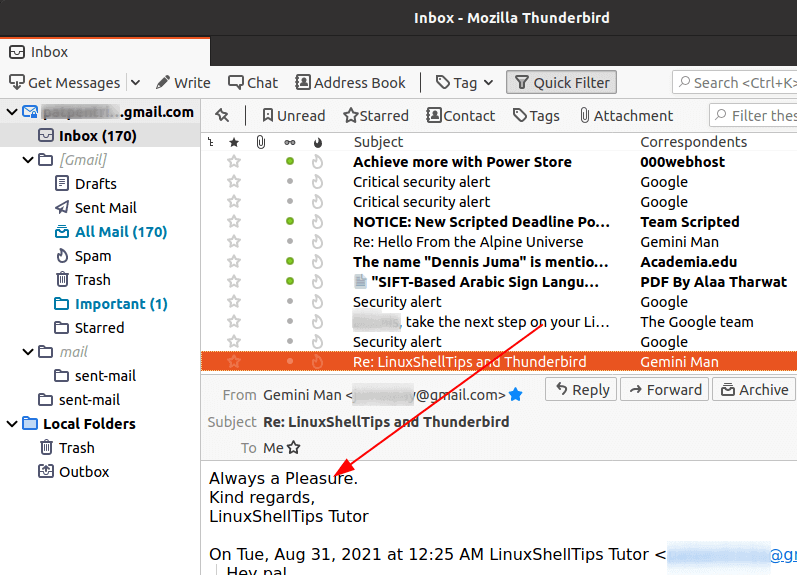
The received mail will be in a format similar to the screen capture below.

You will also be able to receive email replies and send other replies if need be.
Thunderbird, being a very effective mail client, comes as a high recommendation for any Linux users because of the way it auto-configures most technical aspects of a mail server like protocol preferences.
It makes sure that its users do not have to waste time troubleshooting for configuration settings before starting to enjoy its polished and improved mail management interface.
Как установить Thunderbird в Linux
Как установить Thunderbird в Linux? Этот вопрос обычно задают те, кто недавно пересел с Windows на эту операционную систему. И действительно, там все по-другому. Но мы расскажем о том, как инсталлировать этот почтовый клиент.
Руководство
Вообще, Мазилла Тандерберд уже по умолчанию предустановлен во многие дистрибутивы. Но если вдруг вы установили какой-нибудь Debian, Ubuntu или Mint с минимальным набором приложений, то его может и не быть.
Есть несколько способов для инсталляции почтового клиента в Linux. Мы рассмотрим их все. И в качестве примера будем использовать ОС Ubuntu, как самую популярную из «линуксоподобных». Этот дистрибутив основан на Debian. Кстати, инструкция будет актуальна также для Debian и Mint.
Вообще, для всех дистрибутивов, которые основаны на Debian инструкция будет похожей. Только репозитории будут немного отличаться. Сначала мы рассмотрим самый простой и доступный вариант. А затем перейдем к более сложным решениям. Итак, начнем.
Вариант №1: Использование менеджера приложений Ubuntu
В этой операционной системе есть весьма неплохой менеджер приложений с отличным графическим интерфейсом. Этакий аналог App Store на Маках. В библиотеке менеджера находится огромное количество программ на все случаи жизни.
Есть там и пресловутый Thunderbird. Но нужно знать все о том, как его установить. Процесс существенно отличается от того, к чему мы привыкли в Windows. Поэтому мы подготовили подробную инструкцию, рассказывающую о том, как и что нужно делать:
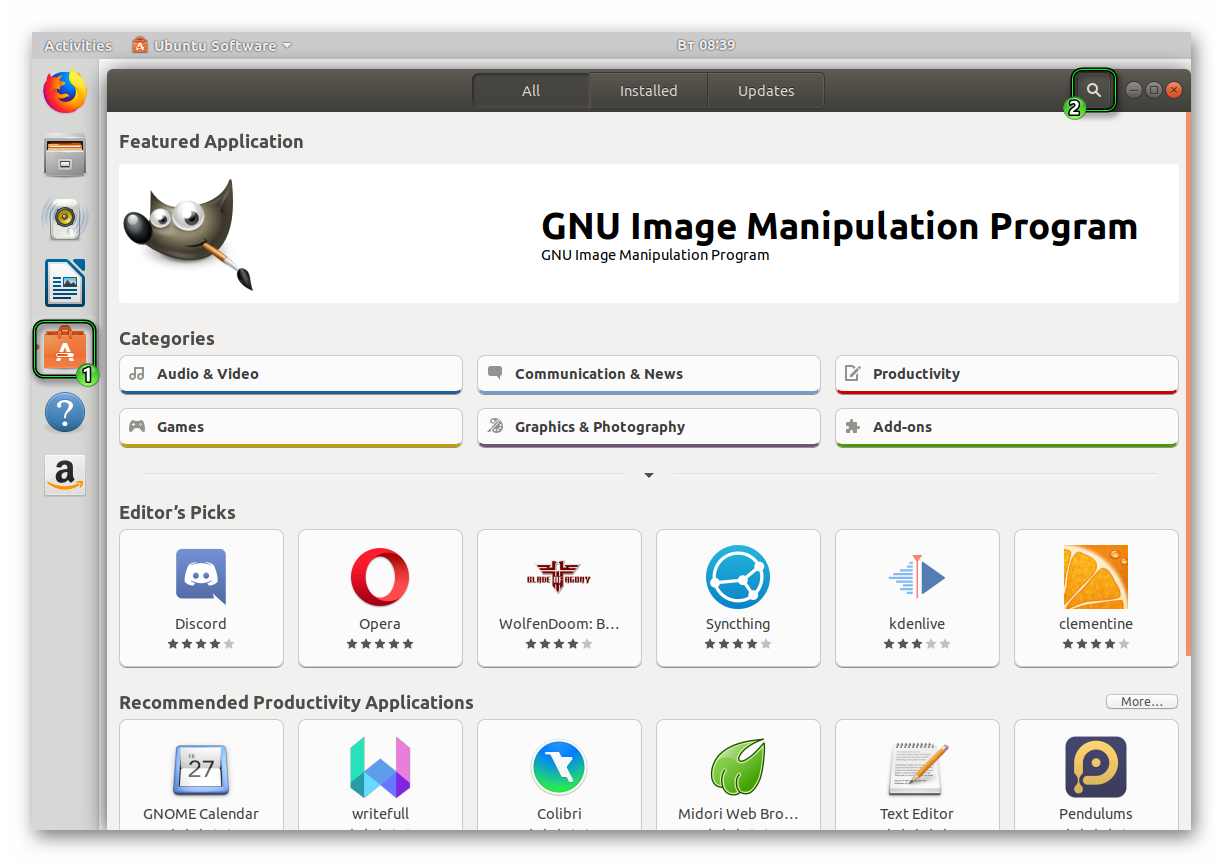
- На рабочем столе Ubuntu есть боковая панель, на которой размещены ярлыки для самых важных программ. Там нужно найти «Менеджер приложений» и кликнуть по нему. Значок в виде пакета с буквой «А».
- Запустится главное окно менеджера. Сверху выбираем опцию поиска.

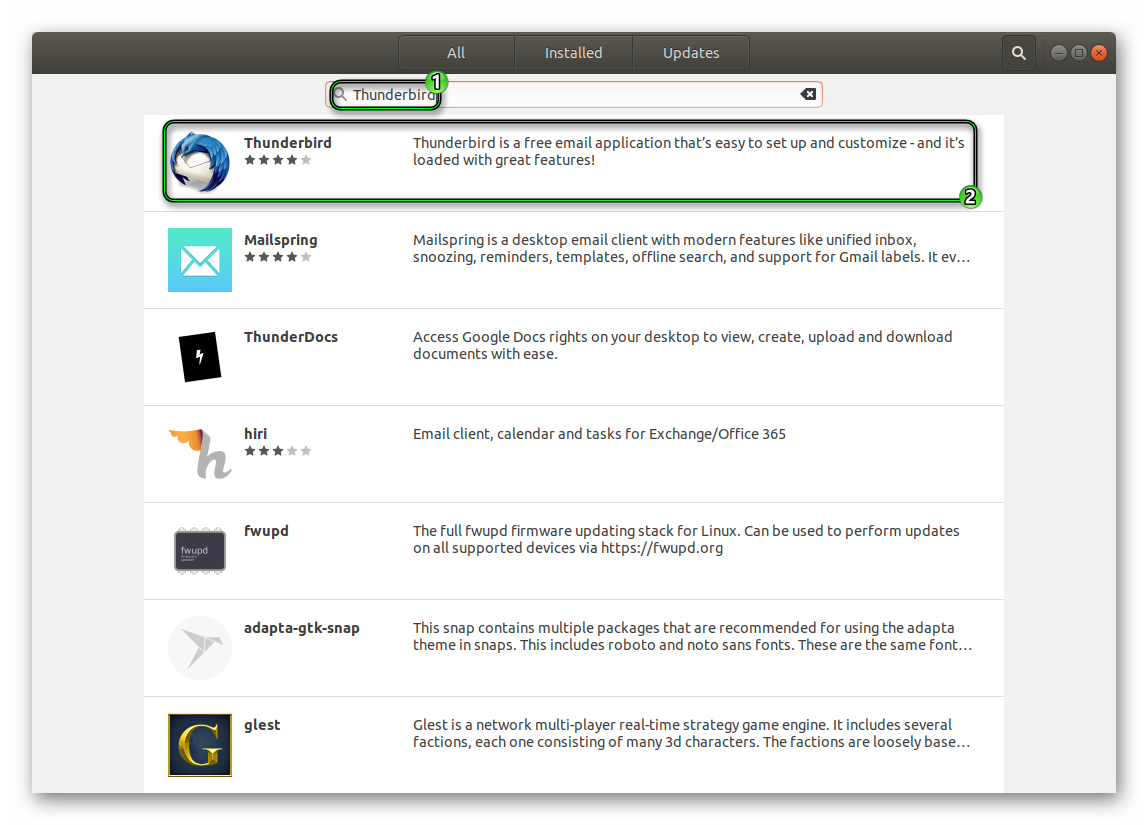
- Составляем запрос Thunderbird.
- Кликаем по соответствующему элементу в списке результатов.

- Откроется описание программы. Также в верхней части будет кнопка с надписью «Установить» (Install). Нужно нажать на нее.
- Через несколько секунд система попросит ввести логин и пароль суперпользователя для инсталляции программы. Нужно ввести данные и нажать пункт подтверждения.
Вот и вся установка. Через несколько секунд она завершится. В результате на странице приложений Ubuntu появится новый элемент с названием Thunderbird. Можно будет запускать клиент и всесторонне настраивать его. Однако существуют и другие способы инсталляции.
Вариант №2: Использование терминала
Для некоторых это самый «правильный» способ инсталляции. Да и этот вариант способен помочь в тех случаях, если по какой-то причине менеджер приложений не желает работать (а такое случается). Да и метод с терминалом намного быстрее.
Некоторых пользователей пугает консоль. Но если делать все в строгом соответствии с инструкцией, то ничего страшного не случится. Учтите, что для установки вам нужно знать логин и пароль суперпользователя. Итак, приступим.
- Итак, сначала нажимаем на клавиатуре сочетание Ctrl + Alt + T .
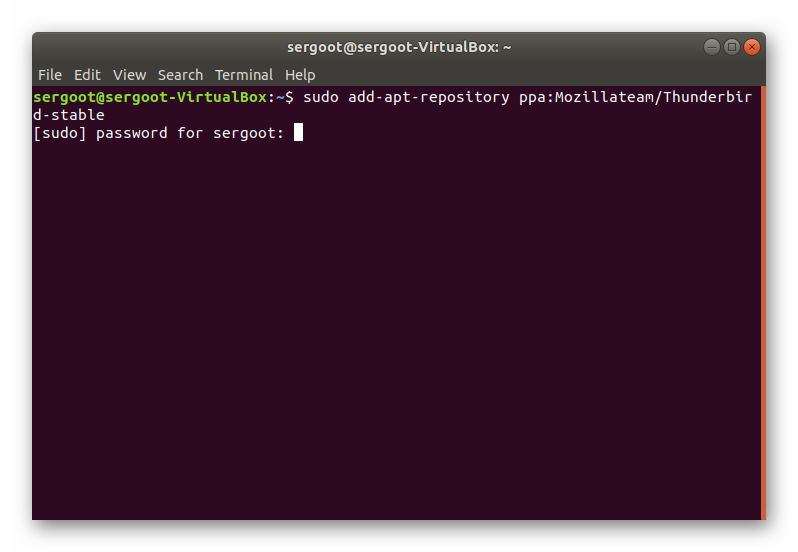
- В консоли вписываем команду sudo add-apt-repository ppa:Mozillateam/Thunderbird-stable и жмем на кнопку Enter .
- После этого вводим пароль суперпользователя и опять жмем Enter

- Теперь необходимо ввести sudo apt-get update . Не забываем нажать Enter .
- И последний шаг: вводим sudo apt-get installthunderbird и подтверждаем действие с помощью той же клавиши.
Вот и все. Через несколько секунд Thunderbird окажется в списке установленных приложений. Такой процесс инсталляции применяется большинством пользователей и считается самым надежным. Но есть еще один метод.
Вариант №3: Использование заранее скачанного пакета
Любое приложение в Linux – это скомпилированный пакет с необходимыми файлами. Поэтому с официального сайта Mozilla можно скачать уже готовый пакет и инсталлировать его вручную. Такой вариант, конечно, сложнее. Но зато всегда срабатывает.
Стоит отметить, что простым двойным кликом по скачанному пакету установку произвести не получится. Придется снова прибегать к помощи терминала. Итак, вот подробная инструкция, рассказывающая о том, что и как нужно делать.
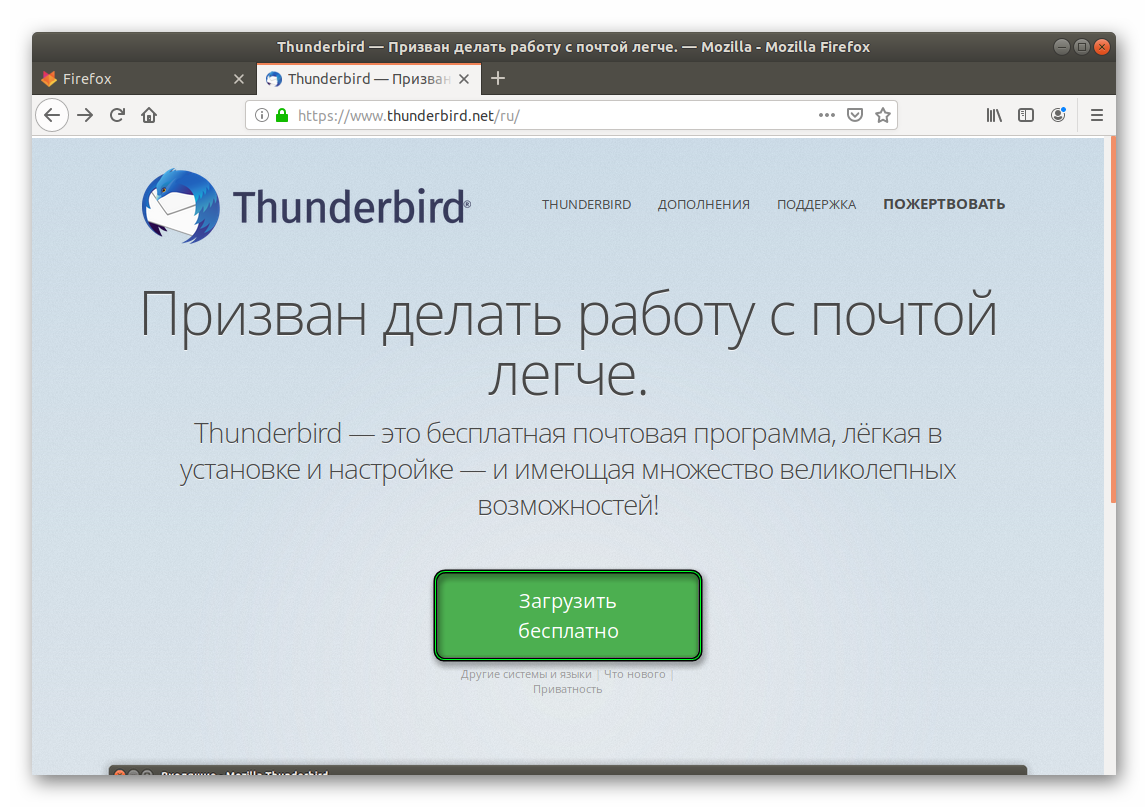
- Запускаем веб-обозреватель и переходим на страницу https://www.thunderbird.net/ru/.
- Нажимаем на кнопку «Загрузить бесплатно».

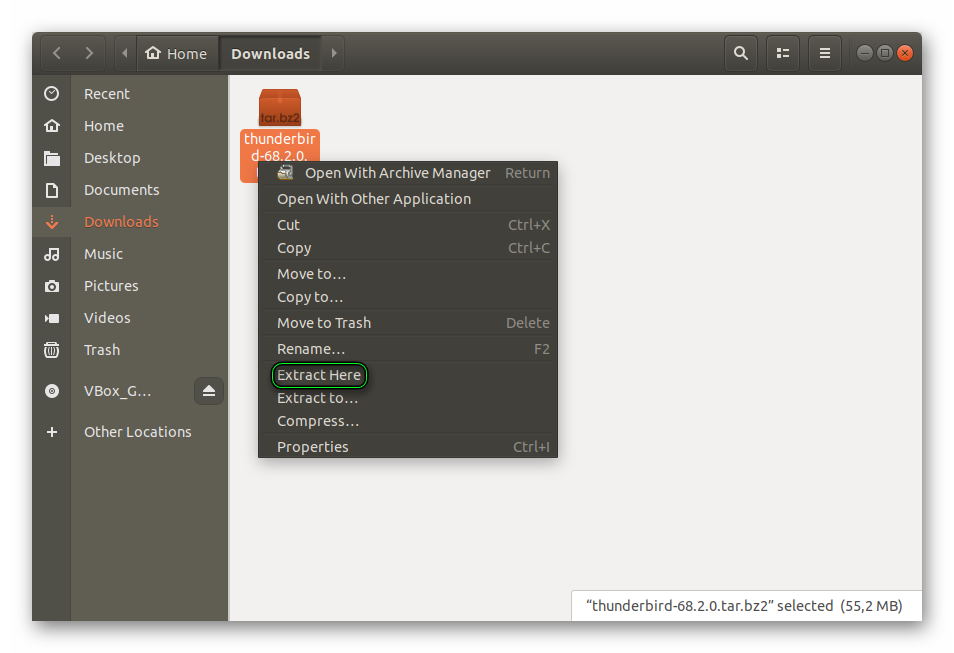
- Сохраняем предложенный файл и переходим к его расположению.
- Кликаем по нему ПКМ и выбираем опцию извлечения.

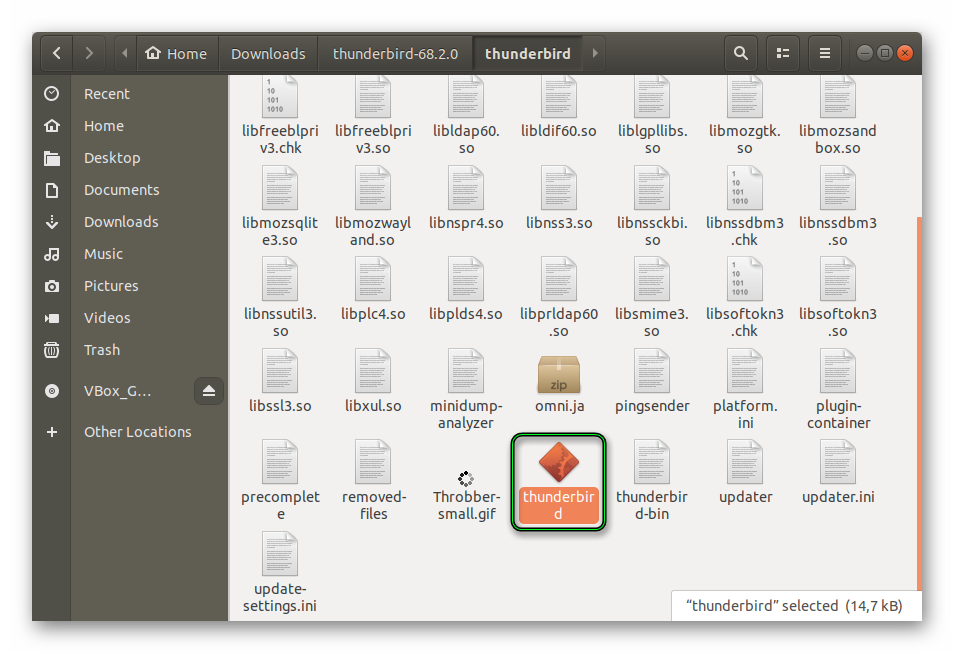
- Открываем сам каталог и в нем папку thunderbird.
- Дважды щелкаем ЛКМ на файл thunderbird.
Вот и все. Клиент запущен. Теперь для него можно создать ярлык стандартным способом. Такой вариант сложнее и непонятен многим. Но он есть. Поэтому нужно было его рассмотреть. Но лучше все-таки использовать первых два способа.
Заключение
Пришло время подвести итоги и сделать соответствующие выводы, а также обобщить информацию. В данном материале мы поговорили о том, как установить почтовый клиент Mozilla Thunderbird в операционной системе семейства Linux.
Для этого есть три способа. Наиболее простыми и популярными являются вариант с менеджером приложений и терминалом. Нужно использовать их. А вариант со скачанными пакетами подходит для более продвинутых пользователей.
Install Latest ‘Thunderbird’ Email Client in Linux Systems
Thunderbird is an open-source free cross-platform web based email, news, and chat client application that is designed to handle multiple email accounts and news feeds.
On July 17, 2020, the Mozilla team announced the release of Thunderbird 78.0. This new version comes with a new look and plethora of new features and they are:
Thunderbird 78.0 Features
- New Account Hub for centralized account setup.
- New config option to anonymize message date header.
- Added Global Search item in-app menu.
- Various bug fixes and improvements in performance.
- Various security fixes.
Check out more about what’s new features and known issues for Thunderbird 78.0 version at Thunderbird Release Note.
This article will explain to you how to install Thunderbird email client on Linux distributions such as Fedora, Ubuntu, and its derivatives.
In many Linux distributions Thunderbird package included by default, and can be installed using the default package management system, because it will:
- Ensure that you have all the needed libraries
- Adds a desktop shortcut to launch Thunderbird
- Make Thunderbird accessible to all system users on your computer
- It may not offer you the latest version of Thunderbird
Install Thunderbird Email Client in Linux
To install Thunderbird from the default system repositories issue:
$ sudo apt-get install thunderbird [On Ubuntu based systems] $ dnf install thunderbird [On Fedora based systems]
As I said, installing from default repositories will give you an older version of Thunderbird. If you want to install the most recent version of Mozilla Thunderbird, you can use the PPA maintained by the Mozilla team.
Use CTRL + ALT + T from the desktop to open a terminal and add the Thunderbird repository under Ubuntu and its derivatives.
$ sudo add-apt-repository ppa:ubuntu-mozilla-daily/ppa
Next, update the system software packages using the update command.
Once you’ve updated the system, install it using the following command.
$ sudo apt-get install thunderbird
Alternatively, you can use the Snap Store to install the latest version of Thunderbird on Linux as shown.
$ sudo snap find thunderbird $ sudo snap install thunderbird
Thunderbird Preview
That’s it, you’ve successfully installed Thunderbird 78.0 under your Linux system. Thunderbird is also available for other operating systems on the Thunderbird download page.