- Install the VNC Remote Access Server on Oracle Linux
- Background
- Objectives
- Prerequisite
- Install a graphical desktop environment
- Install the VNC packages
- Set the VNC password
- Configure the VNC service
- Set up the VNC service
- Configure X509 encryption (optional)
- Configure firewall rules (optional)
- Open a VNC client and test your deployment
- Video demonstration
- For More Information
- More Learning Resources
- How to install VNC Server on Ubuntu and control your Linux machine remotely
- How to install VNC Viewer on Ubuntu
Install the VNC Remote Access Server on Oracle Linux
This tutorial shows you how to install and set up the VNC remote access server software on an Oracle Linux system to enable you to remotely operate a graphical desktop environment. This tutorial is targeted at users of Oracle Linux 8 or later.
Background
Virtual Network Computing (VNC) is a graphical desktop sharing system that controls remote machines by sending keyboard and mouse events over the network. VNC is particularly useful for remotely controlling Oracle Linux servers that have a graphical desktop environment installed.
You can connect to a VNC server by using any compatible software client. VNC is suitable for thin client computing where multiple dumb terminals can share the same hardware resources that are hosted on an Oracle Linux server.
This tutorial uses TigerVNC to illustrate how to remotely connect to systems. However, you can use a different VNC software of your choice. Some alternative software is listed at the end of the tutorial.
TigerVNC Server was rebased from 1.9.0 to 1.10.1 in Oracle Linux 8 Update 3. This newer version is configured differently to previous versions and no longer requires the creation of systemd unit files. The instructions provided here assume that you are using the latest version.
Objectives
- Install a graphical desktop environment along with the VNC service
- Set the VNC Password for a user on the system
- Configure the VNC service for a specific user
- Start and enable the VNC service across subsequent boots
- Optionally enable x509 encryption for direct VNC access
- Optionally create firewall rules to allow direct VNC access
- Access the VNC server from a remote client, either directly or using an SSH tunnel
Prerequisite
Install a graphical desktop environment
Install a GNOME desktop environment and all of its dependencies.
sudo dnf groupinstall "Server with GUI" Set graphical mode as the default login type for user accounts, then reboot the server.
sudo systemctl set-default graphical sudo reboot Uncomment the following line in the /etc/gdm/custom.conf file to ensure that VNC uses X.org instead of Wayland:
Install the VNC packages
Install the VNC server package and all of its dependencies.
sudo dnf install -y tigervnc-server tigervnc-server-module Set the VNC password
Create a VNC password for the user account that you intend to use for remote sessions.
The command prompts you for a password and then prompts you again to validate the password. Optionally you are able to set a ‘view-only’ password that allows you to share the screen but not allow control over the mouse or keyboard.
This action generates configuration information specific to the user account in $HOME/.vnc/ . If this directory already exists from a previous installation, you can either remove the directory prior to running the vncpasswd command; or you can restore the SELinux context on the directory to ensure that you do not have any issues with SELinux for this service. For example:
Configure the VNC service
Append the user account and the X Server display for the VNC service to /etc/tigervnc/vncserver.users file:
Also append the default desktop and screen resolution to the /etc/tigervnc/vncserver-config-defaults file:
session=gnome geometry=1280x1024 Set up the VNC service
Reload the systemd service, then enable and start the VNC server by using X Server display 1:
sudo systemctl daemon-reload sudo systemctl enable --now vncserver@:1.service Configure X509 encryption (optional)
By default, VNC is not an encrypted protocol and you should use an SSH tunnel to access it across an unprotected network. You can configure X509 TLS to encrypt your VNC session, however this requires that your client software supports X509Vnc encryption and has access to the CA certificate used to sign your certificates.
If you do not have a CA signed certificate, you can use self-signed certificates, but your client system must have a copy of the public certificate to be able to connect. To create a self-signed certificate, run:
openssl req -new -x509 -days 30 -nodes -newkey rsa:2048 -keyout ~/.vnc/private.key \ -out ~/.vnc/public.cert -subj "/C=US/ST=Ca/L=Sunnydale/CN=$(hostname -f)" Edit the user’s custom VNC configuration options in ` ~/.vnc/config`. If the file does not exist yet, you may need to create it yourself. Update the configuration to enable x509Vnc encryption and to provide the full path to the X509 key file and that x509 certificate file. For example, assuming that the username is opc, the following configuration should work correctly:
securitytypes=x509Vnc X509Key=/home/opc/.vnc/private.key X509Cert=/home/opc/.vnc/public.cert Note that you must provide the full path to the key and certificate files. You cannot depend on shell expansion or use variables for this purpose.
When you have finished editing the configuration, you can restart the service:
sudo systemctl restart vncserver@:1.service Configure firewall rules (optional)
If you are using X509 encryption and you are running a custom firewall profile or an Oracle Cloud Infrastructure instance, you can open the firewall port for the VNC service (5901) on your firewall or in your security lists for your network.
If you are using X509 encryption and the firewalld service is running on the host, you can add access for the VNC service. Then, reload the default firewall service.
sudo firewall-cmd --zone=public --add-service=vnc-server --permanent sudo firewall-cmd --reload Note: VNC is not an encrypted protocol and you should not open the firewall to this port and connect directly to a VNC server over an unprotected network. Although we list this step as optional, it is not generally advised and you should consider using SSH tunneling or some other mechanism to protect the connection.
Open a VNC client and test your deployment
If your client is running Oracle Linux 8, you can install the TigerVNC software client:
sudo dnf install tigervnc On the client machine, use the VNC software to connect to the remote Oracle Linux server domain or IP address. Make sure to specify the correct port. The default VNC port is 5900, but that number is incremented according to the configured display number. Thus, display 1 corresponds to 5901, display 2 to 5902, and so on.
Note that if you enabled X509 encryption, you may need to provide the CA certificate used to sign your keys, or if you used a self-signed certificate you can use the public certificate as the CA certificate. Some clients may be willing to allow you to simply accept a self-signed certificate automatically.
If you encounter connectivity problems, troubleshoot these issues by connecting to the remote server over an SSH connection that has been configured for an SSH tunnel. Then, use the tigervnc client to connect to the local host:
ssh -L 5901:localhost:5901 user@server1.example.com vncviewer localhost:5901 You may need to perform additional steps if you want to connect to an Oracle Cloud Infrastructure instance. For more information, see https://docs.oracle.com/en-us/iaas/Content/Compute/Tasks/accessinginstance.htm.
If you are trying to connect to a virtual machine hosted by Oracle VM VirtualBox, then you need to configure additional port forwarding for remote access. You can find instructions for how to configure virtual networks in the user manual for your installed version of Oracle VM VirtualBox here: https://docs.oracle.com/en/virtualization/virtualbox/.
Video demonstration
The video demonstration and tutorial provided at https://www.youtube.com/watch?v=Z5vhER7K34E may also be useful if you need more information on configuring a VNC server.

For More Information
Other related resources include:
- Tiger VNC Server configuration documentation in /usr/share/doc/tigervnc/HOWTO.md/
- GNOME desktop sharing with Vino at https://wiki.gnome.org/Projects/Vino
- KDE desktop sharing with Krfb at https://kde.org/applications/internet/org.kde.krfb
- Using VNC client software such as:
- Vinagre; or
- KRDC
The basic steps included in this tutorial are available in the shell script at ol8-vnc-setup.sh
More Learning Resources
Explore other labs on docs.oracle.com/learn or access more free learning content on the Oracle Learning YouTube channel. Additionally, visit education.oracle.com/learning-explorer to become an Oracle Learning Explorer.
For product documentation, visit Oracle Help Center.
Install the VNC Remote Access Server on Oracle Linux
Copyright © 2021, Oracle and/or its affiliates.
How to install VNC Server on Ubuntu and control your Linux machine remotely
Ubuntu is one of the most popular Linux distributions out there. Which is why VNC Server for Ubuntu can come in handy when you want to access a machine running this distro remotely. Even better, VNC Connect allows you to do this securely.

VNC for Ubuntu is a great tool to have, especially if you’re constantly working on or supporting several devices. Installation couldn’t be easier. There are two components and three important steps to follow:
While this tutorial refers to VNC Server on Ubuntu, I must mention that VNC Connect is multiplatform. This includes connecting to and from Windows, macOS, Linux, Raspberry Pi, Android, and iOS.
With that said, let’s go back to VNC Server for Linux.hree
How to install VNC Server on Ubuntu
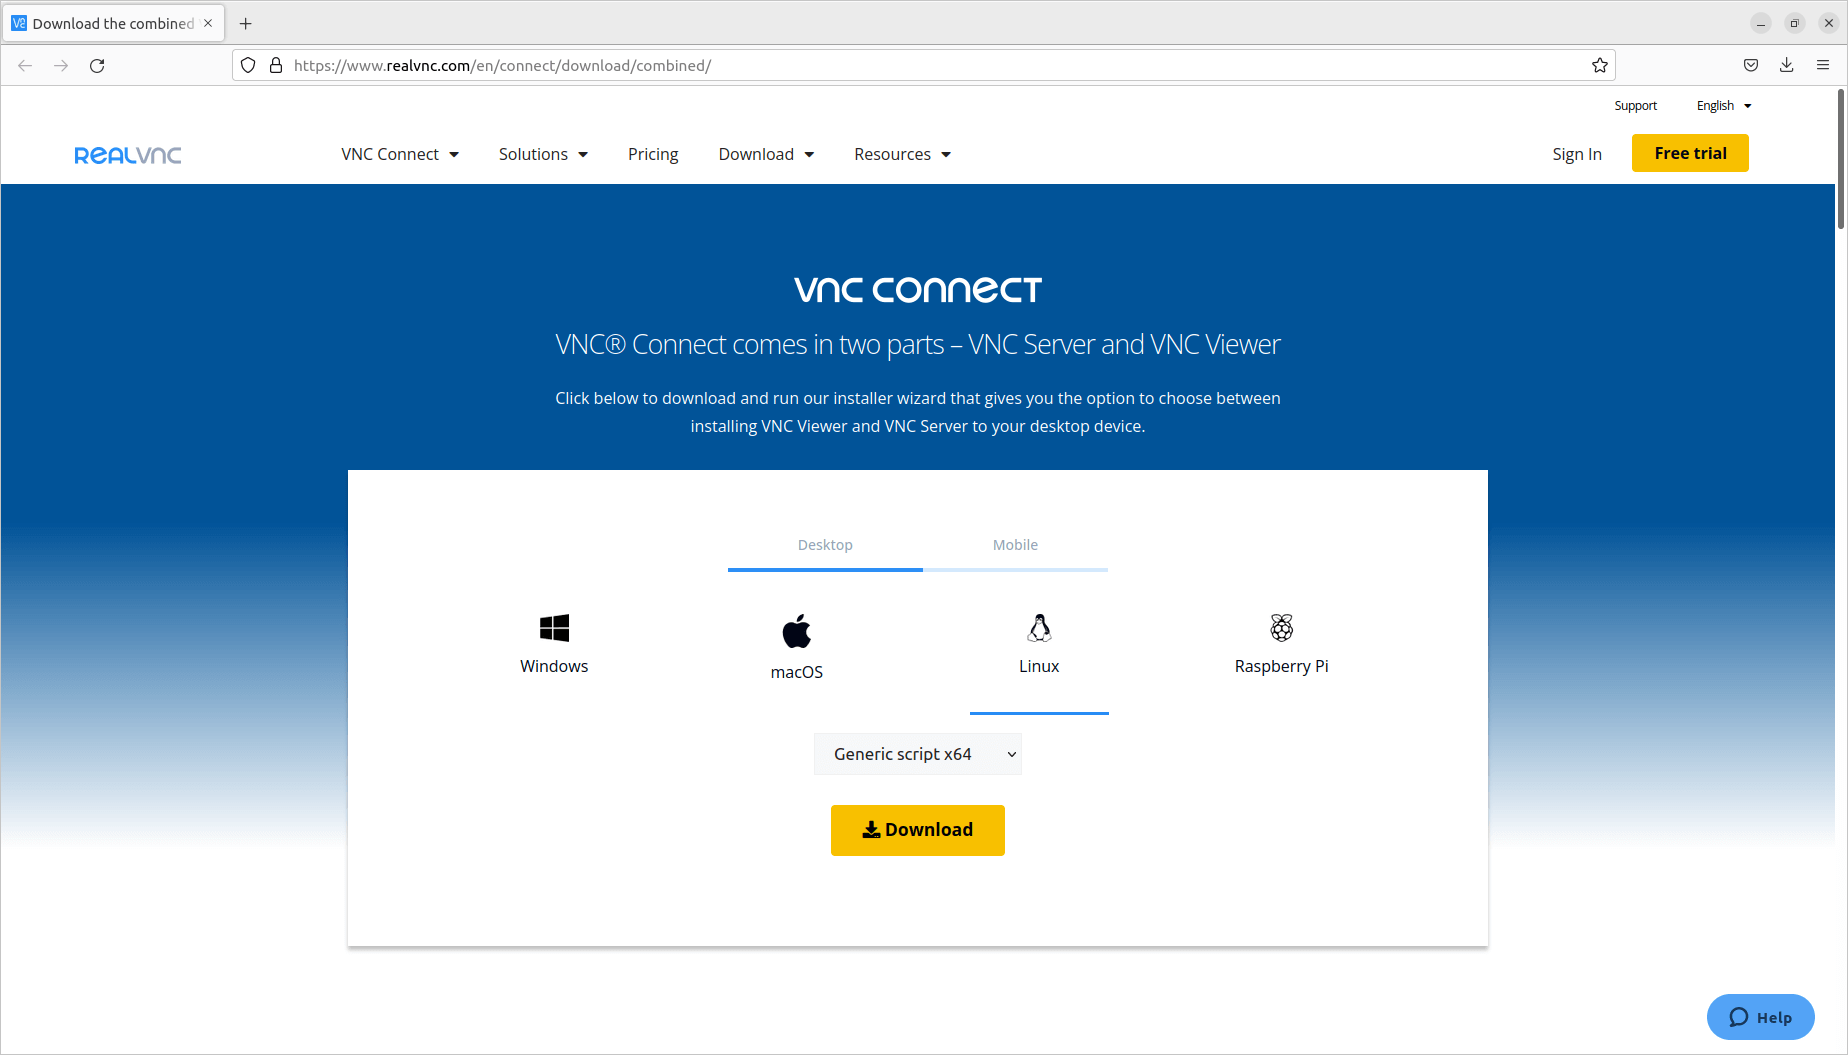
As mentioned above, you’ll need VNC Server on the machine you want to control. So, on your Ubuntu machine (the list of supported operating systems can be found here), open a browser and download the combined installer.
If you don’t already have an account, you will need to create one at this point and sign up for a 14-day trial.

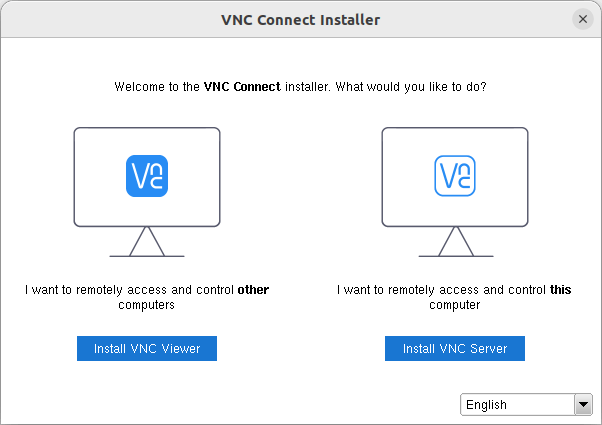
After that, extract the installer and run it. Then, choose Install VNC Server. The installer will work its magic and do every necessary bit of configuration for you.

Your VNC Server Ubuntu installation should be ready to go at this point. It simply needs a bit of configuring before you can use it. To do that, start it.
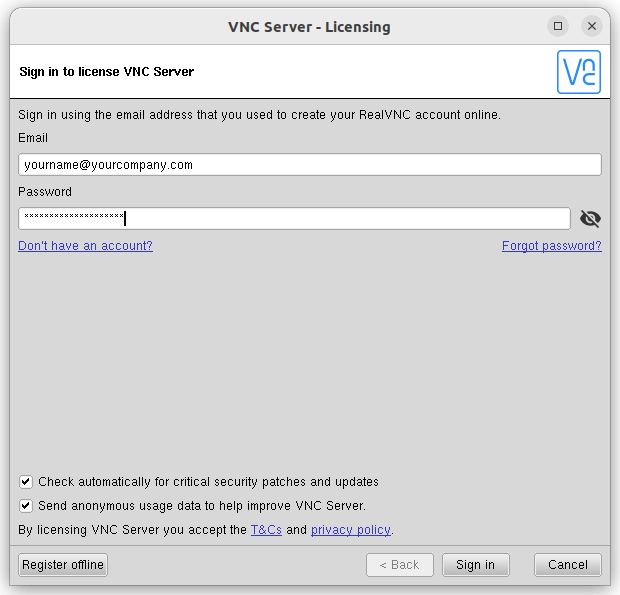
The first thing will be to license it with the VNC account that you’ve created. If you haven’t, no worries. You can create an account here. And if you already have an account, you can easily change your password, should you need to. Either way, make sure you create a strong password.

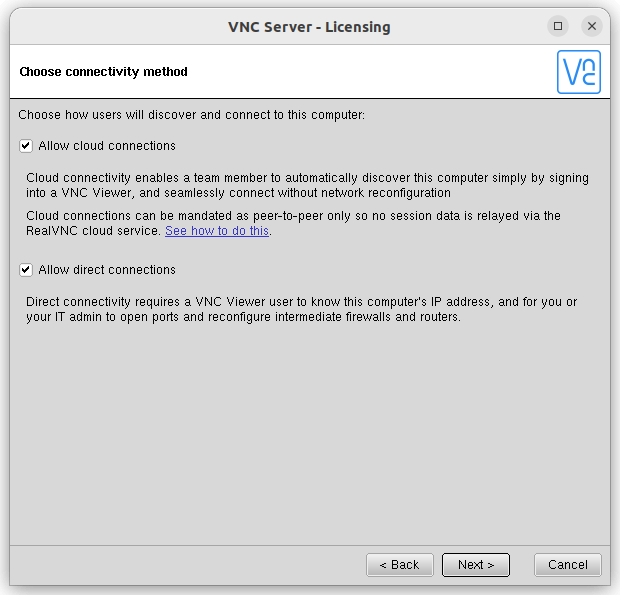
Next, (if you have an Enterprise license), choose if you want to allow cloud connections. If you’ll be accessing your Ubuntu machine remotely, cloud-brokered connections are more secure. And that’s because you won’t expose ports and data to the internet. You can find out more about staying secure with remote access here.
However, if your environment is one in which data cannot leave the network, direct connections are also available.
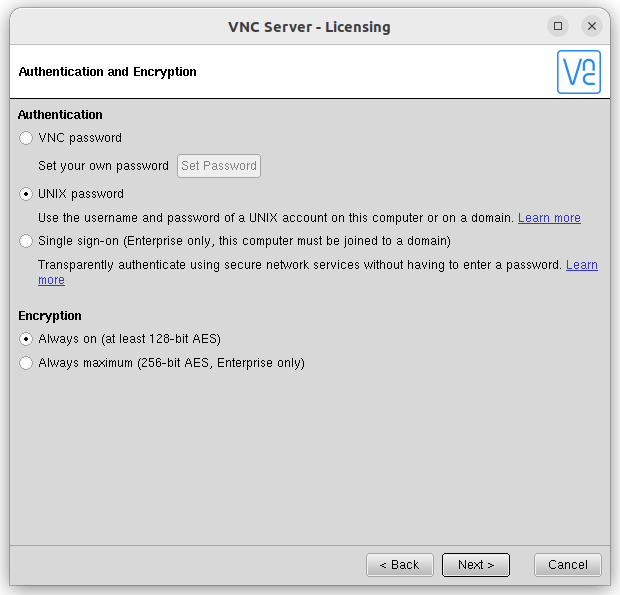
The next step is about security. We provide multiple authentication options, depending on your needs. Choose the one that best suits you. All VNC Connect connections use end-to-end encryption out of the box but you can decide to increase the encryption level if you prefer.
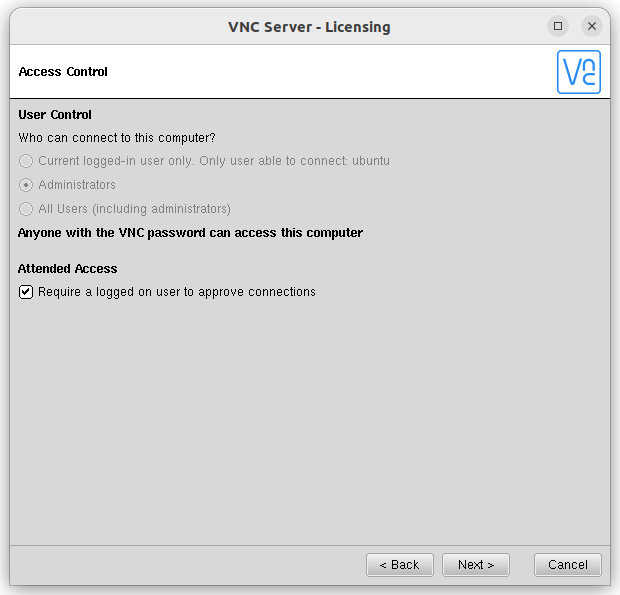
You then need to decide who can connect to the computer and whether a user on the computer needs to always approve a connection. In an IT support environment, this is a great idea. If, for example, the user is handling sensitive data, they can let you in only when they have closed a customer file.
That’s it! You have now installed VNC Server on Ubuntu.
How to install VNC Viewer on Ubuntu
I don’t need to mention that the moment you’ve licensed your VNC Server, you can access your Ubuntu computer from a computer running RealVNC’s VNC Viewer. This is regardless of platform, provided they’re signed in using a RealVNC account that is part of the same Team as the VNC Server.
However, to access other devices from your Ubuntu machine, just install VNC Viewer. You can now use the same installer that you’ve downloaded while following the steps above. The big difference is that you’ll, of course, click Install VNC Viewer.
Once installed, I recommend that you sign in with your RealVNC account. That will give you access to cloud connections and make things much easier. Not to mention that your list of machines in your team will already be there.