Easily Run Windows Applications on Ubuntu Linux with Wine
This article was co-authored by wikiHow staff writer, Nicole Levine, MFA. Nicole Levine is a Technology Writer and Editor for wikiHow. She has more than 20 years of experience creating technical documentation and leading support teams at major web hosting and software companies. Nicole also holds an MFA in Creative Writing from Portland State University and teaches composition, fiction-writing, and zine-making at various institutions.
There are 7 references cited in this article, which can be found at the bottom of the page.
This article has been viewed 558,474 times.
Whether you want to use Adobe Photoshop, play World of Warcraft, or use Microsoft Word 365 on Ubuntu, it’s easy to install Windows programs using Wine. There are two ways to install Wine—through the Ubuntu Software Center, and through the developer’s repository. This wikiHow article will walk you through installing Wine on Ubuntu, show you how to install and run Windows programs, and give you lots of helpful tips along the way.
- You can easily install Wine through the Software Center, but it won’t be the latest version. For the latest version, install directly from the Wine developers.
- Once you’ve installed Wine, you can download a Windows application from the web and double-click the .exe file to install.
- Not all Windows software works flawlessly on Wine, but lots of popular apps and games do.
Installing Wine

- The Software Center version is always going to be older than the version from WineHQ. However, if you want a simpler install process that doesn’t require typing any commands, you can quickly install a stable version of Wine through the Software Center.
- With this installation method, Wine will only update if there’s a newer version available the next time you update Ubuntu itself. You won’t be able to update Wine separately.
- To install the Ubuntu package, just open Software Center, type wine , and click Install. Then, skip down to step 8 to perform the final configuration steps.

- First, run sudo mkdir -pm755 /etc/apt/keyrings to create a directory for the repository key.
- Then, run sudo wget -O /etc/apt/keyrings/winehq-archive.key https://dl.winehq.org/wine-builds/winehq.key to add the repository key.
- Ubuntu 22.04 (Jammy Jellyfish): sudo wget -NP /etc/apt/sources.list.d/ https://dl.winehq.org/wine-builds/ubuntu/dists/jammy/winehq-jammy.sources
- If there is no stable version available for Jammy when you run this command, you can install the development version instead. To do so, use sudo apt install —install-recommends winehq-devel .
Run sudo apt update to update the package database. Once you do this, you’ll be ready to install Wine.
- On the Applications tab, you’ll see that Wine can mimic different Windows versions for each application. The default Windows version is Windows 7, but you’ll probably want to select a newer version of Windows (such as Windows 10).
- On the Desktop Integration tab, you can choose to add Windows-style theme and link Windows-like folder structure (e.g., Desktop, My Documents) to directories in Ubuntu.
- You can customize the behavior of windows and mouse movements on the Graphics tab and sound on the Audio tab.
- Once you’re finished making configuration changes, click OK to save.
Installing Windows Apps
- While lots of popular Windows software titles will work great in Wine, you might run into problems with some apps. Check out the Wine Application Database to see which apps will run flawlessly, with minor flaws, or not at all on Ubuntu.
- If the installer doesn’t launch, you can also start it from the command line. In a Terminal window, use cd to enter the directory to which you saved the downloaded installer, then use wine filename.exe to launch it.
- If prompted to choose an installation location, choose C:\Program Files.
- You can configure any apps you install in the winecfg tool. Just run wincfg at the prompt, click Add Application on the Applications tab, and select the newly installed app. Then, with the new app selected, go through the tabs and make modifications specifically for that app.
Running Windows Apps
- First, open Files and make sure hidden files are visible. If you don’t see the .wine folder, press Ctrl + H to toggle showing hidden files. [6] X Research source
- Double-click the .wine folder and then navigate to the location to which you installed the Windows program.
- Right-click the .exe file and choose Open with >Wine.
- For example, if you installed it in the virtual C:\Program Files\Game\Risk directory, you’d use cd ‘.wine/drive_c/Program Files/Games/Risk’ . [7] X Research source
- You can start Windows programs from the full path if you’d prefer, but you’ll need to start them with wine start . For example, wine start ‘C:\Program Files\Game\Risk.exe’
- Start the program using wine appname.exe . For example, if the Windows application file is called Risk.exe, you’d use wine Risk.exe to open it from the current directory.
- You can install Winetricks from Ubuntu Software or using sudo apt-get install winetricks . However, if you want to get help from the Wine team, they may not provide assistance if you’re using Winetricks. [8] X Research source
- Once Winetricks is installed, run it from the prompt using the command winetricks . You can then use the tool to install working packages of popular apps and libraries.
Community Q&A
Some applications require administrator permissions in order to be installed. Simply enter your account password to continue.
Thanks! We’re glad this was helpful.
Thank you for your feedback.
As a small thank you, we’d like to offer you a $30 gift card (valid at GoNift.com). Use it to try out great new products and services nationwide without paying full price—wine, food delivery, clothing and more. Enjoy! Claim Your Gift If wikiHow has helped you, please consider a small contribution to support us in helping more readers like you. We’re committed to providing the world with free how-to resources, and even $1 helps us in our mission. Support wikiHowDownload the Debian Package (*.dpkg) file onto a flash drive on another computer. Then, put the flash drive into the computer that doesn’t have an internet connection. From here, you should be able to run the Debian Package by double clicking on it.
Thanks! We’re glad this was helpful.
Thank you for your feedback.
As a small thank you, we’d like to offer you a $30 gift card (valid at GoNift.com). Use it to try out great new products and services nationwide without paying full price—wine, food delivery, clothing and more. Enjoy! Claim Your Gift If wikiHow has helped you, please consider a small contribution to support us in helping more readers like you. We’re committed to providing the world with free how-to resources, and even $1 helps us in our mission. Support wikiHowYes, but not all games work with Wine yet. You can check Wine’s list of compatible programs to see if your game is listed.
Thanks! We’re glad this was helpful.
Thank you for your feedback.
As a small thank you, we’d like to offer you a $30 gift card (valid at GoNift.com). Use it to try out great new products and services nationwide without paying full price—wine, food delivery, clothing and more. Enjoy! Claim Your Gift If wikiHow has helped you, please consider a small contribution to support us in helping more readers like you. We’re committed to providing the world with free how-to resources, and even $1 helps us in our mission. Support wikiHowУстановка Windows приложений в Linux

Сегодня покажу, как запускать программы разработанный под Windows в Linux Mint 20, который мы ранее установили и настроили.
Сразу предупреждаю, что не все Windows приложения корректно работают в Linux. Все зависит от того, насколько приложение сложное, объемное в своей конструкции. Тем не менее большое количество программ Windows запускаются в Linux без каких либо проблем, и сегодня я вам это продемонстрирую.
Введение
Для запуска Windows приложений в среде Linux существует программное обеспечение с открытым исходным кодом – Wine. В интернете существует много статей по её установке в Linux Mint и все они различаются между собой. Очень часто натыкался на нерабочие инструкции и приходилось много ковырять руками. В данной заметке я постараюсь описать рабочий и то же время простой вариант установки для Linux Mint 20.
По причине того, что проект Wine активно развивается и его новые версии выходят часто, в стандартных репозиториях Linux Mint обычно находятся не самые новые версии. Мы же подключим репозиторий разработчика и установим свежую версию программы, выполним её начальную настройку, после чего установим и запустим парочку Windows приложений для демонстрации.
Установка Wine в Linux Mint 20
Для начала необходимо включить поддержку архитектуры i386, чтобы также была возможность запускать 32-битные Windows приложения. Открываем терминал и выполняем такую команду:
sudo dpkg --add-architecture i386Для подключения сторонних репозиториев (где могут находиться программы, которых нет в стандартных репозиториях Linux Mint), необходимо импортировать gpg ключ разработчика.
Процедура импорта ключа требуется для подтверждения подлинности устанавливаемых в систему пакетов.
Также подразумевается, что подключая репозитории вручную вы доверяете их владельцам.
Добавляем официальный ключ репозитория Wine. Выполняем две команды:
wget -nc https://dl.winehq.org/wine-builds/winehq.key sudo apt-key add winehq.key && rm ./winehq.keyПервая команда загружает файл ключа по прямой ссылке, а вторая команда импортирует скачанный ключ в список доверенных.
После импорта ключа подключаем официальный репозиторий Wine такой командой:
sudo add-apt-repository 'deb https://dl.winehq.org/wine-builds/ubuntu/ focal main'В этой команде focal обозначает версию операционной системы. К примеру для Linux Mint 21 вместо focal будет bionic .
После подключения нового репозитория необходимо обновить кэш пакетов, чтобы наша ОС узнала о новом источнике ПО. Выполняем в терминале:
В репозитории разработчика Wine доступны стабильные и тестовые версии. Не будем рисковать и установим последнюю стабильную версию:
sudo apt install --install-recommends winehq-stableНастройка Wine
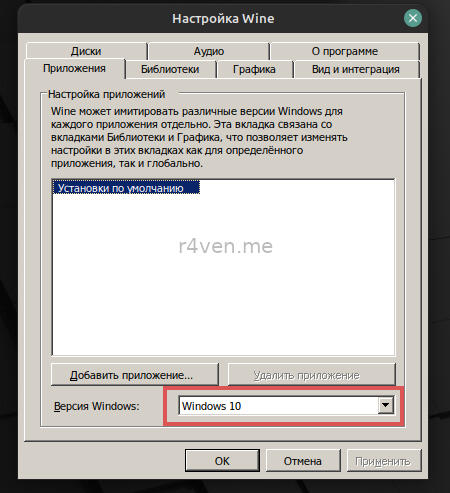
Осталось пару моментов. Перед установкой и запуском Windows программ, необходимо, чтобы Wine создал и сконфигурировал рабочее Windows окружение. По умолчанию создается 64-битное окружение. Для запуска конфигурирования вводим в терминал команду:
После чего Wine приступит к созданию окружения. Это займет некоторое время. После у вас должно появится вот такое окошко:
Выставляем Windows 10 и закрываем его.
Пример установка Windows программы в Linux
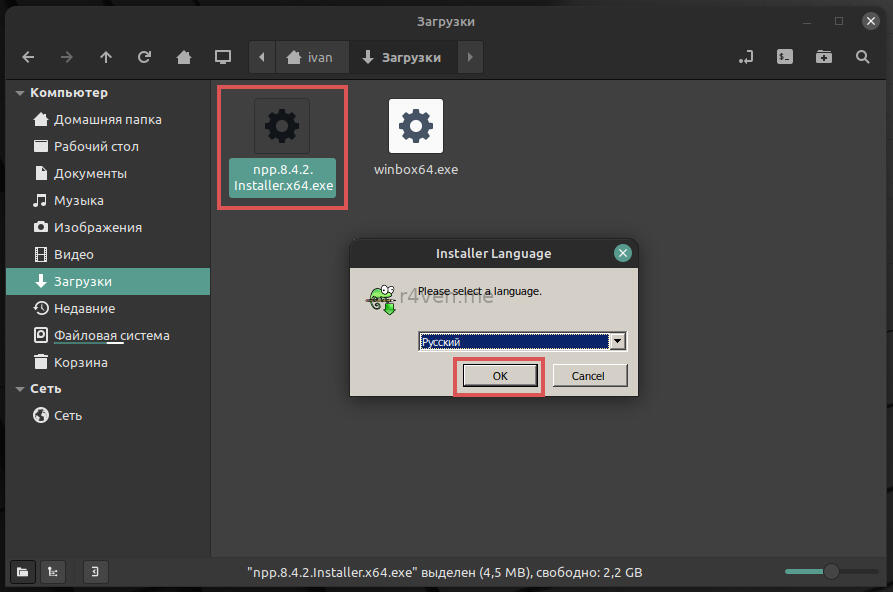
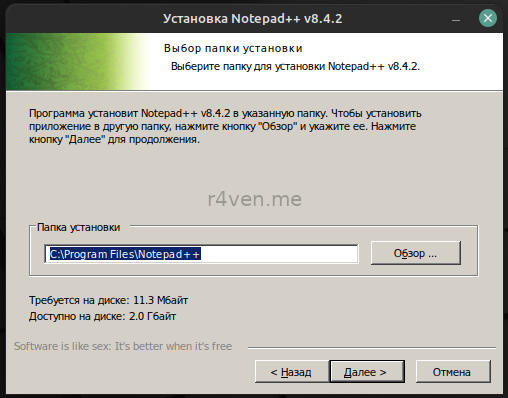
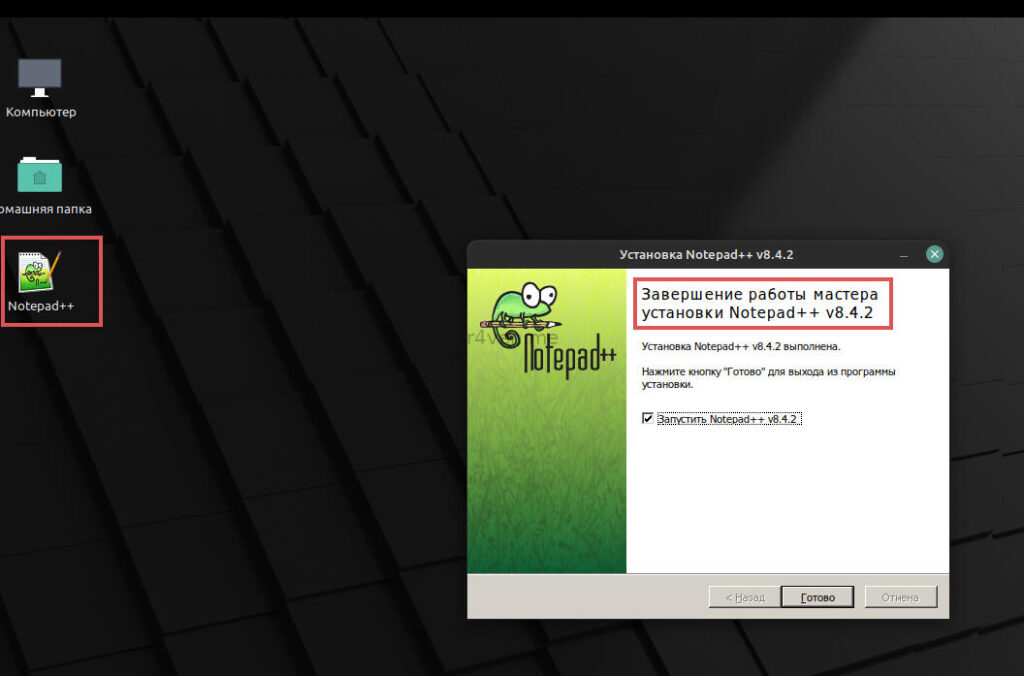
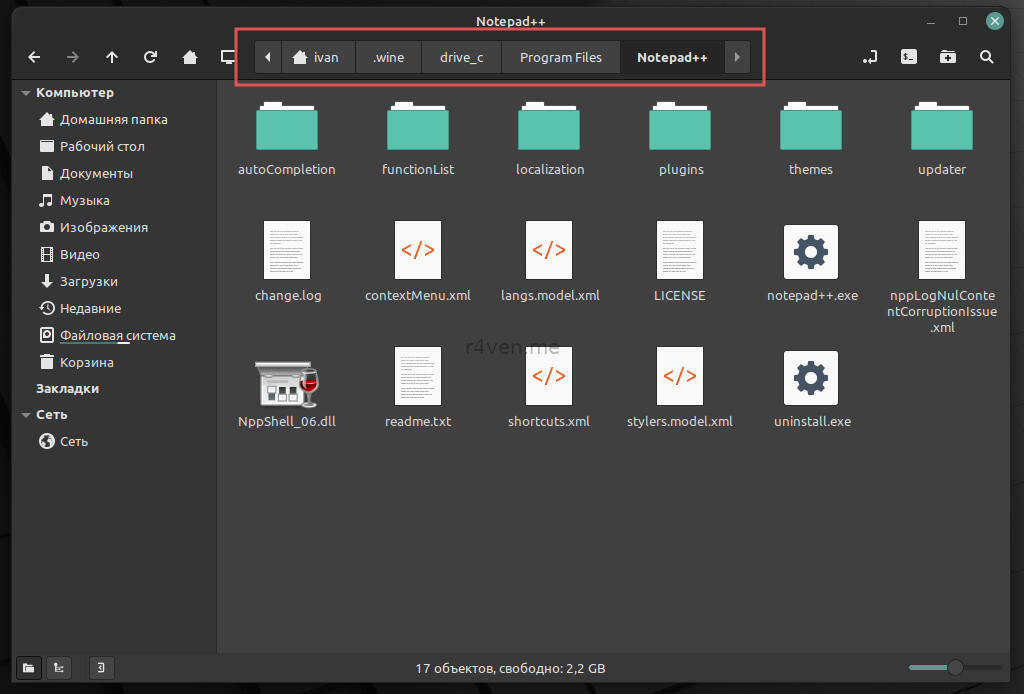
Теперь для демонстрации установим notepad++ и попробуем его запустить. После установки Wine файлы с расширением .exe будут открываться им по умолчанию. Поэтому просто скачиваем нужный exeшник и открываем его в файловом менеджере или через ПКМ –> Открыть с помощью:
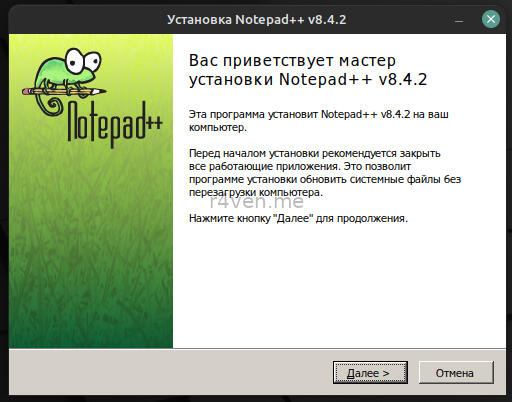
Затем проходим обычные этапы установки Windows программ. Можно даже оставить галочку для создания ярлыка на рабочем столе. Устанавливаем и запускаем:
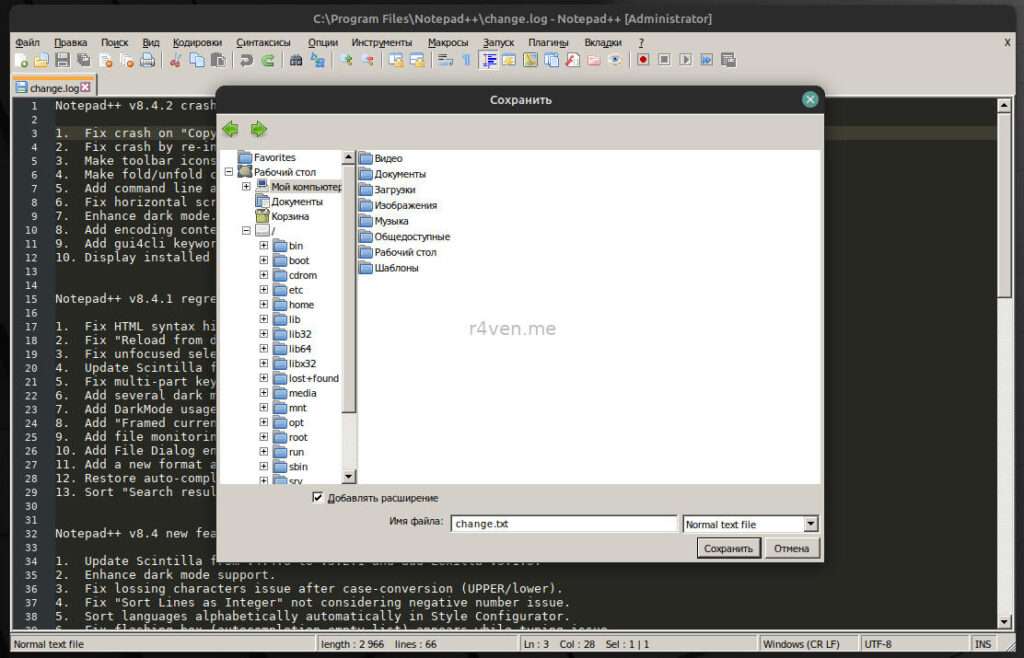
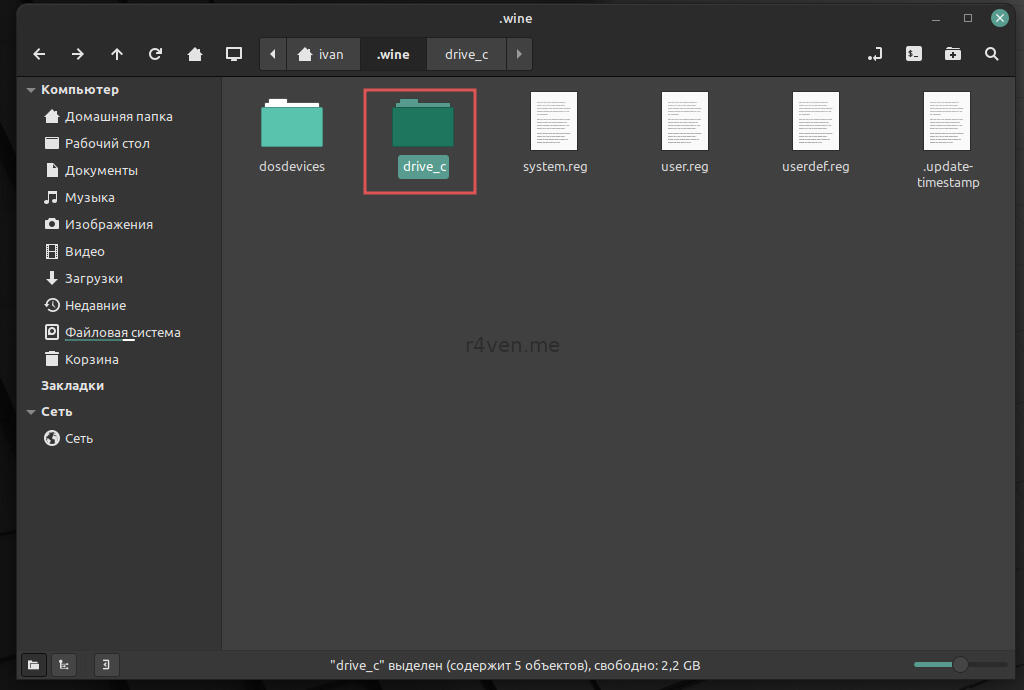
Обратите внимание, что в просмоторщике файлов Wine, при открытии и сохранении документов, в разделе Мой компьютер – есть диск Z – это путь “/” – корень в вашей Linux системе.
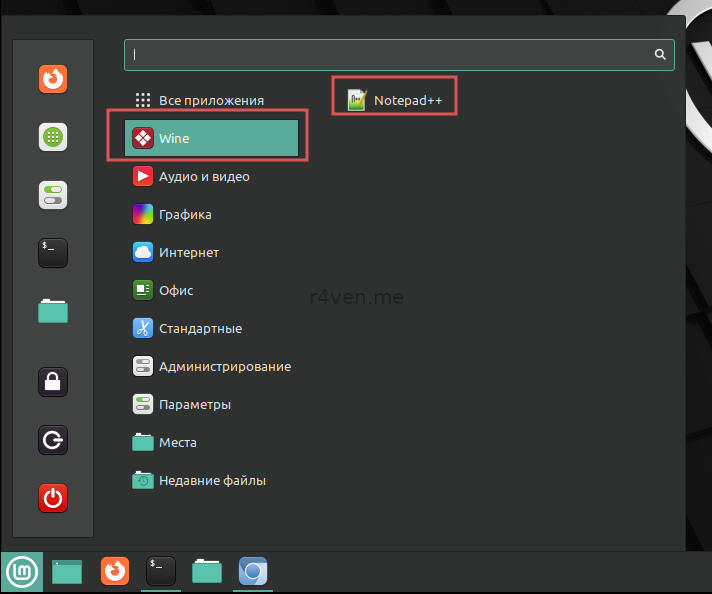
Все программы установленные с помощью Wine – также отображаются в главном меню:
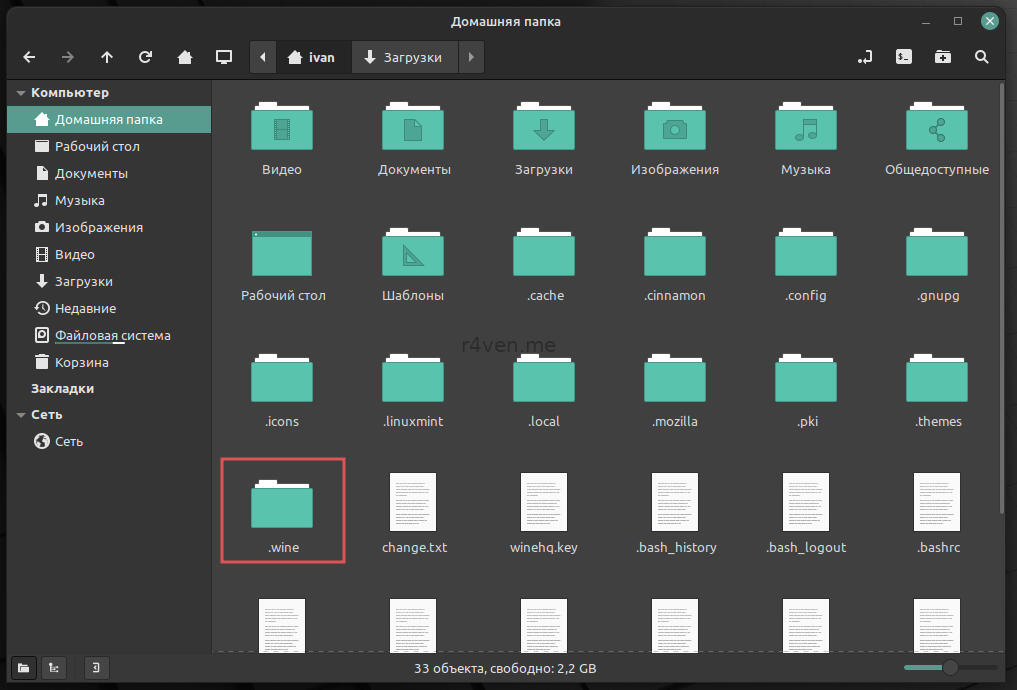
Окружение Wine по умолчанию создаётся в папке /home/username/.wine
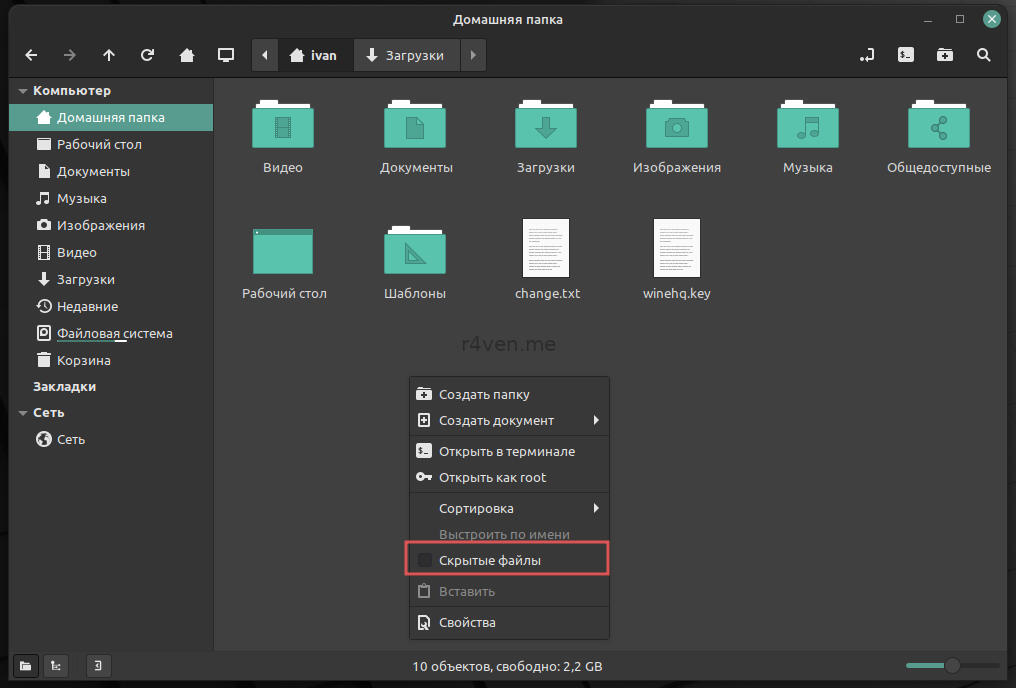
В Linux точка перед названием файла/папки означает, что файл/папка скрытый.
Чтобы увидеть скрытые файлы в Nemo вызовите контекстное меню и установите соответствующую галочку:
В данной директории находится дерево файлов в формате Windows:
Соответственно, наш notepad++ будет находиться в папке Program files.
Запуск портативных Windows программ
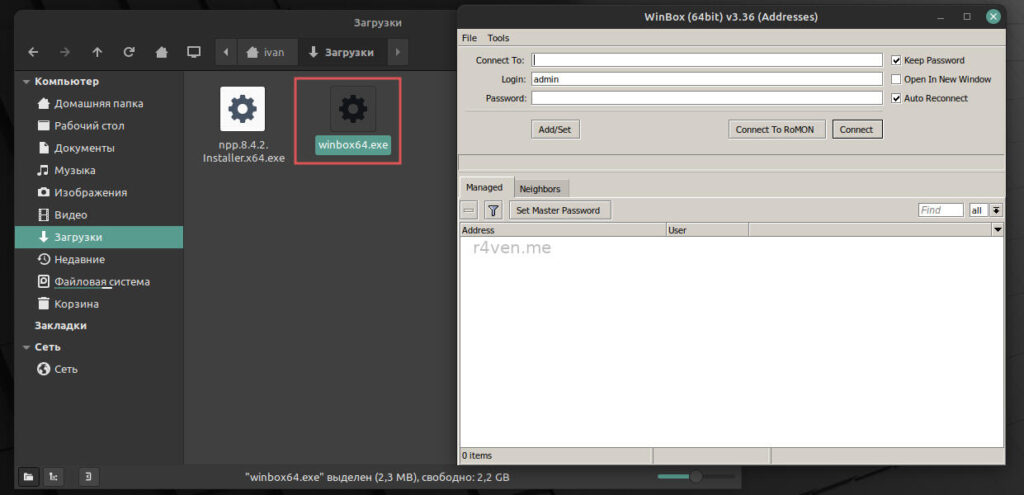
Для Wine также не проблема запускать портативные приложения. Для этого необходимо (как думаете?) просто запустить их.
Пример с запуском приложения для работы с роутерами Mikrotik – winbox:
Всё прекрасно работает. Единственный нюанс, в таком случае программа не устанавливается в окружение Wine и не будет отображаться в главном меню. Для этого придётся находить и запускать файл в ручную. Но это уже мелочи.
На этом сегодня всё. Спасибо, что читаете. Успехов вам 😉