Installer kali linux virtualbox
You can install VirtualBox on Kali Linux, allowing you to use virtual machines (VMs) inside of Kali Linux. However if you are wanting to install Kali Linux as a VM, you want our Kali Linux Guest VirtualBox guide.
VMs are great. There are many upsides with using them. One of the being, able to run multiple Operating Systems (OSs) at the same time. You can have your host machine “untouched”, and then only interact with the guest VMs. Another is when something is going right, take a snapshot. When something goes wrong, revert back.
VirtualBox is free and open source. There are a few other software such as QEMU, KVM/Xen with virt-manager. Then there is also VMware Workstation & Fusion, which is a commercial software (there is VMware Player which is free but it is limited in features).
Preparation
Before trying to install VirtualBox, please make sure your version of Kali Linux is up-to-date, and if required, reboot the machine:
[email protected]:~$ sudo apt update [. ] [email protected]:~$ [email protected]:~$ sudo apt full-upgrade -y [. ] [email protected]:~$ [email protected]:~$ [ -f /var/run/reboot-required ] && sudo reboot -f [email protected]:~$ Download
The first thing we are going to do is import VirtualBox’s repository key:
[email protected]:~$ curl -fsSL https://www.virtualbox.org/download/oracle_vbox_2016.asc|sudo gpg --dearmor -o /etc/apt/trusted.gpg.d/oracle_vbox_2016.gpg [. ] [email protected]:~$ curl -fsSL https://www.virtualbox.org/download/oracle_vbox.asc|sudo gpg --dearmor -o /etc/apt/trusted.gpg.d/oracle_vbox.gpg [. ] [email protected]:~$ We then move onto adding VirtualBox’s repository. We add this to a separate file, so it does not interfere with Kali Linux’s main repository. We also will be making sure to state where the keyring is at so the files can be properly signed. Our CPU architecture is amd64. You may need to alter the example below if yours is different.
One thing to bear in mind, Kali Linux is based on Debian, so we need to use Debian’s current stable version (even though Kali Linux is a rolling distribution). At the time of writing, its “bullseye”:
[email protected]:~$ echo "deb [arch=amd64] https://download.virtualbox.org/virtualbox/debian bullseye contrib" | sudo tee /etc/apt/sources.list.d/virtualbox.list [email protected]:~$ As we have altered our network repository, we need to re-build the cache:
[email protected]:~$ sudo apt update [. ] [email protected]:~$ As VirtualBox has various kernel modules (e.g. vboxdrv , vboxnetflt and vboxnetadp ), we need to make sure they are kept up-to-date when Kali Linux’s kernel gets updated. This can be achieved using dkms:
[email protected]:~$ sudo apt install -y dkms [. ] [email protected]:~$ Setup
Now its time to install VirtualBox itself (along with its Extension Pack to expand VirtualBox’s advanced features):
[email protected]:~$ sudo apt install -y virtualbox virtualbox-ext-pack [. ] [email protected]:~$ When prompted, read and accept the license.
You can now find VirtualBox in the menu or start it via the command line:
[email protected]:~$ virtualbox [email protected]:~$ If you now wish, you are able to install Kali Linux in a VirtualBox VM (on Kali Linux).
Installing Kali Linux on VirtualBox: Quickest & Safest Way
Kali Linux is one of the best Linux distributions for hacking and security enthusiasts. Since it deals with a sensitive topic like hacking, it’s like a double-edged sword. We have discussed it in the past with a detailed Kali Linux review, so I am not going to bore you with the same stuff again. While you can install Kali Linux by replacing the existing operating system, using it via a virtual machine would be a better and safer option. With VirtualBox, you can use Kali Linux as a regular application in your Windows/Linux system. It’s almost the same as running VLC or a game in your system. Using Kali Linux in a virtual machine is also safe. Whatever you do inside Kali Linux will NOT impact your ‘host system’ (i.e. your original Windows or Linux operating system). Your actual operating system will be untouched and your data in the host system will be safe.
How to Install Kali Linux on VirtualBox
I’ll be using VirtualBox here. You may also install Kali Linux on VMWare. VirtualBox is a wonderful open source virtualization solution for anyone (professional or personal use). It is available free of cost. In this tutorial, we will talk about Kali Linux in particular but you can install almost any other OS using the ISO file or a pre-built virtual machine save file.
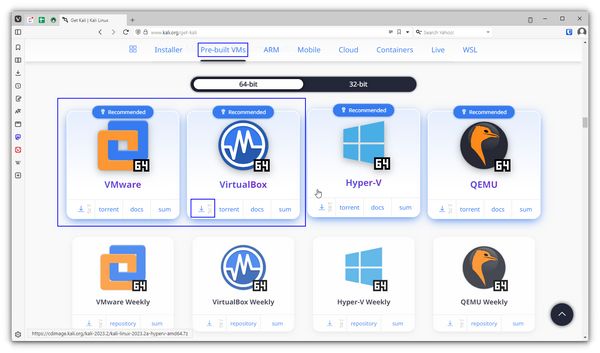
As I already mentioned, you can have either Windows or Linux installed as your host. But, in this case, I have Windows installed (don’t hate me!), where I try to install Kali Linux in VirtualBox step by step. And, the best part is that even if you use a Linux distro as your primary OS, the same steps will be applicable! Wondering how? Let’s see… As the file size is around 3 GB, you should either use the torrent option or download it using a download manager, whichever is fastest for you.
3. Install Kali Linux on Virtual Box
Once you have installed VirtualBox and downloaded the Kali Linux 7z image, you just need to add it to VirtualBox in order to make it work. Here’s how to add the VirtualBox image for Kali Linux: Step 1: Extract the downloaded 7z file. You can use 7zip for extracting the file.
The Kali Linux Virtual Machine storage will be on the same location as you extracted the 7z file. If you want a different location for the VM, you need to extract the 7z file to a location where you have sufficient storage available. I would never recommend the C: drive on Windows.
Step 2: Launch VirtualBox. You will notice an Add button – click on it. 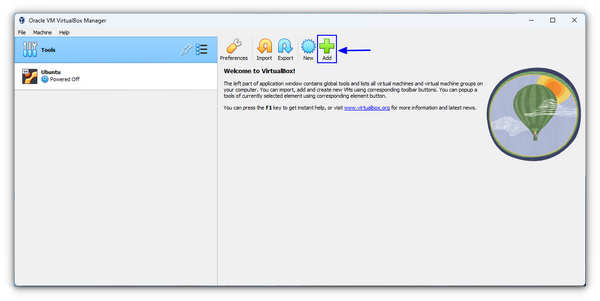 Step 3: Next, browse the folder you just downloaded and extracted. Choose the VirtualBox Machine Definition file to be added (as you can see in the image below). The file name should start with ‘kalilinux‘ and end with .vbox extension.
 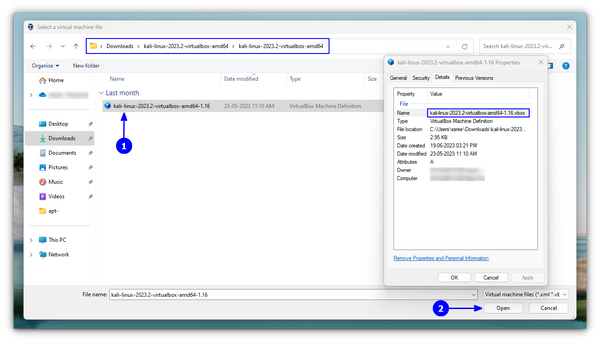 Once selected, proceed by clicking on Open. Step 4: Now, you will be shown the settings for the virtual machine you are about to add. So, you can customize them or not – that is your choice. It is okay if you go with the default settings.
 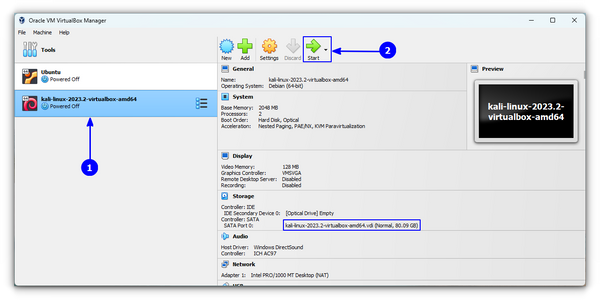 Here, the hard drives as VDI refer to virtually mounting the hard drives by allocating the storage space set. After you are done with the settings, hit Start and wait for a while.
You might get an error at first for USB port 2.0 controller support, you can disable it to resolve it or just follow the on-screen instruction of installing an additional package to fix it. And, you are done!
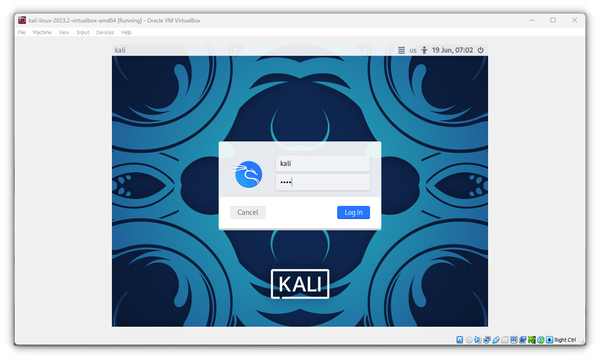 The default username in Kali Linux used to be root and the default password was toor. But since January 2020, Kali Linux is not using the root account. Now, the default account and password both are kali. You should be able to login to the system with it.
 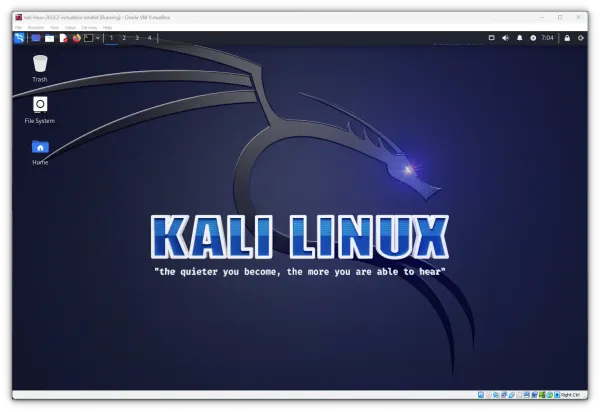 Do note that you should update Kali Linux before trying to install new applications or trying to hack your neighbor’s WiFi.
Of course, Kali Linux has a lot of useful tools in it for penetration testing – so you can explore those after installation.
Both Kali Linux and Ubuntu are Debian-based. If you face any issues or error with Kali Linux, you may follow the tutorials intended for Ubuntu or Debian on the internet.
Suggested Read 📖
How to install Kali Linux on VirtualBox using VDI
While you can always follow the instructions recommended above, there’s also another way of installing Kali Linux. You will notice a VDI file when extracting the 7z file of Kali Linux. You can use this VDI file to create a Kali Linux Virtual Machine. Open VirtualBox and select New option. 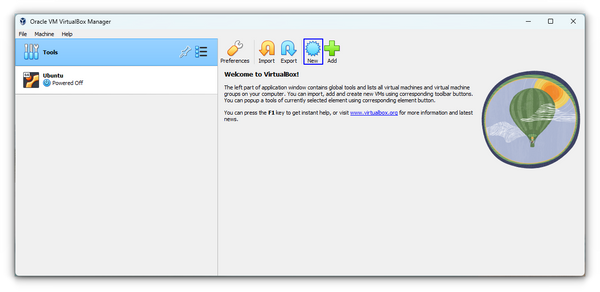 Now, go to expert mode on Virtual box.
 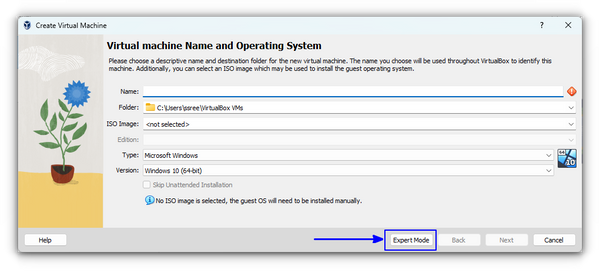 This is nothing but a comprehensive view of all the tweaks that we can do. From there, set all the things like below:
- Name of VM: Kali Linux
- Type: Linux
- Version: Debian 64-bit
- Under Hardware, Base Memory (RAM): 4GB (Recommended)
- Processors: More than one, as per availability
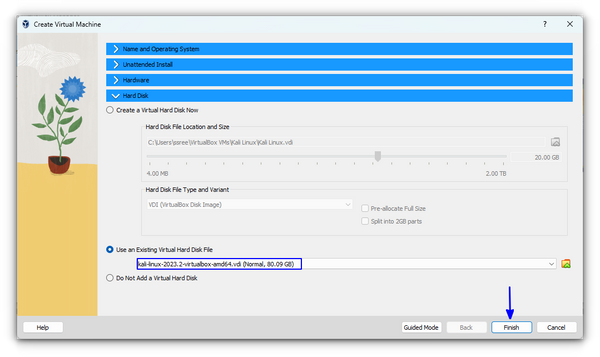
Now, for the Hard Disk part, select Use an existing Virtual Hard Disk File and browse for the extracted .vdi file of Kali Linux.
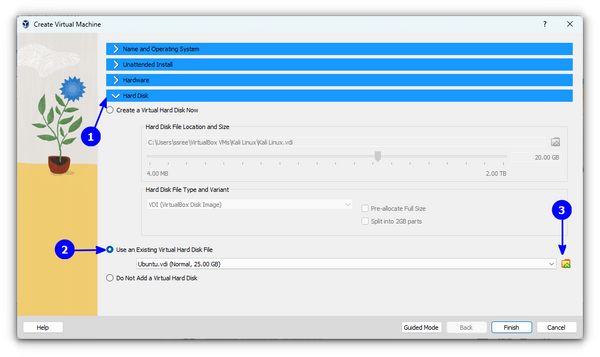
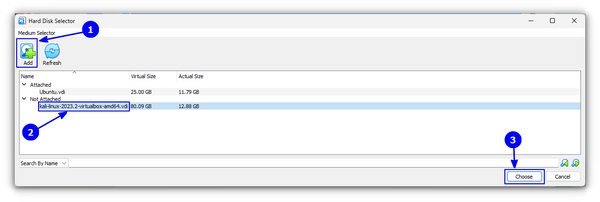
On the new dialog box, click on Add and search for the VDI file in resulting file browser. Once you find the file, select it and then press choose.
You can now press the Finish button.
The VM created will have several settings like Display Memory, Network etc set to default. You should give the Display memory as 128 MB and choose to enable 3D acceleration.
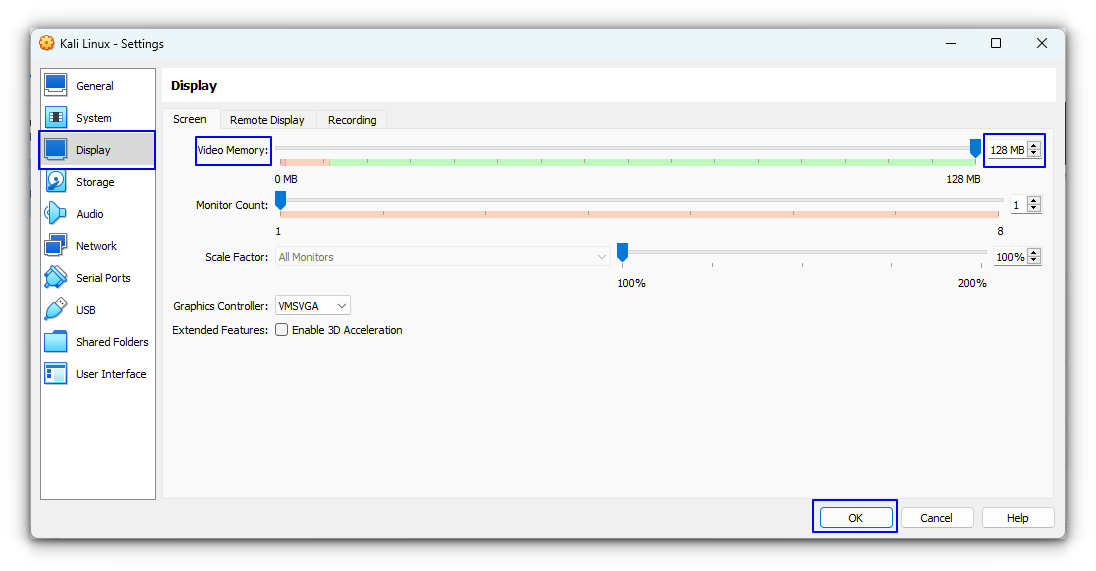
You can now start the VM, and use username and password «kali» once asked to log in.
You can always install Kali Linux using the ISO file, which has same process like any other Linux distribution.
Bonus: Free Kali Linux Guide
If you are just starting with Kali Linux, it will be a good idea to know how to use Kali Linux.
Offensive Security, the company behind Kali Linux, has created courses that explains the basics of Kali Linux, configuration, and more. It also has a few chapters on penetration testing and security tools.
Basically, it has everything you need to get started with Kali Linux. And the best thing is that the course is available for free. You can go to the portal to explore courses and certification exams, and learn them there.
Let us know in the comments below if you face an issue or simply share your experience with Kali Linux on VirtualBox. If you are curious, you can also try Kali Linux on Windows using WSL.