- How To Get A Full Install Of Linux On A USB Stick
- My recommended method for installing a full Linux distro on a 4GB USB stick
- Final notes
- What Is A Home Computer Server?
- 5 thoughts on “How To Get A Full Install Of Linux On A USB Stick”
- How to Install Linux OS on USB Drive and Run it On Any PC
- Requirements:
- Step 1: Create Bootable Linux Installation Media
- Step 2: Create Partitions On Main USB Drive
- Step 3: Install Linux on USB Drive
- Step 4: Customize the Lubuntu System
How To Get A Full Install Of Linux On A USB Stick
In previous articles and videos I’ve discussed how to get a «Live» mode (i.e. as if your computer were booting from CD) of Linux on a USB stick. Some people think this is cool but would rather have a full CD-sized distribution installation instead. And when I said «CD-sized» I’m referring to distributions that take up the entire contents of a CD (such as Ubuntu) and not «biz card» distros like Puppy Linux and Damn Small Linux.
To do this it isn’t dependent on the distribution you’re using (you can use any you like) but more so on your USB stick itself.
Consider it this way: You want to use your USB stick as a «hard drive», so to speak. Being that’s the case, you need a stick that exceeds the minimum requirements for the OS to work.
Using Ubuntu as an example, the minimum requirement according to its native installer is a drive that has at least 2048MB free. A 2GB USB stick isn’t enough because it doesn’t have enough minimum space – so you need a 4GB USB stick.
Side note: Think a 4GB USB stick is expensive? It’s isn’t. It’s 8 bucks. And I remember not more than 3 to 4 months ago they were $22. These things are getting so unbelievably cheap it’s ridiculous – and they all work.
My recommended method for installing a full Linux distro on a 4GB USB stick
Before continuing, yes the way I do it is complete overkill – but I like to have absolute 100% confirmation that the Linux install absolutely positively will not touch the internal hard drive of my system. You’ll understand what I mean by that in a moment.
1. Head into the BIOS of your computer and from the boot device order set the first to be CDROM and the second to be USB-FDD, USB-HDD or USB-CDROM.
If USB-FDD doesn’t work for a boot device, try USB-HDD. If USB-HDD doesn’t work, try USB-CDROM. One of them will eventually work. And if not, try plugging the USB stick directly into the back of the computer (as in use the USB ports that are directly off the motherboard and not the ones wired to the front of the case).
2. Power off your computer, open the case and physically disconnect the hard drive from the motherboard.
This is the overkill part. Not entirely necessary, but I don’t want GRUB to even know the internal hard drive exists – because even if you set the hard drive «not to exist» in your BIOS, the Linux installation will still «see» your internal hard drive on most motherboards. I go the extra mile by cracking open the case and unplugging the SATA connector from the motherboard physically.
Before rebooting the computer:
Pop in your Linux distro CD-ROM into the tray because you’ll need to boot from it to install the OS to the USB stick.
Insert the USB stick you want to install the OS to into one of your open USB ports.
3. Reboot and proceed with a normal Linux distro installation.
If all goes well, your computer will boot up, spin up the CD-ROM and launch Linux in a Live mode. From there you proceed with a normal installation. Being your hard drive is physically disconnected the OS will be forced to pick the USB stick as its only means of media to install the OS to.
When done, the OS will prompt you to eject the disc (which you do), then restart the computer.
4. Reboot and test the Linux OS off the USB stick to make sure everything works okay.
On reboot you should have a full Linux OS ready-to-rock. If so, you’re all done with that.
5. Shut down, power off the computer and reconnect the internal hard drive to the motherboard.
Once the USB stick has a full Linux OS on it you’re safe to reconnect your hard drive back to the motherboard.
6. Do a test boot with the USB stick inserted to see if it loads first before the internal hard drive does.
Your boot order should be CDROM, USB-FDD (or HDD or CDROM) then HDD. So what your computer should do is try to boot from the optical drive first, then the USB stick and then the internal hard drive.
If all goes well, whenever the USB stick is plugged into the computer and booted from a «cold start», it will always boot from the USB stick first whenever you want to go into Linux. When done you log out of Linux, shut down, power off, unplug the stick and reboot again to go back to the internal hard drive’s OS.
Final notes
You should bear in mind that by installing a Linux OS on a USB fashion it will not be portable. What this means is that the OS will set itself to use the computer it is first booted from and configure itself as such.
If you take the USB stick after a full install and boot, then bring it to another computer with different hardware and boot from that, chances are high that the internal settings of the OS on that stick will get all messed up because it’s «expecting» a different the computer it was first booted from. Sure, you can simply reconfigure everything and get it working again relatively quickly for anything messed up, but that’s a bit of a hassle.
For each computer you want to boot a full-install-on-USB-stick distro from, it’s recommended you get a separate USB stick dedicated to each computer. The sticks are cheap enough anyway so it’s not a big deal.
What Is A Home Computer Server?
5 thoughts on “How To Get A Full Install Of Linux On A USB Stick”
Hi,
I installed ubuntu 10.4 following the steps. Everything works as expected as long as the internal HD is not connected. I checked the BIOS, the USBs are the first option, the HDD is the last.
So, what can be wrong?
If you go to http://www.linux-noc.com and click on virtualization, you will find some helpful notes there as well, including unetbootin
Are you using Diskpart to prepare your USB drive?
.. sorry, correction: I meant to say no BOOTABLE flash drives at the end there. PNY makes very good thumbdrives, use them all the time, but not to start into PE or DOS.
WHAT? THEY ALL WORK? No they don’t. What planet are you on? No PNY thumb drive I’ve ever used has worked as a bootable device, and many others don’t work at all, no matter what OS you try to load on there, wether you use BartPE’s USB utility, HP’s “USB Key” appletes, or anything else.
While many USB Flash drives can function as bootable devices, it’s mistake to tell people that “they all work” when they don’t.
ATTENTION CONSUMERS! GEEKS! ETC! ALWAYS READ THE PRODUCT REVIEWS WHEN YOU BUY! Yes some of them will be placed there by the manufacturer, but when most of them say “could not get it to work as a bootable drive” chances are you shouldn’t buy it.
(side note: I’ve had good results from Memorex and Kingston thumbs, and even a few generic ones, but never from a PNY. Very good brand, but no flash drives for some reason.)
Use that and then tell me they don’t work. Seriously. You’re using crappy boot loaders. Junk those and use something that works.
And cut the caps. Makes you look like an idiot.
How to Install Linux OS on USB Drive and Run it On Any PC
Ever thought of using any computer which is not yours, with all your personal stuff and configuration? It is possible with any Linux distribution. Yes! You can use your own, customized Linux OS on any machine with just a USB drive.
This tutorial is all about installing Latest Linux OS on your pen-drive ( fully reconfigurable personalized OS, NOT just a Live USB ), customize it, and use it on any PC you have access to. Here I am using Lubuntu 18.04 Bionic beaver for this tutorial (but, you can use any Linux distribution). So let’s gets started.
Requirements:
- One Pendrive 4GB or More (Let’s call it as Main USB drive/Pendrive).
- One more Pen drive or DVD disk to use as bootable Linux installation media.
- Linux OS ISO file, for example Lubuntu 18.04.
- One PC (Warning: Disconnect internal hard drives to prevent boot record alteration).
Important: While this procedure will not cause loss of data, some users have experienced changes to their internal drive’s bootup behavior depending on Linux distributions selected. To prevent any possibility of this occurrence, you may wish to disconnect your hard drive before continuing with the USB install portion of the tutorial.”
TIP: Use 32 bit Linux OS to make it compatible with any available PC.
That’s it! Go, and collect all of these. It’s time to do something new.
Step 1: Create Bootable Linux Installation Media
Use your Linux ISO image file to create a bootable USB installation media. You can use any software like Unetbootin, Gnome Disk Utility, Yumi Multi Boot, xboot, Live USB Creator, etc. to create bootable USB with the help of ISO image file.
Alternatively, you can use DVD disk by writing that ISO image to it (but that is the old school method).
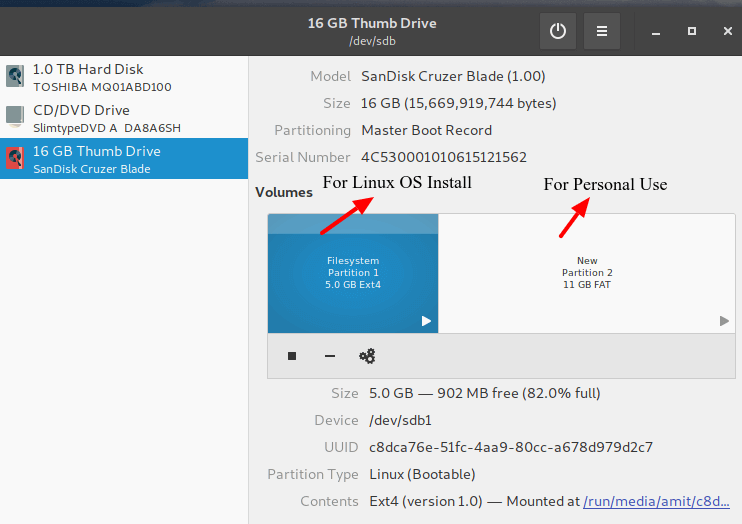
Step 2: Create Partitions On Main USB Drive
You have to make two partitions on your Main USB drive using Gparted or Gnome Disk Utility, etc.
- The root partition of format ext4 of size according to your use.
- Optionally you can use the rest of the space as a FAT partition for using it as a normal USB drive.
I am having 16GB USB drive and I have created one root partition of 5GB and using rest 11GB as normal FAT partition. So my 16 GB USB drive is converted to 11GB drive for normal use on any PC. Sounds good.
This step you can do while installing Linux also, but it will be very complex while installing Operating Systems like Arch Linux.
Once you have created required partitions on the Main USB drive. Now take a deep breath because it’s time to go for Linux installation section.
Step 3: Install Linux on USB Drive
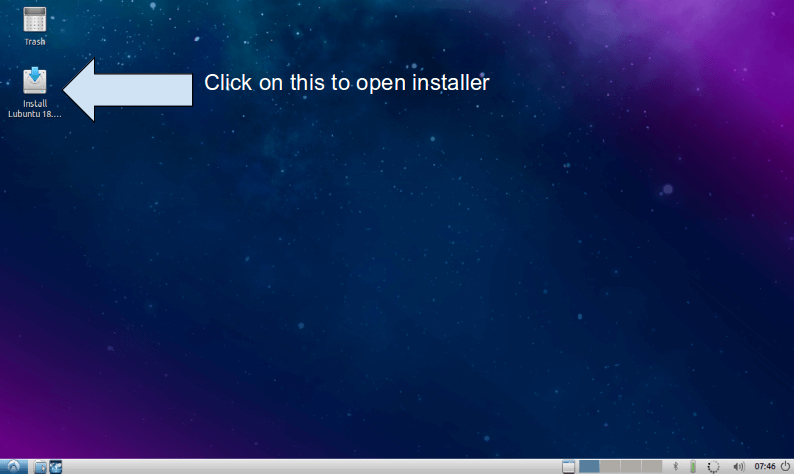
1. First, boot Linux OS (Lubuntu 18.04) from your bootable installation media and launch installation application from a live session. Live session of Lubuntu 18.04 will look like this.
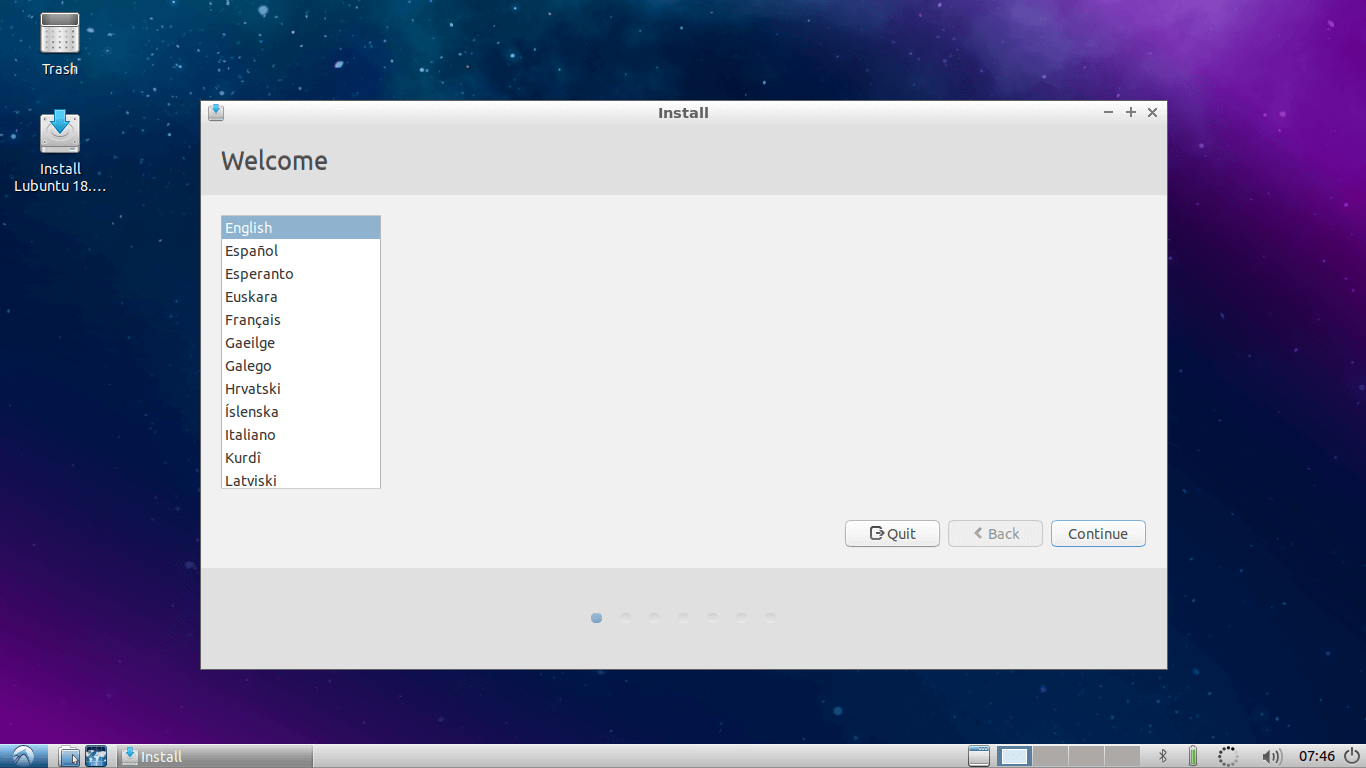
2. Installer welcome screen will appear, select Language there and hit Continue.
3. Select Keyboard Layout and continue…

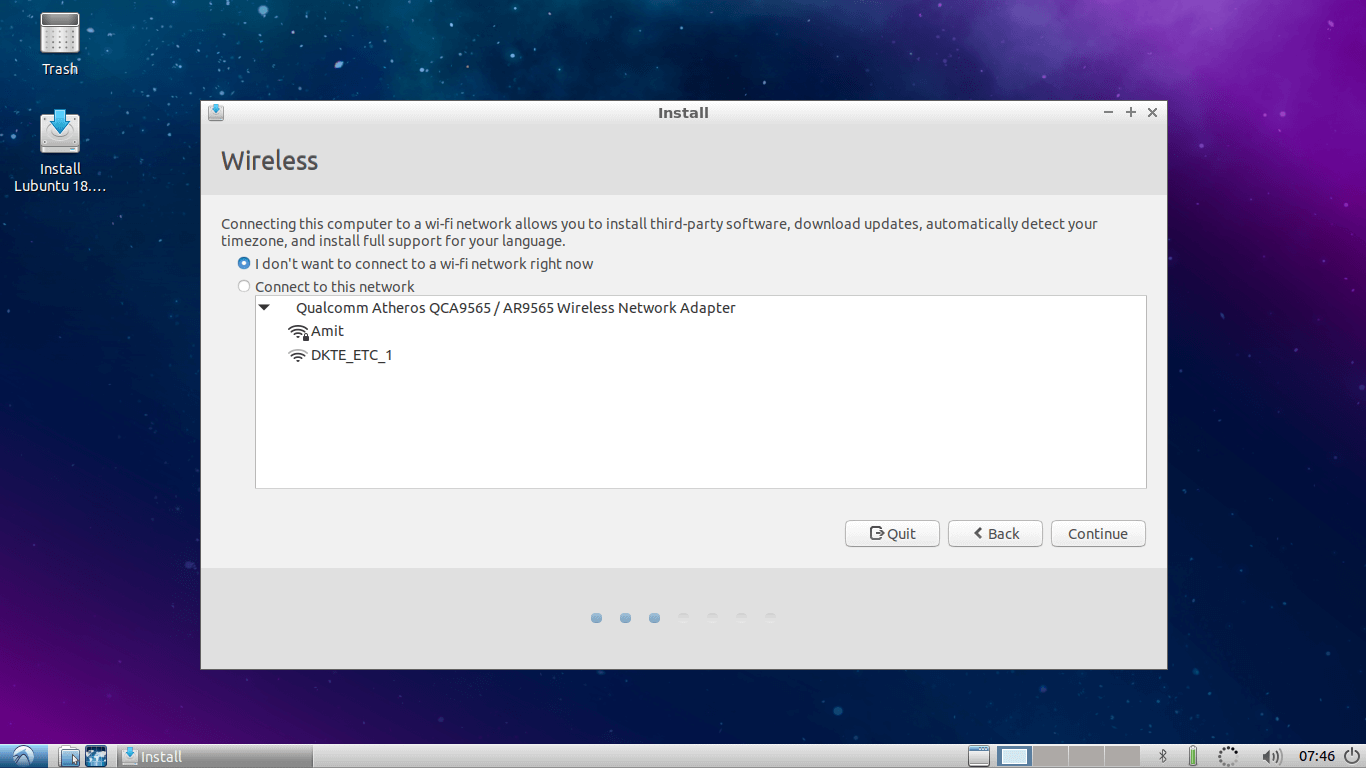
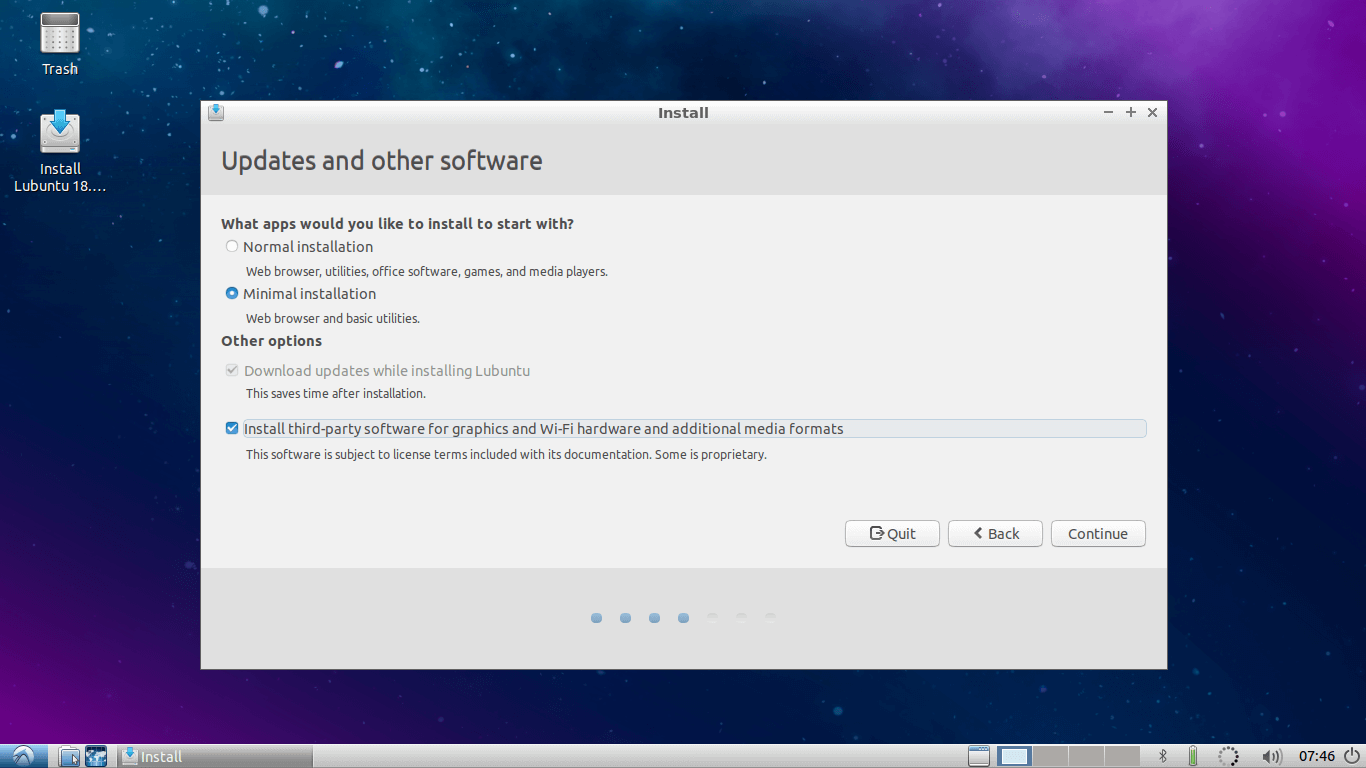
4. Select Wifi internet if you want to update Lubuntu while installation. I will skip it.
5. Select Installation Type and Third-party installation as per your choice and go to next..
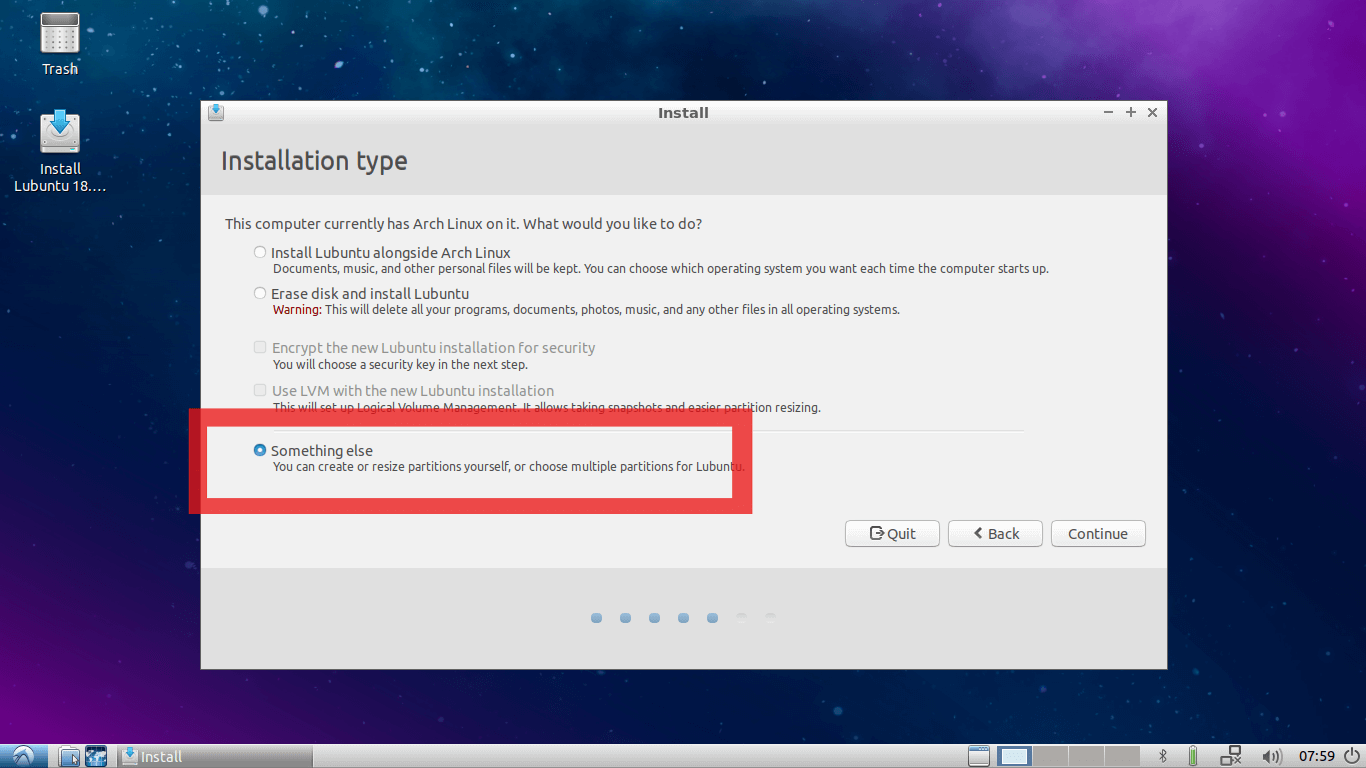
6. Here select Something Else Option (It is Mandatory) and go to next…
7. This is an Important step, here you need to find out where your Main USB drive is mounted.
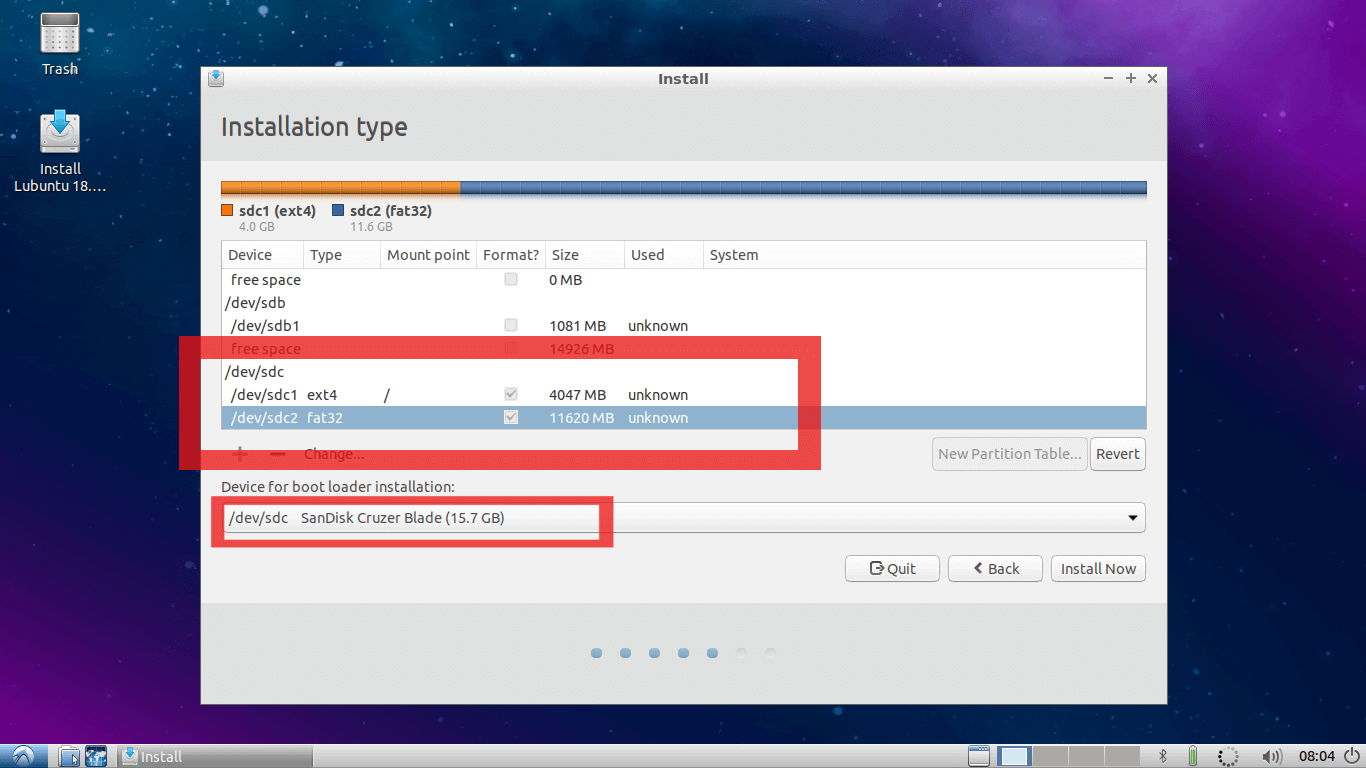
In my case /dev/sda are an internal hard disk of the PC and I am using /dev/sdb is USB Lubuntu Installation media from where this live session is booted.
And /dev/sdc is my Main USB drive where I want to install my Linux system and where I have made two partitions in step number 2. If you have skipped step 2, you can also make partitions in this window.
First, change the mount point of the first partition on this Main USB drive to ROOT (i.e. “ / ” ). And as shown in the second red square select bootloader installation device as the Main USB drive.
In my case it is /dev/sdc . This is the most important step in this tutorial. If it is not done correctly your system will boot only on the current PC you are using, which is exactly opposite of your motivation to follow this tutorial.
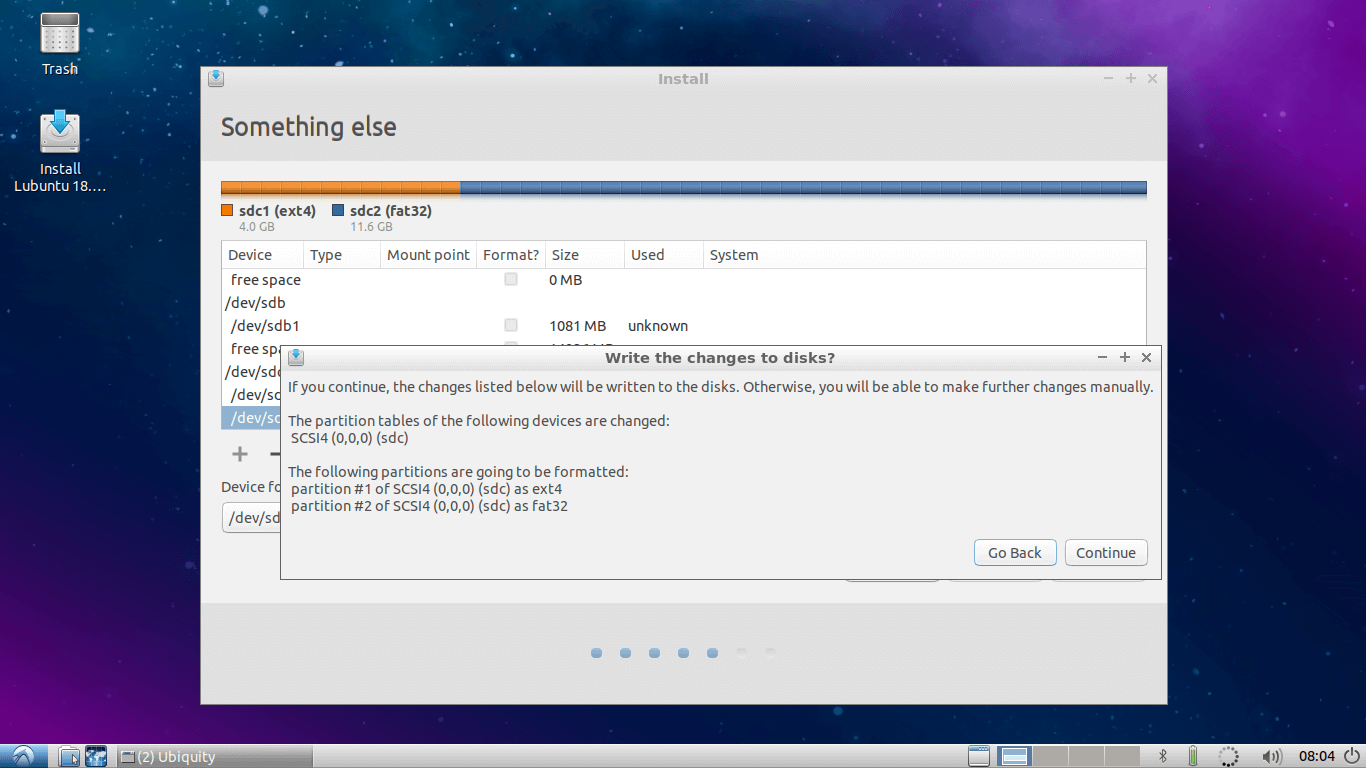
Once it is completed, double-check it and hit continue. You will get a small window showing devices and drive which will be affected.
8. Make sure that the device and drives shown on this window are of your Main USB drive, which is in my case /dev/sdc . Hit continue…
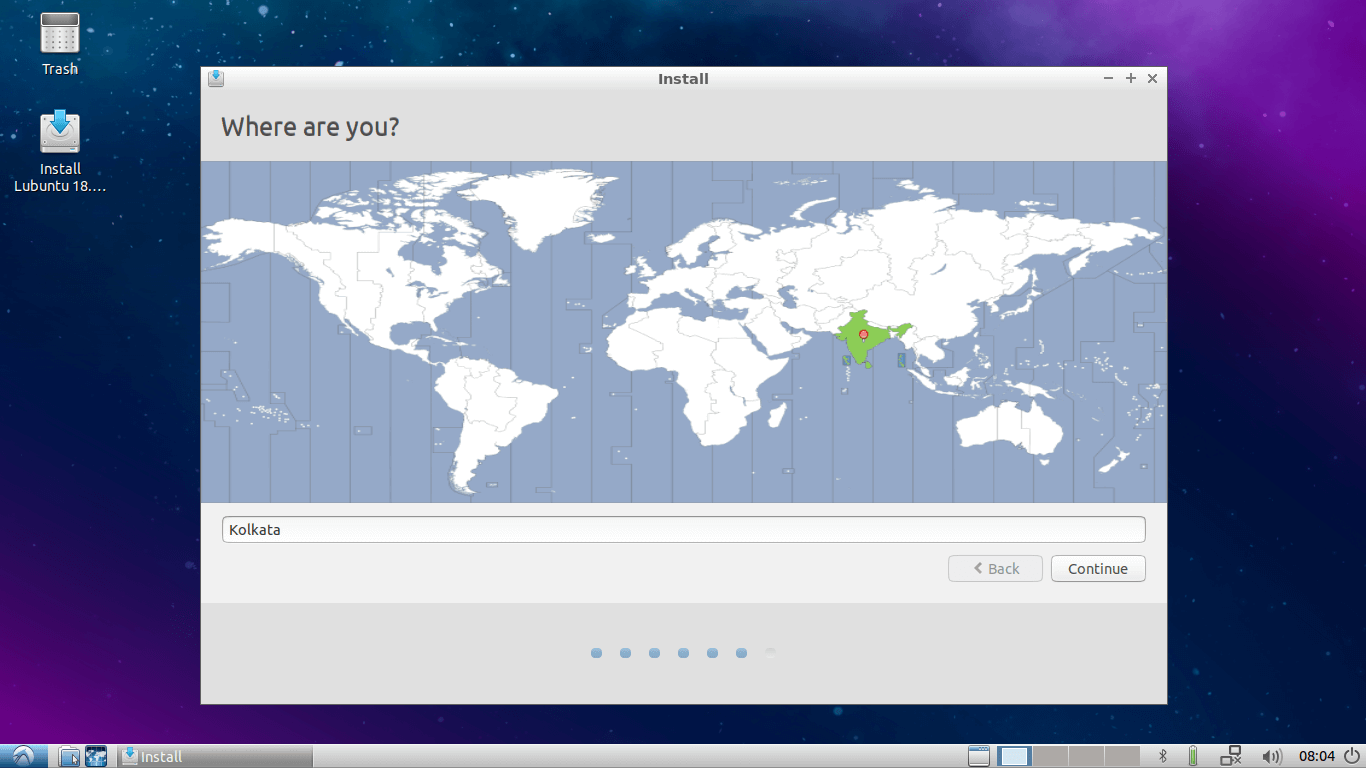
9. Now select your Region and hit Continue…
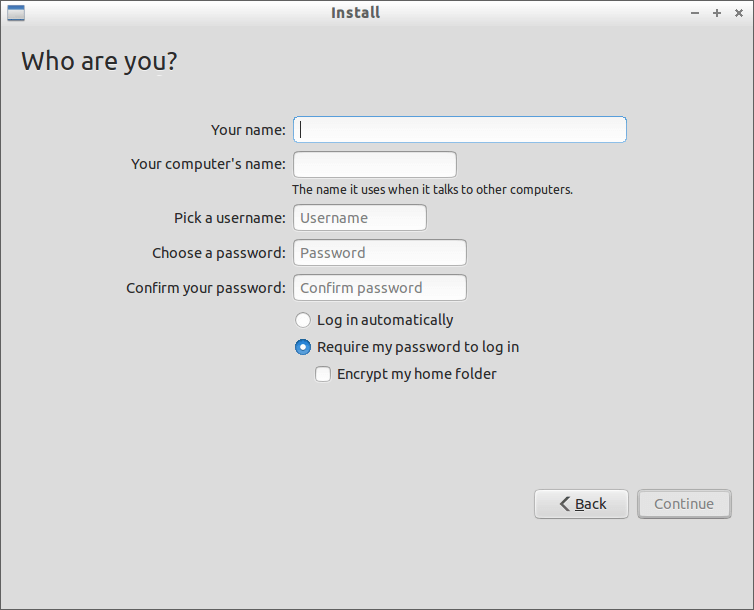
10. Add username, password, and hostname, etc…
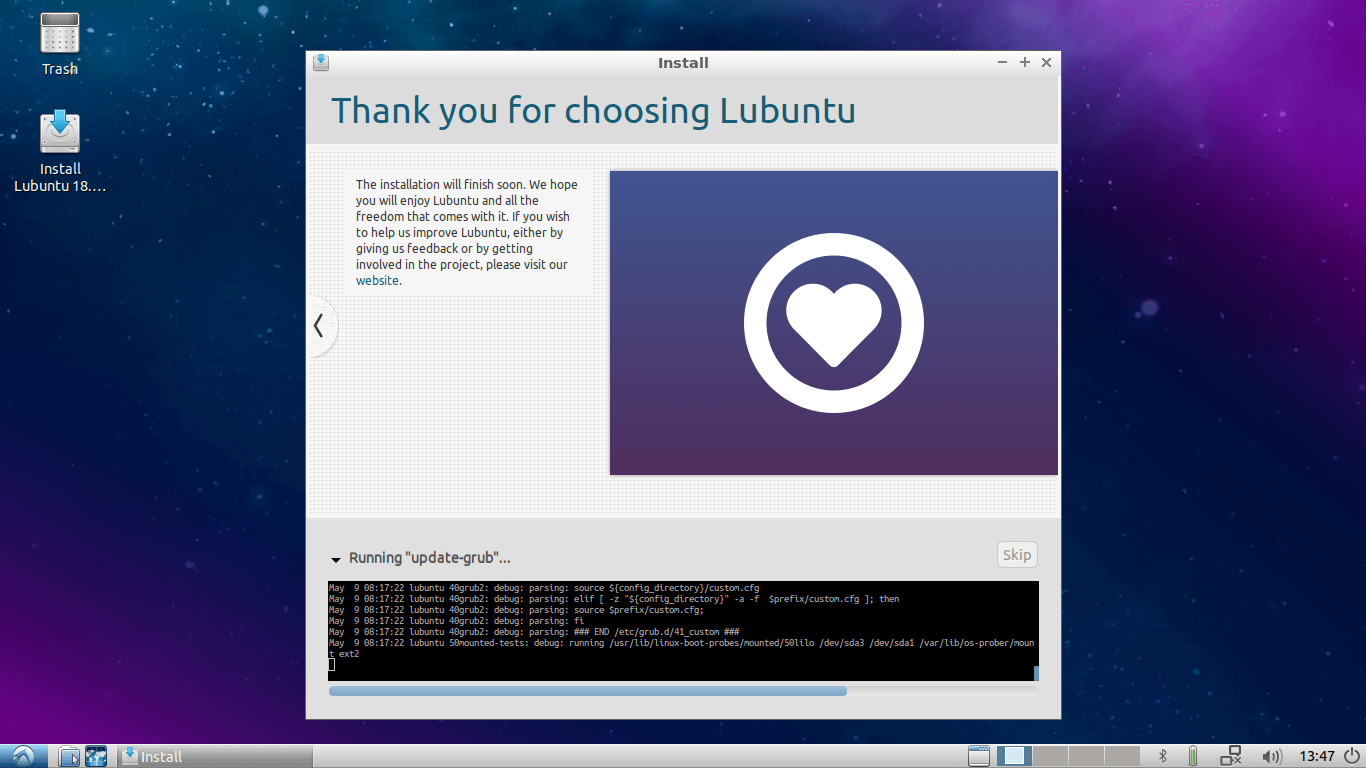
11. Let the installation finish.
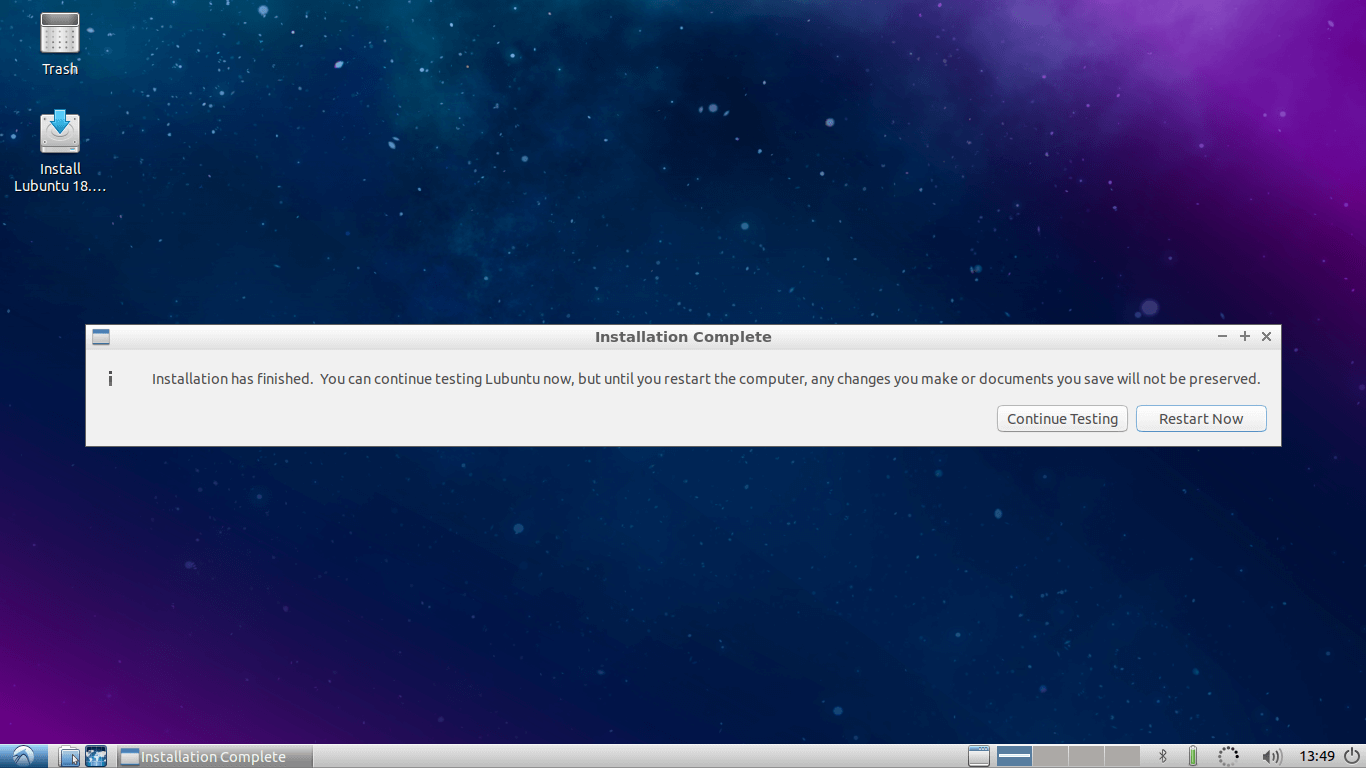
12. After completing installation hit restart and remove your installation media and press Enter.
13. Congratulations, you have successfully installed your own Linux OS on your pen drive to use it on any PC. Now you can connect a USB drive to any PC and start your system on that PC by simply selecting boot from USB option while booting.
Step 4: Customize the Lubuntu System
Now it’s time for fun. Just boot your system on any PC and start customizing. You can install any software you want. You can change Themes, Icon themes, install docker.
You can add and store your online accounts on it. Install/modify/customize whatever you want. All the changes will be permanent. They will not change or reset after rebooting or booting on other PCs.
The following figure shows my customized Lubuntu 18.04.
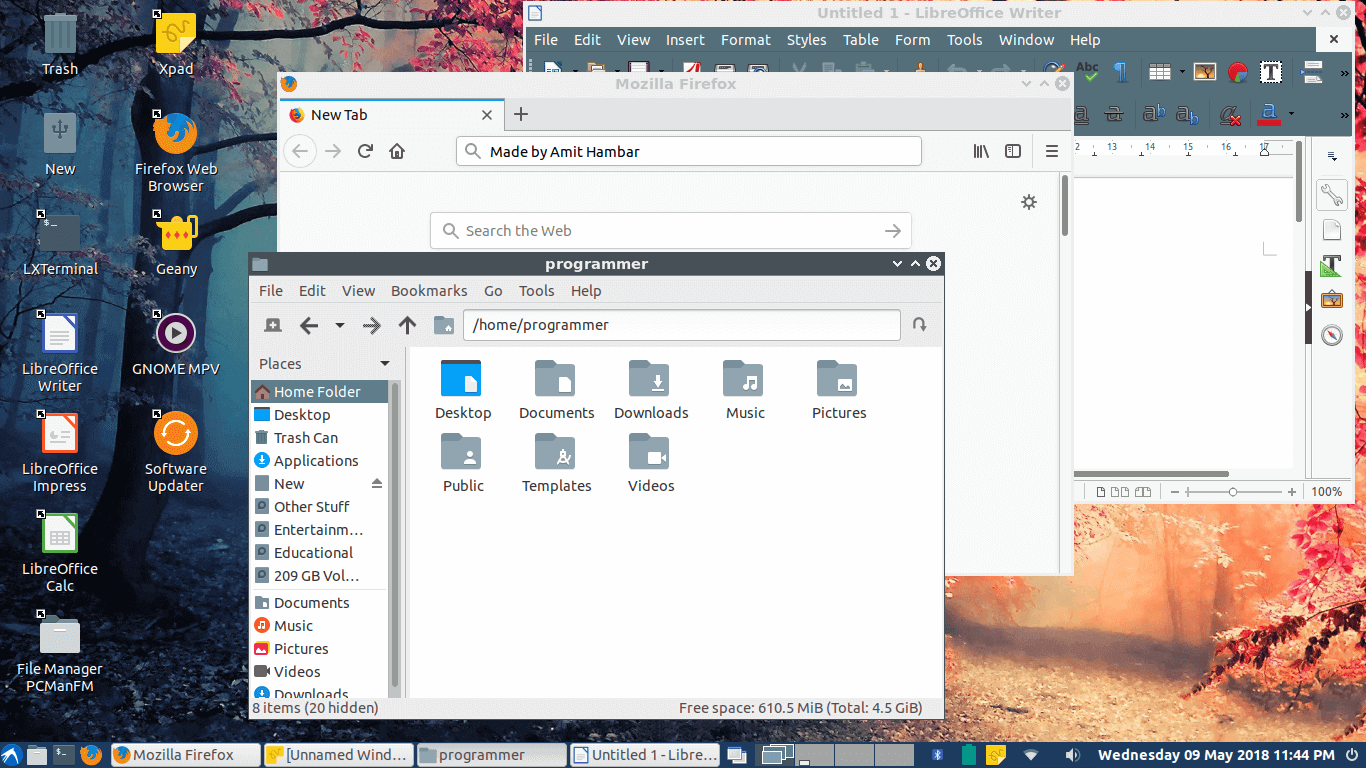
The main advantage of this method is you can use your personal stuff, your online accounts securely on any PC. You can even do secure online transactions as well on any available PC.
I hope it will be helpful for you, if you have questions regarding this article, please feel free to ask in the comment section below.