- How to Install Google Chrome in Linux Mint 20
- Installing Google Chrome in Linux Mint 20
- Method 1: Install Chrome by Adding the Google Chrome Repository
- Step 1: Update apt Repository
- Step 2: Add the Google Chrome Repository
- Step 3: Set Up the Google Chrome Repository
- Step 4: Update apt-cache Again
- Step 5: Install Google Chrome
- Step 6: Launch Google Chrome
- Method 2: Install Chrome Using the .deb Package
- Conclusion
- About the author
- Karim Buzdar
- Как установить Google Chrome в Linux Mint
- Установка Google Chrome в Linux Mint 20
- Удаление Google Chrome
- Выводы
- Похожие записи
- Оцените статью
- Об авторе
- Install Chrome on Linux Mint — Easy Step-By-Step Guide
- Steps to Install Google Chrome on Linux Mint
- 1. Downloading the Key for Chrome
- 2. Adding Chrome Repo
- 3. Run an Apt Update
- 4. Install Chrome on Linux Mint
- 5. Uninstalling Chrome
- A better Alternative: Chromium
- That’s it, folks!
How to Install Google Chrome in Linux Mint 20
![]()
The web browser is the most important and frequently used application on all operating systems, through which you can access search results and browse the Internet. In Linux Mint 20, the default web browser is Mozilla Firefox, but many users prefer to install Google Chrome due to its advanced, useful features. Google Chrome, developed by Google, is one of the most popular freely available web browsers. It uses the WebKit layout engine and has the ability to translate more than 52 languages.
The functionality of Google Chrome can easily be extended by installing different useful extensions and web applications. You can also change the browser’s look by installing new themes.
This article will show you how to install Google Chrome in Linux Mint 20 OS using the command-line interface. All commands in this article were implemented in the Linux Mint 20 distro. Let us now start the demonstration!
First, open the terminal using the keyboard shortcut method Ctrl + Alt + t. You can also access the terminal window from the Start Menu of the Linux Mint distribution. Click on the Start Menu icon and click on the terminal.
Installing Google Chrome in Linux Mint 20
You can install Google Chrome onto your Linux Mint 20 distro by using either of the following two methods:
- Install Chrome by adding the Google Chrome repository
- Install Chrome using the .deb package
Method 1: Install Chrome by Adding the Google Chrome Repository
To install google chrome using this method, you need to perform the following steps:
Step 1: Update apt Repository
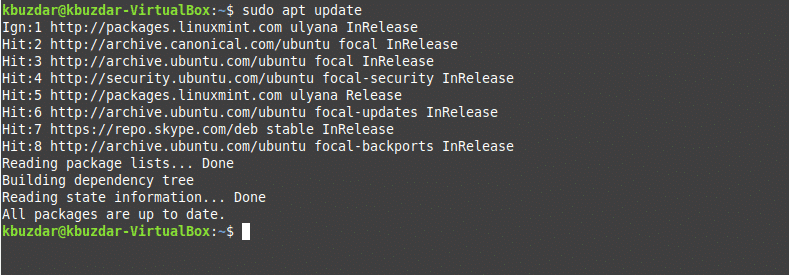
It is recommended that you first update the apt repository before installing any new packages onto your Linux system. So, update the apt-cache by issuing the following command:
Step 2: Add the Google Chrome Repository
Now, you can add the Google Chrome repository to your system. To do so, download the Google signing key using the following command:
The OK status should be displayed on the terminal, as follows:

Step 3: Set Up the Google Chrome Repository
Next, set up the Google Chrome repository on your system by entering the following command:
$ echo «deb [arch=amd64] http://dl.google.com/linux/chrome/deb/ stable main»
| sudo tee / etc / apt / sources.list.d / google-chrome.list

Step 4: Update apt-cache Again
In this step, you will update your apt-cache again.

Step 5: Install Google Chrome
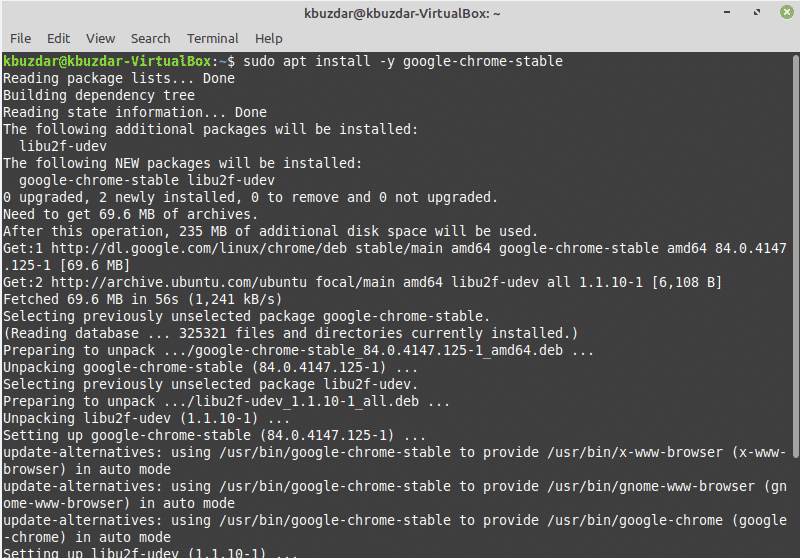
Install the most recent, stable version of Google Chrome onto your system by issuing the command given below:

To install Google Chrome beta, then issue the following command:
Step 6: Launch Google Chrome
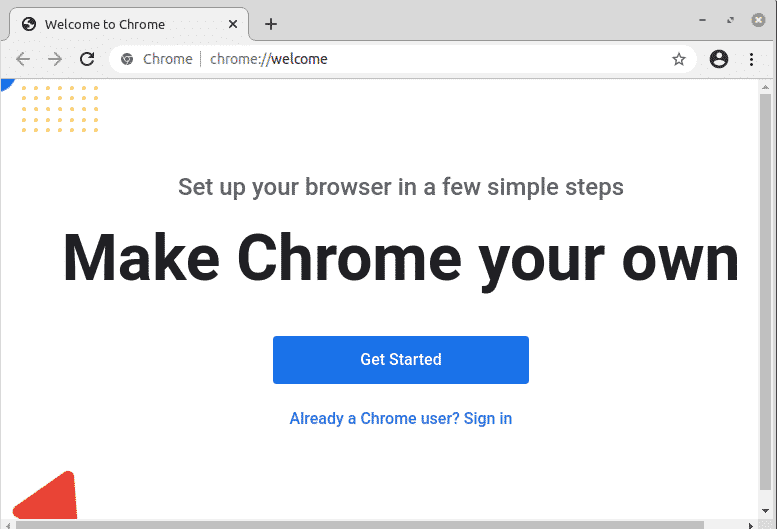
You can launch the stable version of the Google Chrome application through the terminal by issuing the following command:

For the beta version, use the following command instead:
You can also access Google Chrome using the graphical interface. To do so, click on the Start Menu and then select the ‘internet’ option, then click on the Google Chrome icon, as follows:

Method 2: Install Chrome Using the .deb Package
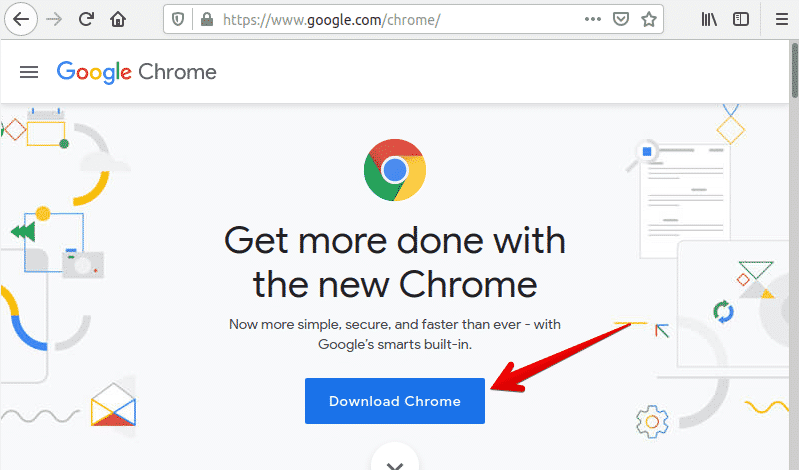
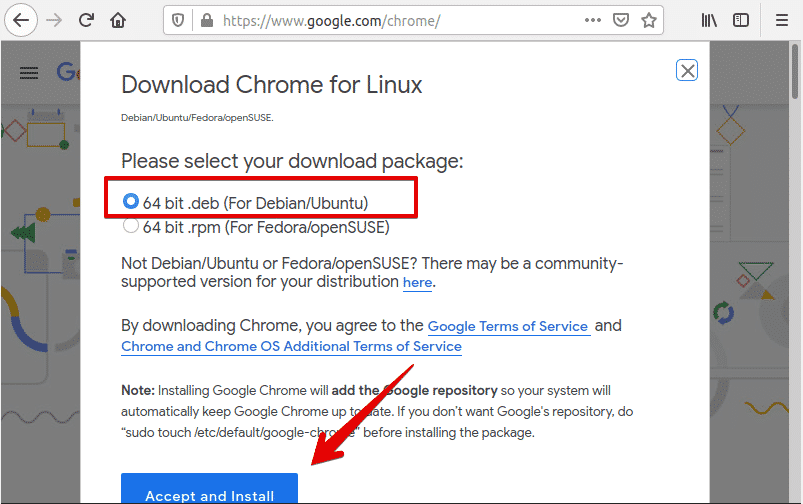
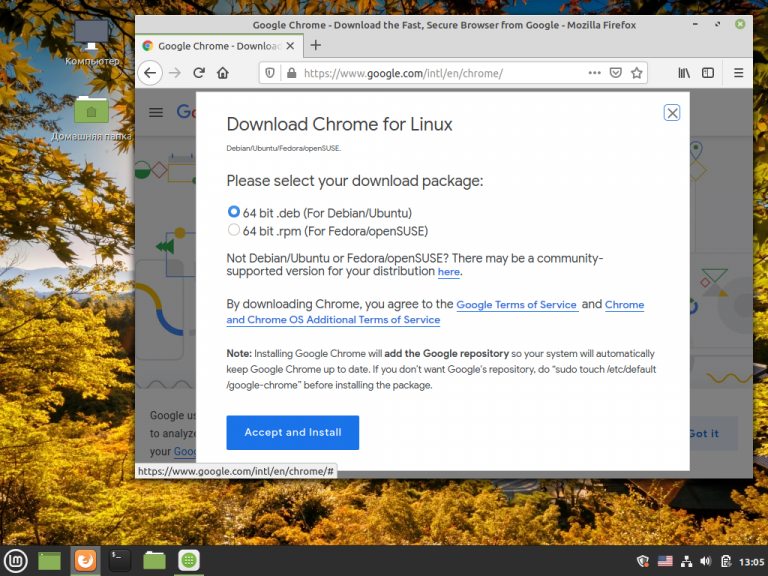
You can download the .deb package for Google Chrome onto your system by using the following URL: https://www.google.com/chrome/. Open this URL in your Mozilla Firefox browser, and then click the ‘Download Chrome’ button.
The following dialog will display in the window. Choose the 64-bit .deb package (for Debian/Ubuntu), and then click the ‘Accept and Install’ option.
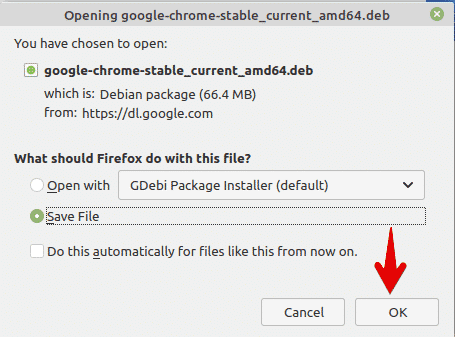
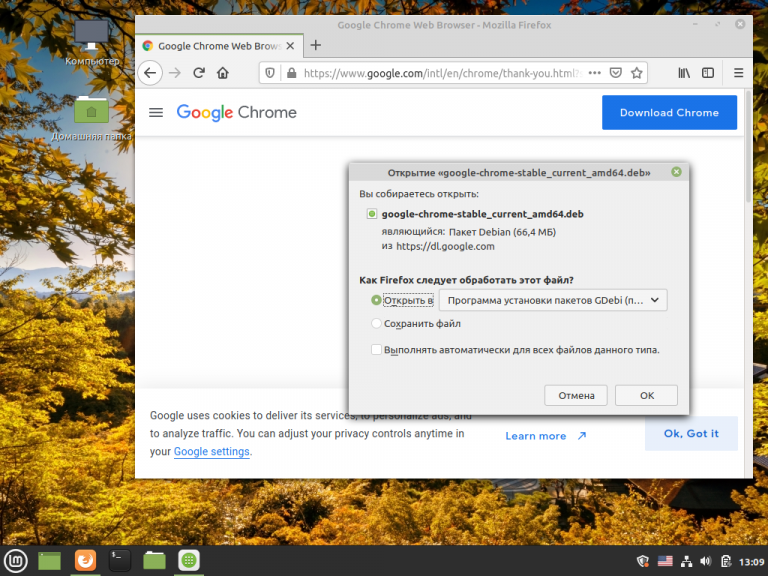
Again, a dialog box will appear on the desktop. Select the ‘Save File’ option and specify the path where you want to save the downloaded .deb package, then click ‘OK.’ In a moment, Chrome will start to download onto your Linux Mint 20 system.
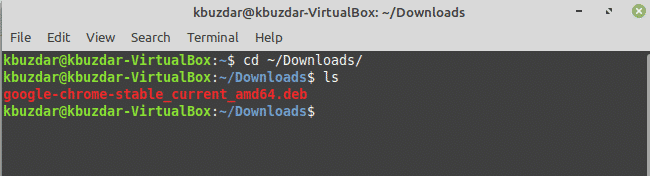
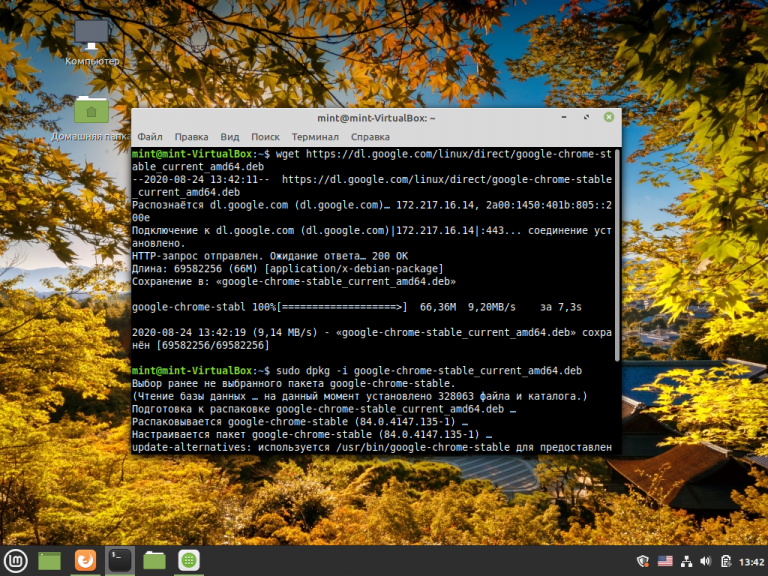
Once the download is complete, open the terminal and navigate to the system downloads using the cd command and list files, as follows:
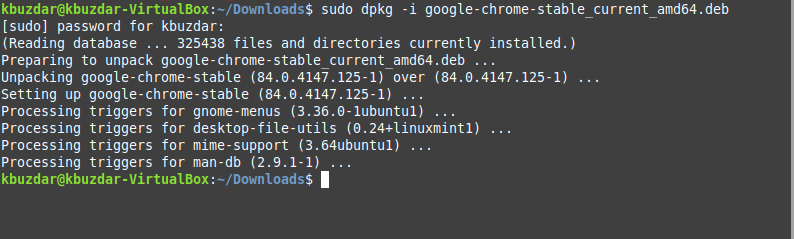
Here, you will type the following command to install the .deb package on your system:
Enter the sudo user password. After that, Chrome will begin to install onto your system.
After completing the installation of Google Chrome, using the same methods mentioned in the section above, you can launch Google Chrome on your system.
Congratulations! Google Chrome has been installed on your system.
Conclusion
This article showed you two different methods for installing Google Chrome onto your Linux Mint 20 system using the terminal commands. Once the installation of Chrome is complete, feel free to add Chrome extensions and your favorite themes from the Google Chrome web store.
About the author
Karim Buzdar
Karim Buzdar holds a degree in telecommunication engineering and holds several sysadmin certifications. As an IT engineer and technical author, he writes for various web sites. He blogs at LinuxWays.
Как установить Google Chrome в Linux Mint
Сегодня браузер Google Chrome уже однозначно стал одним из лидеров по использованию в настольных и мобильных операционных системах, что в общем-то неудивительно. Синхронизация настроек и данных с помощью аккаунта Google, различные расширения, дополнения и плагины сделали его незаменимым в различных сферах использования глобальной паутины. Кроме того, много используемых сервисов прочно связано с Google Play.
В Linux Mint 20 Ulyana по умолчанию установлен только один браузер — Firefox. Как изменить эту ситуацию, добавив ещё один браузер — Google Chrome, мы и расскажем в этой статье.
Установка Google Chrome в Linux Mint 20
Установить Google Chrome можно несколькими способами. Рассмотрим первый. С официального сайта Google необходимо загрузить установочный пакет:

Выберите 64 bit.deb (For Debian/Ubuntu):
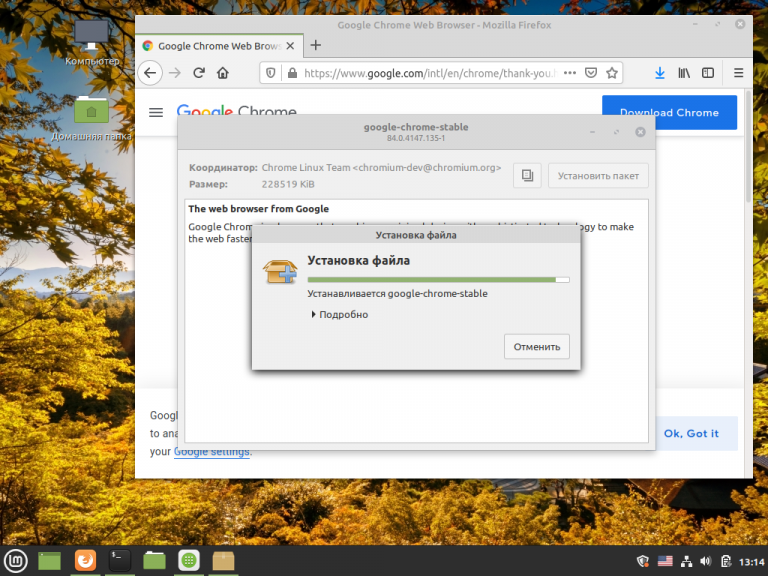
После завершения загрузки выберите из раскрывающегося списка вариант открытия пакета с помощью приложения Программа установки пакетов GDebi:
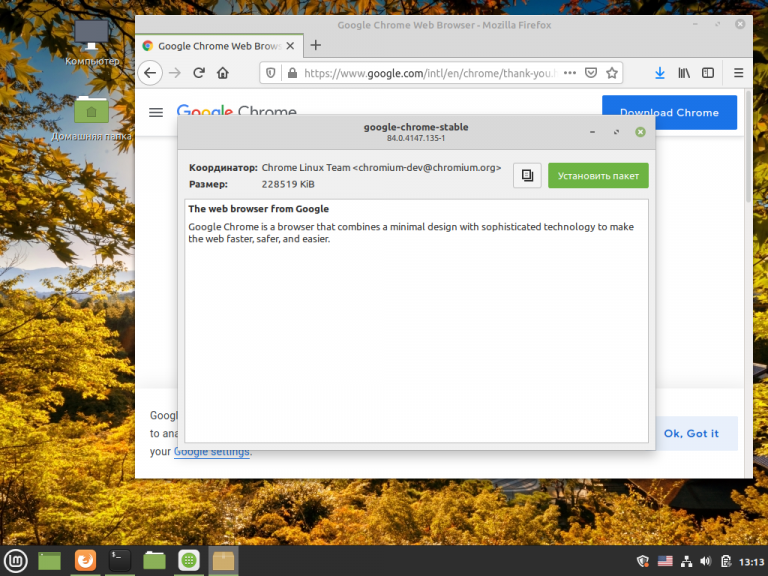
В появившемся окне нажмите кнопку Установить пакет (потребуются права суперпользователя):
Начнётся процесс установки браузера. Для выполнения установки требуется непродолжительное, устойчивое и быстрое подключение к Интернет.
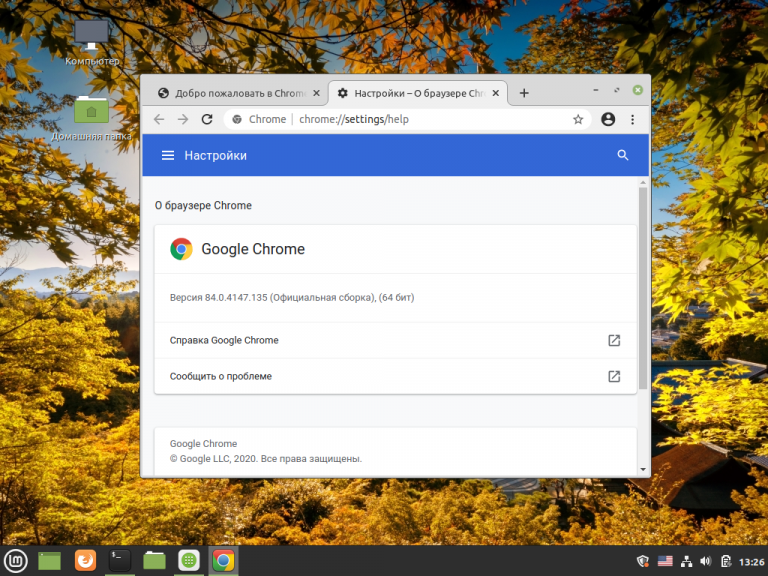
Результат установки (показана версия и разрядность):
Способ второй — установка Google Chrome в консольном режиме с официального репозитория.
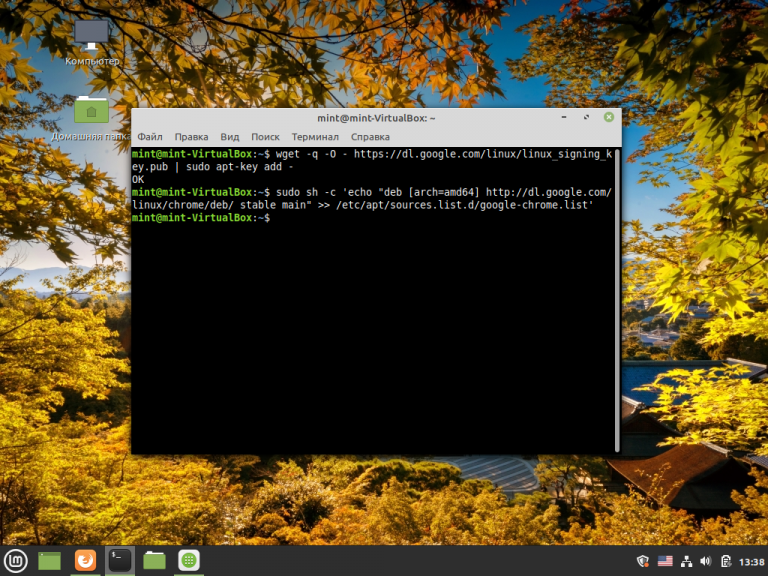
Прежде всего нужно добавить ключ для безопасной работы через https:
wget -q -O — https://dl.google.com/linux/linux_signing_key.pub | sudo apt-key add –
Затем добавьте репозиторий в source.list операционной системы:
sudo sh -c ‘echo «deb [arch=amd64] http://dl.google.com/linux/chrome/deb/ stable main» >> /etc/apt/sources.list.d/google-chrome.list’
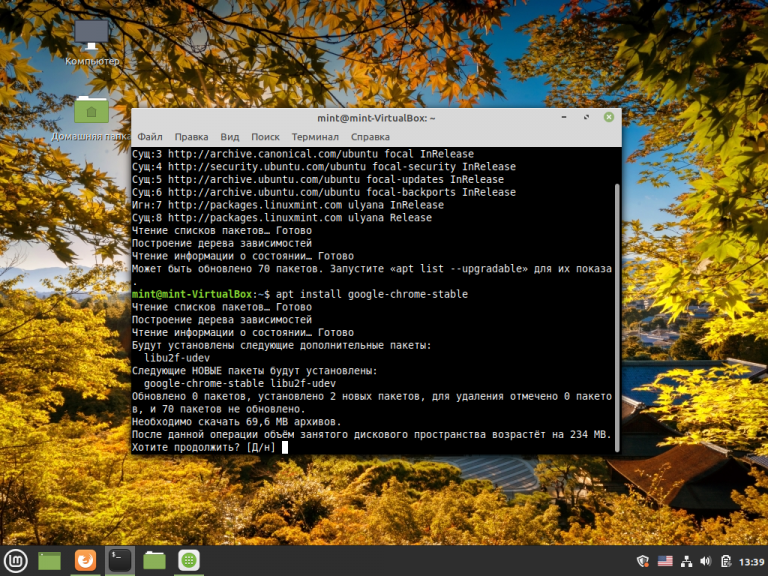
Для того, чтобы продолжить, необходимо обновить репозитории с помощью команды:
Далее установите стабильную версию Google Chrome с помощью команды:
sudo apt install google-chrome-stable
И наконец третий — консольный — способ установки из deb-пакета.
Скачайте текущий стабильный пакет:
Установите его с помощью программы dpkg:
sudo dpkg -I google-chrome-stable_current_amd64.deb:
Удаление Google Chrome
Для того, чтобы удалить Google Chrome, воспользуйтесь командой:
sudo apt remove google-chrome-stable

Выводы
Установка Google Chrome Linux Mint 20 выполняется точно так же, как и в других ОС на базе Debian или Ubuntu. Она достаточно проста даже для не очень опытного пользователя.
Обнаружили ошибку в тексте? Сообщите мне об этом. Выделите текст с ошибкой и нажмите Ctrl+Enter.
Похожие записи
Оцените статью
Статья распространяется под лицензией Creative Commons ShareAlike 4.0 при копировании материала ссылка на источник обязательна .
Об авторе
Прошел долгий путь от помощника системного администратора до DevOps инженера. Свою профессию считаю скорее хобби, чем работой, потому что занимаюсь любимым делом. Впервые Linux скачал в начале 2000 года по Dial-up соединению. Это был Mandriva Linux. На нем же запустил сервер Counter Strike, потом форум в пределах горного комбината, потом вдруг заметил, что любую проблему пытаюсь решить с помощью Linux и ведь решал же!
Install Chrome on Linux Mint — Easy Step-By-Step Guide

While we believe that this content benefits our community, we have not yet thoroughly reviewed it. If you have any suggestions for improvements, please let us know by clicking the “report an issue“ button at the bottom of the tutorial.
In this tutorial, we will see how to install Chrome on Linux Mint. Google Chrome is a popular web browser that is suitable for surfing amazing websites like this one. We will also cover a better alternative to Chrome that is easier to install.
Steps to Install Google Chrome on Linux Mint
Let’s go over the steps to install Google Chrome, which is Google’s version of the original open-source Chromium browser. Since Google Chrome isn’t natively available in the package repositories, we need to add their Linux repos and install the package from there.
1. Downloading the Key for Chrome
Before we proceed, install Google’s Linux package signing Key. This key will automatically configure the repository settings necessary to keep your Google Linux applications up-to-date.
wget -q -O - https://dl-ssl.google.com/linux/linux_signing_key.pub | sudo apt-key add - 
2. Adding Chrome Repo
For installing Chrome you need to add Chrome repository to your system source. You can do this with the command:
sudo add-apt-repository "deb http://dl.google.com/linux/chrome/deb/ stable main" 3. Run an Apt Update
After you add the Chrome repository in the last step you need to do an apt-update. The command for doing that is:

4. Install Chrome on Linux Mint
After going through the commands above you are ready to finally install Chrome. The command for doing that is :
sudo apt install google-chrome-stable 
This command installs the stable version of Chrome. While installing you will be prompted to grant permission to proceed with the installation. Press ‘y’ to continue. That is it! Now you can run Google Chrome by typing in :
5. Uninstalling Chrome
sudo apt remove google-chrome-stable A better Alternative: Chromium
![]()
Chromium is an open-source version of Chrome. It is present by default in the Linux repositories. So you won’t need to add it explicitly. To install Chromium you just need to run the command :
sudo apt install chromium-browser That’s it, folks!
In this tutorial, we saw how Chrome can be installed on Linux systems. Apart from that we also saw Chromium, a better open-source version of Chrome that is readily available on Linux.
Thanks for learning with the DigitalOcean Community. Check out our offerings for compute, storage, networking, and managed databases. Learn more about us