- How to Install Ubuntu 22.10 on VMware Workstation 17 in Windows 10
- How to Set Up Ubuntu 22.10 on a Virtual Machine using VMware Workstation 17 Pro
- How to Create a New Virtual Machine for Ubuntu
- How to Install Ubuntu
- How to Install VMware Tools
- How to Enable and Configure Shared Folder
- How to Use USB Flash Memory
How to Install Ubuntu 22.10 on VMware Workstation 17 in Windows 10
Last Updated: November 28, 2022 | VMware Workstation | Tolga Bagci
In this article, we will examine how to run Ubuntu 22.10 on a new virtual machine using the VMware Workstation 17 Pro virtualization program on the Windows 10 operating system.
How to Set Up Ubuntu 22.10 on a Virtual Machine using VMware Workstation 17 Pro
VMware Workstation is the most popular Hypervisor Type 2 virtualization program developed by the VMware company. With this software, you can run multiple operating systems on your PC virtually. For example, installing Ubuntu in a virtual machine without a Dual-Boot installation can be helpful on the first try.
Ubuntu 22.10 (Kinetic Kudu) was released on October 30, 2022. The 22.10 release includes what’s new in versions 22.04 and 21.10. This version ships with GNOME 43, an open-source desktop environment. It also includes Kernel 5.19 which includes memory error checking and features Landlord working with Linux security modules (LSM). Other features can be listed as follows;
- GNOME 43 was first released with 22.10 as the default desktop environment.
- The quick settings menu has been added to the Power tab with GNOME 43.
- With the newer Nautilus file manager, a more modern design has been developed, thanks to the adaptive folder view.
- The list view within the directory has been redesigned. Thus, multiple file selections can be made more accessible.
- WebP image files can now be opened with the default photo viewer.
- Also, Firefox 105, Thunderbird 102, and LibreOffice 7.4 come with version 22.10.
How to Create a New Virtual Machine for Ubuntu
After installing VMware on your Windows 10 host computer, you can virtually install and run any version from Windows, Linux, or macOS operating systems distributions. If you are considering installing a Linux system on your physical computer and you are new to this business, you can gain experience by installing it on a virtual machine.
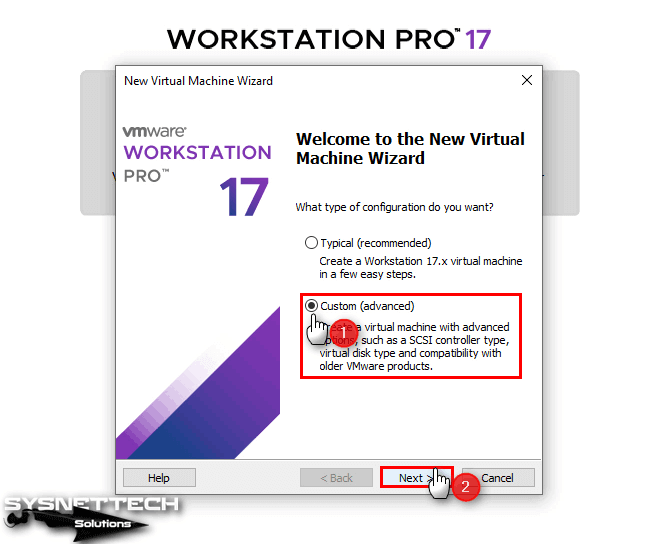
After running VMware Workstation 17 Pro, click Create a Virtual Machine. Then select Custom (Advanced) in the new virtual machine creation window and click Next.
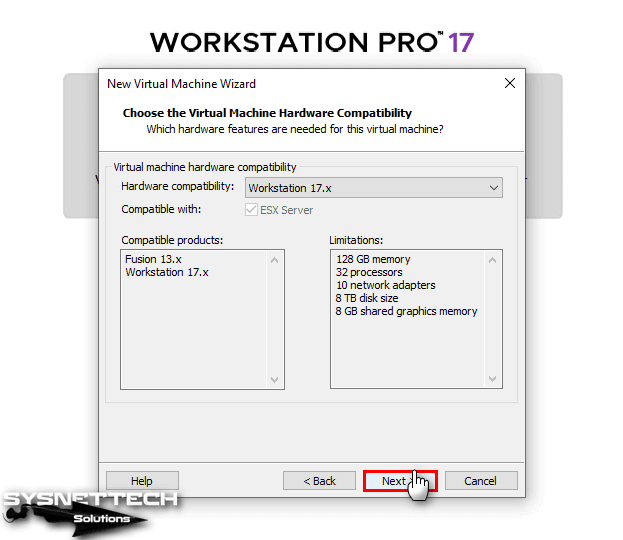
Configure the hardware compatibility setting of the virtual machine as Workstation 17.x.
In the Guest Operating System Installation window, select “I will install the operating system later” and click the Next button.
In the Guest OS selection window, select the Linux / Ubuntu 64-bit version and click Next.
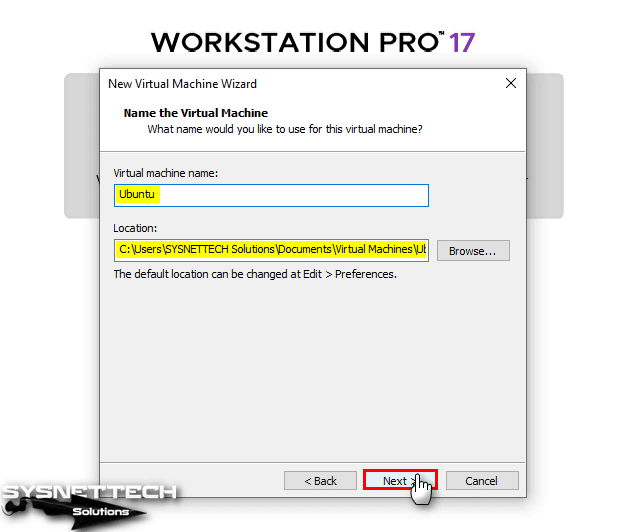
If your physical computer has high storage capacity, you can install your virtual system in the default location. However, if you have a mechanical disk, we recommend installing your system on an external SSD storage device. Because mechanical disks are weaker in terms of performance, storing VMs on a USB 3.0/3.1 portable disk will provide you with extra performance.
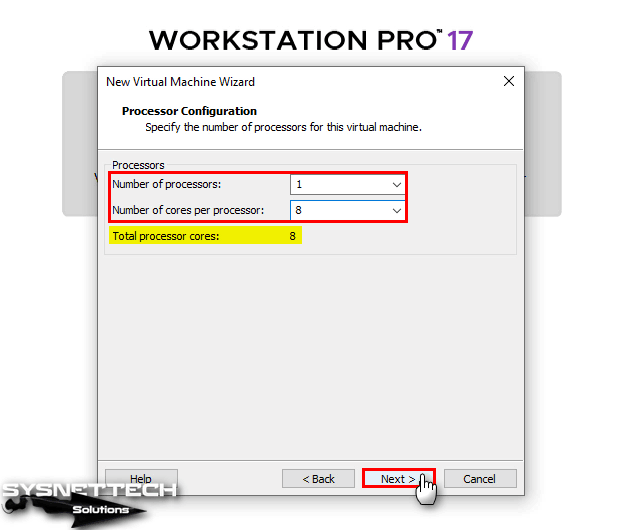
According to the hardware features of your computer, you can add one or more virtual processors for the Ubuntu virtual machine and increase the virtual core value.
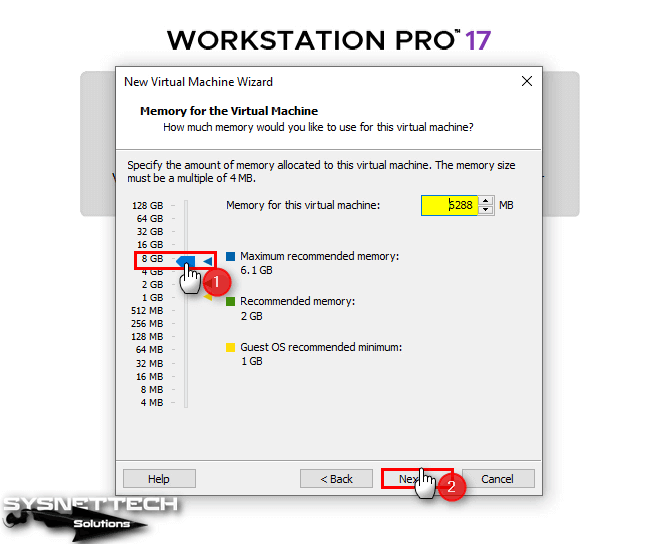
In the same way, set a value suitable for the memory capacity of your host for the Ubuntu virtual computer. You can automatically determine the maximum memory value of the program by clicking the blue arrow in the Memory for the Virtual Machine window.
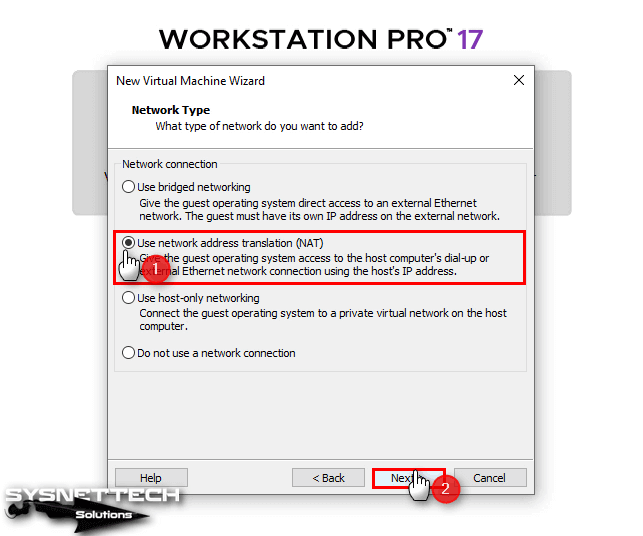
You can configure the network adapter settings of the virtual machine that will run on VMware according to your personal preferences or according to your project. Select the default NAT for the network adapter and click Next.
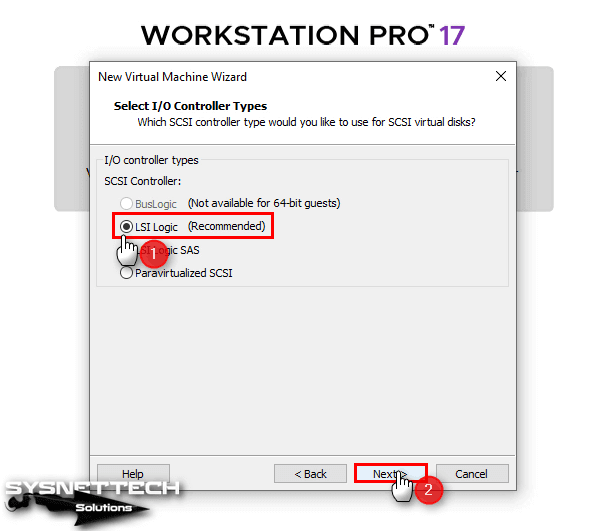
Continue with the LSI Logic option selected by default in the I/O Controller window.
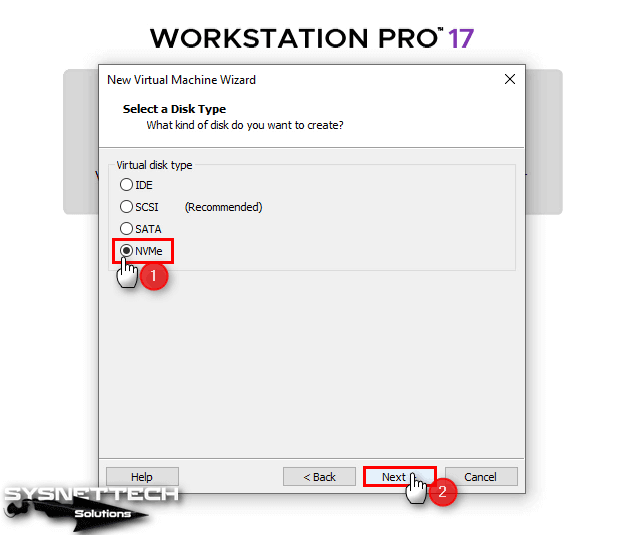
In the Disk Type window, select NVMe instead of the default SCSI type and continue.
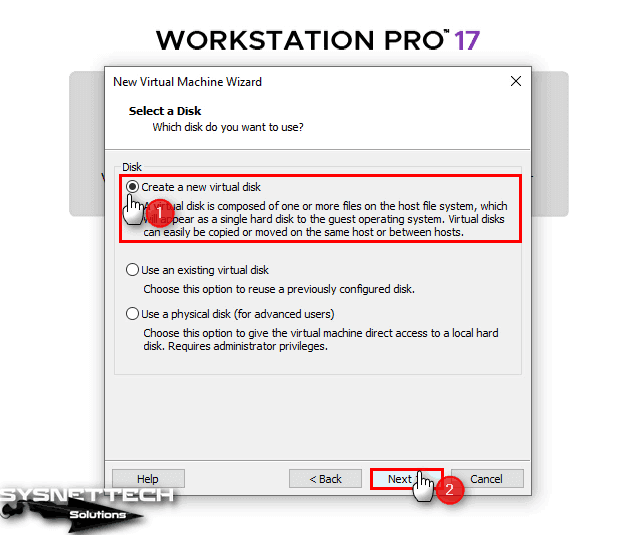
You must create a new virtual disk with the Create a New Virtual Disk option in the Select a Disk configuration. If you want to use a previously installed virtual disk, you must continue with the Use an existing virtual disk option.
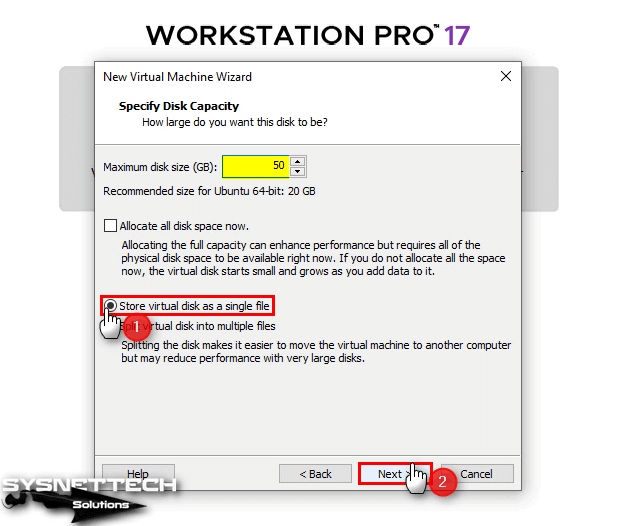
Select Store virtual disk as a single file to back up the virtual hard disk as a single file. In addition, after configuring the maximum disk size for the Ubuntu VM, you can allocate disk space on your host disk as much as the disk size you specified by checking the Allocate all disk space now option for even more disk performance. This option increases the performance of the guest machine much more on the mechanical disk.
If you want to install the virtual machine for testing purposes only, you can configure a smaller virtual disk size. The disk size here is the maximum value and disk space will be dynamically allocated from your host as much as the guest machine will occupy.
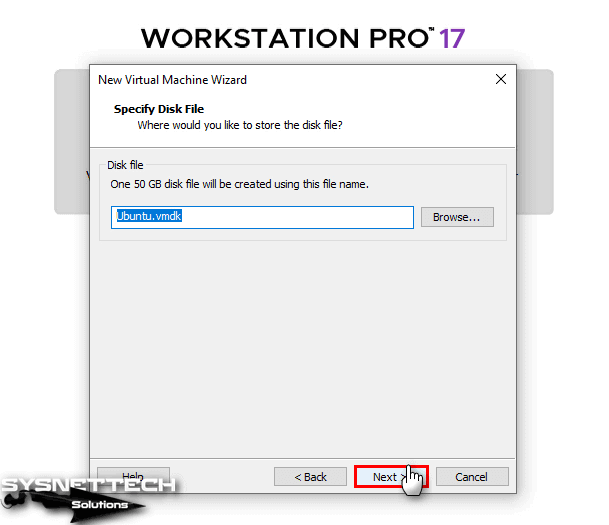
In the Specify Disk File window, leave it as default to backup the virtual disk to the location where the guest machine will be installed.
Click Customize Hardware to add the ISO file to the Ubuntu VM and configure some hardware settings.
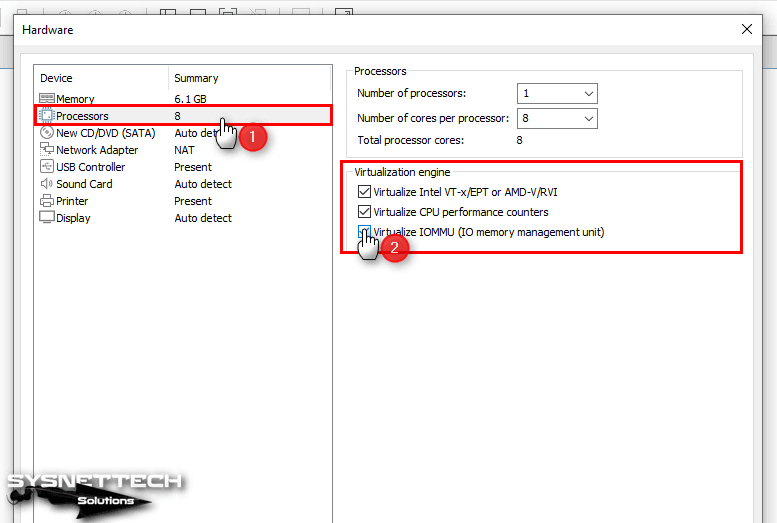
In the Hardware window, click on the processor device and enable the virtualization feature by ticking the Virtualize Intel VT-x/EPT or AMD-V/RVI, Virtualize CPU Performance Counters and Virtualize IOMMU (IO Memory Management) options in the Virtualization Engine section you see on the right.
Also, depending on your usage, you can get more efficiency and performance by removing Printer and Sound Card devices from the VM.
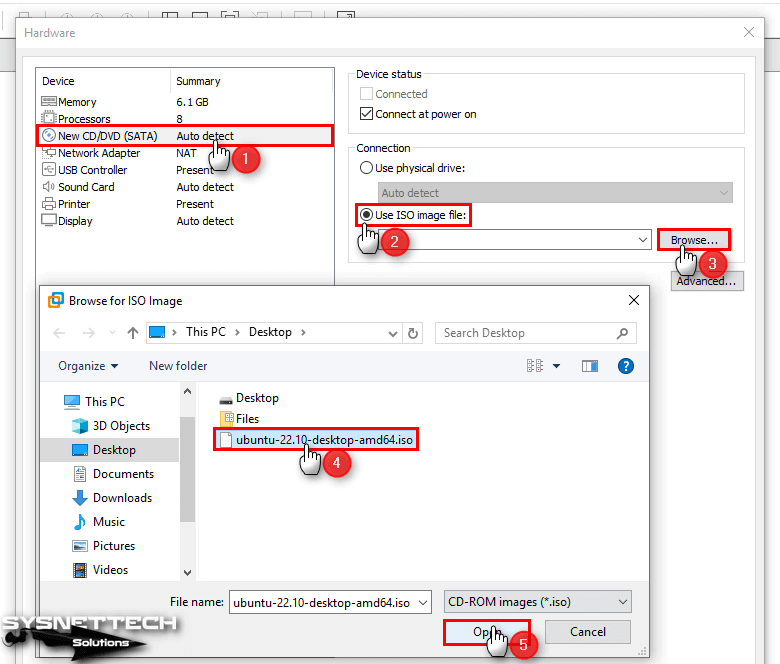
Download the Ubuntu 22.10 ISO file to your computer from this link, and then click Browse to add the ISO file to the CD/DVD device and specify the location.
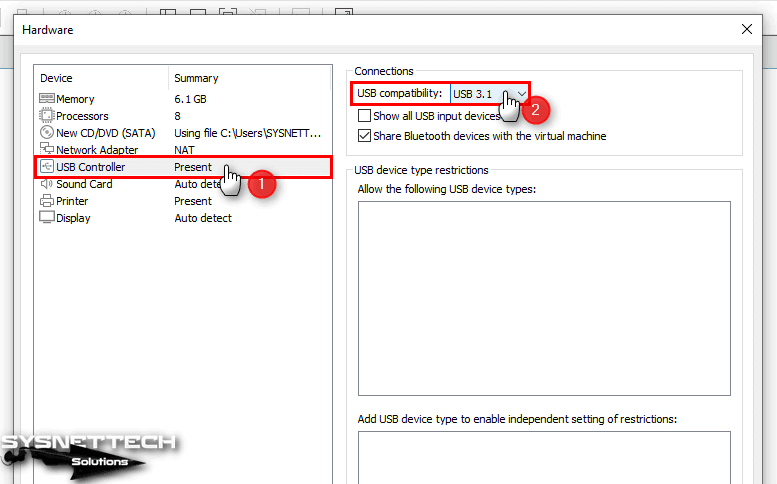
Change the USB Compatibility option to 3.1 in the settings of the USB Controller device.
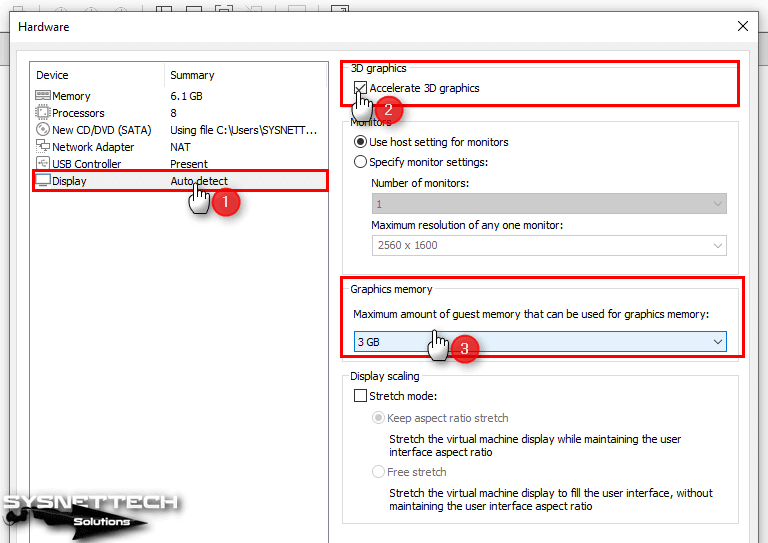
In order to better process 3D graphics in the virtual machine in the Display settings, enable the 3D feature and set the graphics memory size in accordance with the graphics card specifications of your host.
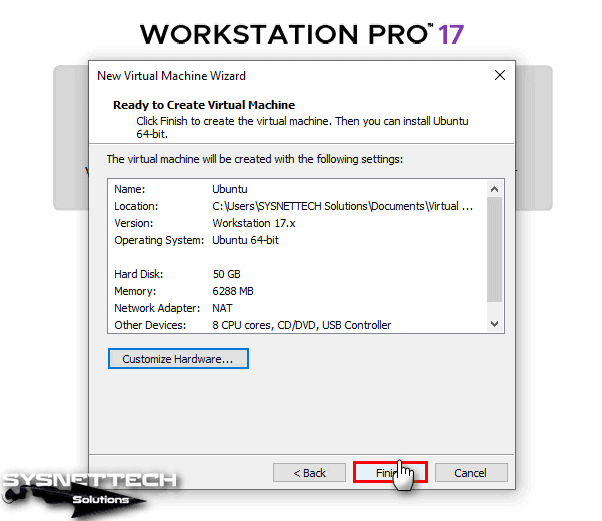
After creating your Ubuntu guest machine, review the summary hardware information and click Finish.
How to Install Ubuntu
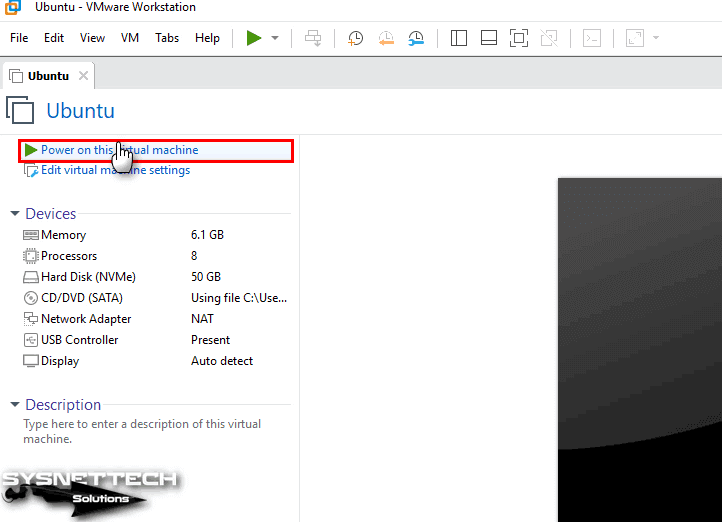
After running the Ubuntu guest machine, you can complete the installation steps as if you were installing on a physical computer.
Press Enter on the Ubuntu option to run the system on the GNU GRUB version 2.04 screen.
Wait while Ubuntu boots up.
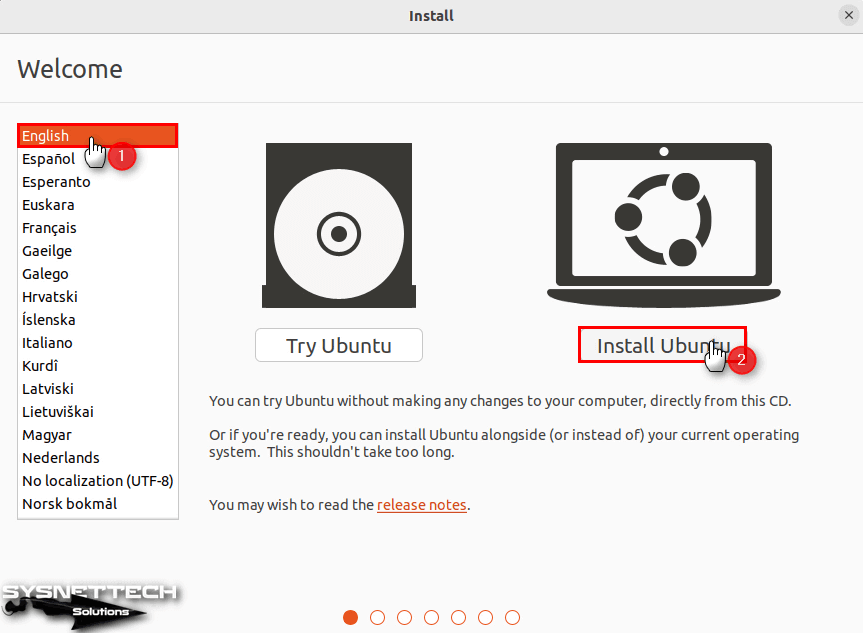
When the installation wizard opens, click the Install Ubuntu button to start the installation. If you only want to open and test the system once, you can click Try Ubuntu.
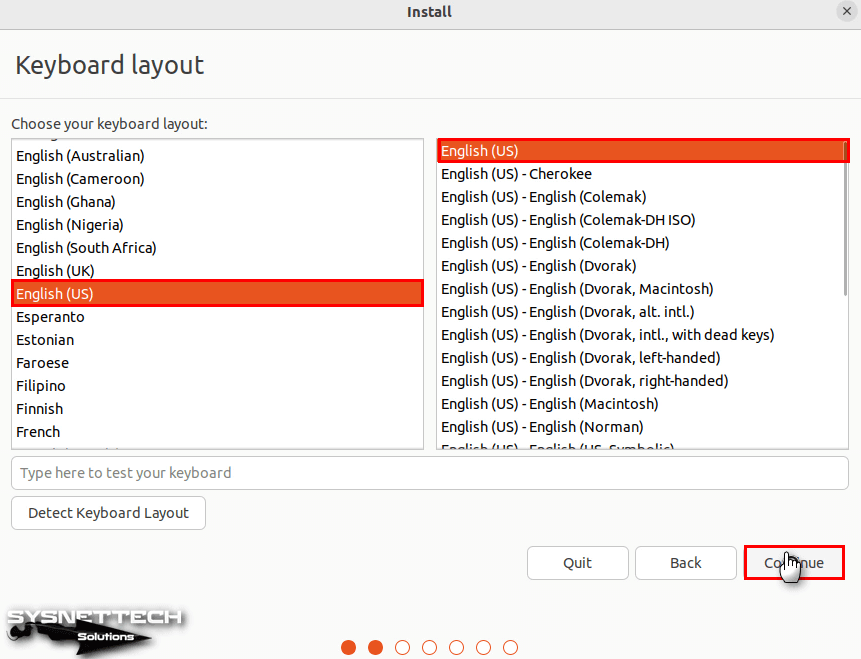
Select your preferred keyboard layout and click Continue.
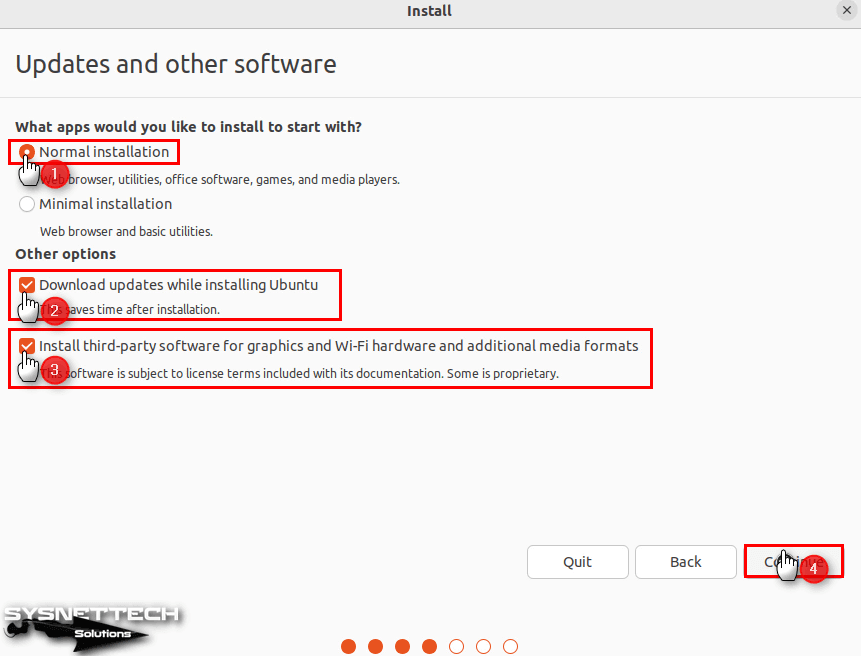
In the Updates and other software window, you can continue by choosing either Normal Installation or Minimal Installation. The difference between the two options is the installation of basic tools and more advanced applications only.
To do a clean install, select Erase disk and install Ubuntu and click Install Now and click Continue to confirm the changes to be made on the disk.
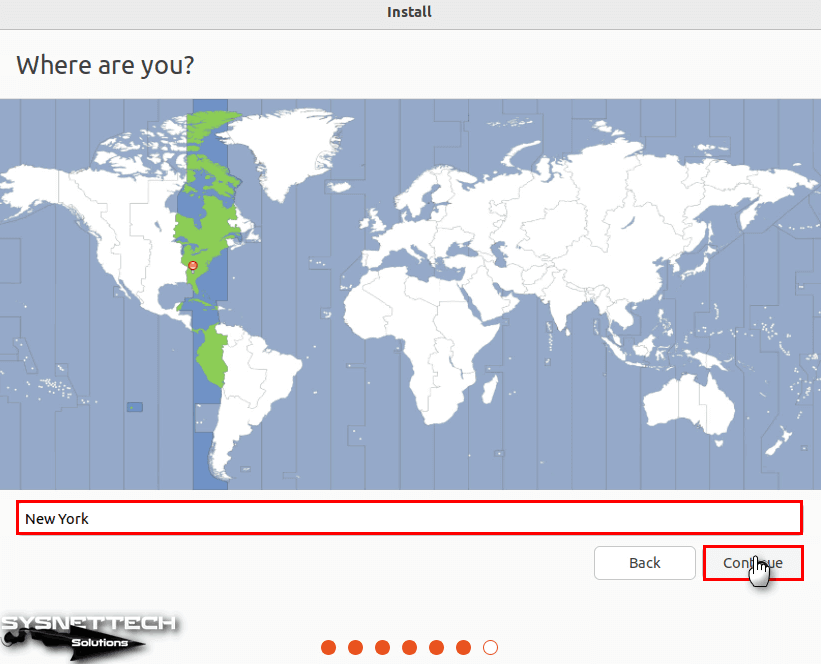
After marking the location you live in on the map, click Continue.
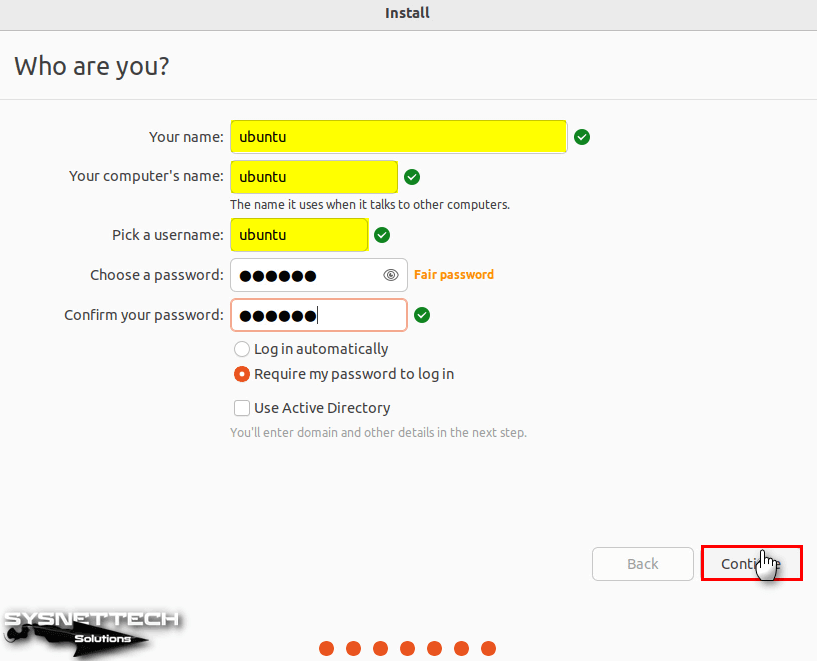
Type your username for your Ubuntu virtual system and continue after creating a strong root password.
Wait while Ubuntu is installed on the virtual computer you created. At this stage, some files will be downloaded and installed automatically from the Internet.
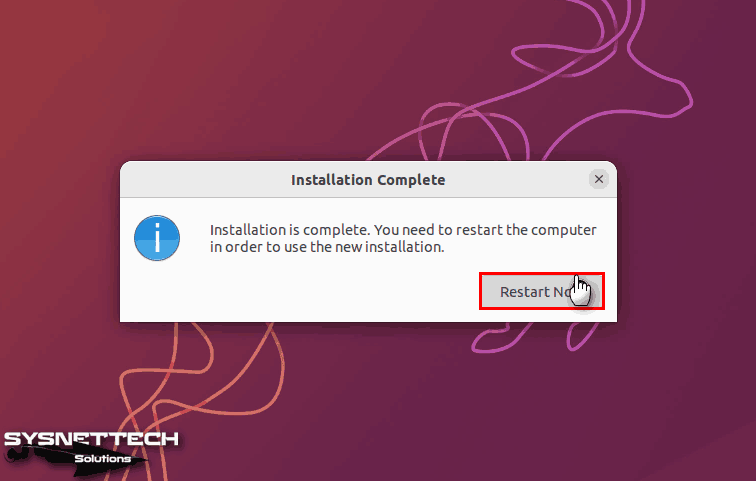
After the installation wizard has copied the Ubuntu system files and installed the necessary software, restart your system.
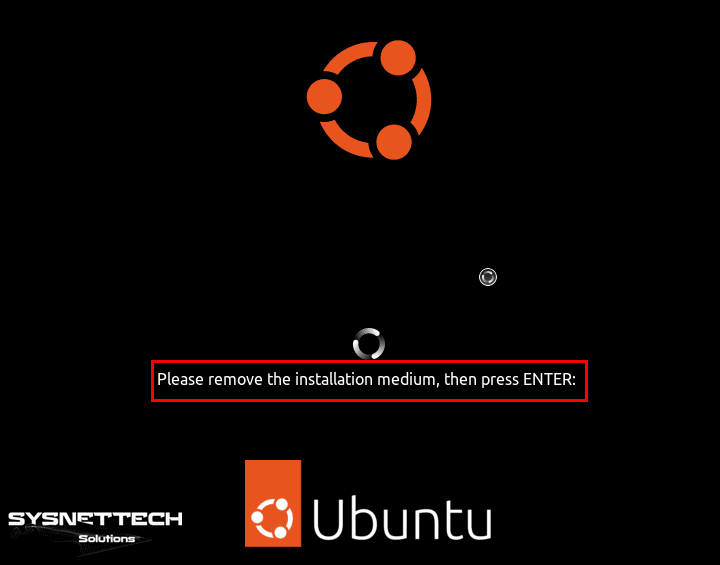
When you see the “Please remove the installation medium, then press Enter” warning on the screen to enable the system to boot, continue by pressing the Enter key.
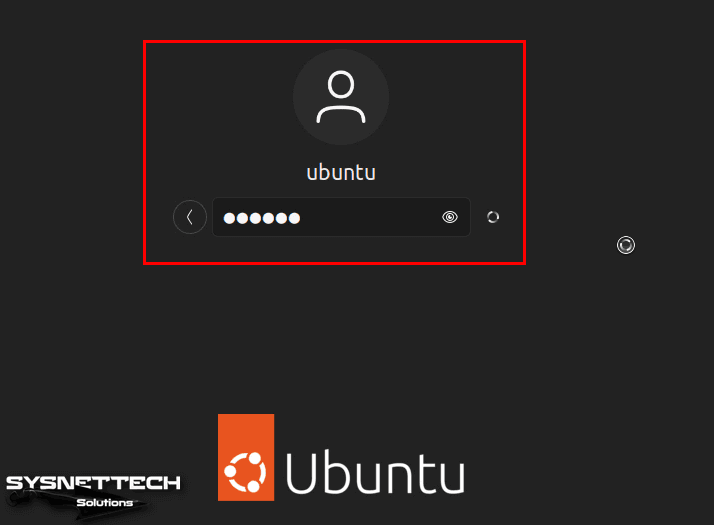
Type the root password you created to log in, and press Enter.
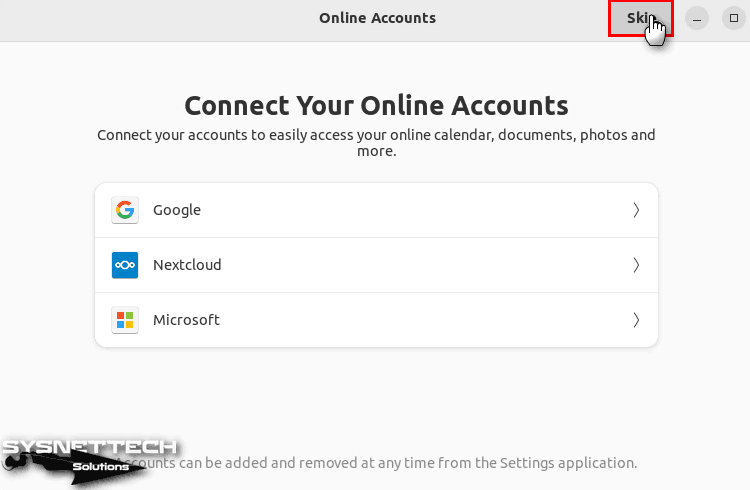
After logging in, the system configuration wizard will appear. If you want to log in to Google, Microsoft, or other services in Ubuntu, you can do so by typing your personal information in the Online Accounts window.
If you prefer to configure your account later, click the Skip button.
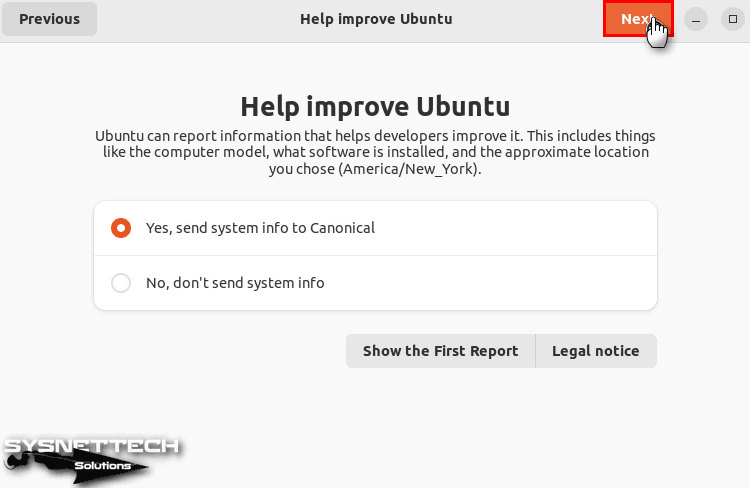
Check “Yes, send system info to Canonical” to help develop Ubuntu and click Next.
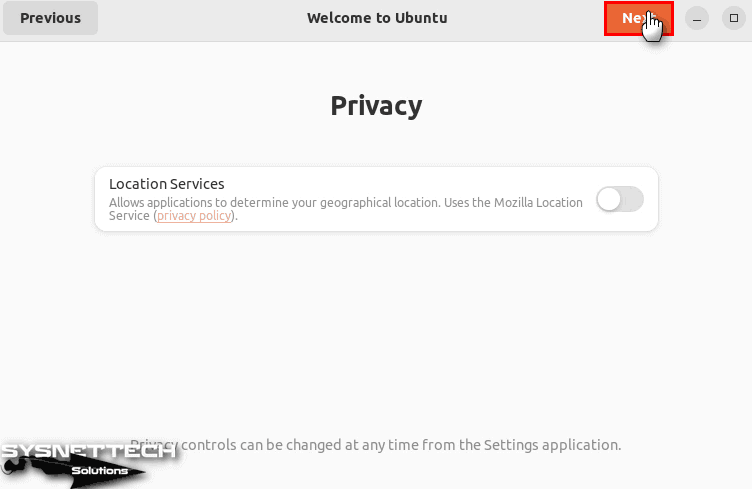
If you want to allow the applications you use to access your location information, enable Location Services.
In the last step, click Done in the window that states that you can use the Software to install the sample programs on your Linux virtual machine.
How to Install VMware Tools
Under normal conditions, when installing a guest operating system with VMware on your host computer connected to the Internet, VMware Tools is automatically installed. If you are going to connect your VM to the Internet later, you should temporarily install VMware Tools on VMware.
VM Tools is installed automatically in Ubuntu 19.10, 20.04, 20.10, 21.04, and 22.04 versions. However, you have to do this manually in old versions of 18.04, 18.10, and 19.04.
VMware company recommends using open-vm-tools or open-vm-tools-desktop to install your VMware Tools.
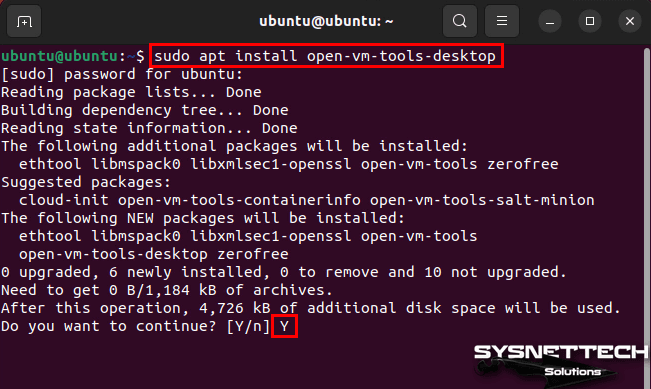
Open Terminal in your Ubuntu virtual system and execute the command sudo apt install open-vm-tools-desktop. After this process, press the Y key and then Enter to confirm the additional disk space usage and continue.
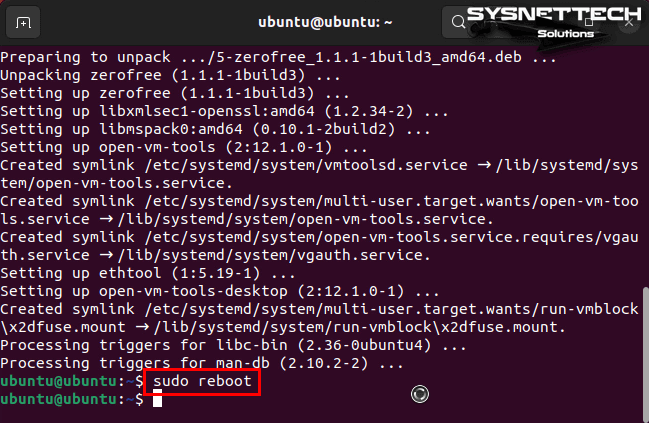
sudo apt install open-vm-tools-desktopAfter installing VMware Tools on your Ubuntu system, execute the sudo reboot command and restart your system.
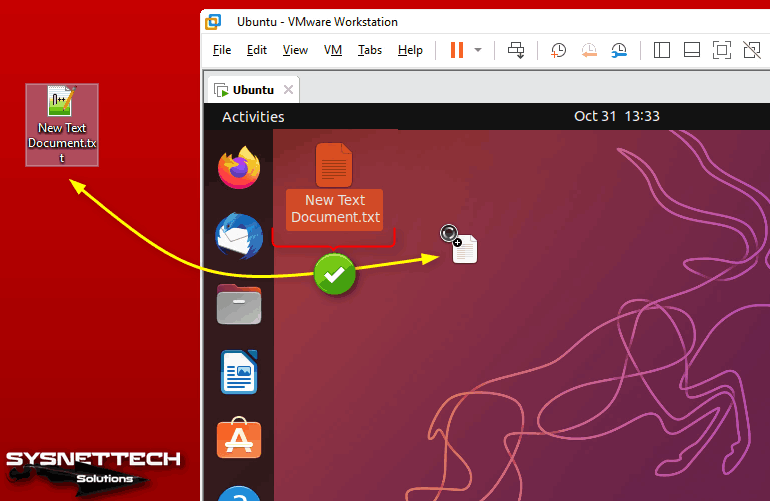
After restarting your virtual system, you can transfer a file from your host system’s desktop location to your VM by dragging and dropping or using the Ctrl + C / Ctrl + V keys.
If you are encountering the Drag and Drop is not Supported error while copying the file, you can fix this problem by installing Extensions and Nemo file manager on your system.
Execute the “sudo apt install gnome-shell-extension-prefs” command in the terminal and then find the extension in the start menu and run it. Disable Desktop Icons NG (DING) in the Extensions window.
sudo apt install gnome-shell-extension-prefsTo install Nemo file manager after disabling desktop icons, execute “sudo apt install nemo” command in the terminal and then open Startup Applications Preference and click Add button to enable file manager at startup.
sudo apt install nemoFill in the Name, Command, and Comment fields in the Add Startup Program window as below and click the Add button again. Then after rebooting your Linux system, you can now use drag and drop file transfer between the host and your VM.
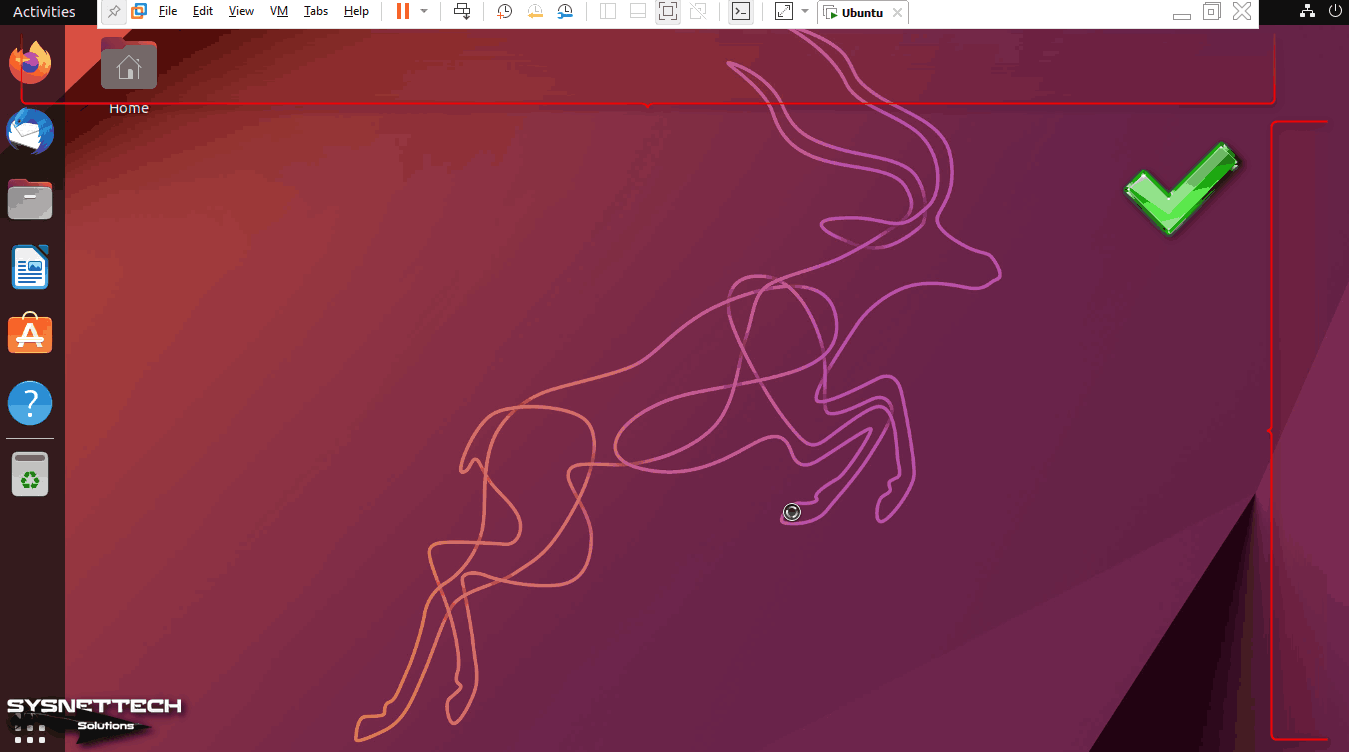
You can also use your Ubuntu guest machine in full-screen resolution.
How to Enable and Configure Shared Folder
Another method of transferring files between your host computer and your Ubuntu virtual computer is to use the Shared Folder feature.
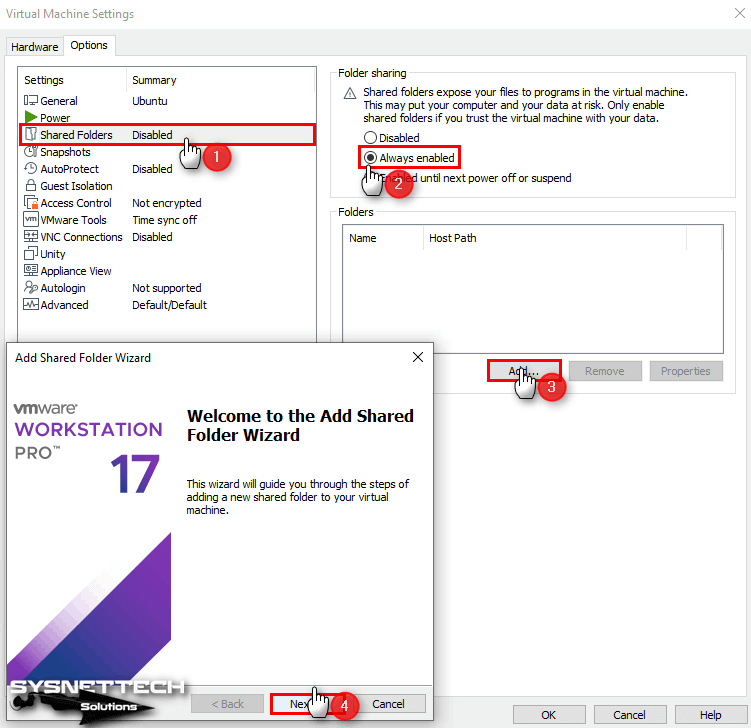
Click VM / Settings from the tool menu to enable and configure Shared Folder in Ubuntu.
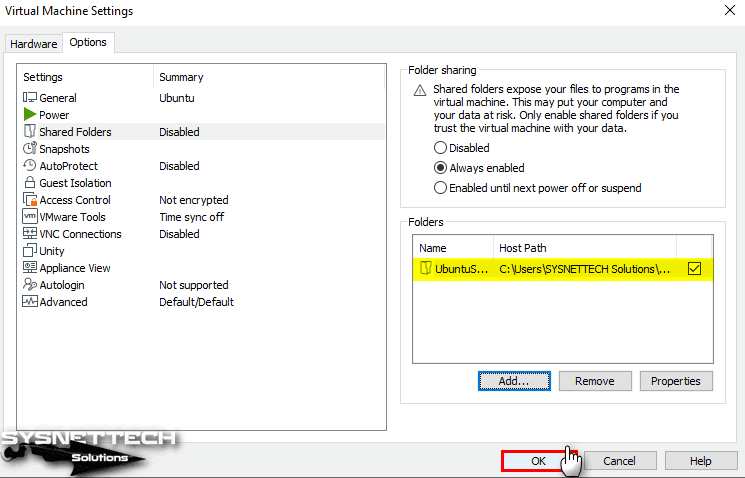
After clicking the Options tab in the virtual machine settings, select Shared Folders and then tick Always Enabled. Click Add to specify a folder path from your host system in the Folders section.
Click Next when the Add Shared Folders Wizard opens.
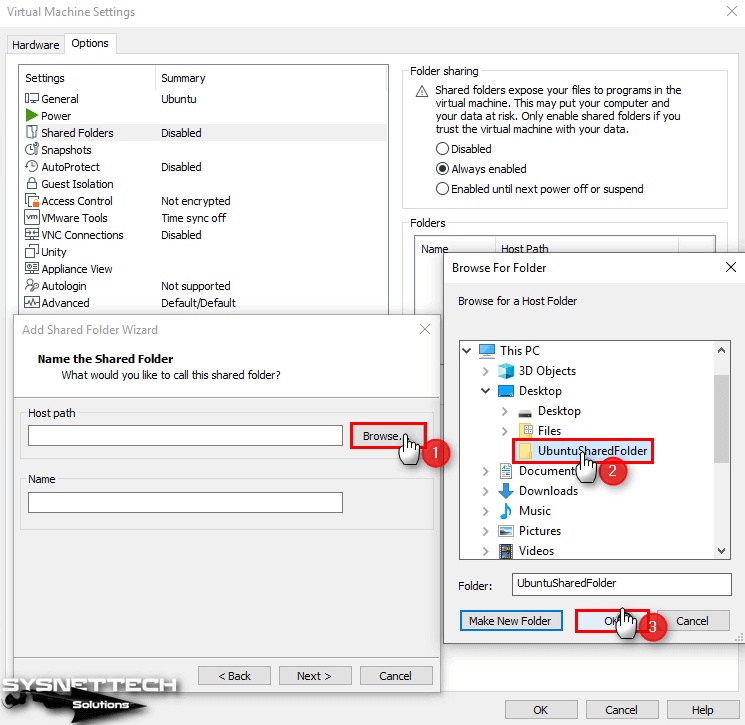
Click the Browse button in the Host Path section, and then select the folder you specified.
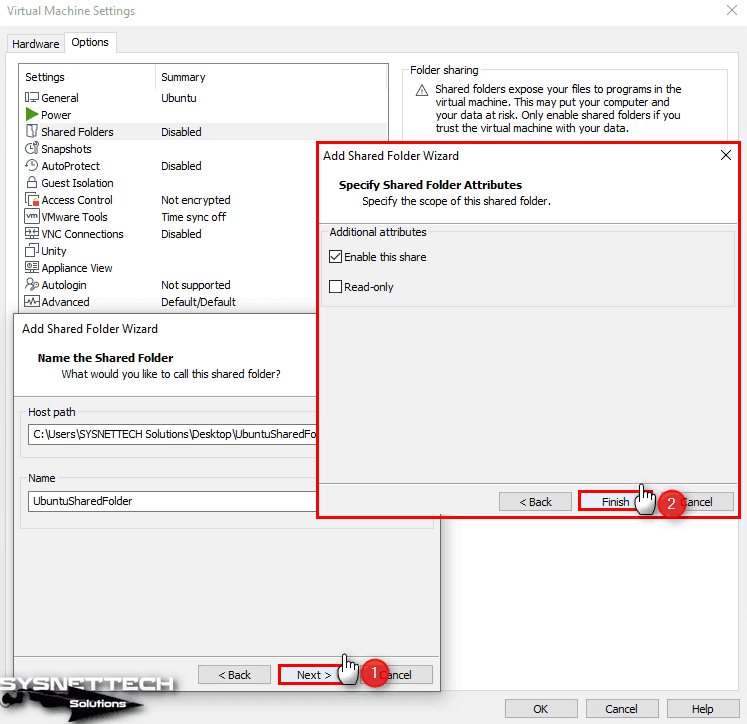
After selecting the folder on your host, make sure Enable This Share is checked and close the wizard.
Close the settings of your Linux virtual machine.
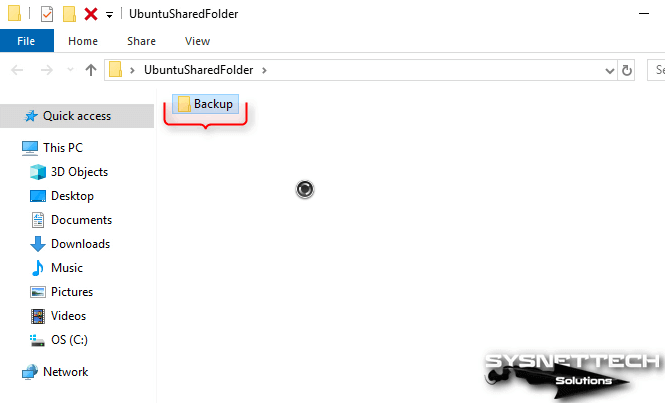
Create one or more text documents in the folder you shared.
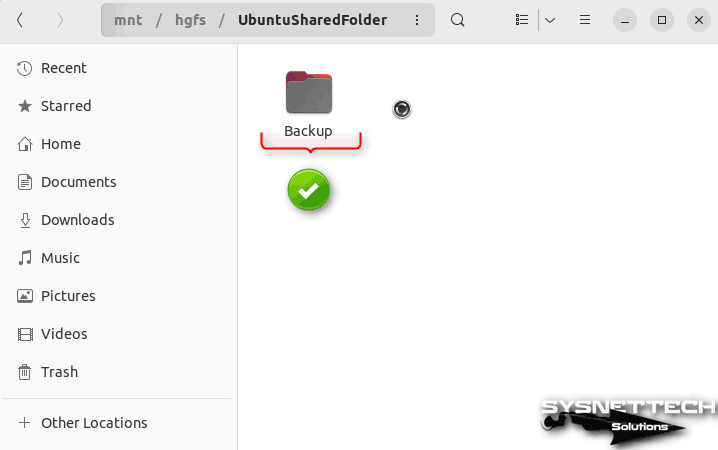
To access Shared Folder from your Ubuntu guest system, go to Home / Other Locations / Computer / mnt / hgfs and view the common folder.
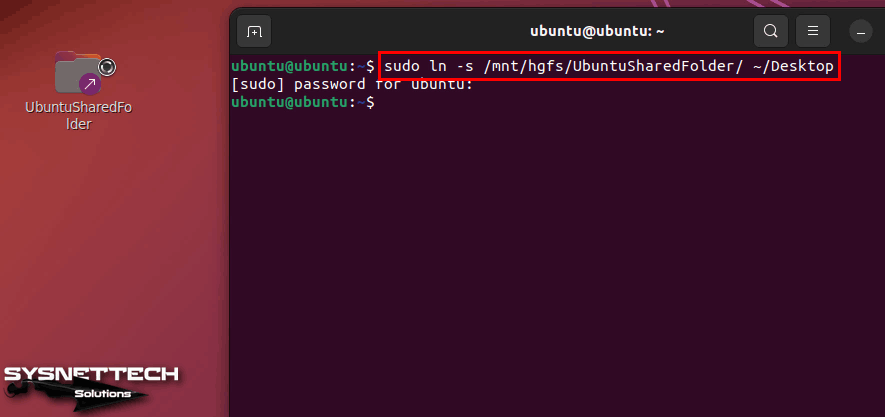
Execute the below command in the terminal to create a shortcut to the desktop location for UbuntuSharedFolder.
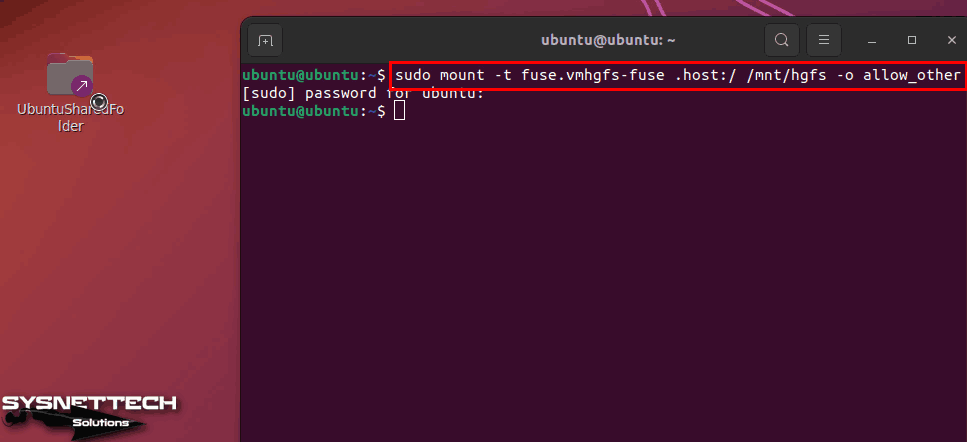
sudo ln -s /mnt/hgfs/UbuntuSharedFolder/ ~/DesktopWhen you restart your Ubuntu virtual system, you can see that the Shared Folder shortcut is Broken. This is because the public folder is not automatically mounted to the system. To fix this problem, first, run the command below in the terminal and reactivate the shared folder.
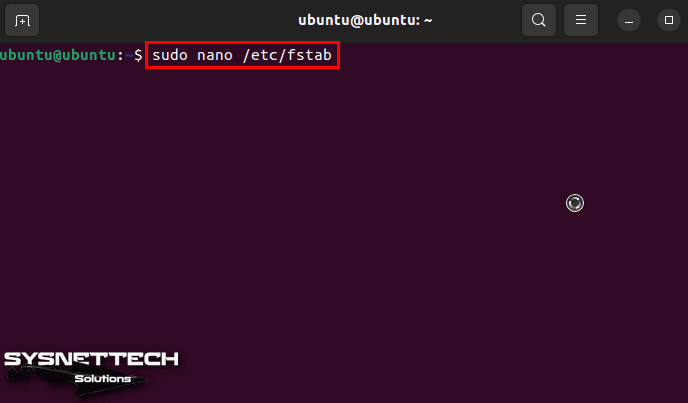
sudo mount -t fuse.vmhgfs-fuse .host:/ /mnt/hgfs -o allow_otherExecute the “sudo nano /etc/fstab” command in the terminal to edit the fstab file to automatically mount the public folder.
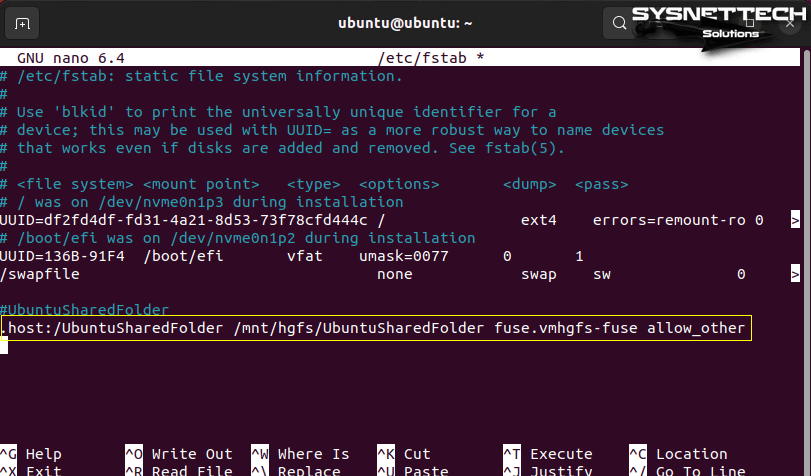
After opening the fstab file, type the below command and press CTRL + X and press Y, and then Enter to save the file.
.host:/UbuntuSharedFolder /mnt/hgfs/UbuntuSharedFolder fuse.vmhgfs-fuse allow_otherHow to Use USB Flash Memory
In order to use your USB 3.0/3.1 flash memories in your Ubuntu system, make sure to change the current 2.0 value in USB compatibility, then insert your flash memory into your host system and change the file system of your device to FAT32 or ExFAT.
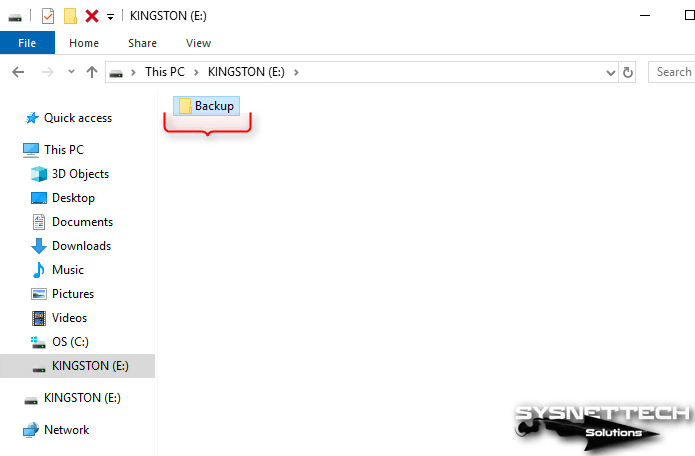
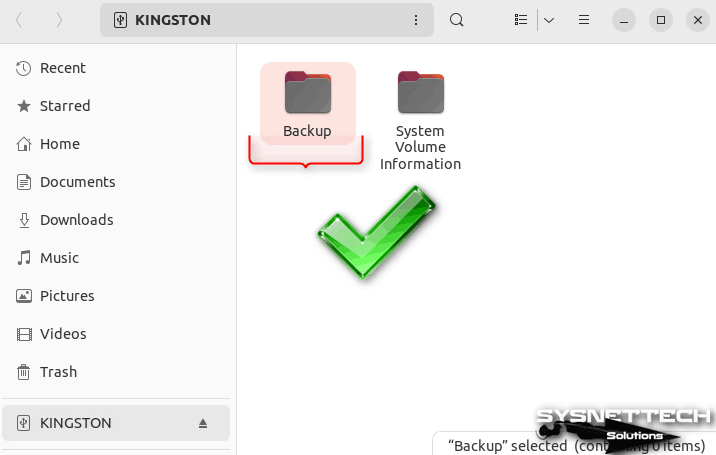
Create a folder named BACKUP in your USB flash memory that you have inserted in your host.
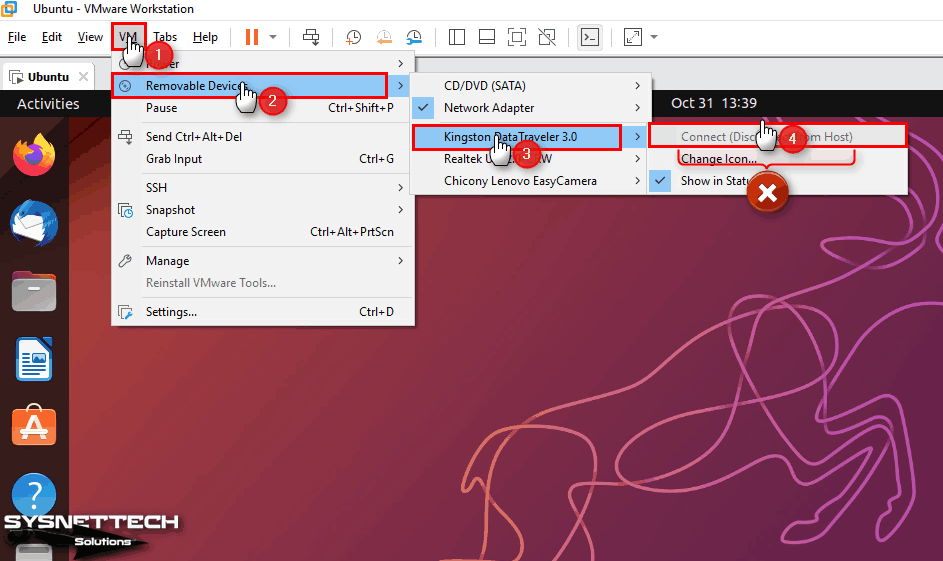
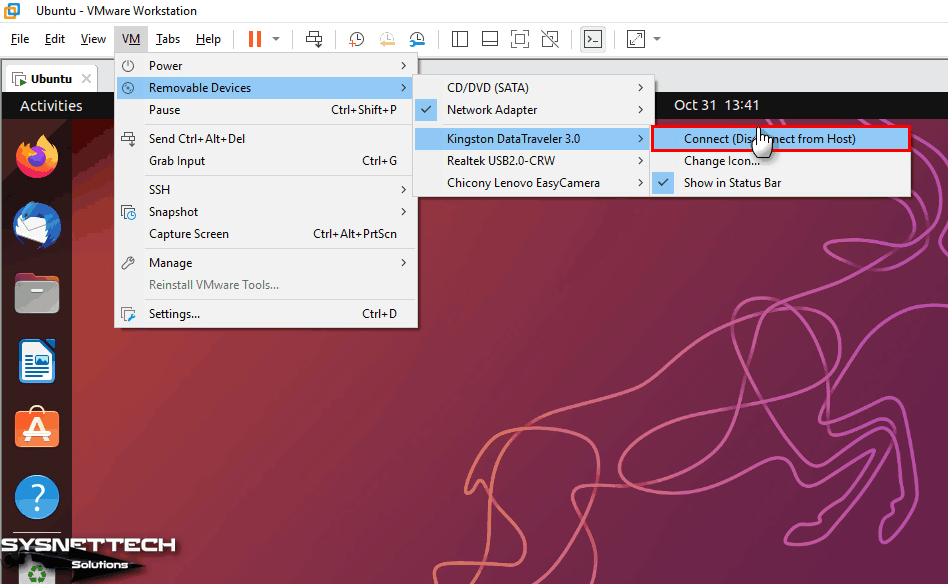
To add your flash memory to your virtual computer, simply click on VM / Removable Devices / Name of your USB / Connect (Disconnect from Host) from the VMware tool menu. However, if the Connect option is grayed out and inactive as in the image below, close your guest system and open the VMX file.
Change usb.restrictions.defaultAllow = “FALSE” to “TRUE” in Ubuntu 22.10.vmx file and save the file.
usb.restrictions.defaultAllow = "TRUE"After turning on your virtual computer again, connect your USB flash memory to your Linux system.
You can now use your USB 3.0/3.1 flash drives or storage devices on your Ubuntu guest machine without any problems.

