- How to Use Netcat to Scan Open Ports in Linux
- Install Netcat in Linux
- Linux Port Scanning with Netcat Commands
- How To Install netcat on Ubuntu 22.04
- What is netcat
- Install netcat Using apt-get
- Install netcat Using apt
- Install netcat Using aptitude
- How To Uninstall netcat on Ubuntu 22.04
- Uninstall netcat And Its Dependencies
- Remove netcat Configurations and Data
- Remove netcat configuration, data, and all of its dependencies
- References
- Summary
- How to Install netcat(nc) command on Linux(Ubuntu 18.04/20.04) in 7 Easy Steps
- How to Install netcat(nc) command on Linux(Ubuntu 18.04 / 20.04)
- Step 1: Prerequisites
- Step 2: Update Your Server
- Step 3: Install Netcat(nc)
- Step 4: Verify Installation
- Step 5: Using Netcat(nc)
- Step 6: Check all the Available Options
- Step 7: Uninstall Netcat(nc)
How to Use Netcat to Scan Open Ports in Linux
The Netcat (in short NC) is a feature-rich computer networking, debugging and investigation utility that supports an extensive range of commands to manage networks and monitor the flow of network traffic data between systems using Transmission Control Protocol (TCP) and User Datagram Protocol (UDP).
Netcat can be a very useful tool for network and system administrators to quickly recognize how their network is performing and what type of network activity is occurring in the system.
In this article, we will discuss how to install and use this versatile netcat utility to perform simple port scans to identify open ports in Linux systems.
Install Netcat in Linux
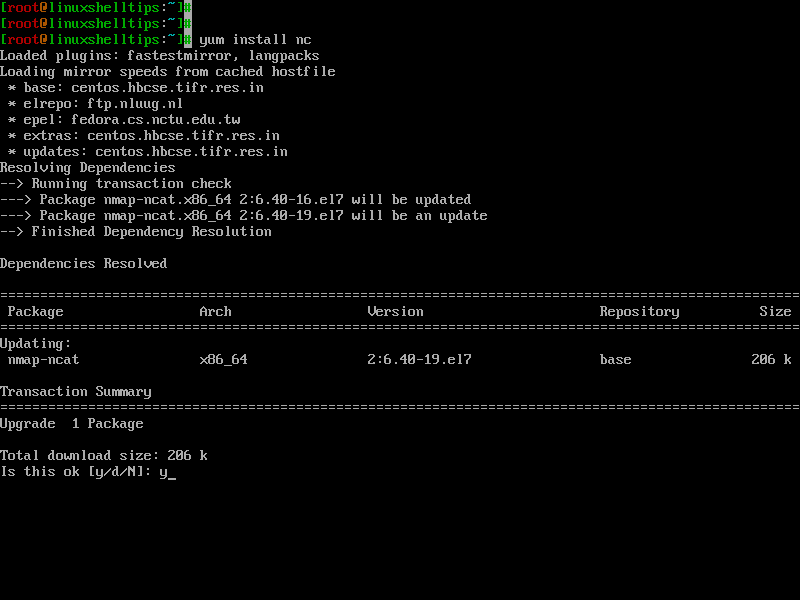
Netcat should be obtainable on almost all modern Linux distributions using the default package manager as shown.
$ sudo yum install nc [On CentOS/RHEL/Rocky Linux/AlmaLinux] $ sudo dnf install nc [On Fedora 22+ and RHEL 8] $ sudo apt install Netcat [On Debian/Ubuntu]
Linux Port Scanning with Netcat Commands
Once you have the Netcat utility installed on your Linux server, you can start performing a network port scan, which will inspect the status of all ports on the specified domain or IP address so that you can discover whether a firewall or other blocking mechanism is in place.
For example, we can scan all ports up to 1000 by running the following command using the -z option, which will only do a scan instead of attempting to open a connection, and -v option to notify netcat to produce more verbose information.
$ netcat -z -v google.com 1-1000 Or $ nc -z -v google.com 1-1000
The output will look like this:
netcat: connect to google.com port 1 (tcp) failed: Connection timed out netcat: connect to google.com port 1 (tcp) failed: Network is unreachable netcat: connect to google.com port 2 (tcp) failed: Connection timed out netcat: connect to google.com port 2 (tcp) failed: Network is unreachable netcat: connect to google.com port 3 (tcp) failed: Connection timed out netcat: connect to google.com port 3 (tcp) failed: Network is unreachable netcat: connect to google.com port 4 (tcp) failed: Connection timed out netcat: connect to google.com port 4 (tcp) failed: Network is unreachable netcat: connect to google.com port 5 (tcp) failed: Connection timed out netcat: connect to google.com port 5 (tcp) failed: Network is unreachable .
You can also perform a port scan for IP address using the -n option to define that you don’t require to resolve the IP address using DNS.
$ netcat -z -n -v 192.168.0.173 1-1000 OR $ nc -z -n -v 192.168.0.173 1-1000
The output will look like this:
netcat: connect to 192.168.0.173 port 1 (tcp) failed: Connection refused netcat: connect to 192.168.0.173 port 2 (tcp) failed: Connection refused netcat: connect to 192.168.0.173 port 3 (tcp) failed: Connection refused netcat: connect to 192.168.0.173 port 4 (tcp) failed: Connection refused netcat: connect to 192.168.0.173 port 5 (tcp) failed: Connection refused netcat: connect to 192.168.0.173 port 6 (tcp) failed: Connection refused netcat: connect to 192.168.0.173 port 7 (tcp) failed: Connection refused netcat: connect to 192.168.0.173 port 8 (tcp) failed: Connection refused netcat: connect to 192.168.0.173 port 9 (tcp) failed: Connection refused netcat: connect to 192.168.0.173 port 10 (tcp) failed: Connection refused netcat: connect to 192.168.0.173 port 11 (tcp) failed: Connection refused netcat: connect to 192.168.0.173 port 12 (tcp) failed: Connection refused netcat: connect to 192.168.0.173 port 13 (tcp) failed: Connection refused netcat: connect to 192.168.0.173 port 14 (tcp) failed: Connection refused netcat: connect to 192.168.0.173 port 15 (tcp) failed: Connection refused netcat: connect to 192.168.0.173 port 16 (tcp) failed: Connection refused netcat: connect to 192.168.0.173 port 17 (tcp) failed: Connection refused netcat: connect to 192.168.0.173 port 18 (tcp) failed: Connection refused netcat: connect to 192.168.0.173 port 19 (tcp) failed: Connection refused netcat: connect to 192.168.0.173 port 20 (tcp) failed: Connection refused netcat: connect to 192.168.0.173 port 21 (tcp) failed: Connection refused Connection to 192.168.0.173 22 port [tcp/*] succeeded! netcat: connect to 192.168.0.173 port 23 (tcp) failed: Connection refused netcat: connect to 192.168.0.173 port 24 (tcp) failed: Connection refused netcat: connect to 192.168.0.173 port 25 (tcp) failed: Connection refused netcat: connect to 192.168.0.173 port 26 (tcp) failed: Connection refused netcat: connect to 192.168.0.173 port 27 (tcp) failed: Connection refused .
From the above output, you can clearly see that the traditional SSH port is open in the range of 1-1000 on the remote machine.
If you only want to print the open ports on the screen, then you need to filter the output with the grep command as shown.
$ netcat -z -n -v 192.168.0.173 1-1000 2>&1 | grep succeeded OR $ nc -z -n -v 192.168.0.173 1-1000 2>&1 | grep succeeded
Connection to 192.168.0.173 22 port [tcp/*] succeeded! Connection to 192.168.0.173 80 port [tcp/*] succeeded!
You can also scan individual ports as well.
$ nc -zv 192.168.0.173 80 $ nc -zv 192.168.0.173 22 Or $ nc -zv 192.168.0.173 http $ nc -zv 192.168.0.173 ssh
For more information and usage, read the netcat man pages.
How To Install netcat on Ubuntu 22.04
In this tutorial we learn how to install netcat on Ubuntu 22.04.
What is netcat
This is a transitional package that depends on the netcat-openbsd implementation of netcat, preferred in Ubuntu. It may be safely removed.
There are three ways to install netcat on Ubuntu 22.04. We can use apt-get , apt and aptitude . In the following sections we will describe each method. You can choose one of them.
Install netcat Using apt-get
Update apt database with apt-get using the following command.
After updating apt database, We can install netcat using apt-get by running the following command:
sudo apt-get -y install netcat Install netcat Using apt
Update apt database with apt using the following command.
After updating apt database, We can install netcat using apt by running the following command:
sudo apt -y install netcat Install netcat Using aptitude
If you want to follow this method, you might need to install aptitude first since aptitude is usually not installed by default on Ubuntu. Update apt database with aptitude using the following command.
After updating apt database, We can install netcat using aptitude by running the following command:
sudo aptitude -y install netcat How To Uninstall netcat on Ubuntu 22.04
To uninstall only the netcat package we can use the following command:
sudo apt-get remove netcat Uninstall netcat And Its Dependencies
To uninstall netcat and its dependencies that are no longer needed by Ubuntu 22.04, we can use the command below:
sudo apt-get -y autoremove netcat Remove netcat Configurations and Data
To remove netcat configuration and data from Ubuntu 22.04 we can use the following command:
sudo apt-get -y purge netcat Remove netcat configuration, data, and all of its dependencies
We can use the following command to remove netcat configurations, data and all of its dependencies, we can use the following command:
sudo apt-get -y autoremove --purge netcat References
Summary
In this tutorial we learn how to install netcat package on Ubuntu 22.04 using different package management tools: apt, apt-get and aptitude.
How to Install netcat(nc) command on Linux(Ubuntu 18.04/20.04) in 7 Easy Steps

In this article, I will take you through the steps to install netcat(nc) command on Linux(Ubuntu 18.04 /20.04) in 7 Easy Steps. nc is a free and open source utility to read and write data across networks using UDP or TCP connections. It is a very handy tool often used by Linux and System Administrators to perform various network related tasks. It provides excellent port scanning and listening capabilities, be it a TCP or UDP traffic.
Along with this you can also use this utility to transfer a file based on the specific port number. We will see some more important features in upcoming articles but for now we will the steps to install netcat(nc) utility on Ubuntu 18.04/20.04 based systems in great detail. More on netcat(nc) Man Page.
How to Install netcat(nc) command on Linux(Ubuntu 18.04 / 20.04)
Step 1: Prerequisites
a) You should have a running Ubuntu 18.04/20.04 Server.
b) You should have sudo or root access to run privileged commands.
c) You should have apt or apt-get utility available in your Server.
Step 2: Update Your Server
Before installing any new package in the System, it is always advisable to check for any latest available updates using apt-get update command as shown below. If any of the package needs upgradation, then upgrade it by using apt-get upgrade command.
root@cyberithub:~# apt-get update Hit:1 http://in.archive.ubuntu.com/ubuntu focal InRelease Hit:2 http://in.archive.ubuntu.com/ubuntu focal-updates InRelease Hit:3 http://in.archive.ubuntu.com/ubuntu focal-backports InRelease Hit:5 http://ppa.launchpad.net/nilarimogard/webupd8/ubuntu focal InRelease Hit:6 https://dl.google.com/linux/chrome/deb stable InRelease Get:7 http://security.ubuntu.com/ubuntu focal-security InRelease [114 kB] Hit:4 https://downloads.apache.org/cassandra/debian 40x InRelease Get:8 http://security.ubuntu.com/ubuntu focal-security/main amd64 DEP-11 Metadata [40.6 kB] Get:9 http://security.ubuntu.com/ubuntu focal-security/universe amd64 DEP-11 Metadata [66.3 kB] Get:10 http://security.ubuntu.com/ubuntu focal-security/multiverse amd64 DEP-11 Metadata [2,464 B] Fetched 223 kB in 6s (38.9 kB/s) Reading package lists. Done Step 3: Install Netcat(nc)
To install netcat from default Ubuntu repo, you need to use apt-get install netcat command as shown below. This will install the netcat utility along with all its required dependencies.
root@cyberithub:~# apt-get install netcat Reading package lists. Done Building dependency tree Reading state information. Done The following packages were automatically installed and are no longer required: dmeventd libaio1 libdevmapper-event1.02.1 liblvm2cmd2.03 libreadline5 thin-provisioning-tools Use 'apt autoremove' to remove them. The following NEW packages will be installed: netcat 0 upgraded, 1 newly installed, 0 to remove and 177 not upgraded. Need to get 2,172 B of archives. After this operation, 15.4 kB of additional disk space will be used. Get:1 http://in.archive.ubuntu.com/ubuntu focal/universe amd64 netcat all 1.206-1ubuntu1 [2,172 B] Fetched 2,172 B in 0s (5,464 B/s) Selecting previously unselected package netcat. (Reading database . 182228 files and directories currently installed.) Preparing to unpack . /netcat_1.206-1ubuntu1_all.deb . Unpacking netcat (1.206-1ubuntu1) . Setting up netcat (1.206-1ubuntu1) .
Step 4: Verify Installation
Once it is successfully installed, you can verify the installation path by using dpkg -L netcat . This will show all the installed files path of netcat package.
root@cyberithub:~# dpkg -L netcat /. /usr /usr/share /usr/share/doc /usr/share/doc/netcat /usr/share/doc/netcat/copyright /usr/share/doc/netcat/changelog.Debian.gz Step 5: Using Netcat(nc)
Now that netcat(nc) is installed in the System, it is time to test this utility. This can be done by checking Let’s say google.com remote https port by using nc -vz google.com 443 command as shown below.
root@cyberithub:~# nc -vz google.com 443 Connection to google.com 443 port [tcp/https] succeeded! -v : verbose mode
-z : Zero-I/O mode [used for scanning]
Step 6: Check all the Available Options
If you want to check all the options available with nc command then you need to use nc -h command as shown below.
root@cyberithub:~# nc -h OpenBSD netcat (Debian patchlevel 1.206-1ubuntu1) usage: nc [-46CDdFhklNnrStUuvZz] [-I length] [-i interval] [-M ttl] [-m minttl] [-O length] [-P proxy_username] [-p source_port] [-q seconds] [-s source] [-T keyword] [-V rtable] [-W recvlimit] [-w timeout] [-X proxy_protocol] [-x proxy_address[:port]] [destination] [port] Command Summary: -4 Use IPv4 -6 Use IPv6 -b Allow broadcast -C Send CRLF as line-ending -D Enable the debug socket option -d Detach from stdin -F Pass socket fd Step 7: Uninstall Netcat(nc)
In case you decide to uninstall netcat utility from your System due to certain reasons then you can do that by using apt-get remove netcat command as shown below.
root@cyberithub:~# apt-get remove netcat Reading package lists. Done Building dependency tree Reading state information. Done The following packages were automatically installed and are no longer required: dmeventd libaio1 libdevmapper-event1.02.1 liblvm2cmd2.03 libreadline5 thin-provisioning-tools Use 'apt autoremove' to remove them. The following packages will be REMOVED: netcat 0 upgraded, 0 newly installed, 1 to remove and 177 not upgraded. After this operation, 15.4 kB disk space will be freed. Do you want to continue? [Y/n] Y (Reading database . 182231 files and directories currently installed.) Removing netcat (1.206-1ubuntu1) .