- Установка rpm пакетов в Linux
- Что такое RPM?
- Установка RPM пакетов в Linux
- Установка RPM файла в GUI
- Выводы
- How to Install RPM Packages on Ubuntu
- Steps to Install an RPM Package on Ubuntu
- Install Alien Package
- Convert .rpm Files to .deb Format
- Install the converted .rpm package on Ubuntu
- How to Install .rpm Package Directly on Ubuntu
- How to Install RPM Files on Fedora Linux [Beginner’s Tutorial]
- Installing RPM files on Fedora and Red Hat Linux
- Method 1: Use software center
- Method 2: Use DNF command to install RPM file
- Method 3: Install RPM files in Red Hat using Yum command
- How to remove RPM packages
Установка rpm пакетов в Linux
Рано или поздно нам приходится устанавливать программное обеспечение не из официальных репозиториев. Там есть далеко не все пакеты, и не всегда есть самые новые версии, только что вышедших программ. Очень часто разработчики размещают на своем официальном сайте пакеты для самых популярных дистрибутивов. Обычно это deb и rpm.
Последний встречается немного реже, но если вы используете дистрибутив на базе Red Hat Enterprice Linux, вам нужен именно этот формат пакетов. Также в сети часто можно найти библиотеки и другие компоненты, которых нет в репозиториях в виде пакетов. Раньше мы уже рассматривали установку deb пакетов в Ubuntu. А в этой статье будет подробно разобрана установка rpm пакетов в linux.
Что такое RPM?
RPM или RPM Package Manager — это пакетный менеджер, используемый в дистрибутивах Linux, основанных на Red Hat. Такое же название имеет формат файлов этого пакетного менеджера.
Этот формат не очень сильно отличается от того же самого Deb. Вы можете посмотреть их детальное сравнение в статье что лучше *.deb или *.rpm. Здесь же, только отмечу, что файл rpm — это обычный cpio архив, в котором содержатся сами файлы программы, а также метаданные, описывающие куда их нужно устанавливать. База всех установленных пакетов находится в каталоге /var/lib/rpm. Из особенностей можно отметить, что rpm не поддерживает рекомендованные пакеты, а также зависимости формата или-или.
Для управления пакетами, так же как и в Debian-системах, здесь существует консольная, низкоуровневая утилита с одноименным названием — rpm. Ее мы и будем рассматривать дальше в статье. В разных системах используются разные пакетные менеджеры, например в Red Hat используется Yum, в Fedora — DNF, а в OpenSUSE — zypper, но во всех этих системах будет работать утилита rpm.
Установка RPM пакетов в Linux
Давайте сначала рассмотрим синтаксис самой утилиты rpm:
$ rpm -режим опции пакет
Утилита может работать в одном из режимов:
Рассмотрим только самые интересные опции программы, которые понадобятся нам в этой статье:
- -v — показать подробную информацию;
- —vv — выводить отладочную информацию;
- —quiet — выводить как можно меньше информации;
- -h — выводить статус-бар;
- —percent — выводить информацию в процентах о процессе распаковки;
- —force — выполнять действие принудительно;
- —nodeps — не проверять зависимости;
- —replacefiles — заменять все старые файлы на новые без предупреждений;
- -i — получить информацию о пакете;
- -l — список файлов пакета;
- -R — вывести пакеты, от которых зависит этот пакет;
Теперь, когда вы уже имеете представление как работать с этой утилитой, может быть рассмотрена установка rpm пакета в Linux. Самая простая команда установки будет выглядеть вот так:
Для работы с командной текущей директорией должна быть папка с пакетом. Здесь мы устанавливаем режим установки и передаем файл пакета. При успешной установке утилита не выведет ничего, если произойдет ошибка, вы об этом узнаете.
Для того чтобы посмотреть более подробную информацию в процессе установки используйте опцию -v:
sudo rpm -iv имя_пакета.rpm
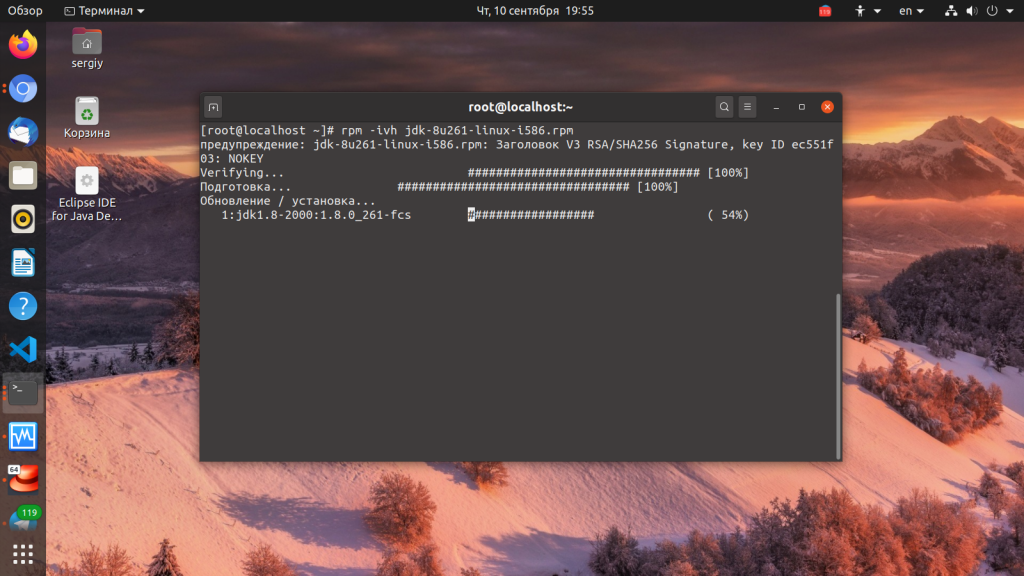
Также вы можете включить отображение статус бара в процессе установки:
sudo rpm -ivh имя_пакета.rpm
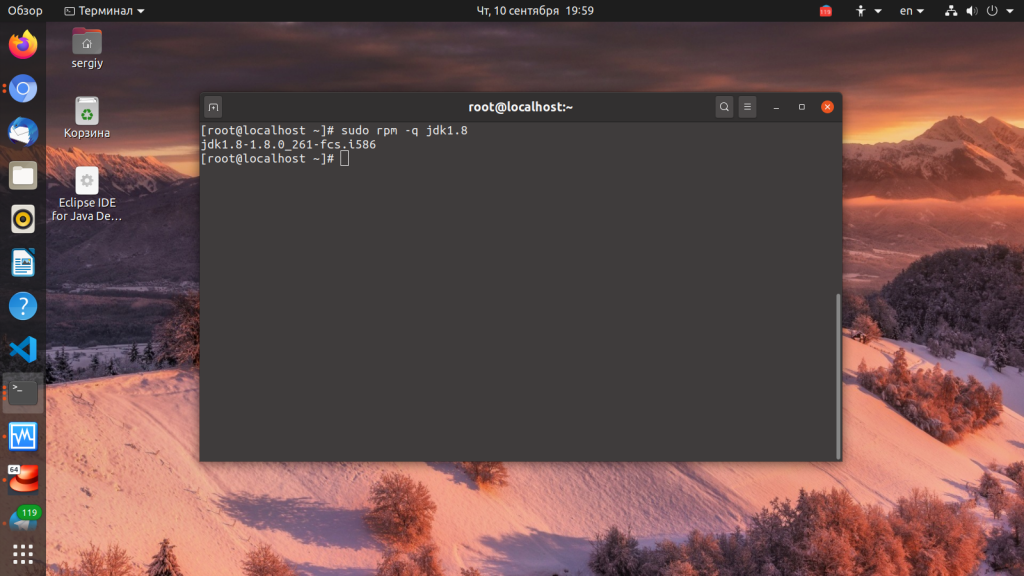
Чтобы проверить установлен ли пакет, нам уже нужно использовать режим запроса:
Также сразу можно удалить пакет, если он не нужен:
Но у rpm так же как и у dpkg, есть один существенный недостаток. Программа не может разрешать зависимости. В случае отсутствия нужного пакета в системе, вы просто получите сообщение об ошибке и пакет не установится.
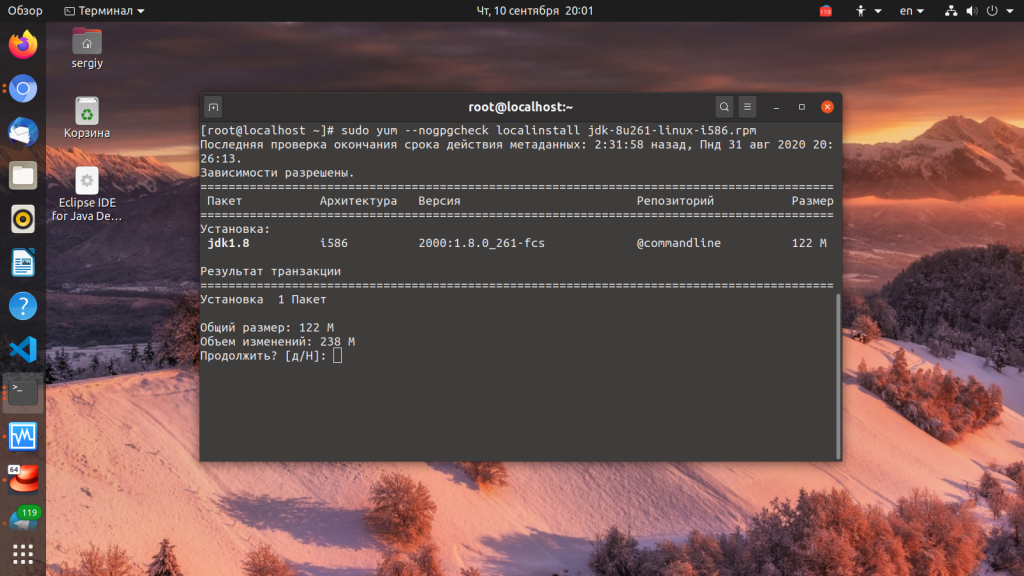
Для автоматической загрузки зависимостей во время выполнения установки rpm linux нужно использовать пакетный менеджер дистрибутива. Рассмотрим несколько команд для самых популярных RPM дистрибутивов. В RedHat и других дистрибутивах, использующих Yum используйте такую команду:
sudo yum —nogpgcheck localinstall имя_пакета.rpm
Первая опция отключает проверку GPG ключа, а вторая говорит, что мы будем выполнять установку локального пакета. В Fedora, с помощью dnf все делается еще проще:
sudo dnf install имя_пакета.rpm
Пакетный менеджер Zypper и OpenSUSE справляются не хуже:
sudo zypper install имя_пакета.rpm
Вот так очень просто выполняется установка rpm с зависимостями. Но не всем нравится работать в консоли, многие новые пользователи хотят использовать графический интерфейс для решения всех задач, в том числе и этой. Дальше мы рассмотрим несколько таких утилит.
Установка RPM файла в GUI
Если вы используете OpenSUSE, то это делается очень просто. Универсальный конфигуратор системы YaST, кроме всего прочего позволяет установить rpm пакеты. Вы можете сделать это с помощью файлового менеджера, выбрав пункт контекстного меню для файла открыть с помощью Yast или выполнив команду:
В Fedora для тех же целей вы можете использовать менеджер приложений дистрибутива. Раньше было еще несколько универсальных утилит для решения этой задачи, но сейчас они уже все устарели.
Выводы
Теперь вы знаете как выполняется установка rpm файла в Linux. На самом деле это очень просто и даже существует не только один способ, а целых несколько. Хотя графических утилит здесь немного меньше чем в Ubuntu. Но консольных утилит полностью хватает. Если у вас остались вопросы, спрашивайте в комментариях!
Обнаружили ошибку в тексте? Сообщите мне об этом. Выделите текст с ошибкой и нажмите Ctrl+Enter.
How to Install RPM Packages on Ubuntu
RPM is a package format used by Red Hat-based derivatives like CentOS, RHEL or Fedora. The name comes from the RPM Package Manager (RPM), a free and open-source package management system for installing, uninstalling, and managing software packages in Linux.
Is it possible to install .rpm files on Debian based distributions like Ubuntu? The answer is yes. However, you need to be careful as it could lead to package dependency conflicts.
Follow the steps in this tutorial to learn how to install .rpm packages on Ubuntu.
- A user account with sudo privileges
- Access to a terminal/command line
- apt package manager (included by default)
Steps to Install an RPM Package on Ubuntu
Install Alien Package
To improve the stability of the installation process, we need to convert the .rpm file to a .deb file format.
Alien is a useful tool that facilitates conversions between Red Hat rpm, Debian deb, Stampede slp, Slackware tsz, and Solaris pkg file formats.
To install Alien follow these steps:
1. Check the status of the Universe distribution component:
sudo add-apt-repository universe2. Make sure that your repositories are up-to-date:
3. The following command installs the Alien conversion tool:
sudo apt-get install alienConvert .rpm Files to .deb Format
Now that Alien has been installed, it’s time to convert the files to the .deb format to complete the installation. Go to the folder where the .rpm file is located and enter the following command:
sudo alien packagename.rpmThis command instructs the Alien tool to initiate the conversion process of the .rpm file to a .deb file.
Note: You need to log in as a user with sudo access to install packages on Ubuntu.
Install the converted .rpm package on Ubuntu
Once the conversion has run its course, enter the following command to start the installation:
sudo dpkg –i packagename.debYou have successfully installed a converted .rpm file on Ubuntu.
How to Install .rpm Package Directly on Ubuntu
The command we’ll use below installs a .rpm package in Ubuntu without previously converting it to a .deb file format.
This command can lead to serious compatibility issues if you attempt to run it with important system packages. RPM was not developed initially for Debian based distributions. As we have already installed Alien, we can use the tool to install RPM packages without the need to convert them first.
To complete this action, enter this command:
sudo alien –i packagename.rpmYou have now directly installed an RPM package on Ubuntu. Keep in mind that installing packages in formats that are not native to Ubuntu can pose a significant risk.
By following the tutorial, you have installed an RPM package on Ubuntu. Understanding the installation processes and the available options significantly reduce the likelihood of something going wrong. Check out our article on how to use the RPM command in Linux.
If you were planning to update essential system packages, a better option would be to use Ubuntu repositories and find adequate alternative packages.
How to Install RPM Files on Fedora Linux [Beginner’s Tutorial]
When you start using Fedora Linux in the Red Hat domain, sooner or later, you’ll come across .rpm files. Like .exe files in Windows and .deb files in Ubuntu and Debian, .rpm files enable you to quickly install a software from it on Fedora.
You could find and install plenty of software from the software center, specially if you enable additional repositories in Fedora. But sometimes you’ll find software available on their website in RPM format.
Like .exe files in Windows, you download the .rpm file and double click on it to install it. Don’t worry, I’ll show you the detailed steps.
Installing RPM files on Fedora and Red Hat Linux
I’ll be showing you three ways to install RPM files:
Method 1: Use software center
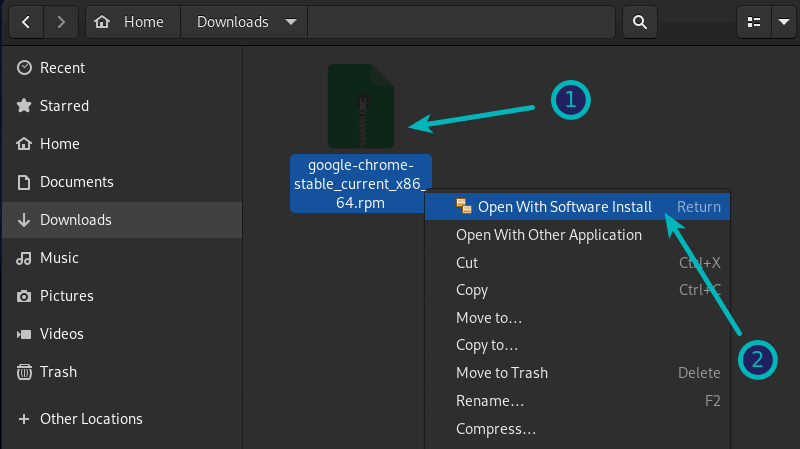
The simplest method is to use the default software center in Fedora. It’s really simple. Go to the folder where you downloaded the .rpm file. It is usually the Downloads folder.
Just double click on the RPM file and it will be opened in the software center.
Alternatively, you can right click on the file and choose to install it via Software Center.
When it is opened in the software center, you should see the installation option. Just hit the install button and enter your account’s password when prompted for it.
Method 2: Use DNF command to install RPM file
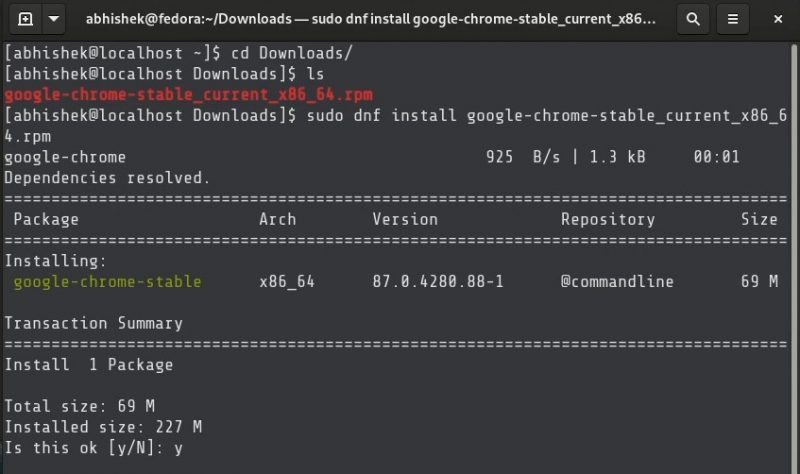
This is the command line method. Fedora uses the new DNF package manager and you can use it to install downloaded RPM files as well.
Open a terminal and switch to the directory where you have the RPM file downloaded. You can also provide the path to the RPM file. Use the DNF command like this:
sudo dnf install rpm_file_nameMethod 3: Install RPM files in Red Hat using Yum command
Unlike Fedora, Red Hat still uses the good old Yum package manager. You won’t find the DNF command here, yet.
The process is the same as DNF command. You go to the directory where the RPM file is located or provide its path.
sudo yum install path_to_RPM_fileHow to remove RPM packages
Removing a RPM package isn’t a big deal either. And no, you don’t need the original rpm file that you used to install the program.
You may find the installed package in the software center and remove application from there.
Alternatively, you can use the DNF or YUM command with remove option.
With DNF, use this command:
sudo dnf remove rpm_package_nameWith Yum, use this command:
sudo yum remove rpm_package_nameYou probably won’t remember the exact package name and that’s fine. What you can do is to type the first few letters of the package and then hit tab. This is assuming that you have tab completion enabled which usually is.
And that’s all you need to do here. Pretty simple, right? Being a beginner, you may struggle with a simple task like this and I hope you feel more confident with Fedora thanks to quick tutorials like this.
