Setting up SDL 2 on Linux
Since there are so many flavors of Linux these tutorials might not work on your Linux set up. If you’ve tried everything and are still having problems, contact me and I’ll try to add on a distro specific fix.
In the age of packaging managers, a lot of the work is done for you when installing libraries. You’ll need root privileges to install packages so make sure to use «su» or «sudo» if you’re not logged in as root.
Make sure you have updated to the latest version of your distro because your older package manager may not support the latest version of SDL 2.
1) For those of you who have Advanced Packaging Tool available (ie Ubuntu and Debian) you’ll want to search the apt-get cache to find the current SDL 2 version to install. You can search the apt-get available packages using the command:
You’ll want to download the development version of SDL 2. As of the last update of this tutorial, the development package of SDL 2 is libsdl2-dev. You can install this package using the command
apt-get install libsdl2-dev
2) If you use the Yellow dog Updater, Modified (used in Fedora and CentOS) you can enter the command:
To search for the SDL 2 developers package. As of the last update of this tutorial, the developer package for SDL 2 is SDL2-devel. You can install this package using the command:
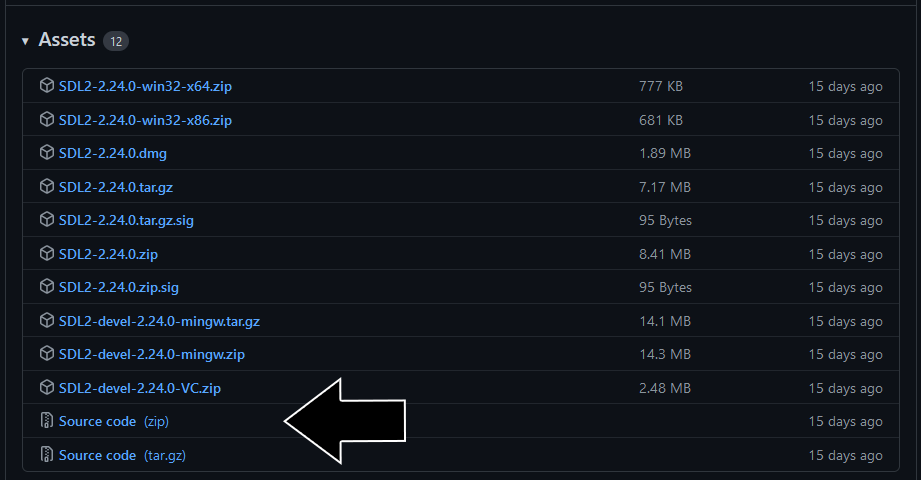
3) If somehow you don’t have a package manager, you can install from the source the classic Unix way. Download the latest source from the SDL GitHub.
Extract the archive and cd to the folder that got extracted. Configure the installation using
Compile the source using the make command
Finally, install the package using the make command
Note: If you do a manual install you may have to specify where the headers and library files are for your compiler/IDE.
4) Now that you’ve installed the development libraries, it’s time to start up your IDE/compiler.
Copyright Lazy Foo’ Productions 2004-2023
Installing SDL2 on Linux
SDL2 was released a little while ago, but still hasn’t made it into the stable repositories of some Linux distributions. After doing a big of digging, it’s not too hard to get this installed yourself — most of the advice offered in this post comes from an answer on the Ubuntu forums here.
In today’s post, we’ll install SDL2 on a Debian/Ubuntu style distribution from source.
Dependencies
First thing before we download and compile the SDL2 source is to get some of the dependencies installed on your system. The following install line will put all of the libraries that SDL2 requires:
$ sudo apt-get install build-essential xorg-dev libudev-dev libts-dev libgl1-mesa-dev libglu1-mesa-dev libasound2-dev libpulse-dev libopenal-dev libogg-dev libvorbis-dev libaudiofile-dev libpng12-dev libfreetype6-dev libusb-dev libdbus-1-dev zlib1g-dev libdirectfb-devOnce all of these have installed successfully, you’ll need to download a copy of the source. All downloads can be found here. This guide will assume that you’ll download the .tar.gz source archive.
Compilation and Installation
Extract the package into a directory under your home directory, somewhere . . .
$ tar -xzf SDL2-*.tar.gz $ cd SDL2-* Next we’ll configure, build and install the libraries.
$ ./configure $ make $ sudo make install Once compilation and installation have complete, you’ll need to update your library links/cache. Do this with the following command:
Installing sdl2 on linux
The libsdl direct media library is open source and cross-platform. It helps that it’s also part of Linux already. You can see this if you open a terminal and do a
apt-cache search libsdl2 | grep devThis will show you what libraries are available
david@david-VM-PC9:~$ apt-cache search libsdl2 | grep dev libsdl2-dev - Simple DirectMedia Layer development files libsdl2-gfx-dev - development files for SDL2_gfx libsdl2-image-dev - Image loading library for Simple DirectMedia Layer 2, development files libsdl2-mixer-dev - Mixer library for Simple DirectMedia Layer 2, development files libsdl2-net-dev - Network library for Simple DirectMedia Layer 2, development files libsdl2-ttf-dev - TrueType Font library for Simple DirectMedia Layer 2, development files
Although SDL is available, the dev files aren’t installed by default and we want all the headers for C/C++ programs to use them.
We need to install the devs for the libraries we’ll need which are libsdl2-dev, libsdl2-image-dev (you do want to display graphics don’t you?), libsdl2-mixer-dev (for sounds) and if you want text you’ll need libsdl2-ttf-dev.
So install all those with
sudo apt install libsdl2-dev sudo apt install libsdl2-image-dev sudo apt install libsdl2-mixer-dev sudo apt install libsdl2-ttf-dev
Where do the headers get installed?
A quick search for sdl.h found it and associated header files in /usr/include/SDL2, a total of 76 header files though we’ll rarely use more than half a dozen.
Note. When I first wrote this, Ubuntu was on 18.04 LTS and clang was 6. When I updated this on 20.04 LTS, clang was version 10.0 and I got a weird include error.
The source code hasn’t changed but the VS Code JSON files have been altered slightly.
< "version": "2.0.0", "tasks": [ < "type": "shell", "label": "clang-10.0 build active file", "command": "/usr/bin/clang-10", "args": [ "-g", "$","$/hr_time.c", "-o", "$/demo", "-I/usr/include/SDL2", "-lSDL2" ], "options": < "cwd": "/usr/bin" >, "group": < "kind": "build", "isDefault": true >> ] >The two changes between this and earlier versions are the command line to compile which is now /usr/bin/clang-10 though I think clang without the -10 will also do.
The second change luine is the addition of «-I/usr/include/SDL2», which tells the compiler the include path. Without it the compiler complains it can’t find the include file “begin_code.h” which is part of SDL2.
This is a listing of the demo program.
// sdldemo.c Author D. Bolton 7th March 2020 #include "hr_time.h" #include #include #define __timespec_defined 1 #define __timeval_defined 1 #define __itimerspec_defined 1 #include /* All SDL App's need this */ #include #include #define QUITKEY SDLK_ESCAPE #define WIDTH 1024 #define HEIGHT 768 SDL_Window* screen = NULL; SDL_Renderer *renderer; SDL_Event event; SDL_Rect source, destination, dst; int errorCount = 0; int keypressed; int rectCount = 0; stopWatch s; /* returns a number between 1 and max */ int Random(int max) < return (rand() % max) + 1; >void LogError(char * msg) < //FILE * err; //int error; //error = fopen_s(&err,"errorlog.txt", "a"); printf("%s\n", msg); //fclose(err); errorCount++; >/* Sets Window caption according to state - eg in debug mode or showing fps */ void SetCaption(char * msg) < SDL_SetWindowTitle(screen, msg); >/* Initialize all setup, set screen mode, load images etc */ void InitSetup() < srand((unsigned int)time(NULL)); SDL_Init(SDL_INIT_EVERYTHING); SDL_CreateWindowAndRenderer(WIDTH, HEIGHT, SDL_WINDOW_SHOWN, &screen, &renderer); if (!screen) < LogError("InitSetup failed to create window"); >SetCaption("Example One"); > /* Cleans up after game over */ void FinishOff() < SDL_DestroyRenderer(renderer); SDL_DestroyWindow(screen); //Quit SDL SDL_Quit(); exit(0); >/* read a character */ char getaChar() < int result = -1; while (SDL_PollEvent(&event)) < if (event.type == SDL_KEYDOWN) < result = event.key.keysym.sym; break; >> return result; > void DrawRandomRectangle() < char buff[20]; SDL_Rect rect; SDL_SetRenderDrawColor(renderer, Random(256) - 1, Random(256) - 1, Random(256) - 1,255); rect.h = 200;// Random(100) + 20; rect.w = 200;// Random(100) + 20; rect.y = Random(HEIGHT - rect.h - 1); rect.x = Random(WIDTH - rect.w - 1); SDL_RenderFillRect(renderer,&rect); rectCount++; if (rectCount % 10000 == 0) < SDL_RenderPresent(renderer); stopTimer(&s); snprintf(buff,sizeof(buff),"%10.6f", diff(&s)); SetCaption(buff); startTimer(&s); >> /* main game loop. Handles demo mode, high score and game play */ void GameLoop() < int gameRunning = 1; startTimer(&s); while (gameRunning) < DrawRandomRectangle(); while (SDL_PollEvent(&event)) < switch (event.type) < case SDL_KEYDOWN: keypressed = event.key.keysym.sym; if (keypressed == QUITKEY) < gameRunning = 0; break; >break; case SDL_QUIT: /* if mouse click to close window */ < gameRunning = 0; break; >case SDL_KEYUP: < break; >> /* switch */ > /* while SDL_PollEvent */ > > int main(int argc,char * args[]) When you run this you’ll get a Window with random sized coloured rectangles like this and the time to draw 10,000 in the Window caption bar. Timing is done in the hr_time.h and .c files. These can be found in the file sdldemo.zip along with the VS code JSON files on GitHub.
Установка sdl2 на основные дистрибутивы
Здравствуй, Хабр. Недавно наткнулся на новый цикл статей по sdl2, но без процедуры установки. Вроде ничего сложного, но если интересно, то давайте вместе пройдемся по граблям, которые могут нас ожидать. Я проведу установку для xcode10 на macOS 10.14.5, code::blocks на Ubuntu 18.04 и Visual Studio 2019 Windows 10. Можно, конечно, было бы использовать clion. Одна ide на всех системах, но мне по какой-то причине не нравится их продукт. Ничего личного, просто кодинг.
Для проверки я буду использовать следующий код.
#include #include const int WIDTH = 800, HEIGHT = 600; int main( int argc, char *argv[] ) < SDL_Init( SDL_INIT_EVERYTHING ); SDL_Window *window = SDL_CreateWindow( "Hello SDL World", SDL_WINDOWPOS_UNDEFINED, SDL_WINDOWPOS_UNDEFINED, WIDTH, HEIGHT, SDL_WINDOW_ALLOW_HIGHDPI ); // Check that the window was successfully created if ( NULL == window ) < // In the case that the window could not be made. std::cout SDL_Event windowEvent; while ( true ) < if ( SDL_PollEvent( &windowEvent ) ) < if ( SDL_QUIT == windowEvent.type ) < break; >> > SDL_DestroyWindow( window ); SDL_Quit( ); return EXIT_SUCCESS; > Ubuntu
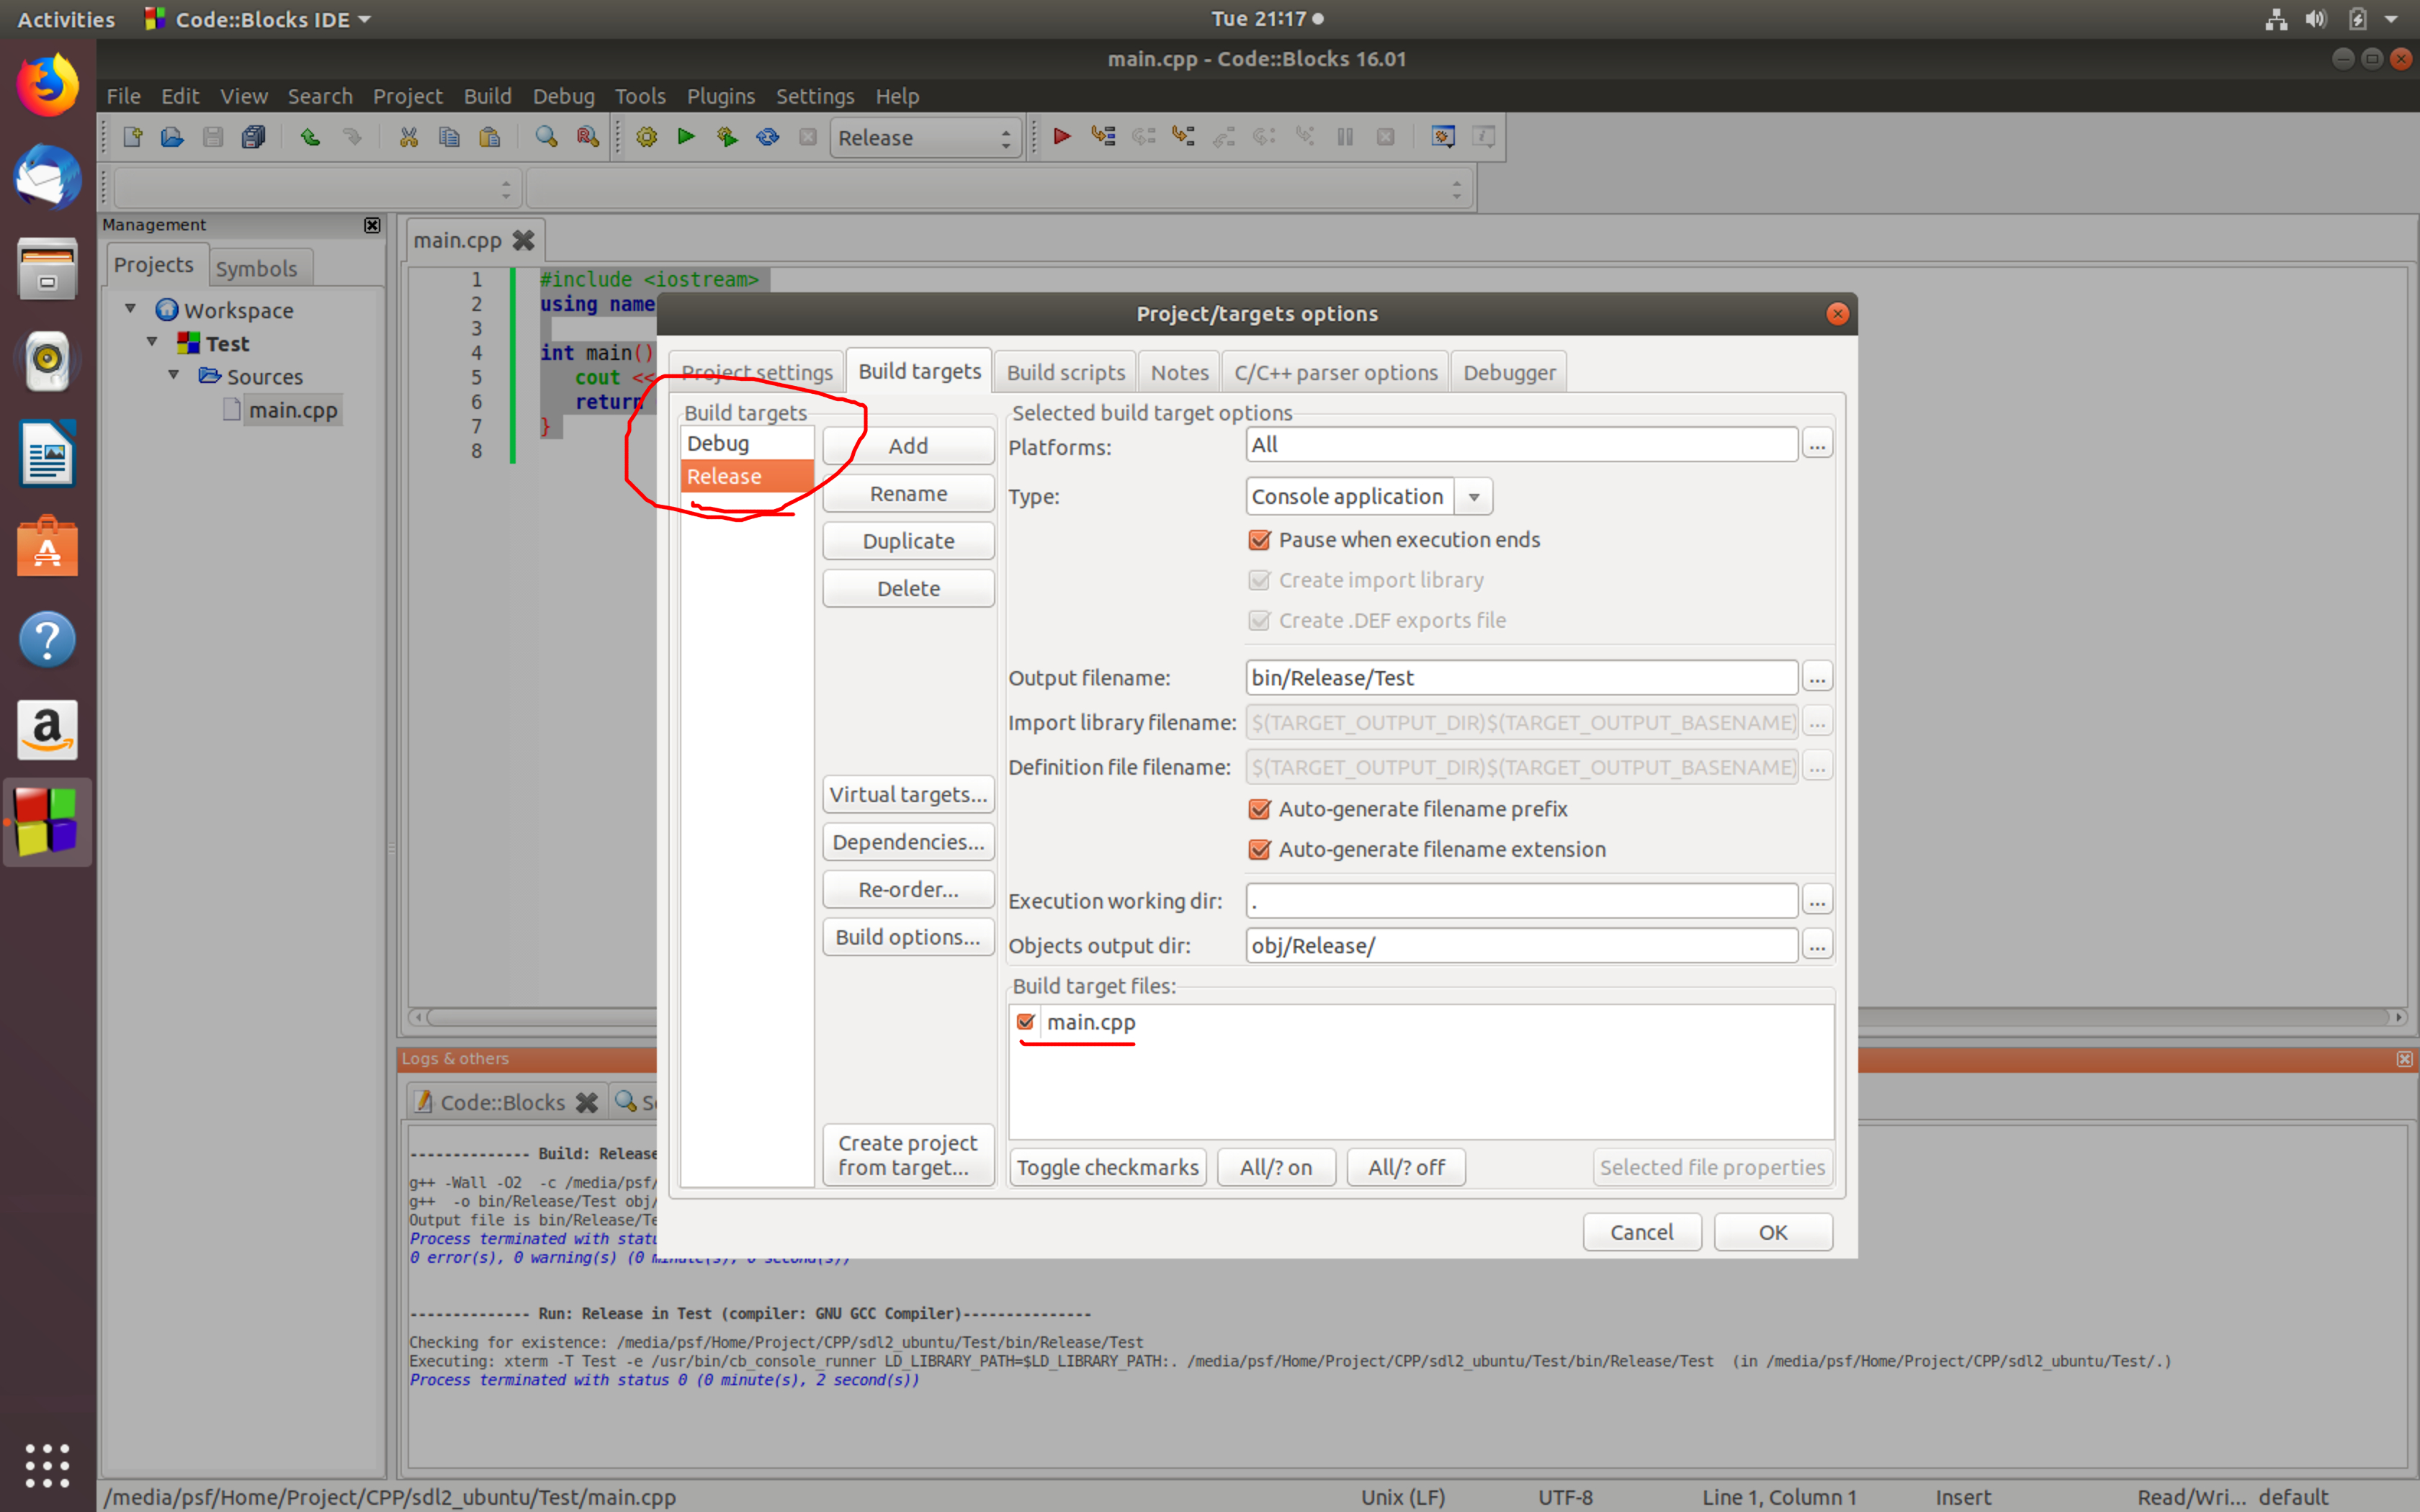
Ставим code::blocks из магазина — здесь никаких неожиданностей. Далее создаем простенький файл mian.cpp для теста.
Если не собираетесь компилировать из терминала, то нужно указать target в настройках проекта.
Отлично. Далее нужно установить сам sdl2. Пишем в терминале
sudo apt install libsdl2-dev -yПосле установки дадим знать ide, что нужно использовать sdl2. Перейдем в в раздел «project»->«build options». Нас интересует вкладка «Linker settings». В окно «other linker options» добавим «-lSDL2».

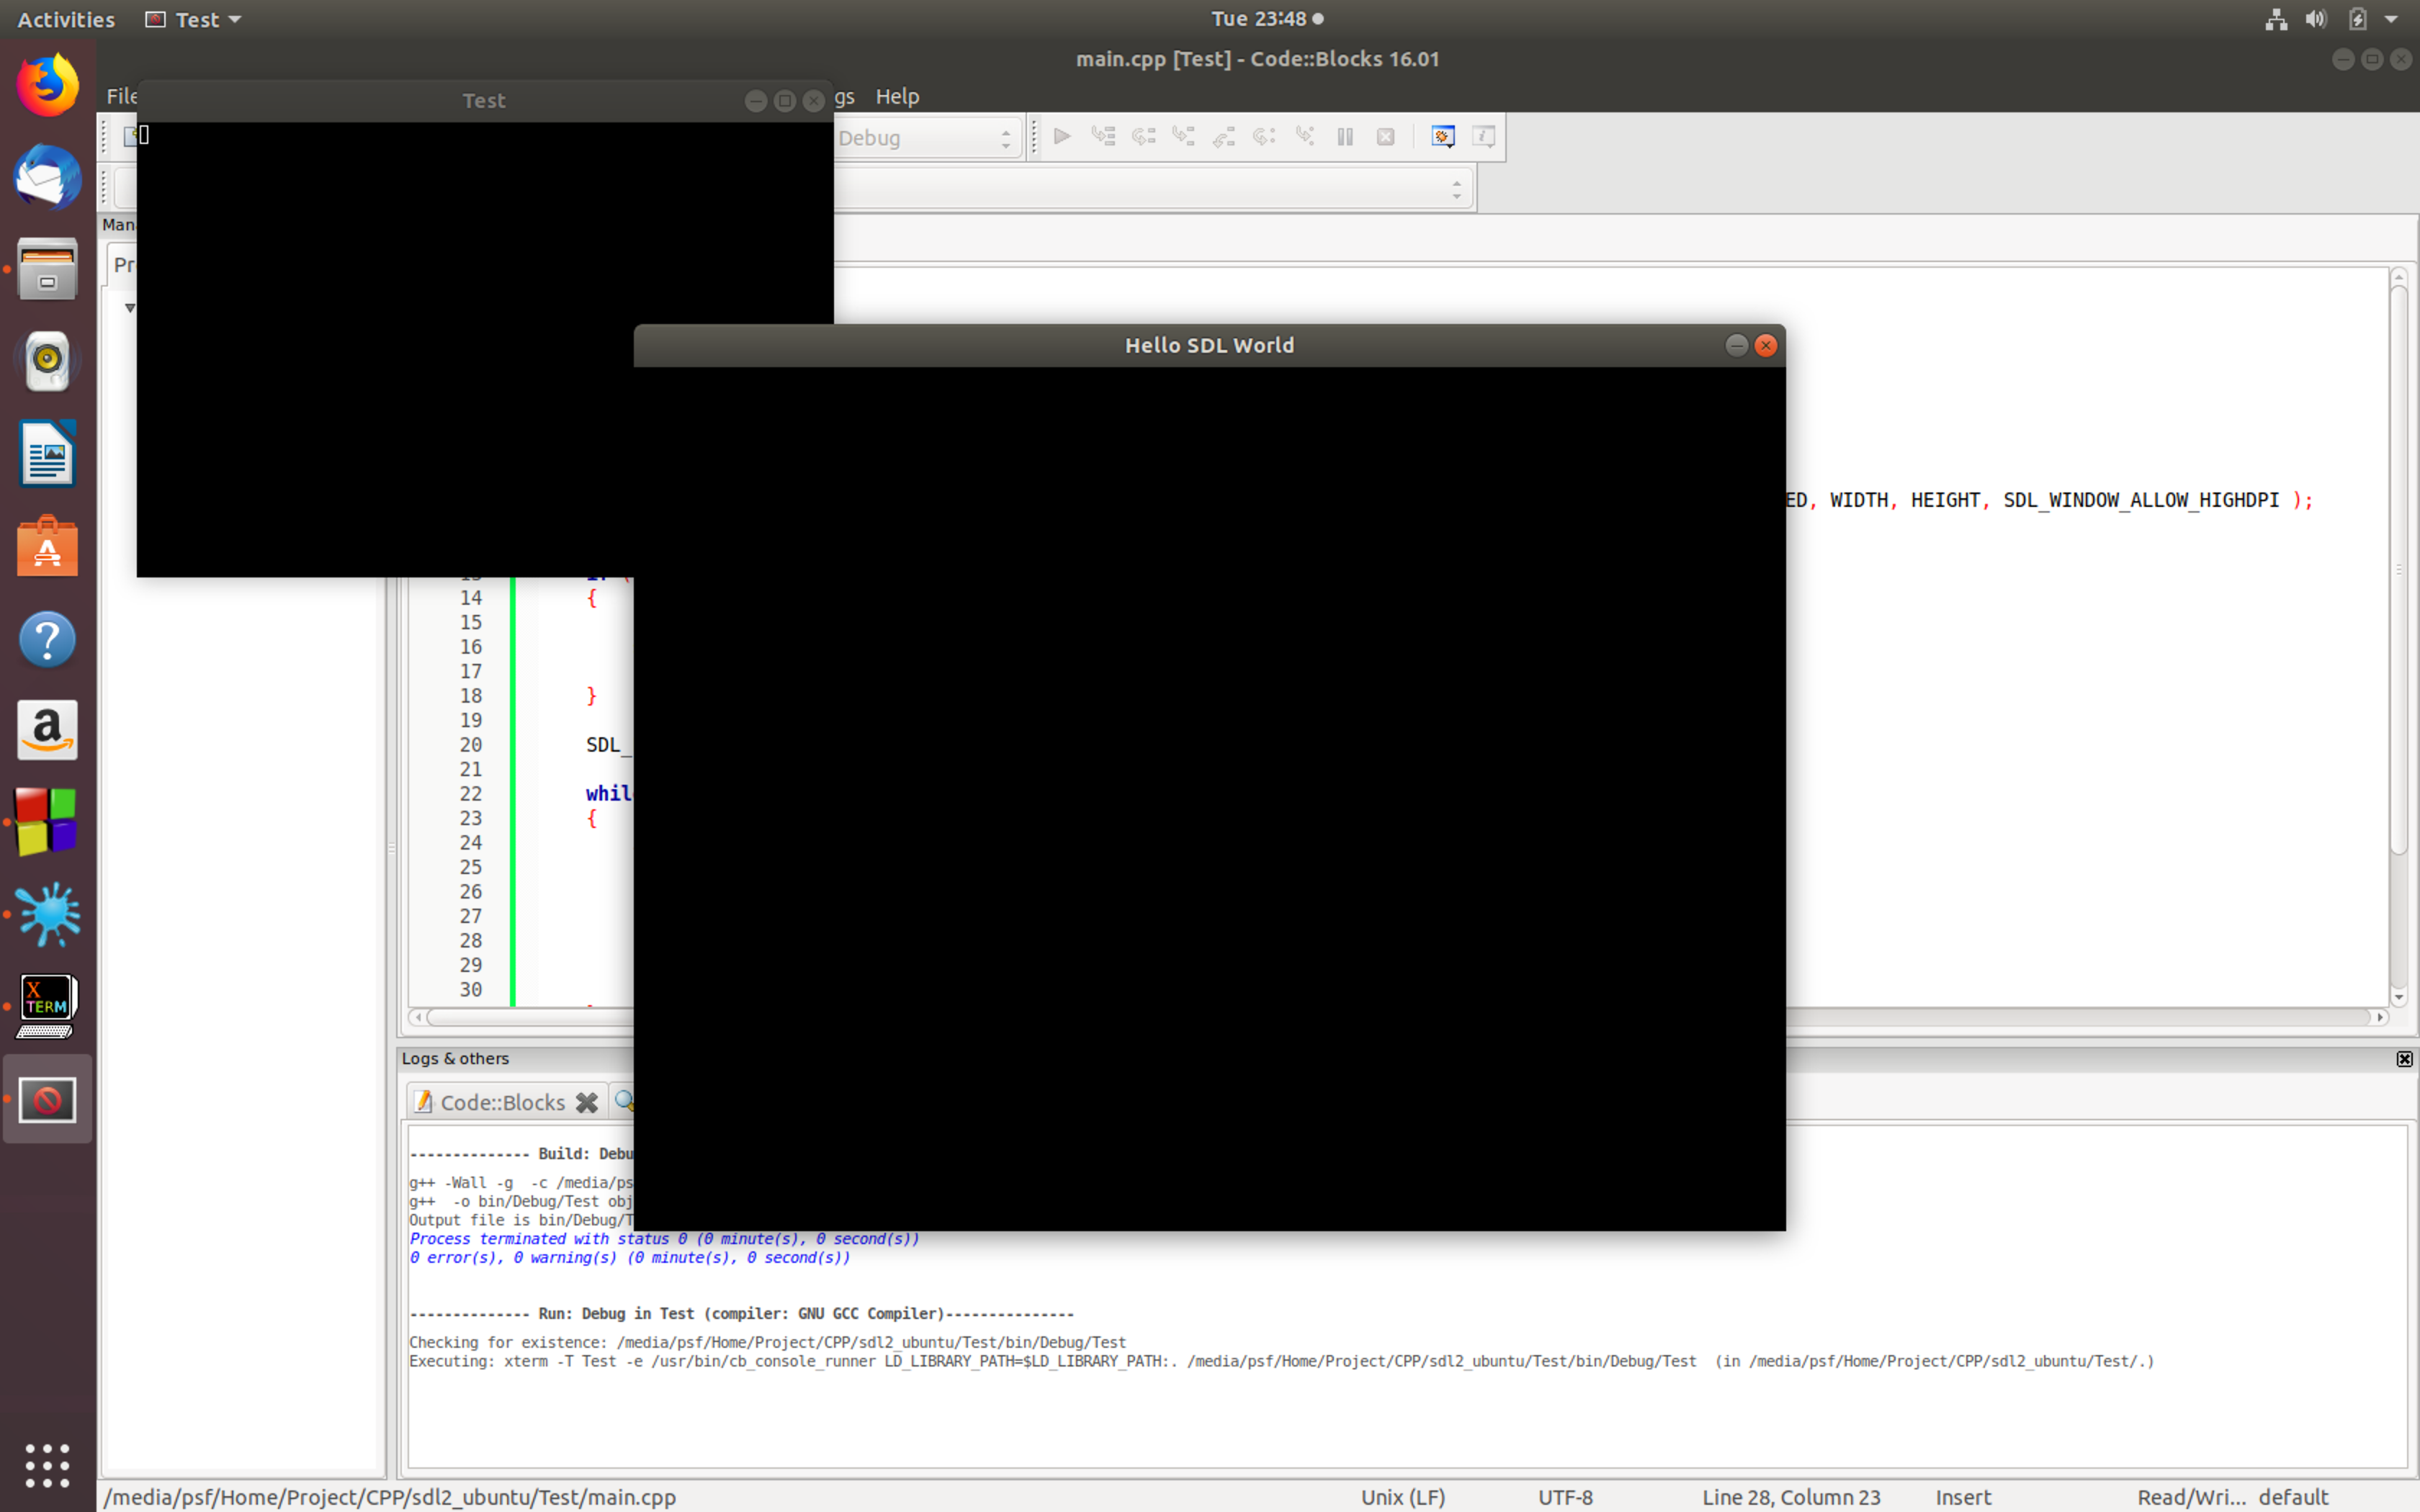
Заменяем на наш код. Отлично, окно рисуется.
macOS
Для установки вы можете использовать установочный образ с Сайта. На данный момент последняя стабильная версия 2.0.9.
Скачиваем и копируем в каталог /Library/Frameworks. Для использования может потребоваться аутентификация.
Запускаем xcode и выбираем проект command line tool macOS. Даем имя проекту и выбираем язык C++.
Чтобы добавить поддержку sdl2, необходимо перейти в «настройки проекта»->«build phases»->«link binary with libraries» и добавить элемент. В открывшемся окне выбрать «add other»
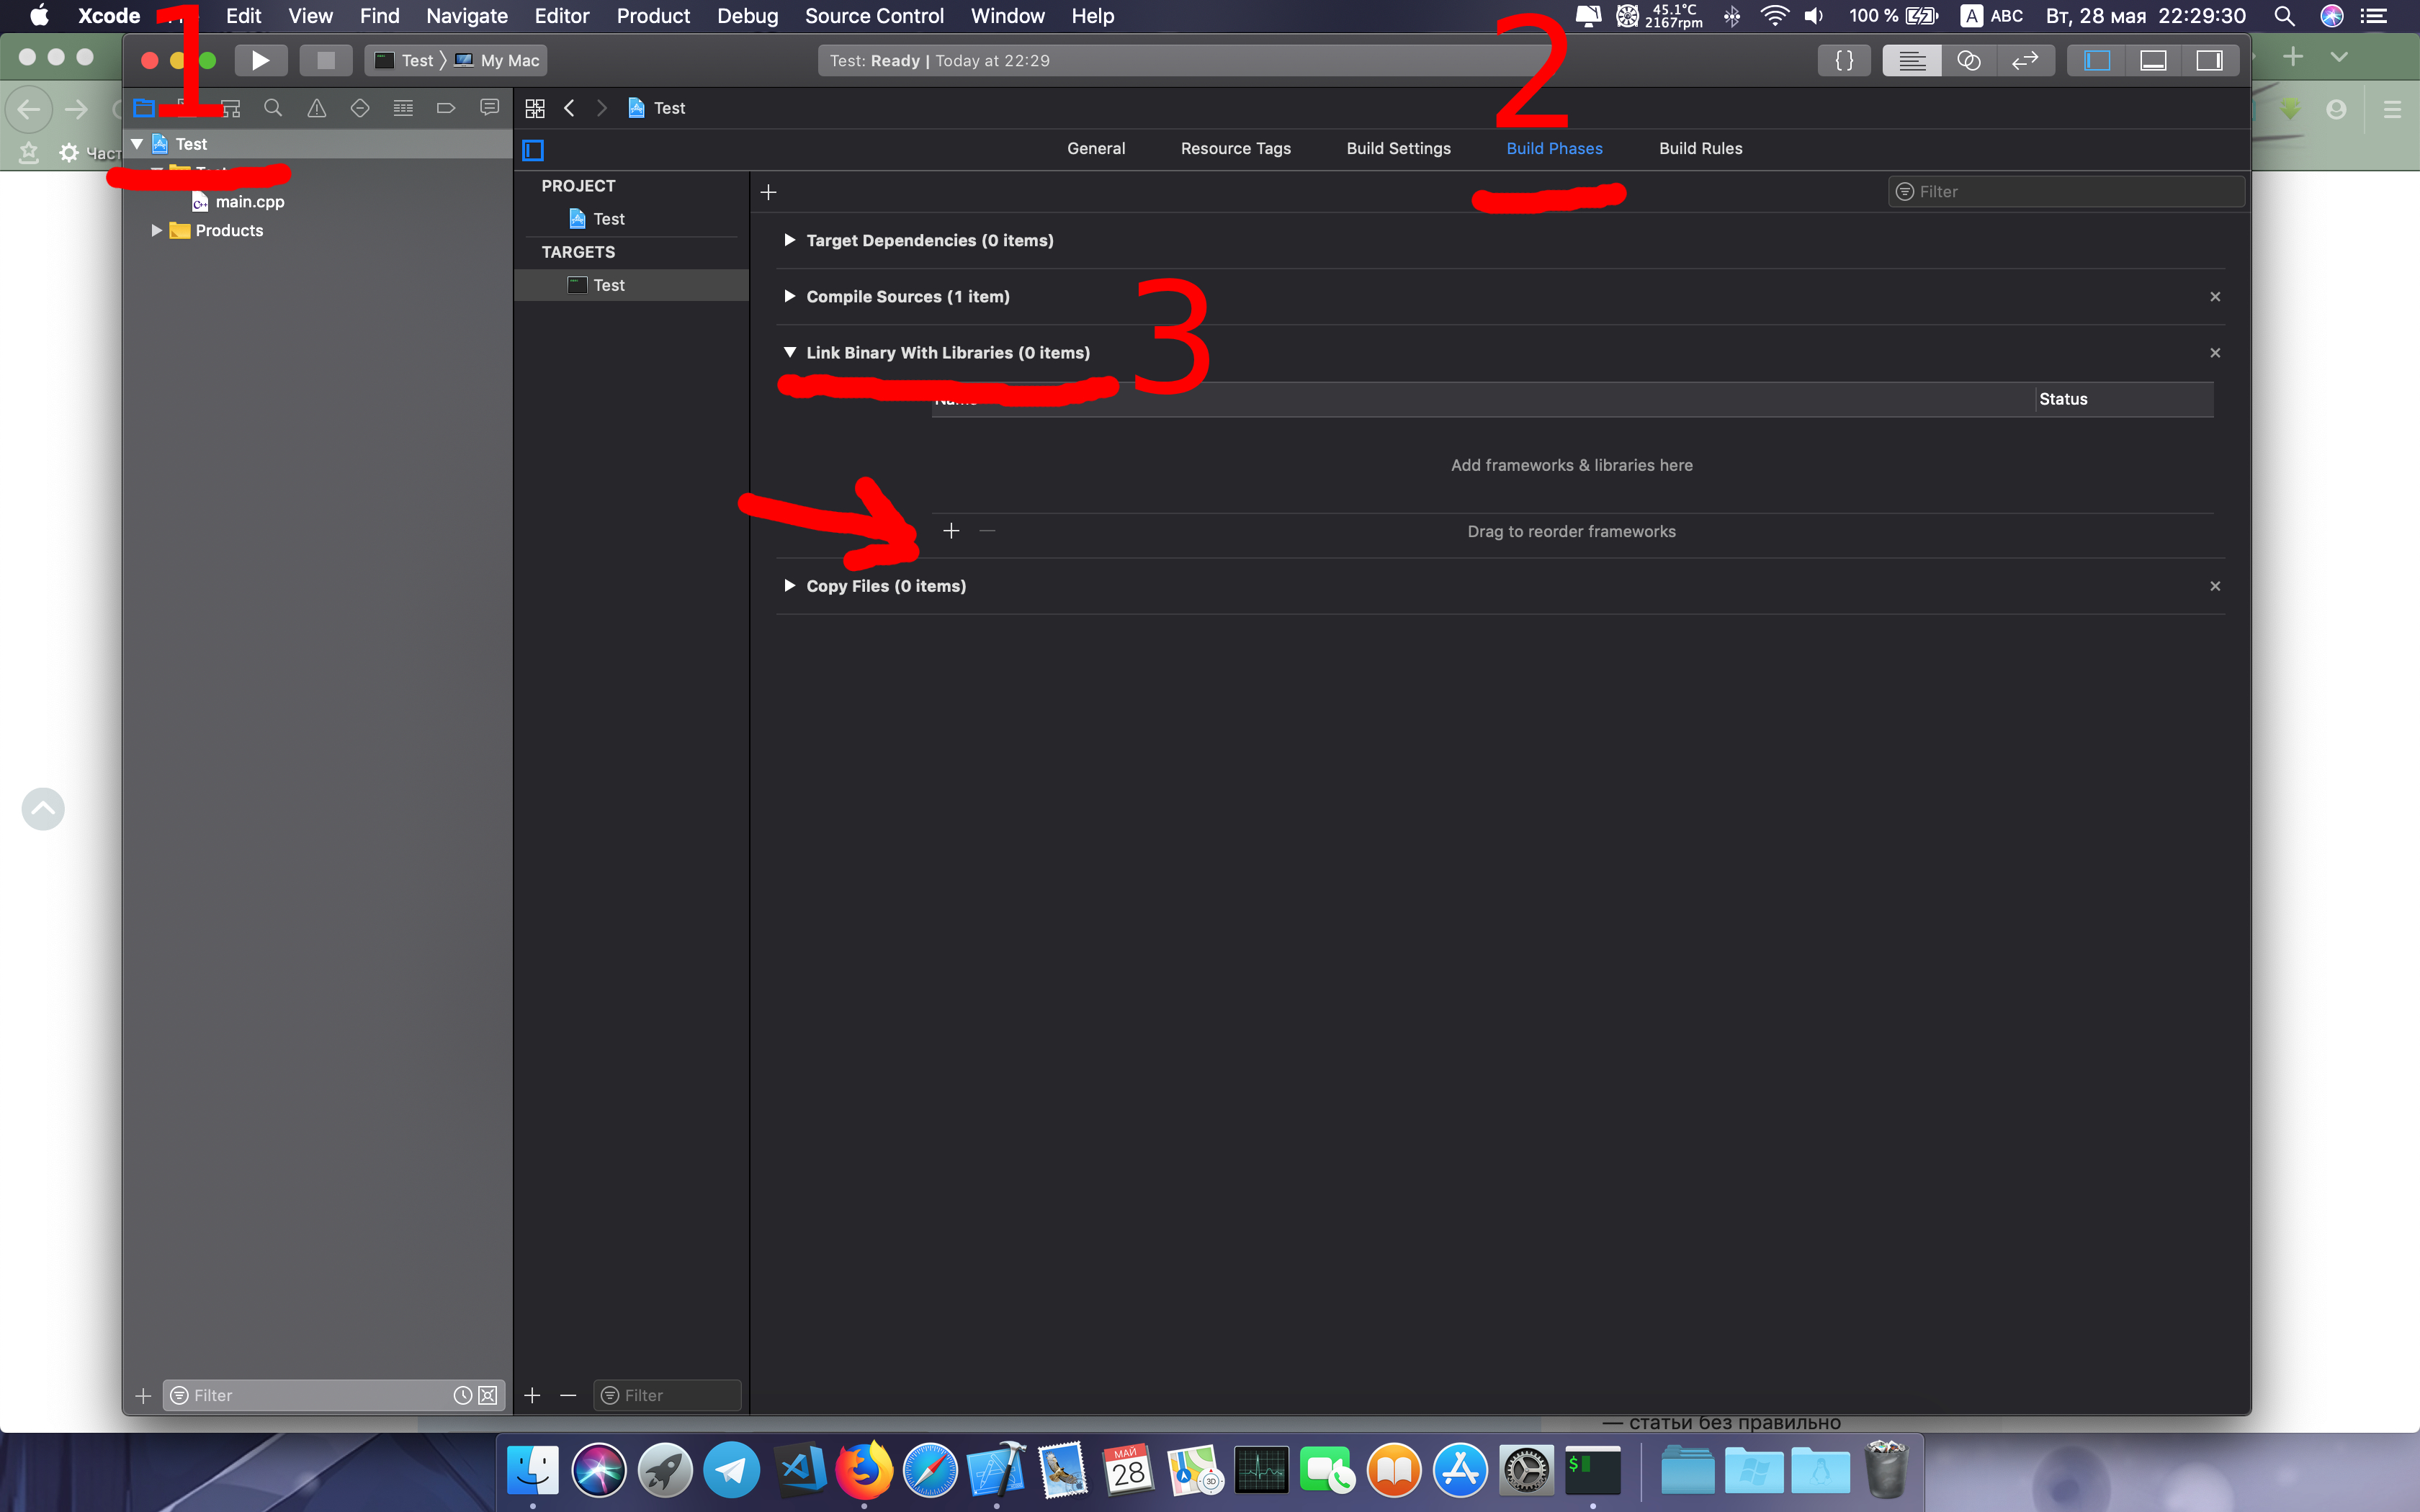
Добавляем наш файл /Library/Frameworks/SDL2.framework и можем проверять.
В случае, если вы предпочитаете использовать brew, то помните, что он устанавливает только статические библиотеки. В таком случае нужно передать флаг -I/usr/local/include.
Все работает, поехали дальше.

Windows
Установите vs studio. Скачайте библиотеку. Распакуйте содержимое и расположите где вам больше нравится. Я очень редко использую windows, поэтому не знаю, где хранятся все остальные библиотеки.
Создаем проект с пустым cpp файлом, либо консольное приложение, как вам удобно.
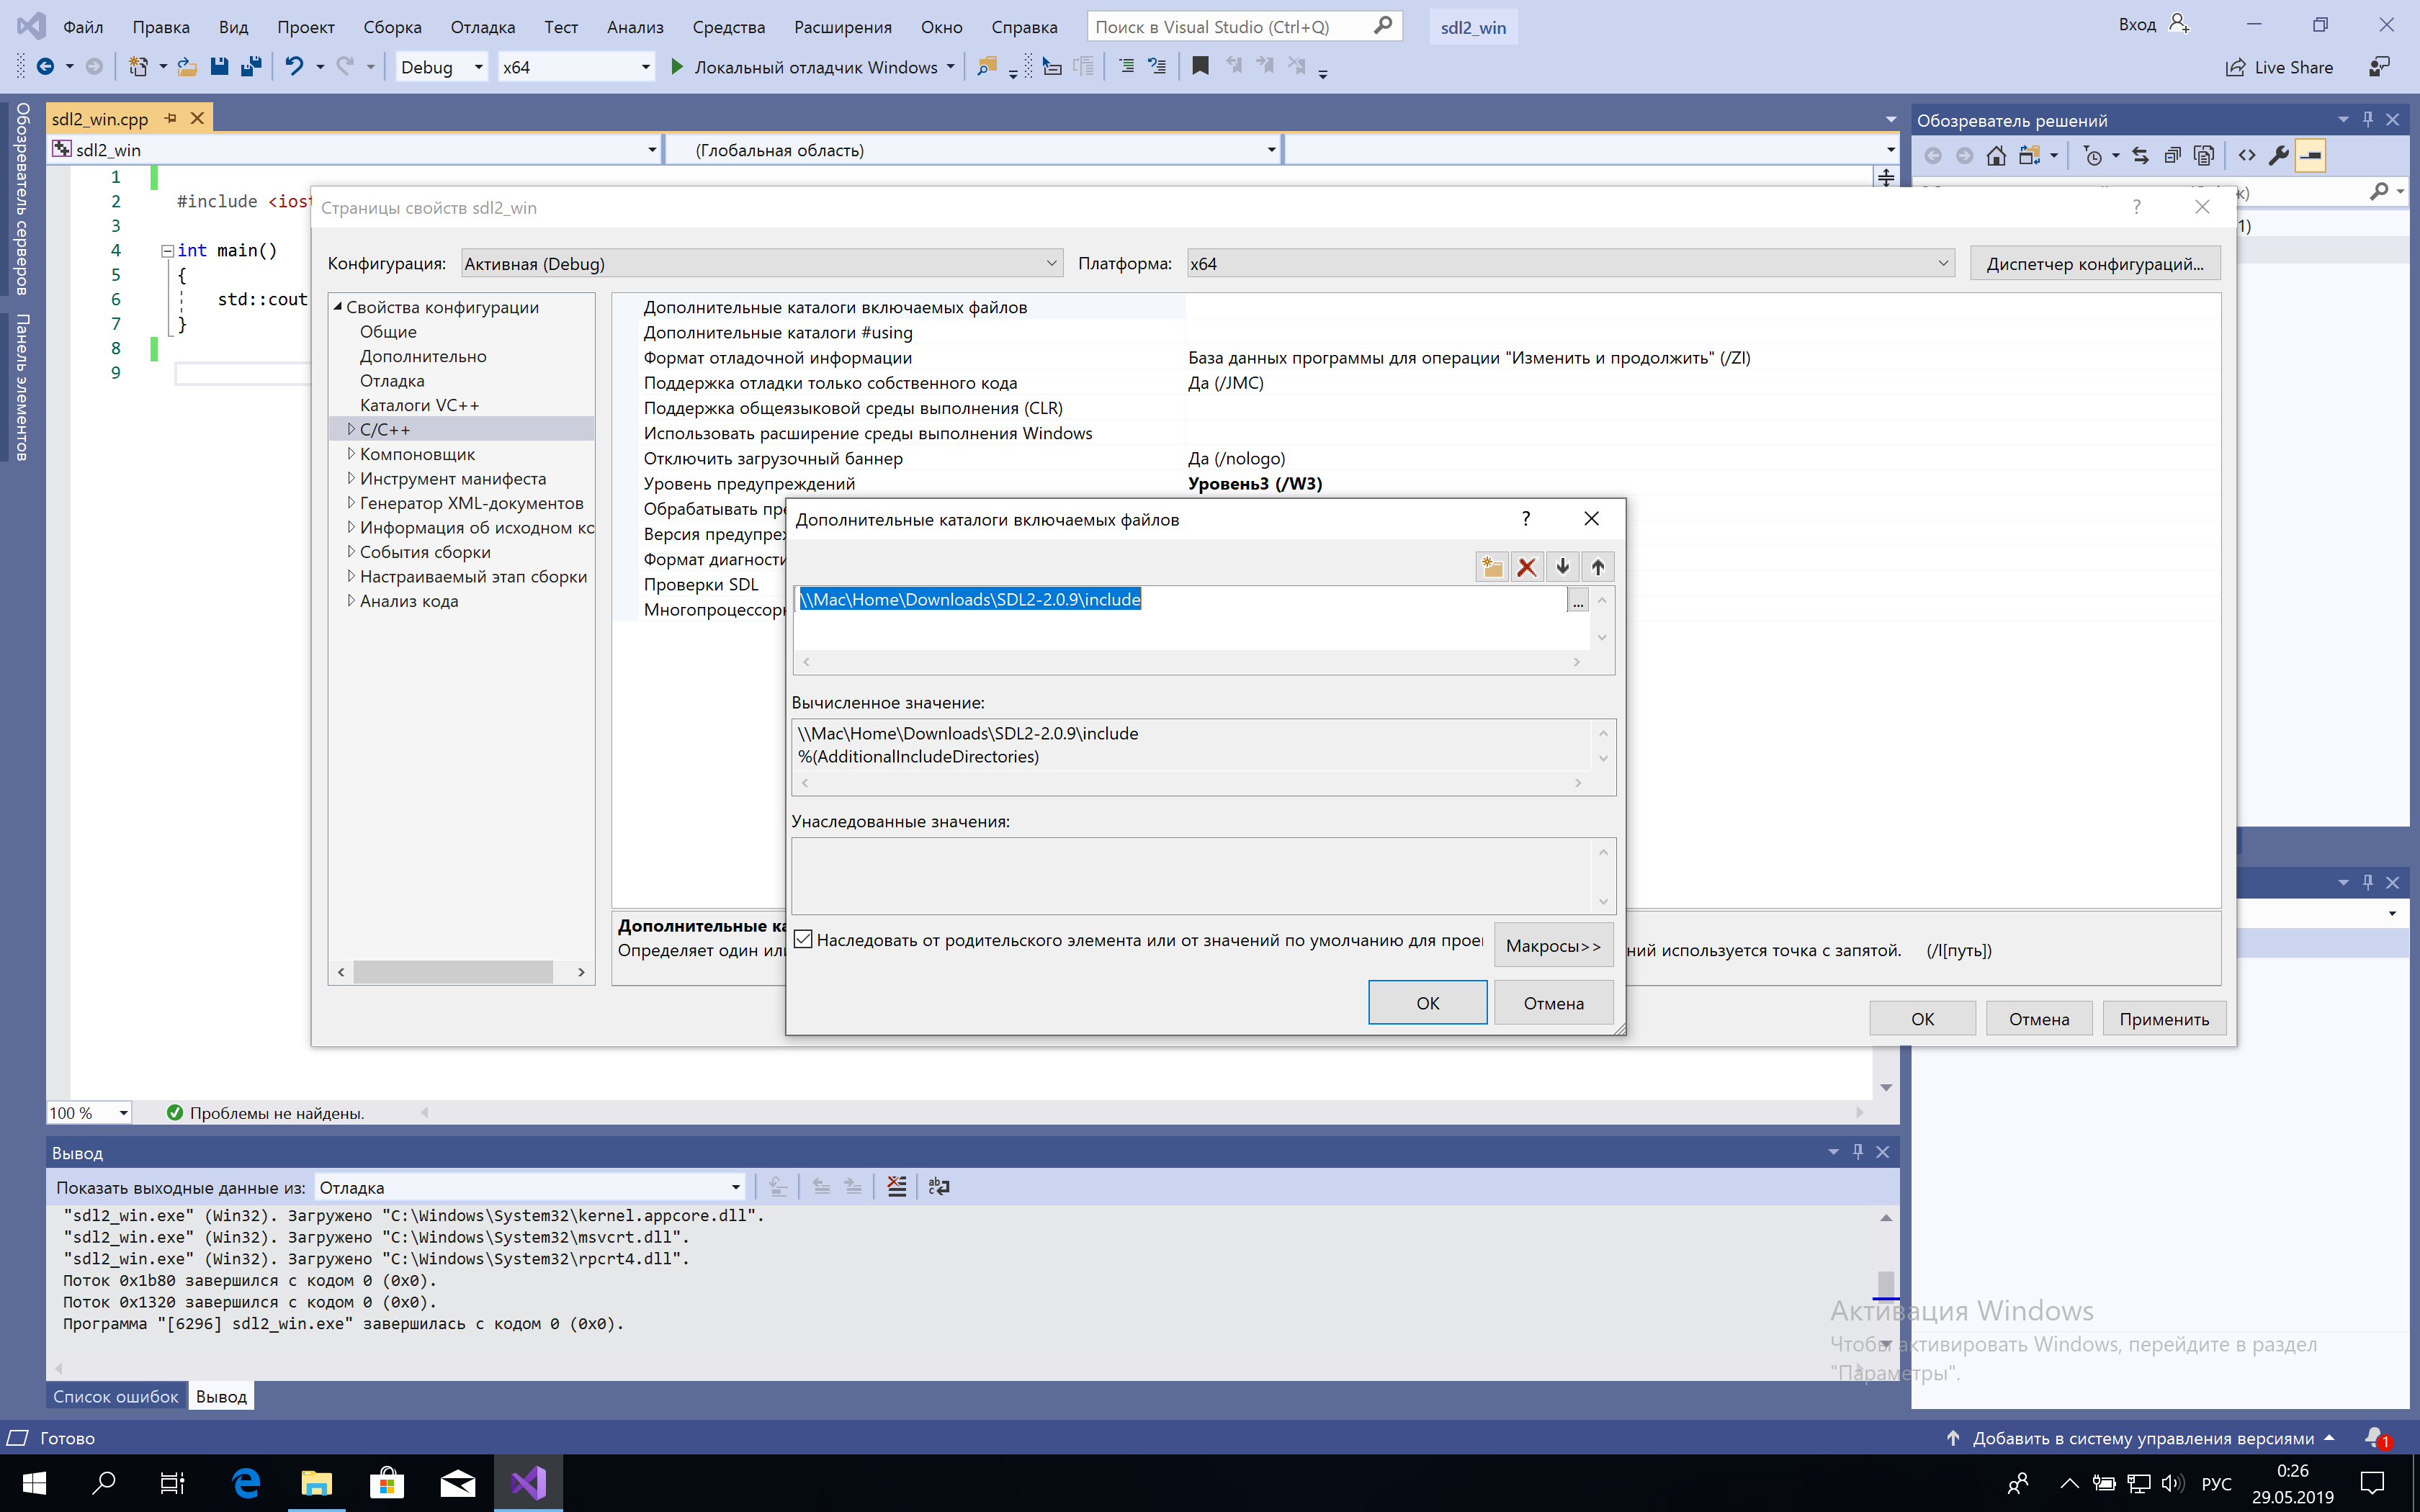
Перейдите в «проект»->«свойства»->«C/C++»->«дополнительные каталоги включаемых файлов». Добавьте путь к распакованному каталогу, указав include. В моем случае вышло \\Mac\Home\Downloads\SDL2-2.0.9\include, т.к. у меня виртуальная машина.
После этого в разделе «компоновщик»->«общие»->«дополнительные каталоги библиотек» нужно указать путь к SDL2.dll, например \\Mac\Home\Downloads\SDL2-2.0.9\lib\x64.
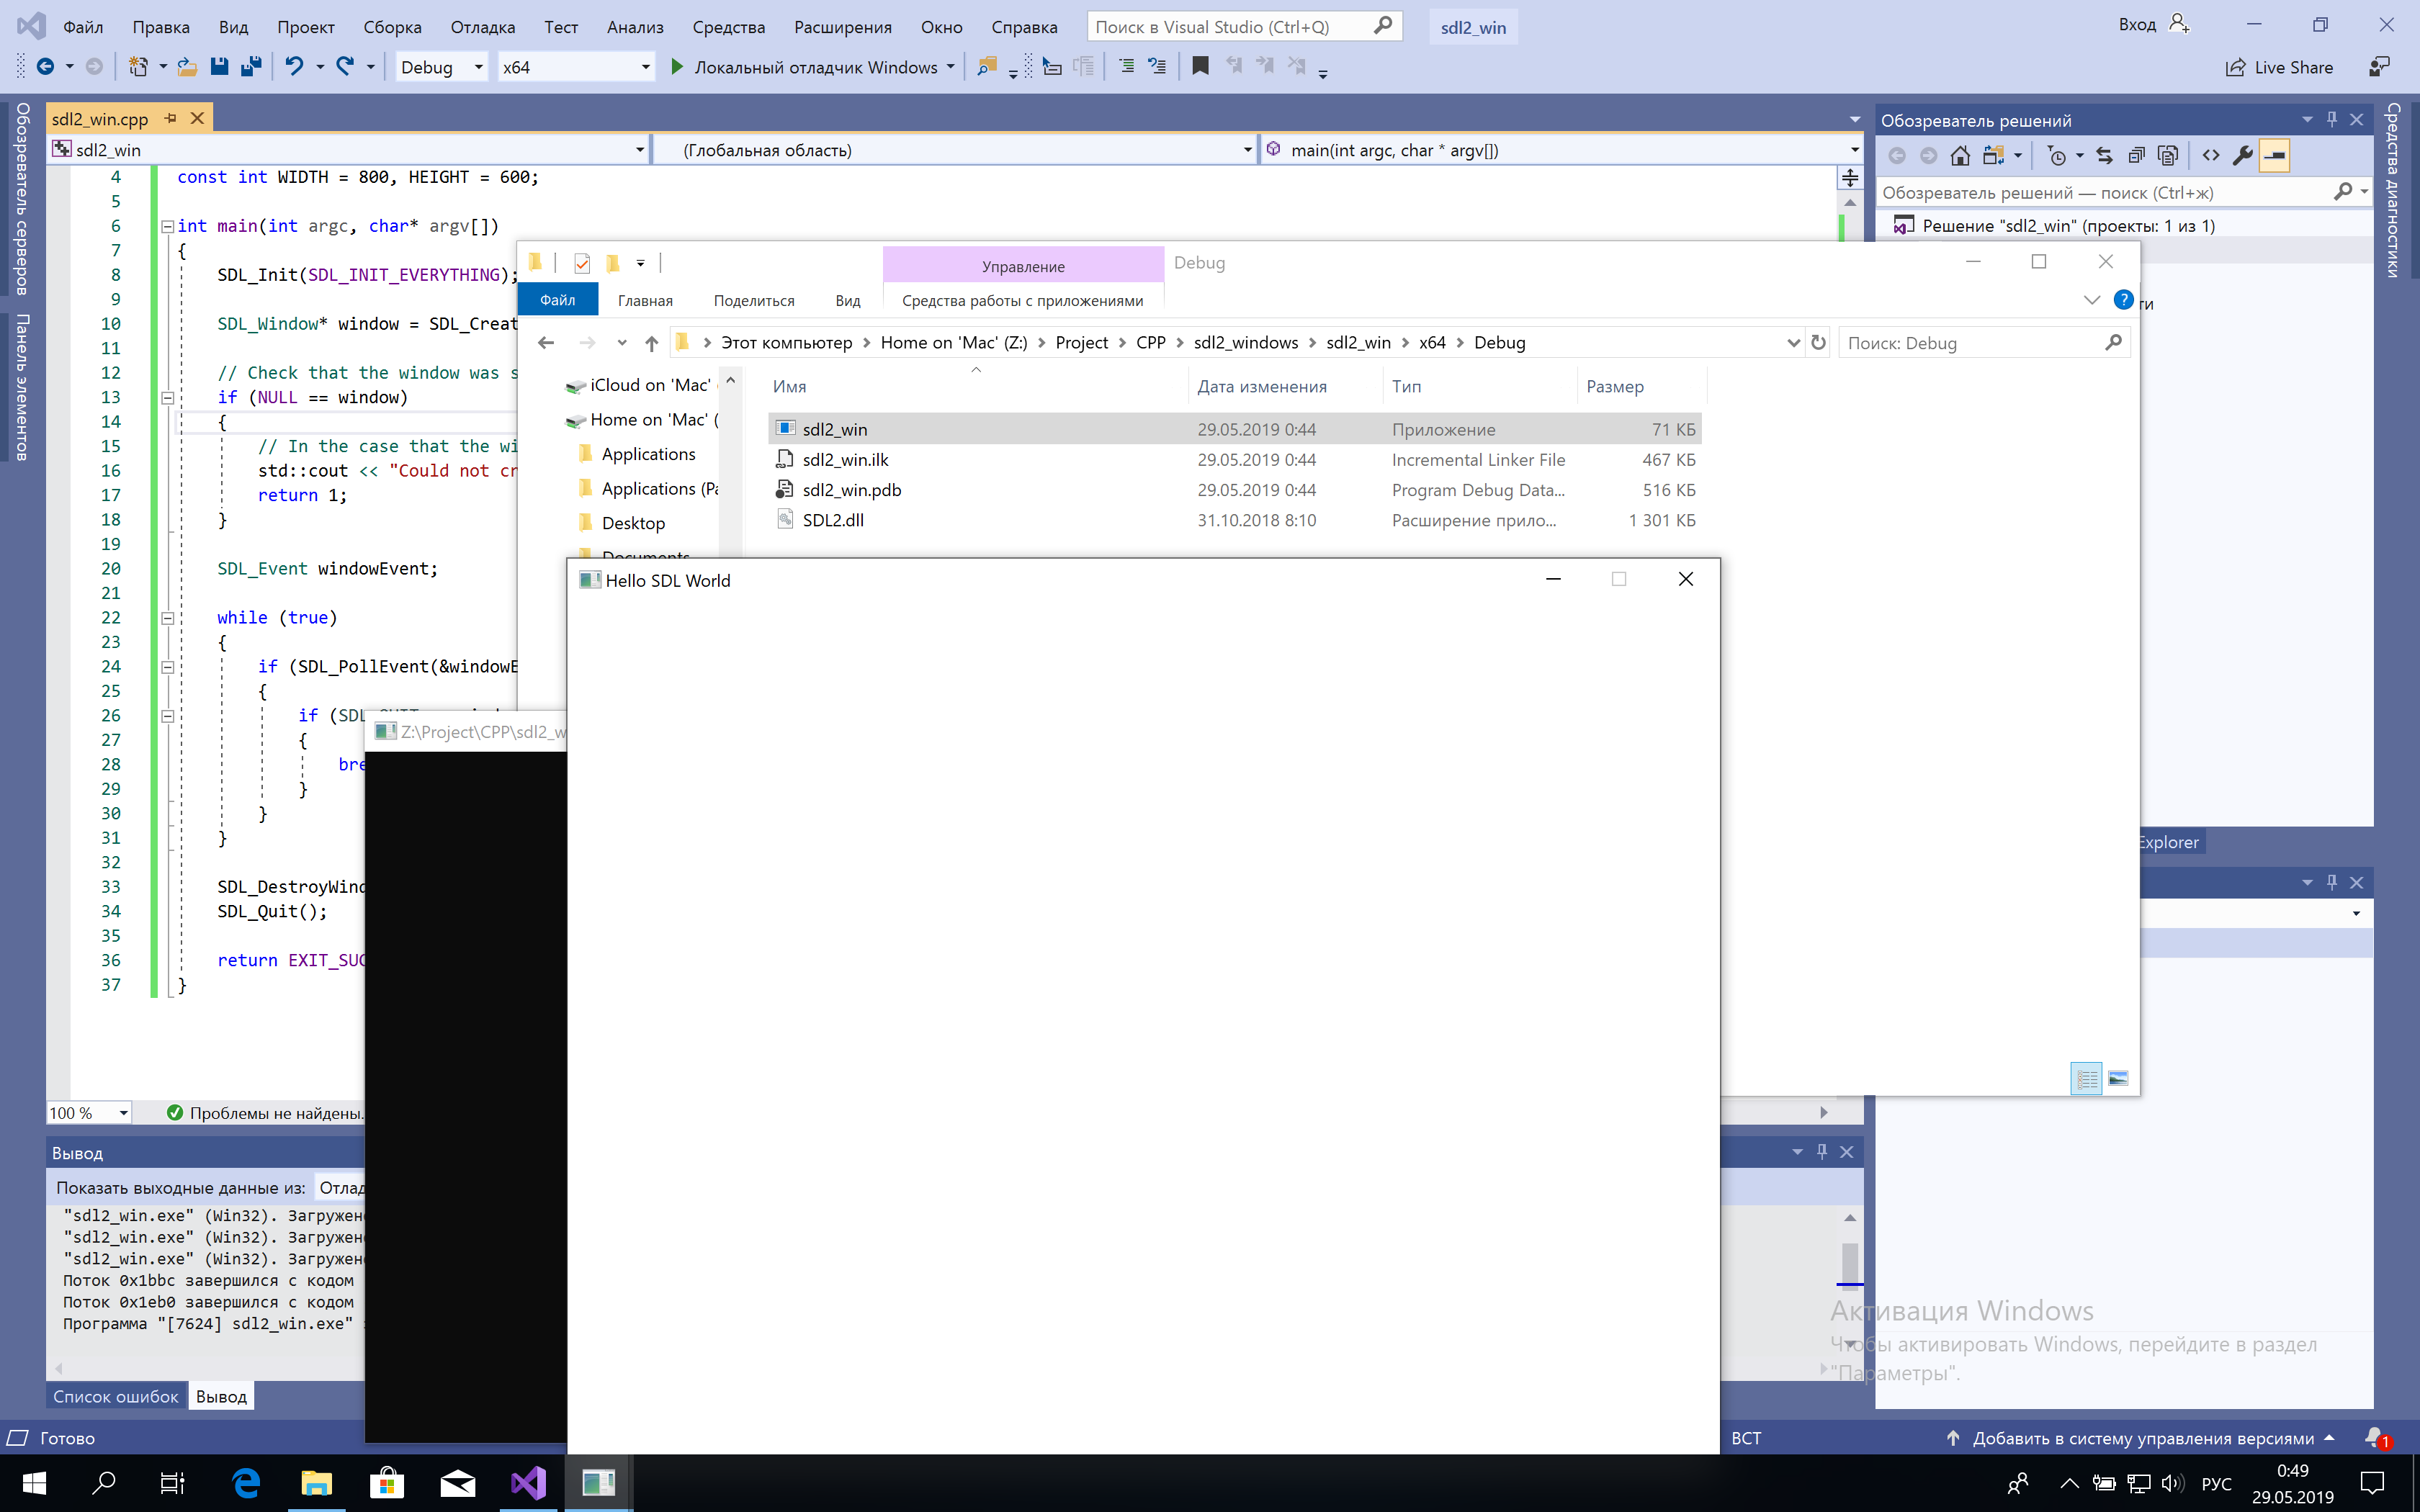
Осталось немного, «компоновщик»->«ввод»->«дополнительные зависимости» мы дописываем то, что необходимо использовать, SDL2.lib, SDL2main.lib, SDL2test.lib. После этого необходимо собрать проект. Собрав, скопируйте файл SDL2.dll из каталога lib\x64 или lib\x32 и поместите рядом с исполняемым файлом. Теперь пробуем наш код. Еще один момент: т.к. в «дополнительные каталоги включаемых файлов» мы указали путь сразу до подключаемых заголовков, то
Поздравляю, мы успешно собрали приложения под основные платформы. Надеюсь, у вас не возникнет трудностей при установке.