- Hardware-Accelerated Video Playback on Intel CPUs in Ubuntu
- Quick Start 17.10 & 18.04
- Quick Start 17.04
- Option 1: Accelerated playback using GStreamer
- Option 2: Accelerated playback using MPV
- And TS files
- Know Your Limits
- Medium Term: A more polished quick start
- Long Term: Future Roadmap
- Future Approach #1: VA-API («LibVA») decode
- Future Approach #2: Media SDK («MSDK»)
- YouTube
- Overall Architecture (in Ubuntu 17.10)
- What about NVIDIA and AMD?
- Recommended test videos to download
- Proxmox – Plex Setup on Ubuntu LXC with Intel 11th Generation CPU and Quick Sync Transcoding
Hardware-Accelerated Video Playback on Intel CPUs in Ubuntu
There’s a lot of complicated stuff written on this topic. This document aims to get you working efficient video playback on Ubuntu, as simply as possible, as well as outlining future plans.
It’s important to know the difference between working and not working. If it’s working then you should be able to play modern 4K or full HD videos with around 20% CPU usage or less on a laptop and 10% or less on a desktop. If it’s much more than that then something has gone wrong. For example, in testing these instructions a properly configured Haswell desktop uses only 3% CPU to play 4K 60FPS H.264 video.
Alternate approaches do exist, but those have been observed to increase rather than decrease CPU usage when compared to the default software decoders. So remember to measure your CPU. A working solution should play the video and decrease your CPU usage significantly.
Quick Start 17.10 & 18.04
- If you are installing Ubuntu from scratch, make sure you connect to wifi/network during the setup. Assuming you have internet access while installing Ubuntu then simply ticking the «Install third-party software» option will install most of what you need.
- If you already have Ubuntu installed or failed to get third-party software installed because you weren’t connected to the internet during setup then all you need to do to catch up is:
$ sudo apt install ubuntu-restricted-addons
$ sudo apt install vainfo $ vainfo
$ sudo apt install mpv $ mpv myvideo.mp4
Quick Start 17.04
- Install Ubuntu. You may find that 17.10 or 17.04 is required in order to get a current acceleration driver that supports your hardware.
- Preferably you’re using X and not Wayland. This means either Unity 7 or GNOME is OK. Just don’t use GNOME on Wayland because it’s not yet fully working. That is; unless you’re willing to use some ugly workarounds outlined below.
- Install the Intel acceleration driver and tools:
$ sudo apt install vainfo i965-va-driver
Option 1: Accelerated playback using GStreamer
$ sudo apt install gstreamer1.0-vaapi gstreamer1.0-libav gstreamer1.0-plugins-ugly gstreamer1.0-plugins-bad
$ env GST_GL_WINDOW=wayland gst-play-1.0 --videosink glimagesink myvideo.mp4
You can also use totem to play videos accelerated, but compared to gst-play-1.0 or mpv it is more power hungry, less smooth and corrupt:
$ env GST_GL_WINDOW=wayland totem myvideo.mp4
Option 2: Accelerated playback using MPV
$ mpv --hwdec=vaapi myvideo.mp4
$ env -uDISPLAY mpv --hwdec --opengl-backend=wayland myvideo.mp4
Other video player apps won’t work anywhere near as efficiently. VLC, Mplayer, Google Chrome and Firefox for example, will only use software decoding (much higher CPU) since they use FFmpeg directly rather than GStreamer. See the Future Roadmap below where we will try to fix those issues.
And TS files
- Install the ffmpeg command-line tool:
$ sudo apt install -f ffmpeg
$ ffmpeg -i INFILE.ts -vcodec copy -acodec copy OUTFILE.mp4
Know Your Limits
If video playback appears frozen or causes high CPU usage, then it’s likely you’re trying to play a certain profile of video your CPU is a bit too old to handle (or you made a mistake in following the instructions).
The simplest answer is to run ‘vainfo‘ which will list all the video codecs that your CPU/GPU can handle in hardware.
The complicated answer is to look up your CPU model (from ‘lscpu’) on http://ark.intel.com, find out what generation it is and then using that information you can check your CPU generation against this list or this table.
Medium Term: A more polished quick start
The above Quick Start section has a lot of caveats. Most of them are mentioned as links to bugs that need fixing. But there is also the problem of poor MKV and TS container file support in GStreamer that needs fixing. After some or all of these issues are addressed we will be able to recommend Totem as the efficient video player of choice.
Long Term: Future Roadmap
In future we would like all video playback in Ubuntu to be accelerated by default (on modern Intel chips at least), out of the box. There are two good ways to get there. Both of them involve the FFmpeg because the FFmpeg libraries are the core decoding libraries that almost all video players and web browsers use by default.
For video player apps, we will need to modify the standard Ubuntu/Debian ffmpeg packages to add acceleration. For web browsers however, they will also each need to be modified as each browser has it’s own private copy of FFmpeg libraries. So FFmpeg is the focus of all future work.
You should also know that the Intel Quick Sync Video is what we’re aiming to use. Quick Sync Video is the Intel hardware feature that accelerates video handling efficiently. So if you see «QSV» referred to in software instructions then those instructions are misleading you, and actually talking about something else that indirectly uses your Intel Quick Sync Video hardware. Also note that historically the video decoding functions have been referred to by Intel as Intel Clear Video HD, and this is still true for Intel technical documents. But generally the internet community refers to it under the heading of Quick Sync Video (QSV).
Future Approach #1: VA-API («LibVA») decode
FFmpeg’s wiki claims that there is no support for a VA-API decoder. This appears to be contradicted using the above mpv instructions until you realize that mpv reimplements VA-API support from scratch. But it also seems to be disproven by the existence of vaapi_decode.c and lots of related logic in the FFmpeg source code starting in version 3.3.
The trouble is that FFmpeg’s hwaccel architecture (v1) requires per-app implementation, and that implementation is missing in common players like Mplayer, Chrome/Chromium and Firefox. Even FFmpeg’s own ffplay tool doesn’t support it yet. However rather than implementing the v1 hwaccel architecture in each app, it is probably advisable to take (or wait for) the approach the FFmpeg themselves have in mind: Hardware Acceleration (hwaccel) API v2.
Future Approach #2: Media SDK («MSDK»)
(This is the approach that the FFmpeg documentation rather confusingly refers to as «Intel QSV»)
Intel’s Media SDK is the company’s professional offering with the aim of providing the highest performance and the most video features all accelerated on Intel chips.
- Overwrite official Ubuntu files, possibly breaking your system; and
- Recompile all your video players yourself; and
- Don’t redistribute what you’ve made.
That won’t work for us right now. And we don’t recommend you try. It’s very complicated and can easily break your Ubuntu installation.
So what about their open source version of Media SDK on Github? Well, that won’t work either. It actually has a dependency on the commercial download in order to build at all, and with that has all the same restrictions as the commercial download.
Why is this a «Future Approach» then? Because in future we might be able to use the Media SDK after Intel removes the proprietary prerequisite problem.
YouTube
- Follow the above Quick Start steps to get mpv installed and working.
- If your CPU is Broadwell (5 th gen) or older then disable 4K/VP9 support (to stop it from reverting to software playback): Create a configuration file .config/mpv/mpv.conf in your home directory that explicitly tells mpv to use acceleration and to download only formats that most Intel CPUs can decode in hardware:
hwdec=vaapi ytdl-format="bestvideo[ext=mp4]+bestaudio[ext=m4a]"
Overall Architecture (in Ubuntu 17.10)
What about NVIDIA and AMD?
They have different acceleration architectures with different instructions. So for the sake of simplicity, NVIDIA and AMD are not covered in this document. Still, long term future efforts for all CPU/GPU types should be focussed on FFmpeg for the same reasons outlined above.
Recommended test videos to download
IntelQuickSyncVideo (последним исправлял пользователь vanvugt 2018-08-28 04:00:15)
The material on this wiki is available under a free license, see Copyright / License for details.
Proxmox – Plex Setup on Ubuntu LXC with Intel 11th Generation CPU and Quick Sync Transcoding

Disclaimer: This is a personal blog, any views or opinions expressed in this blog are personal and belong solely to the blog author and do not represent those of people, institutions, or organizations that the author may or may not be associated with in a professional or personal capacity, unless explicitly stated. Any views or opinions are not intended to malign any religion, ethnic group, club, organization, company, or individual.
In this post we are going to install Plex Media Server on Proxmox using an Ubuntu 20.04 Container (LXC), while enabling Quick Sync for video Transcoding on an 11th Generation Intel CPU.
- Make sure to add storage if you added a new disk. I added a new NVME 500GB drive. Wiped the disk via Proxmox GUI, and then initialized as GPT.
- Then created LVM Thin Storage using this disk
- Create a new Privileged Container, give it a friendly hostname and remember your password
- Use a Ubuntu 20.04 template
- Switch to the storage you just created. As this will just host the Plex Server and not the actual content, I’m giving this container just 20GB of storage
- For now, I am using 4 cores and 8GB RAM
- Use DHCP for Networking
- Leave DNS as-is
- Do not start the container just yet
- In a future post, we will add our videos from other sources which is why we created a Privileged container.
As I want to use Intel Quick Sync for video transcoding, I had to do a bit of searching to find how to get this to work with an 11th Generation Intel i7 CPU.
I came across this post and I’m following user “osaether‘s” instructions; I’ve added some more commentary but this method is all from osaether. Click on the link to see the original post.
- In your BIOS, ensure that Intel Integrated Graphics is enabled and disable IOMMU.
- SSH into your Proxmox host or use the console in the GUI, and run the following:
root@pve:~# ls -l /dev/dri total 0 drwxr-xr-x 2 root root 80 Feb 20 21:21 by-path crw-rw---- 1 root video 226, 0 Feb 20 21:21 card0 crw-rw---- 1 root render 226, 128 Feb 20 21:21 renderD128 root@pve:~# 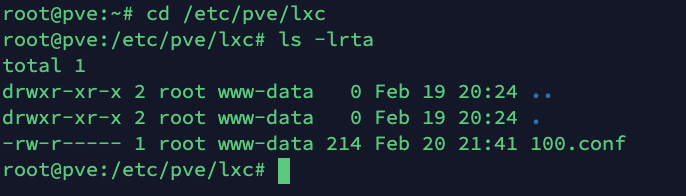
- If you don’t see the above, or see “No such file or directory”, then your Intel iGPU is not enabled properly. Please check your BIOS settings.
- On your Proxmox server, edit your container configuration file
- This is located at /etc/pve/lxc/.conf
- Add the following lines to the bottom of the config file.
lxc.cgroup2.devices.allow: c 226:0 rwm lxc.cgroup2.devices.allow: c 226:128 rwm lxc.cgroup2.devices.allow: c 29:0 rwm lxc.mount.entry: /dev/dri dev/dri none bind,optional,create=dir lxc.mount.entry: /dev/dri/renderD128 dev/renderD128 none bind,optional,create=file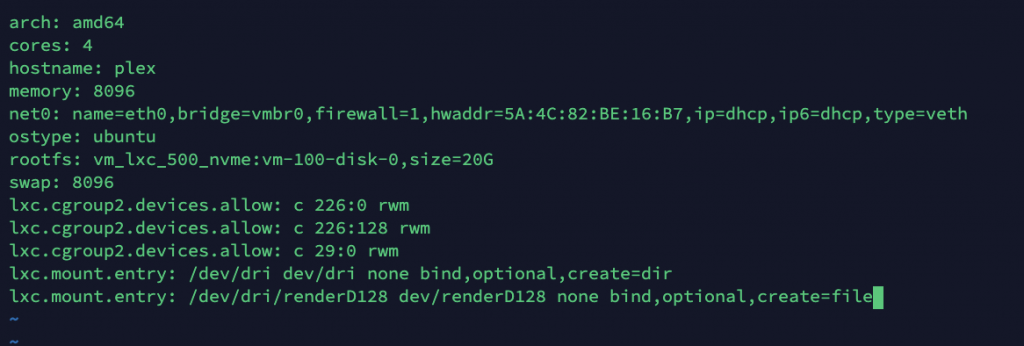
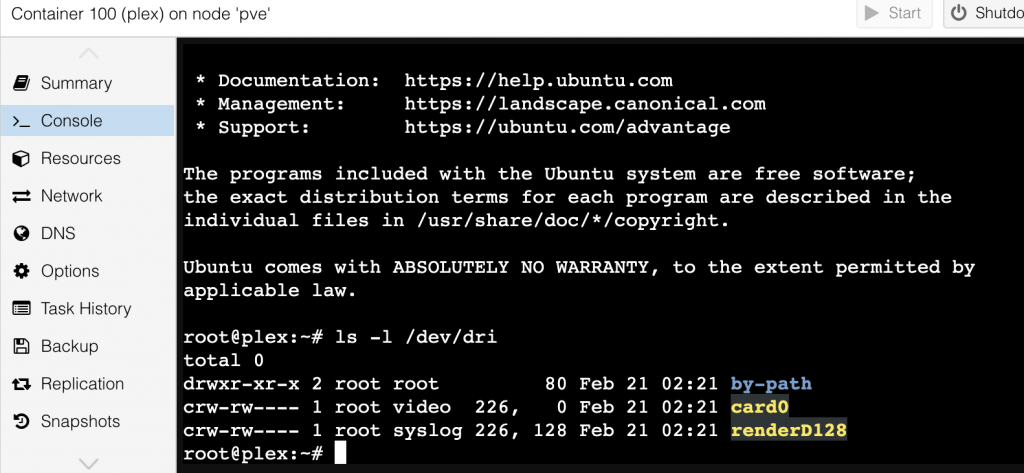
- Now start your container and run ls -l /dev/dri in your container. You should see outlook like below.
- Note: Your username is “root” and the password is what you set during creation.
- Personally, I like to use Termius for working in the terminal, so I’ll first SSH to Proxmox, and then attach to the container.
- Use the below command to attach to your container

- Go ahead and update and upgrade your Ubuntu install with:
- apt update
- apt upgrade
- Make sure to install curl for use when adding Plex repos
- apt install curl
- Install GNU Privacy Guard
- apt install gnupg
- Install net-tools (will make our lives easier to find our container IP)
- apt install net-tools
- Next we need to install the Intel Drivers – https://github.com/intel/compute-runtime/releases
- Follow the instructions in the above link. Do Not Skip This Step.
- Change the group and mode of /dev/dri
/bin/chgrp video /dev/dri /bin/chmod 755 /dev/dri /bin/chmod 660 /dev/dri/*- Now enable the Plex repos as described here: https://support.plex.tv/articles/235974187-enable-repository-updating-for-supported-linux-server-distributions/
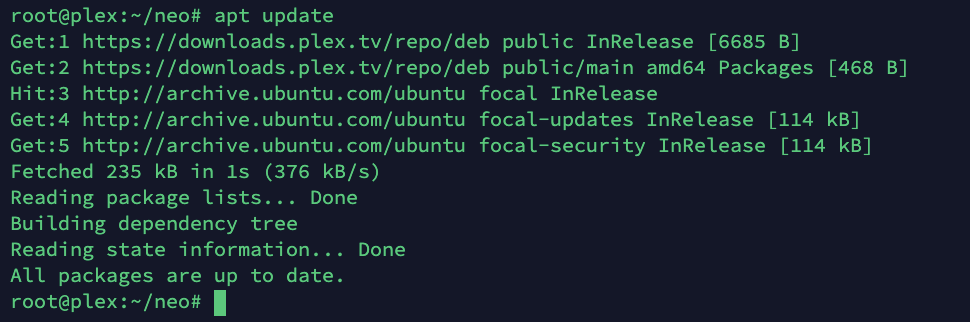
echo deb https://downloads.plex.tv/repo/deb public main | sudo tee /etc/apt/sources.list.d/plexmediaserver.list curl https://downloads.plex.tv/plex-keys/PlexSign.key | sudo apt-key add -Now update your system. If you get any errors, make sure you have all the pre-requisite packages installed as mentioned above (curl, gnupg).
- Install Plex Media Server via:
apt install plexmediaserver- Use “ifconfig” to find your IP address and then go to http://IP:32400/manage
- You should see Plex and test your content to ensure HW transcoding works!
- Note that you do need Plex Pass for HW acceleration