- Копирование файлов с Apple iPhone/iPad/iPod в Ubuntu 16.04 и Windows 10
- How to Import Your Photos Easily from iPhone to Ubuntu 22.04
- Install and setup gThumb
- Connect iPhone via USB and start importing photos
- Copy & paste photos manually:
- Ji m
- Как легко импортировать фотографии с iPhone в Ubuntu 22.04
- Установите и настройте gThumb
- Подключите iPhone через USB и начните импорт фотографий
- Скопируйте и вставьте фотографии вручную:
- Похожие посты:
- How do I access iOS camera pictures on Ubuntu?
- 5 Answers 5
- Ubuntu 18.04 and later
- Historical workaround
Копирование файлов с Apple iPhone/iPad/iPod в Ubuntu 16.04 и Windows 10
Раньше копирование файлов с Apple iPhone/iPad/iPod прекрасно работало в Windows и Ubuntu. Не нужно было устанавливать iTunes или другие программы. К сожалению, iOS 9.3.5 и более ранние версии этой операционной системы уже не столь дружелюбны к пользователям Windows 10 и Ubuntu 16.04.
В Windows 10 папка с фотографиями iPhone/iPad/iPod видна, но при попытке скопировать файлы с Apple iPhone/iPad/iPod на компьютер появляется ошибка «Ошибка при копировании файла или папки: Параметр задан неверно». Для обхода ограничений можно воспользоваться приложениями вроде iFunBox, iTools, но конечно очень странно, что нельзя просто скопировать папку. Тем более, что китайские приложения, хотя и бесплатные, устанавливать на компьютер не очень хочется. Можно конечно использовать iCloud, но
мне совершенно не хочется, чтобы личные фотографии попадали в облачные хранилища.
Устанавите необходимые приложения:
sudo apt-get install ideviceinstaller python-imobiledevice libimobiledevice-utils libimobiledevice6 libplist3 python-plist ifuse usbmuxd
[ 11.393557] ipheth 2-1:4.2: Apple iPhone USB Ethernet device attached
[ 11.393681] usbcore: registered new interface driver ipheth
[ 11.398044] ipheth 2-1:4.2 enp0s29f7u1c4i2: renamed from eth0
[ 621.378604] ipheth 2-1:4.2: ipheth_rcvbulk_callback: urb status: -71
[ 621.392138] ipheth 2-1:4.2: Apple iPhone USB Ethernet now disconnected
[ 632.802036] ipheth 2-1:4.2: Apple iPhone USB Ethernet device attached
[ 632.811921] ipheth 2-1:4.2 enp0s29f7u1c4i2: renamed from eth0

How to Import Your Photos Easily from iPhone to Ubuntu 22.04
It’s easy to make backup of your iPhone’s photos, since Ubuntu now has out-of-the-box support for accessing iOS files.
To make life easy, the gThumb image organizer can even pop-up the photo import dialog automatically once your iPhone is plugged in via USB port.
Install and setup gThumb
1.) Firstly, press Ctrl+Alt+T on keyboard to open terminal in Ubuntu. When it opens, run the command below to install gThumb image viewer and organizer:
For those hate Linux commands, it can be also installed via Ubuntu Software.
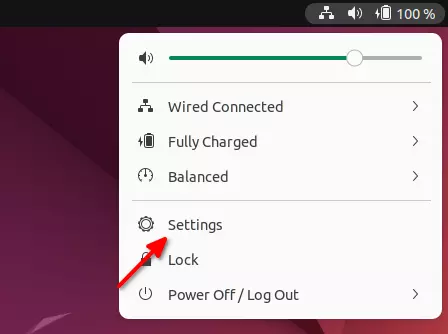
2.) Next, set gThumb as the default app for handling photos from removable media. To do so, open “Settings” from system tray menu.
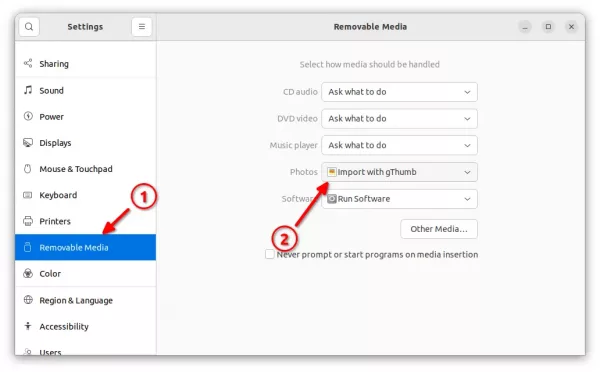
When the Settings utility opens, navigate to “Removable Media” from left pane. Finally, select “Import with gThumb” in right for photos drop-down box.
Connect iPhone via USB and start importing photos
Now, plug your iPhone into Ubuntu PC/laptop via USB port. Then, select “Trust this computer” in your iPhone and type password to confirm.
A import dialog should pop-up automatically, with preview of all photos in your iOS device. Simply, click on “Import” button will start the process importing all photos from iPhone to Ubuntu.
If the dialog didn’t open, try manually launching gThumb, open ‘☰’ menu, and finally navigate to ‘Import from -> Removable device’.
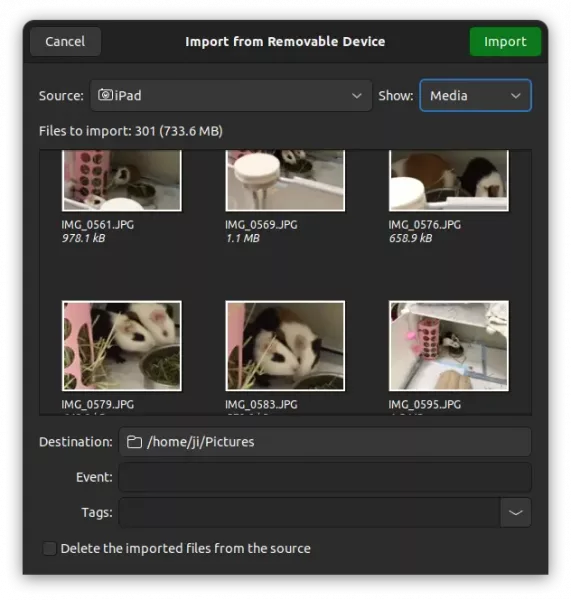
All photo files are saved to user’s “Pictures” folder by default, though you may change the location in the previous dialog.
This is tested and works on iOS 15.5 and iOS 14.4.2. That’s it. Enjoy!
Copy & paste photos manually:
The import process may fail if there are 0 KB videos/photos in your iOS devices. In my case, the old iPad has “100CLOUD” folder that contains empty MP4 files that interrupted the importing process.
For the case, you may first search for and kill the frozen ‘gThumb’ app window in System Monitor. Then, manually copy and paste your photos from the mounted folder.
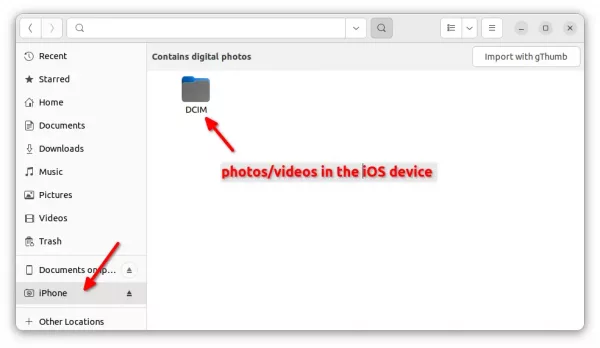
As the picture shows, there are usually 2 mounted folders: “Documents on DEVICE_NAME” and “iOS DEVICE_NAME”. The DCIM sub-folder in the latter one contains all photo and video files in your iOS device.

Ji m
I’m a freelance blogger who started using Ubuntu in 2007 and wishes to share my experiences and some useful tips with Ubuntu beginners and lovers. Please comment to remind me outdated tutorial! And, notify me if you find any typo/grammar/language mistakes. English is not my native language. Contact me via [email protected] Buy me a coffee: https://ko-fi.com/ubuntuhandbook1
Как легко импортировать фотографии с iPhone в Ubuntu 22.04
![]()
Сделать резервную копию фотографий вашего iPhone легко, так как Ubuntu теперь имеет встроенную поддержку доступа к файлам iOS.
Чтобы упростить жизнь, организатор изображений gThumb может даже автоматически открывать диалоговое окно импорта фотографий, как только ваш iPhone подключен к USB-порту.
Установите и настройте gThumb
1.) Во-первых, нажмите Ctrl+Alt+T на клавиатуре, чтобы открыть терминал в Ubuntu. Когда он откроется, выполните приведенную ниже команду, чтобы установить средство просмотра и органайзер изображений gThumb:
sudo apt установить gthumb
Для тех, кто ненавидит команды Linux, его также можно установить через программное обеспечение Ubuntu.
2.) Затем установите gThumb в качестве приложения по умолчанию для обработки фотографий со съемных носителей. Для этого откройте «Настройки» в меню панели задач.

Когда откроется утилита «Настройки», перейдите к «Съемные носители» на левой панели. Наконец, выберите «Импортировать с помощью gThumb» в раскрывающемся списке справа от фотографий.

Подключите iPhone через USB и начните импорт фотографий
Теперь подключите свой iPhone к ПК/ноутбуку Ubuntu через USB-порт. Затем выберите «Доверять» на своем телефоне, чтобы доверять этому компьютеру.
Диалоговое окно импорта должно появиться автоматически с предварительным просмотром всех фотографий на вашем устройстве iOS. Просто нажмите кнопку «Импорт», чтобы начать процесс импорта всех фотографий с iPhone в Ubuntu.

Все файлы фотографий по умолчанию сохраняются в пользовательскую папку «Изображения», хотя вы можете изменить расположение в предыдущем диалоговом окне.
Это проверено и работает на iOS 15.5 и iOS 14.4.2. Вот и все. Наслаждаться!
Скопируйте и вставьте фотографии вручную:
Процесс импорта может завершиться неудачно, если на ваших устройствах iOS есть видео/фото размером 0 КБ. В моем случае на старом iPad есть папка «100CLOUD», содержащая пустые файлы MP4, которые прервали процесс импорта.
В этом случае вы можете сначала найти и закрыть зависшее окно приложения «gThumb» в системном мониторе. Затем вручную скопируйте и вставьте фотографии из смонтированной папки.

Как видно на картинке, обычно монтируются 2 папки: «Документы на ИМЯ_УСТРОЙСТВА» и «ИМЯ УСТРОЙСТВА iOS». Подпапка DCIM в последнем содержит все фото и видео файлы на вашем устройстве iOS.
Похожие посты:
How do I access iOS camera pictures on Ubuntu?
The libimobiledevice shipped with 17.04 is actually compatible with the latest iOS. When you connect a device, two virtual devices show up. However, the one with the documents works but the one for the camera just shows an empty folder. There is no obvious way to access the camera pictures on the iOS device. How do I access them? I don’t want to compile libimobiledevice from source.
5 Answers 5
Ubuntu 18.04 and later
Tested on Ubuntu 21.10 and iOS 14.7
This version of Ubuntu has the latest libimobiledevice (at the time of release) so it supports iOS 11.4. There is a propblem with the Gnome integration, though. It shows the Documents folder (app folders). In addition to the tip below by @diego, here’s a simple way to get to the pictures folder (this works if the iOS Documents show up for you but not the pictures):
- Open the iDevices Documents folder in Nautilus.
- Press CTRL + L to get the real address which will look like afc://YOURSERIAL:3/
- Remove trailing colon and number and press ENTER (i.e. it should just read afc://YOURSERIAL )
You should now see your iDevices system folders, including DCIM. If you need to access these folders from the command line, you can find them in $XDG_RUNTIME_DIR/gvfs (this this answer for a more detailed explanation).
Historical workaround
As a workaround, you can mount your iOS device with ifuse.
Now connect your device and make sure it is paired with your computer.
If you get a SUCCESS message, you are good, if not run idevicepair pair . Now you can use ifuse to mount your iOS images folder:
The images are now available in your $HOME folder under pics. Ready to be synced with Shotwell. To unmount the folder, use fusermount:
fusermount -u ~/pics && rmdir ~/pics Note: in this example I create a pics folder and remove it afterwards. If you already have a folder named like this, choose a different name.