- How to Setup an IKEv2 VPN Connection on Arch Linux (Example: NordVPN)
- Why IPSec/IKEv2?
- 1. Installation
- 2. Configuration
- 1. ipsec/swanctl
- 2. Constraints Plugin
- 3. Get Certificates
- 4. Restart strongSwan
- 5. Test Connection
- Further Reading
- More from the blog
- Настройка IKEv2 VPN соединения на Ubuntu 17
- Configure strongSwan VPN Client on Ubuntu 18.04/CentOS 8
- Configure strongSwan VPN Client on Ubuntu 18.04/CentOS 8
- Install strongSwan on Ubuntu 18.04
- Install strongSwan on CentOS 8
- Install strongSwan VPN Server CA certificate on the Client
- Configure strongSwan VPN client on Ubuntu 18.04/CentOS 8
- Test VPN Clients Connection
- Related Tutorials
- SUPPORT US VIA A VIRTUAL CUP OF COFFEE
How to Setup an IKEv2 VPN Connection on Arch Linux (Example: NordVPN)
In this blog post I’ll show you how to connect your local machine to a remote VPN server using the IKEv2 and IPSec protocol. Instead of the deprecated ipsec.conf we’ll use the modern swanctl.conf .
Why IPSec/IKEv2?
strongSwan provides an open-source implementation of IPSec. strongSwan works on Linux, Android, FrreBSD, macOS, iOs, and Windows.
Why is that useful?
With split-tunneling you can exclude your local subnets (your home network, or local Docker bridge) from the VPN gateway.
Now you can connect your local machine to the VPN server, but still have access to your wifi-connected printer.
1. Installation
Usually, the Arch wiki is a mine of gold. Unfortunately, the wiki solely describes how to setup a connection with ipsec.conf and ipsec starter.
The newly available swanctl and vici plugin provide a better experience in combination with systemd and strongSwan’s plugins.
In this article, I’ll show you a sample ipsec.conf with pre-shared keys (EAP), and how to migrate the configuration to swanctl.
We’ll assume that you have access to a remote VPN server, either your own implementation or a commercial provider like NordVPN.
We’ll use yay to install strongSwan:
2. Configuration
1. ipsec/swanctl
Example ipsec.conf with username and password (NordVPN uses a different approach, see below):
conn vpn keyexchange=ikev2 dpdaction=clear dpddelay=300s eap_identity="" leftauth=eap-mschapv2 left=%defaultroute leftsourceip=%config right= rightauth=pubkey rightsubnet=0.0.0.0/0 rightid=%any type=tunnel auto=add Here’s how the configuration translates to swanctl.conf (on your machine: /etc/swanctl/swanctl.conf or similar):
connections vpn version = 2 proposals = aes192gcm16-aes128gcm16-prfsha256-ecp256-ecp521,aes192-sha256-modp3072,default rekey_time = 0s fragmentation = yes dpd_delay = 300s local_addrs = %defaultroute remote_addrs = vips=0.0.0.0. local auth = eap-mschapv2 eap_id = "" > remote auth = pubkey style=display:flex> > children vpn remote_ts = 0.0.0.0/0. /0 rekey_time = 0s dpd_action = clear esp_proposals = aes192gcm16-aes128gcm16-prfsha256-ecp256-modp3072,aes192-sha256-ecp256-modp3072,default > > > > secrets eap-vpn style=display:flex> secret = "" > > Don’t forget to replace the remote_addr with the real server name.
Replace and , too.
Here’s another example configuration where we use a username and certifictate instead of username/password in the ipsec.conf (NordVPN):
conn NordVPN keyexchange=ikev2 dpdaction=clear dpddelay=300s eap_identity="" leftauth=eap-mschapv2 left=%defaultroute leftsourceip=%config right= rightauth=pubkey rightsubnet=0.0.0.0/0 rightid=%any rightca=/etc/ipsec.d/cacerts/NordVPN.pem type=tunnel auto=add connections nordvpn version = 2 proposals = aes192gcm16-aes128gcm16-prfsha256-ecp256-ecp521,aes192-sha256-modp3072,default rekey_time = 0s fragmentation = yes dpd_delay = 300s local_addrs = %defaultroute remote_addrs = vips=0.0.0.0. local auth = eap-mschapv2 eap_id = "" > remote auth = pubkey cacerts=/etc/ipsec.d/cacerts/NordVPN.pem style=display:flex> > children nordvpn remote_ts = 0.0.0.0/0. /0 rekey_time = 0s dpd_action = clear esp_proposals = aes192gcm16-aes128gcm16-prfsha256-ecp256-modp3072,aes192-sha256-ecp256-modp3072,default > > > 2. Constraints Plugin
You might also want to disable the constraints plugin:
sudo sed -i 's/load = yes/load = no/g' /etc/strongswan.d/charon/constraints.conf Make sure that your strongSwan basic configuration respects that setting ( /etc/strongswan.conf ):
## strongswan.conf - strongSwan configuration file # ## Refer to the strongswan.conf(5) manpage for details # ## Configuration changes should be made in the included files charon-systemd threads = 16 plugins include strongswan.d/charon/*.conf > > include strongswan.d/*.conf 3. Get Certificates
With NordVPN you have to download their certificate:
sudo wget https://downloads.nordvpn.com/certificates/root.der -O /etc/ipsec.d/cacerts/NordVPN.der sudo openssl x509 -inform der -in /etc/ipsec.d/cacerts/NordVPN.der -out /etc/ipsec.d/cacerts/NordVPN.pem With other providers it might suffice to link the standard OpenSSL certificates with the IPSec certs:
sudo rmdir /etc/ipsec.d/cacerts sudo ln -s /etc/ssl/certs /etc/ipsec.d/cacerts 4. Restart strongSwan
sudo systemctl restart strongswan You can also enable the script for starting strongSwan on boot:
sudo systemctl enable strongswan You can use the tool via the swanctl command line utility. For example:
## starts the connection and the remote children setup sudo swanctl -i -c ## stops the complete connection sudo swanctl -t -i 5. Test Connection
Further Reading
More from the blog
Настройка IKEv2 VPN соединения на Ubuntu 17
Эта инструкция подходит только для операционной системы Ubuntu 17.
Ubuntu 16 содержит устаревшие пакеты, которые работают не корректно.
Рекомендуем настроить OpenVPN подключение на Ubuntu 16.
Зайдите в раздел Все программы.

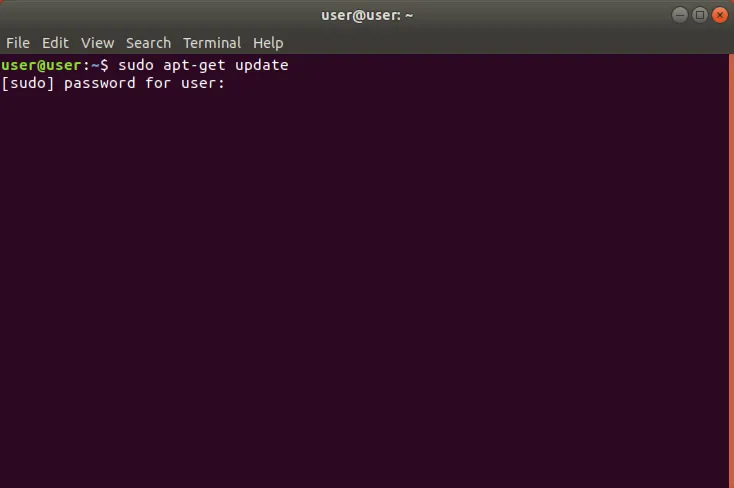
Введите в строку поиска: terminal и запустите Терминал.

Введите команду. Возможно потребуется ввод пароля.
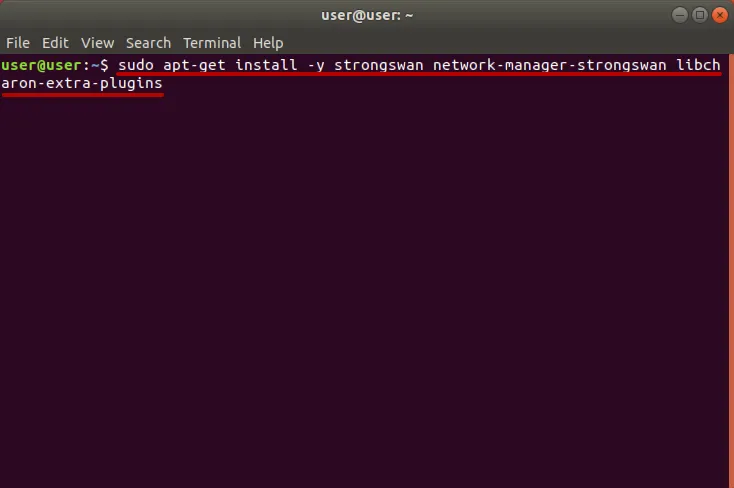
Выполните следующую команду для установки приложений.
sudo apt-get install -y strongswan network-manager-strongswan libcharon-extra-plugins
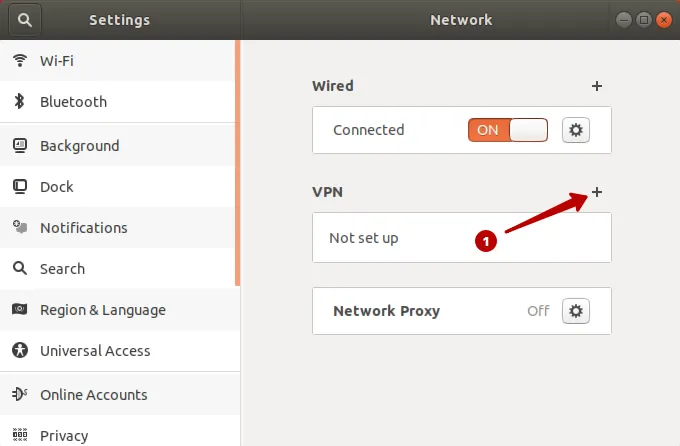
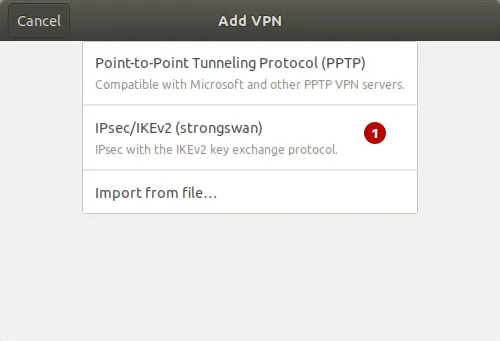
Выберите IPSec/IKEv2 (strongswan).
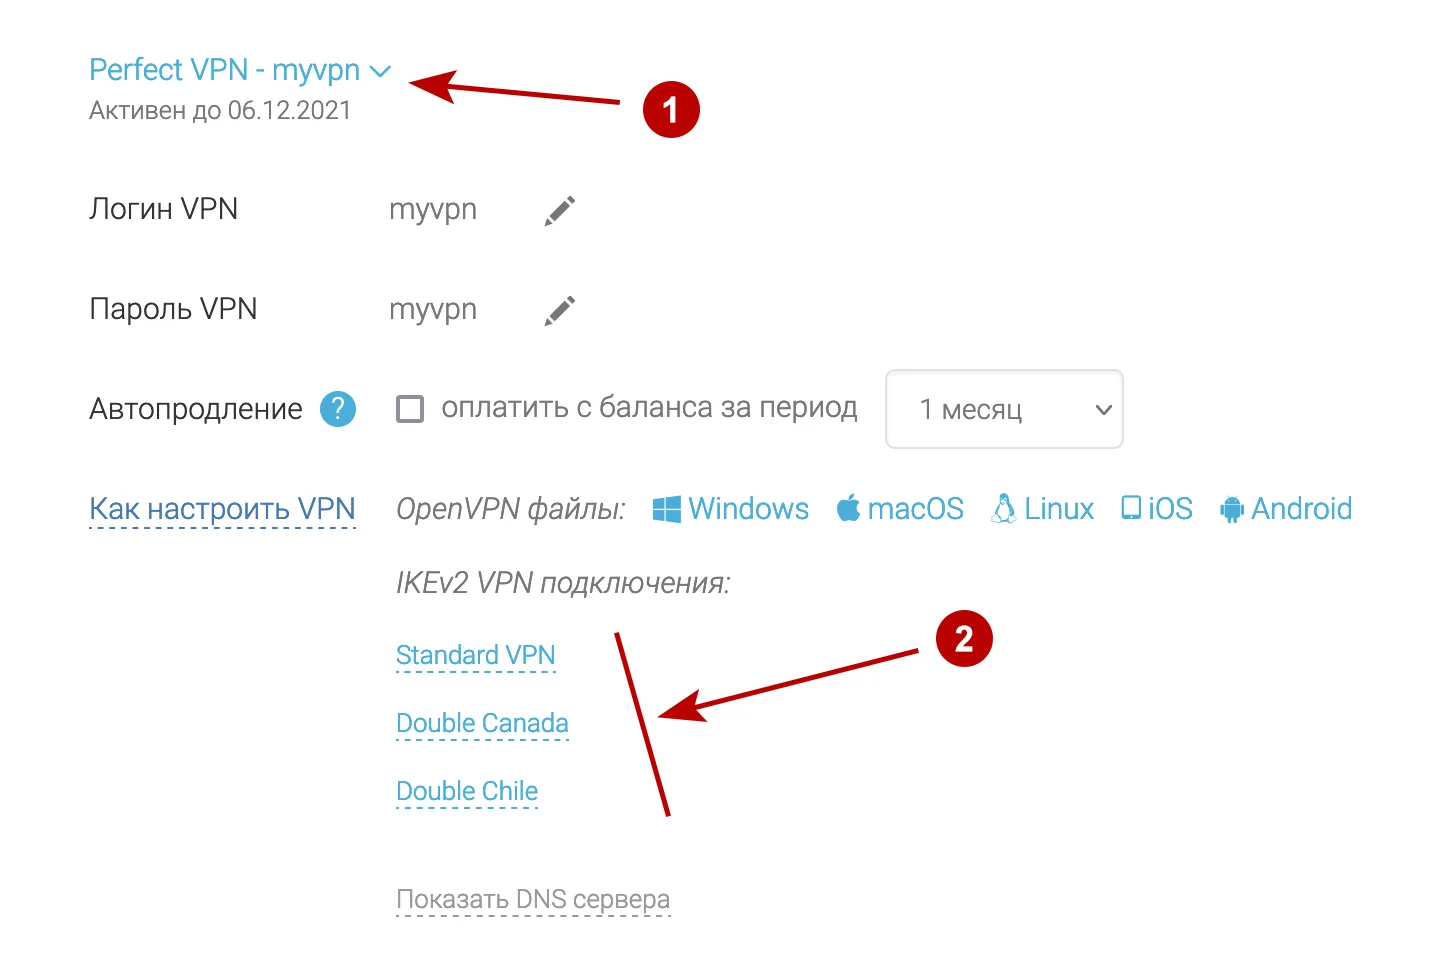
В разделе Подписки посмотрите домен для IKEv2 VPN, а также Логин и Пароль VPN.
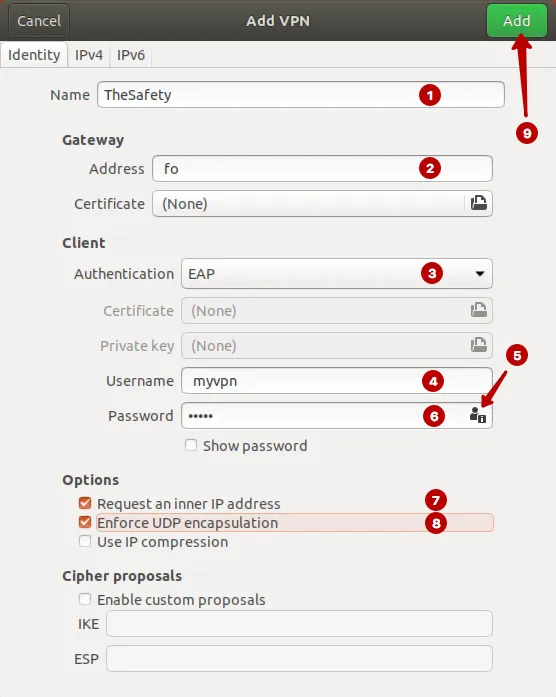
- Напишите любое название подключения
- Домен IKEv2 VPN сервера из раздела Аккаунт
- Аутентификация EAP
- Логин VPN
- Нажмите на иконку пользователя для сохранения пароля
- Пароль VPN
- Поставьте галку
- Поставьте галку
- Нажмите Add
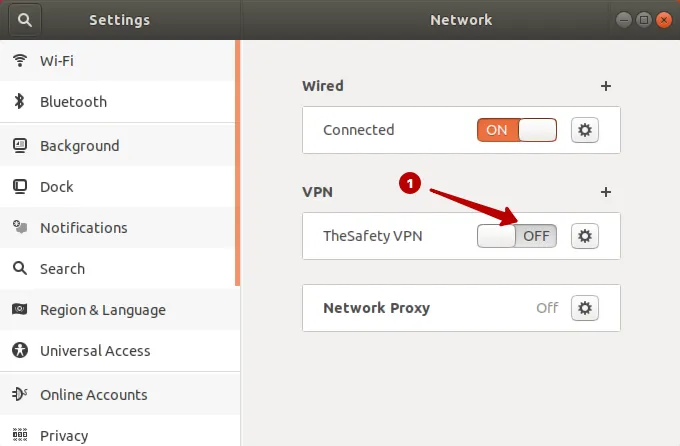
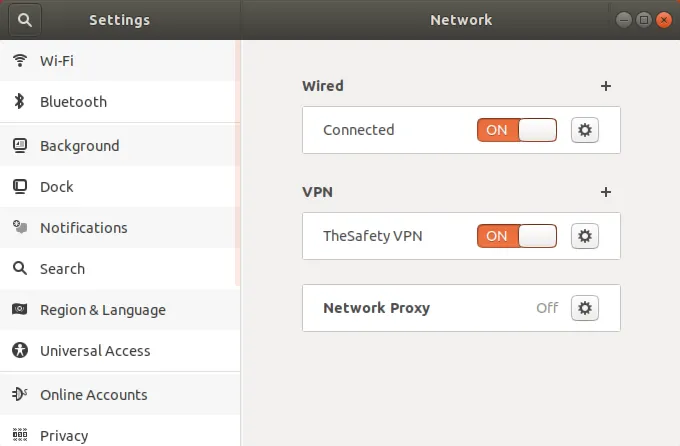
Подключитесь к IKEv2 VPN на Ubuntu 17.
IKEv2 VPN подключение успешно установлено.
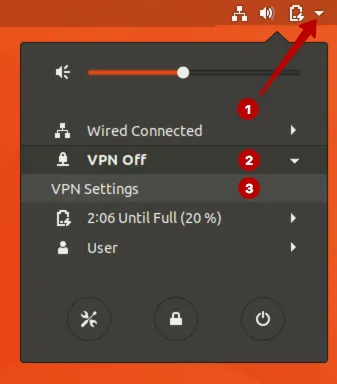
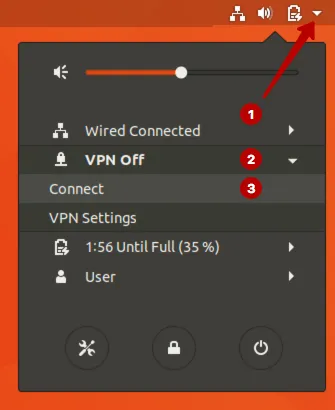
Также можно подключиться к IKEv2 VPN через верхнее меню.
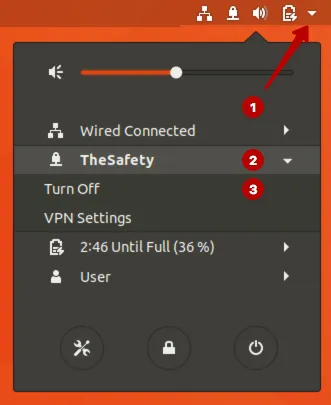
Отключитесь от VPN сети при необходимости.
VPN и прокси сервис защищает своих клиентов с 2006 года, используя надежные технологии в области анонимности передачи данных в Интернете.
Configure strongSwan VPN Client on Ubuntu 18.04/CentOS 8

Follow through this tutorial to learn how to configure strongSwan VPN Client on Ubuntu 18.04/CentOS 8. Our previous tutorial on provided a step by step guide on how to setup strongSwan VPN server on Debian 10 Buster.
Follow the link below to learn how to install and setup strongSwan VPN server on Debian 10 Buster.
Once you have the strongSwan VPN server setup, you can now proceed to test the IP assignment and local connection via the VPN server.
In this demo, we are using Ubuntu 18.04 and CentOS 8 as our test strongSwan VPN clients.
Configure strongSwan VPN Client on Ubuntu 18.04/CentOS 8
Install strongSwan on Ubuntu 18.04
strongSwan and extra plugins can be installed on Ubuntu 18.04 by running the command below;
apt install strongswan libcharon-extra-pluginsInstall strongSwan on CentOS 8
strongSwan packages is provided by the EPEL repos on CentOS 8 and similar derivatives. Hence, begin by installing EPEL repos;
dnf install strongswan strongswan-charon-nmInstall strongSwan VPN Server CA certificate on the Client
- place it on the /etc/ipsec.d/cacerts/ directory on Ubuntu 18.04
- place it on the /etc/strongswan/ipsec.d/cacerts directory on CentOS 8.
Configure strongSwan VPN client on Ubuntu 18.04/CentOS 8
Update the /etc/ipsec.conf configuration file to define how connect to the strongSwan VPN server. See the configuration file below;
conn ipsec-ikev2-vpn-client auto=start right=vpnsvr.kifarunix-demo.com rightid=vpnsvr.kifarunix-demo.com rightsubnet=0.0.0.0/0 rightauth=pubkey leftsourceip=%config leftid=vpnsecure leftauth=eap-mschapv2 eap_identity=%identitySetup authentication secrets
. # user id : EAP secret vpnsecure : EAP "[email protected]" # this file is managed with debconf and will contain the automatically created private key include /var/lib/strongswan/ipsec.secrets.incSave the configuration file and restart the strongswan.
systemctl restart strongswanDisable strongSwan from running on system boot;
systemctl disable strongswanSecurity Associations (1 up, 0 connecting): ipsec-ikev2-vpn-client[1]: ESTABLISHED 1 minutes ago, 10.0.2.15[vpnsecure]. 192.168.56.174[vpnsvr.kifarunix-demo.com] ipsec-ikev2-vpn-client: INSTALLED, TUNNEL, reqid 1, ESP in UDP SPIs: cc36db97_i cb5ceb5b_o ipsec-ikev2-vpn-client: 172.16.7.1/32 === 0.0.0.0/0Update the /etc/strongswan/ipsec.conf configuration file to define how connect to the strongSwan VPN server.
vim /etc/strongswan/ipsec.confconn ipsec-ikev2-vpn-client auto=start right=vpnsvr.kifarunix-demo.com rightid=vpnsvr.kifarunix-demo.com rightsubnet=0.0.0.0/0 rightauth=pubkey leftsourceip=%config leftid=koromicha leftauth=eap-mschapv2 eap_identity=%identityNext, open the /etc/strongswan/ipsec.secrets configuration file and setup the EAP authentication details just as they are defined on the server.
vim /etc/strongswan/ipsec.secrets# user id : EAP secret koromicha : EAP "mypassword"systemctl restart strongswanDisable strongSwan from running on system boot;
systemctl disable strongswanCheck the VPN connection status
Security Associations (1 up, 0 connecting): ipsec-ikev2-vpn-client[1]: ESTABLISHED 2 minutes ago, 10.0.2.15[vpnsecure]. 192.168.56.174[vpnsvr.kifarunix-demo.com] ipsec-ikev2-vpn-client: INSTALLED, TUNNEL, reqid 1, ESP in UDP SPIs: c573b6a1_i cd8306eb_o ipsec-ikev2-vpn-client: 172.16.7.2/32 === 0.0.0.0/0On the strongSwan VPN Server, check the status;
In this demo, our strongSwan VPN server is running on Debian 10 Buster. Hence, you can check status as shown below;
Security Associations (2 up, 0 connecting): ipsec-ikev2-vpn[4]: ESTABLISHED 18 seconds ago, 192.168.56.174[vpnsvr.kifarunix-demo.com]…192.168.56.1[koromicha] ipsec-ikev2-vpn: INSTALLED, TUNNEL, reqid 4, ESP in UDP SPIs: c4e5f1c2_i c8e1a02f_o ipsec-ikev2-vpn: 0.0.0.0/0 === 172.16.7.2/32 ipsec-ikev2-vpn[3]: ESTABLISHED 21 seconds ago, 192.168.56.174[vpnsvr.kifarunix-demo.com]…192.168.56.1[vpnsecure] ipsec-ikev2-vpn: INSTALLED, TUNNEL, reqid 3, ESP in UDP SPIs: c7a4ee1d_i c558073b_o ipsec-ikev2-vpn: 0.0.0.0/0 === 172.16.7.1/32Test VPN Clients Connection
To test the connection, you can simply run the ping test.
From Ubuntu 18.04, ping CentOS 8;
PING 172.16.7.2 (172.16.7.2) 56(84) bytes of data. 64 bytes from 172.16.7.2: icmp_seq=1 ttl=64 time=3.18 ms 64 bytes from 172.16.7.2: icmp_seq=2 ttl=64 time=4.15 ms 64 bytes from 172.16.7.2: icmp_seq=3 ttl=64 time=3.47 ms 64 bytes from 172.16.7.2: icmp_seq=4 ttl=64 time=3.61 ms --- 172.16.7.2 ping statistics --- 4 packets transmitted, 4 received, 0% packet loss, time 10ms rtt min/avg/max/mdev = 3.176/3.602/4.154/0.360 msFrom CentOS 8, ping Ubuntu 18.04.
PING 172.16.7.1 (172.16.7.1) 56(84) bytes of data. 64 bytes from 172.16.7.1: icmp_seq=1 ttl=64 time=3.24 ms 64 bytes from 172.16.7.1: icmp_seq=2 ttl=64 time=4.37 ms 64 bytes from 172.16.7.1: icmp_seq=3 ttl=64 time=4.08 ms 64 bytes from 172.16.7.1: icmp_seq=4 ttl=64 time=3.43 ms --- 172.16.7.1 ping statistics --- 4 packets transmitted, 4 received, 0% packet loss, time 9ms rtt min/avg/max/mdev = 3.237/3.780/4.371/0.462 msThe authenticity of host '172.16.7.2 (172.16.7.2)' can't be established. ECDSA key fingerprint is SHA256:wKoh/MWvCicV6cEe6jY19AkcBgk1lyjZorQt3aqflJM. Are you sure you want to continue connecting (yes/no)? yes Warning: Permanently added '172.16.7.2' (ECDSA) to the list of known hosts. [email protected]'s password: [[email protected] ~]$The authenticity of host '172.16.7.1 (172.16.7.1)' can't be established. ECDSA key fingerprint is SHA256:v20whQz4a4zpTJQfny/CGG56fRnP3Dpx8g5CkeCtFpo. Are you sure you want to continue connecting (yes/no)? yes Warning: Permanently added '172.16.7.1' (ECDSA) to the list of known hosts. [email protected]'s password: Linux debian 4.19.0-8-amd64 #1 SMP Debian 4.19.98-1 (2020-01-26) x86_64 The programs included with the Debian GNU/Linux system are free software; the exact distribution terms for each program are described in the individual files in /usr/share/doc/*/copyright. Debian GNU/Linux comes with ABSOLUTELY NO WARRANTY, to the extent permitted by applicable law. Last login: Wed Feb 26 00:54:04 2020 from 172.16.7.2 [email protected]:~$That marks the end of our guide on how to configure strongSwan VPN Client on Ubuntu 18.04/CentOS 8.
Related Tutorials
SUPPORT US VIA A VIRTUAL CUP OF COFFEE
We’re passionate about sharing our knowledge and experiences with you through our blog. If you appreciate our efforts, consider buying us a virtual coffee. Your support keeps us motivated and enables us to continually improve, ensuring that we can provide you with the best content possible. Thank you for being a coffee-fueled champion of our work!