- How to configure iptables on CentOS
- Listing current rules
- Adding rules
- Saving and restoring rules
- Advanced rule setup
- How to configure iptables on CentOS
- Types of Tables in iptables
- Types of Chains in iptables
- How to install iptables on CentOS
- How to enable iptables on CentOS
- How to configure iptables on CentOS
- What is FirewallD in CentOS
- How to disable FirewallD on CentOS
- Conclusion
- About the author
- Sharqa Hameed
How to configure iptables on CentOS
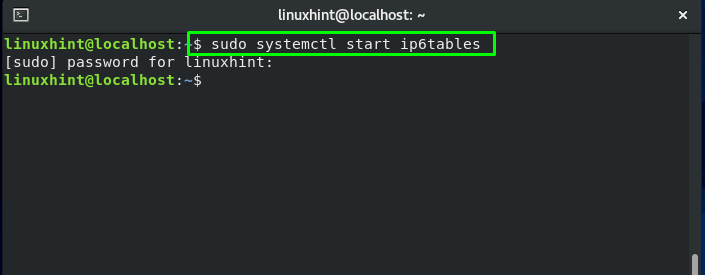
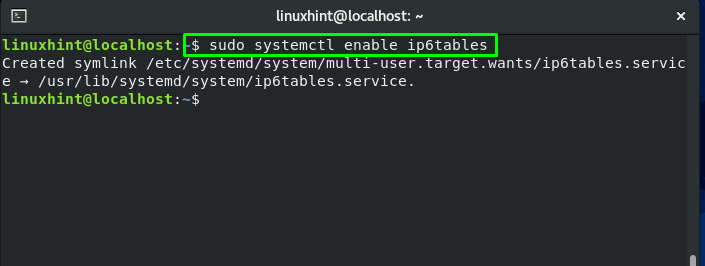
The user-space application program iptables allows configuring the tables provided by the Linux kernel firewall, as well as the chains and rules it stores. The kernel module currently used for iptables only applies to IPv4 traffic, to configure firewall rules for IPv6 connections instead use ip6tables, which respond to the same command structures as iptables. If you are using CentOS 7, you should look into configuring firewalld, which combines the functionality of iptables and ip6tables, though it’s possible to still use iptables just the same.
Listing current rules
On CentOS and other Red Hat variants, iptables often comes with some pre-configured rules, check the current iptable rules using the following command.
This will print out a list of three chains, input, forward and output, like the empty rules table example output below.
Chain INPUT (policy ACCEPT) target prot opt source destination ACCEPT all -- anywhere anywhere state RELATED,ESTABLISHED ACCEPT icmp -- anywhere anywhere ACCEPT all -- anywhere anywhere ACCEPT tcp -- anywhere anywhere state NEW tcp dpt:ssh REJECT all -- anywhere anywhere reject-with icmp-host-prohibited Chain FORWARD (policy ACCEPT) target prot opt source destination REJECT all -- anywhere anywhere reject-with icmp-host-prohibited Chain OUTPUT (policy ACCEPT) target prot opt source destination
The chain names indicate which traffic the rules in each list will be applied to, input is for any connections coming to your cloud server, output is any leaving traffic and forward for any pass through. Each chain also has its policy setting which determines how the traffic is handled if it doesn’t match any specific rules, by default it’s set to accept.
Adding rules
Firewalls can commonly be configured in one of two ways, either set the default rule to accept and then block any unwanted traffic with specific rules, or by using the rules to define allowed traffic and blocking everything else. The latter is often the recommended approach, as it allows pre-emptively blocking traffic, rather than having to reactively reject connections that should not be attempting to access your cloud server.
To begin using iptables, you should first add the rules for allowed inbound traffic for the services you require. Iptables can track the state of the connection, so use the command below to allow established connections continue.
sudo iptables -A INPUT -m conntrack --ctstate ESTABLISHED,RELATED -j ACCEPT
You can check that the rule was added using the same sudo iptables -L as before.
Next, allow traffic to a specific port to enable SSH connections with the following.
sudo iptables -A INPUT -p tcp --dport ssh -j ACCEPT
The ssh in the command translates to the port number 22, which the protocol uses by default. The same command structure can be used to allow traffic to other ports as well. To enable access to an HTTP web server, use the following command.
sudo iptables -A INPUT -p tcp --dport 80 -j ACCEPT
After adding all the allowed rules you require, change the input policy to drop.
Warning: Changing the default rule to drop will permit only specifically accepted connection. Make sure you’ve enabled at least SSH as shown above before changing the default rule.
sudo iptables -P INPUT DROP The same policy rules can be defined for other chains as well by entering the chain name and selecting either DROP or ACCEPT.
Saving and restoring rules
Now if you were to restart your cloud server all of these iptables configurations would be wiped. To prevent this, save the rules to a file.
sudo iptables-save > /etc/sysconfig/iptables
You can then simply restore the saved rules by reading the file you saved.
# Overwrite the current rules sudo iptables-restore < /etc/sysconfig/iptables # Add the new rules keeping the current ones sudo iptables-restore -n < /etc/sysconfig/iptables
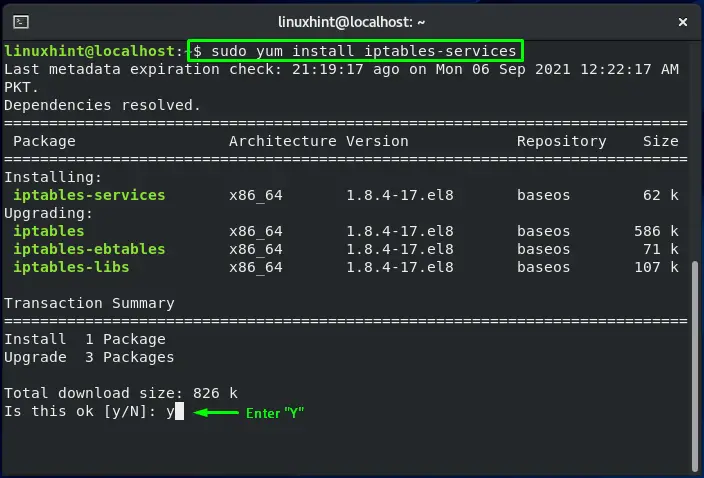
To automate the restore at reboot CentOS offers a system service by the same name, iptables. However, it does not come in the default configuration and needs to be installed manually.
sudo yum install iptables-services
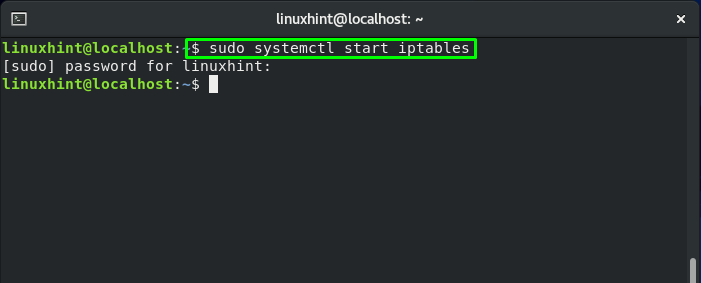
Once installed, start and enable the service.
sudo systemctl start iptables sudo systemctl enable iptables
Afterwards, you can simply save the current rules using the following command.
sudo service iptables save
These are just a few simple commands you can use with iptables, which is capable of much more. Read on to check on some of the other options available for more advanced control over iptable rules.
Advanced rule setup
As per basic firewall behaviour, the rules are read in the order they are listed on each chain, which means you’ll need to put the rules in the correct order. Appending new rules adds them to the end of the list. You can add new rules to a specific position of the list by inserting them using iptables -I -command, where the is the order number you wish to insert the rule. To know which index number to enter, use the following command.
sudo iptables -L --line-numbers
Chain INPUT (policy DROP) num target prot opt source destination 1 ACCEPT all -- anywhere anywhere ctstate RELATED,ESTABLISHED 2 ACCEPT tcp -- anywhere anywhere tcp dpt:ssh 3 ACCEPT tcp -- anywhere anywhere tcp dpt:http
The number at the beginning of each rule line indicates the position in the chain. To insert a new rule above a specific existing rule, simply use the index number of that existing rule. For example to insert a new rule to the top of the chain, use the following command with index number 1.
sudo iptables -I INPUT 1 -p tcp --dport 80 -j ACCEPT
If you wish to remove an existing rule from a certain chain, use the delete command with the parameter -D. The easiest way to select the rule for deletion is to use the index numbers explained above. For example to delete the second rule on the input chain, use this command
It’s also possible to flush all rules of a specific chain or even the whole iptables using the -F -parameter. This is useful if you suspect iptables is interfering with your attempted network traffic, or you simply wish to start configuring again from a clean table. Remember to save the rules to a file before flushing the table.
Warning: Make sure you set the default rule to ACCEPT before flushing any chain.
sudo iptables -P INPUT ACCEPT Afterwards, you can go ahead with clearing other rules. Remember to save the rules to a file before flushing the table in case you want to restore the configuration later.
# Clear input chain sudo iptables -F INPUT # Flush the whole iptables sudo iptables -F
With the iptable flushed, your server could be vulnerable to attacks. Make sure to secure your system with an alternative method while disabling iptables even temporarily.
How to configure iptables on CentOS
![]()
In Linux-based systems like CentOS, iptables is a command-line utility that permits a system administrator to set the Linux kernel firewall’s IP packet filter rules, which are executed as additional Netfilter modules. These filters are structured in separate tables, each of which has a set of rules for how network traffic packets should be handled. Currently, different programs and kernel modules exist for the protocols, such as ebtables are used for Ethernet packets, arptables are utilized for ARP, ip6tables are used for and IPv6, and for IPv4, iptables are used. The iptables security tool is also used to enable acceptable traffic, block unwanted traffic, reroute packets to other TCP/UDP ports, protect the system against Denial of Service attacks, and much more.
Types of Tables in iptables
A table is a collection of chains that performs a specific task. The NAT, Filter, and Mangle tables are the three main tables of iptables:
The NAT table is utilized for redirecting connections to other network interfaces.
The Filter table is the default filter used in iptables, which manages the packet flow from and to a system. It is also in charge of permitting and blocking the connections.
The Mangle table is used for changing the packets headers.
Types of Chains in iptables
Each of the iptables contains specific chains comprising a set of rules that are executed in a specific order. In iptables, we have five primary chains:
- Input: This chain handles incoming connections and packets to a protocol or service.
- Output: After a packet has been processed or processed, it is added to the output chain.
- Prerouting: When the packet enters the interface of your network, it is pre routed through the prerouting chain.
- Forward: This chain forwards is responsible for routing, or we can say that it forwards the incoming packets from their source to the destination.
- Postrouting: The routing decision is made before a packet leaves the network interface and is added to the post-routing chain.
Iptables is widely used to refer to kernel-level components. The kernel module that comprises the shared code section is known as x_tables. All four modules (eb, arp, v6, and v4) utilize this kernel module. It is also utilized for referring to the full firewall architecture.
Iptables are installed in the “usr/sbin/iptables” files in most Linux-based systems. It can also be located in “/sbin/iptables”. However, iptables also works as a service. That’s why “/usr/sbin” is the preferred location for it.
Now, we will demonstrate how you can configure iptables on CentOS. Before that, install iptables if you do not have it already on your system.
How to install iptables on CentOS
In your CentOS terminal, you can easily install iptables by executing the command given below:
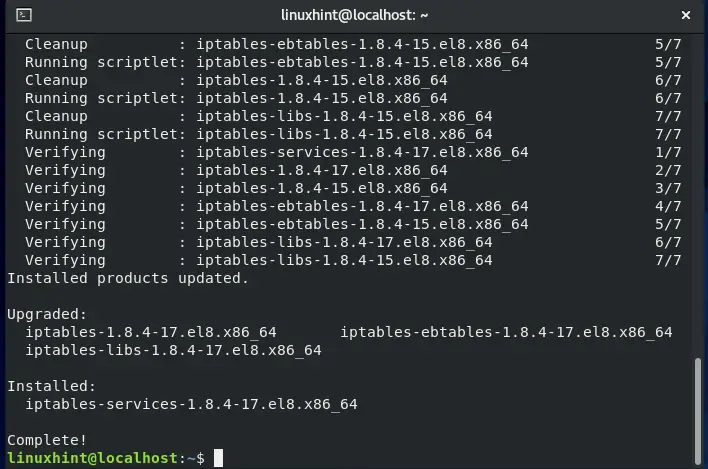
The error-free output signifies that iptables utility is successfully installed.
How to enable iptables on CentOS
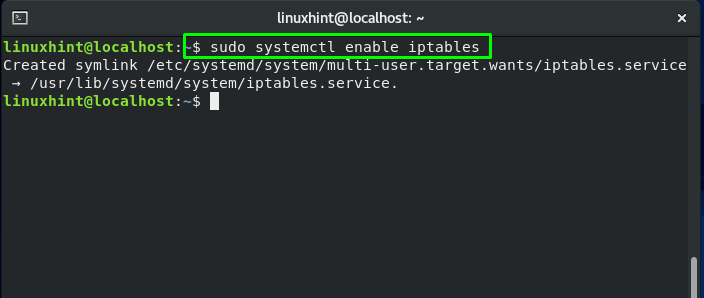
To follow up the procedure of enabling iptables service, the first step to do is to start its service:
For enabling this service to start automatically on CentOS boot, write these commands in your system terminal:
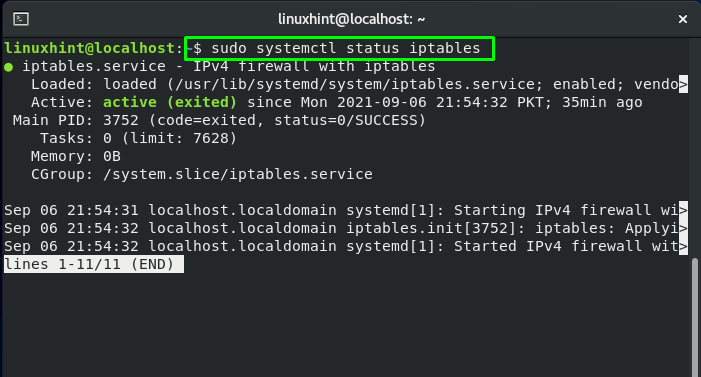
Execute the below-given systemctl command to verify the status of iptables service:
How to configure iptables on CentOS
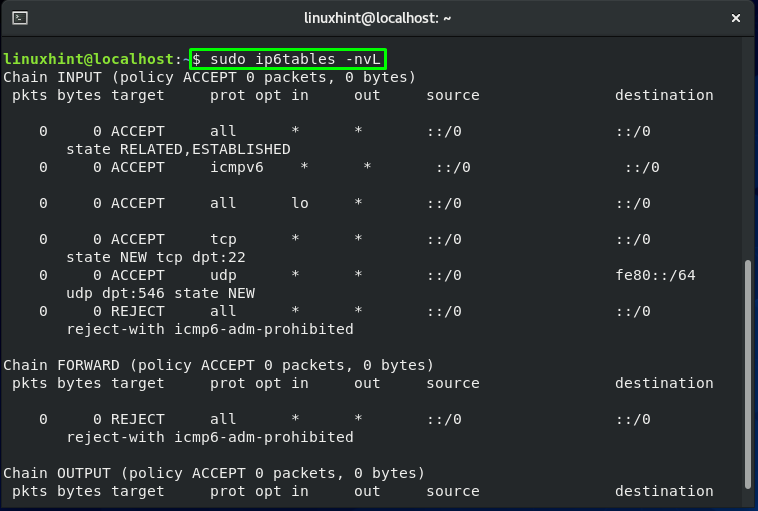
You can utilize the “iptables” command to review the current iptables rules by executing the below-given commands:
Here:
-n is added for numeric output. For instance, the port numbers and IP addresses are printed in numeric format.
-v is for verbose output. This option is added to list the information such as rule options, and interface names.
-L is utilized to list iptables rules.
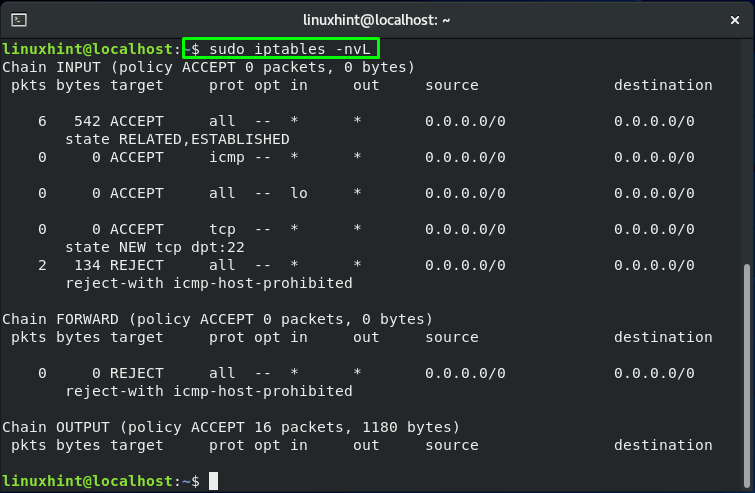
The SSH port 22 is only open by default. You will get the output like this:
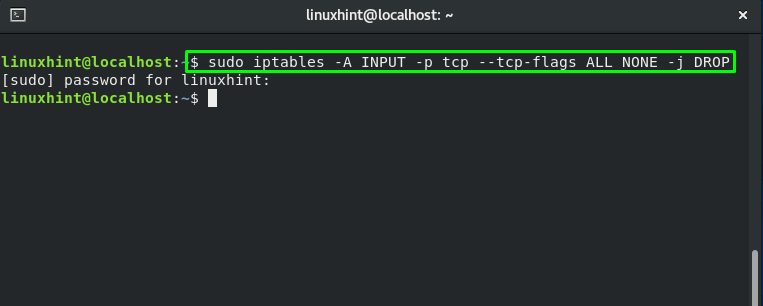
To block all the null packets over the network, execute the below-given iptables command:
If you want to add your localhost to the firewall filter then execute this command:

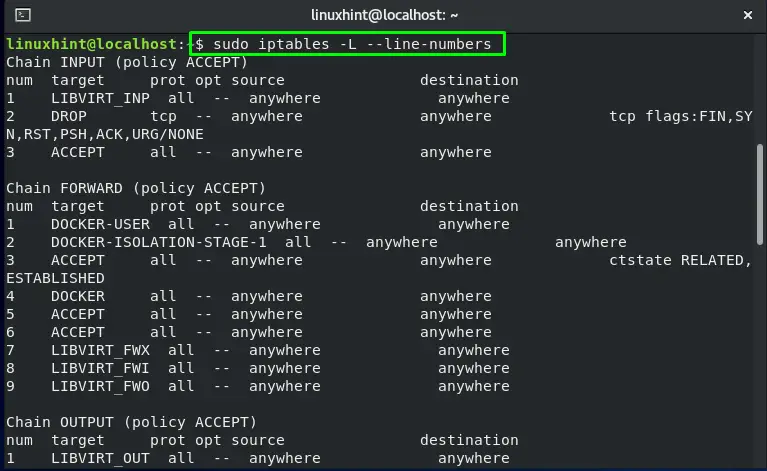
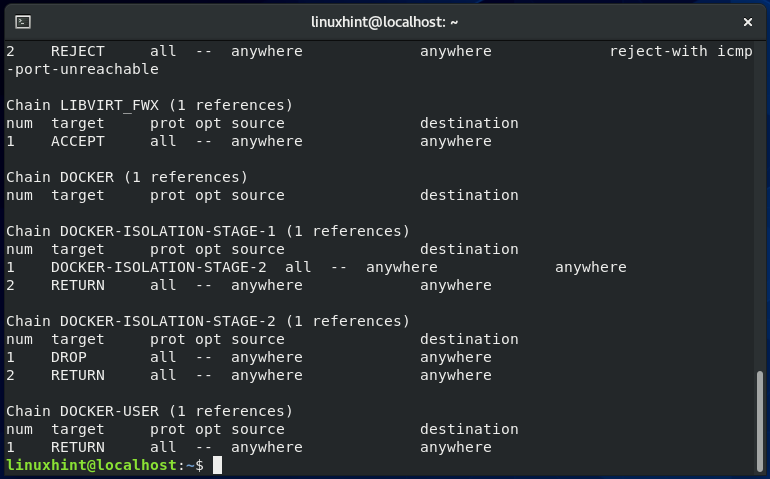
For listing the iptables chain rules with their index numbers, write out the below-given command in your CentOS terminal:
Here, the “-L” option is added to list chain rules and “–lines-numbers” for showing their index numbers:
What is FirewallD in CentOS
FirewallD is a firewall service that is managed via the “firewall-cmd”, a command-line utility. If you prefer the iptables command line syntax, you can disable FirewallD and return to the standard iptables configuration. In the next section, we will demonstrate the procedure of disabling FirewallD on a CentOS system.
How to disable FirewallD on CentOS
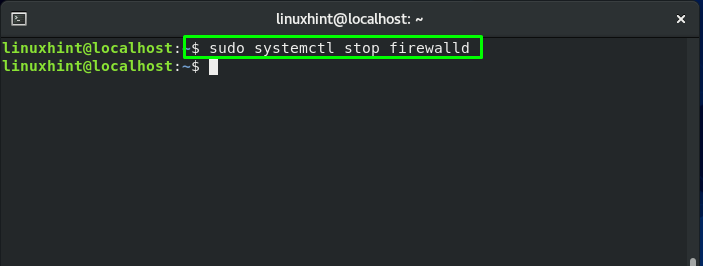
If you want to stop FirewallD on your CentOS, then open up your terminal by pressing “CTRL+ALT+T” and then execute the below-given command in it:
This command will stop FirewallD from performing its functionality:
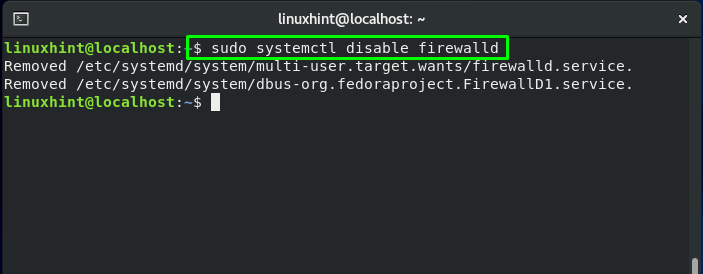
You should know that on system boot, FirewallD service starts automatically. To disable the FirewallD service, write out this command:
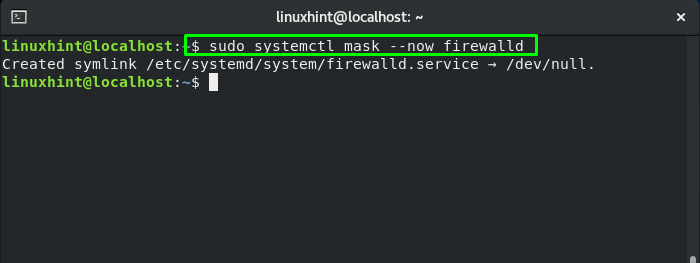
To restrict other services from starting the FirewallD service, mask the FirewallD service:
Conclusion
In Linux-based systems such as CentOS, iptables is a command-line firewall that permits system administrators to control incoming and outgoing traffic by utilizing configurable table rules. Each of these tables comprises a chain of user-defined or built-in rules. In this post, we provided you the method to install and configure iptables on CentOS. Moreover, we have also shown you the procedure of disabling FirewallD on your system.
About the author
Sharqa Hameed
I am a Linux enthusiast, I love to read Every Linux blog on the internet. I hold masters degree in computer science and am passionate about learning and teaching.