- Настройка Bluetooth Ubuntu 16.04
- Первоначальная настройка
- Сканирование устройств Bluetooth
- Сопряжение устройств
- Отправка и прием файлов по OBEX
- Интернет через Bluetooth
- Выводы
- Introduction
- Requirements
- Installation and Configuration
- Ubuntu 10.04 Install via the command line
- Ubuntu 11.04 Install via the command line
- Older documentation:
- Manual Discovery
- Setup Devices
- Find Device Addresses
- Connect Devices for Current Session Only
- Connect Devices at Startup
- Using Devices as Modems
- Using audio devices
- Troubleshooting
- «obex://[xx:xx:xx:xx:xx:xx]» is not a valid location.
- hcitool scan/dev/inq »’Connection timed out»’ Error
- Comments
Настройка Bluetooth Ubuntu 16.04
Устройства Bluetooth встречаются довольно часто в наше время. Это простой и дешевый способ добавить поддержку беспроводных технологий для смартфона или любого другого гаджета. Система Linux может использовать различные протоколы: OBEX, A2DP, DUN, HID и другие для взаимодействия с различными устройствами.
В этой статье мы рассмотрим как выполняется настройка Bluetooth Ubuntu 16.04. Рассмотрим как установить драйвера и настроить связь между двумя устройствами.
Первоначальная настройка
Большинство Bluetooth адаптеров выполнены в виде USB и могут быть настроены с помощью утилит HCL. Некоторые устройства, такие как Atheros, требуют для своей работы установленных прошивок в системе.
Для установки всех необходимых программ выполните такую команду:
sudo apt-get install bluetooth bluez bluez-tools rfkill rfcomm
Дальше установите прошивки для адаптеров Atheros, если это необходимо:
sudo apt-get install bluez-firmware firmware-atheros
Затем запустите службу управления Bluetooth:
sudo service bluetooth start
Сканирование устройств Bluetooth
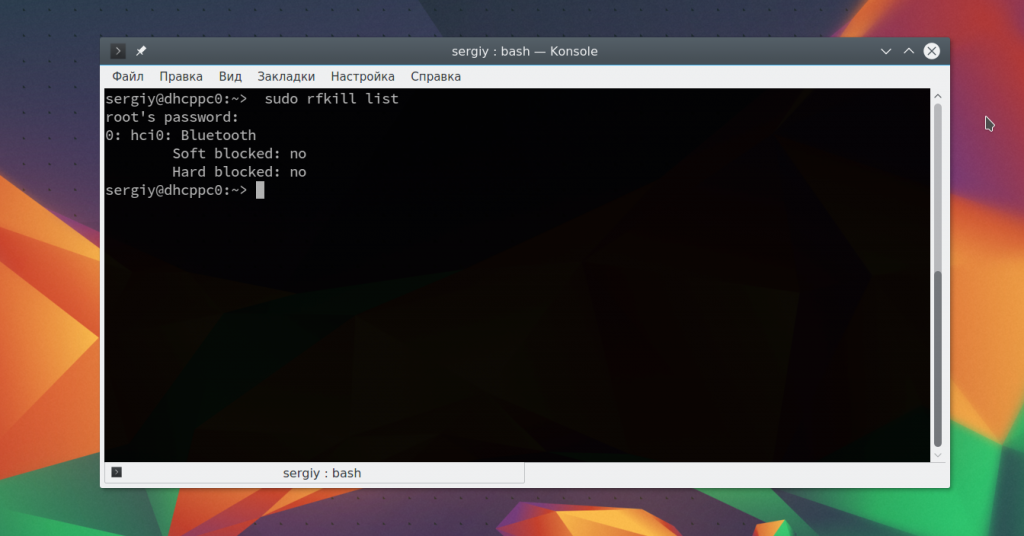
Перед тем, как перейти к сканированию устройств нужно убедиться что ваш bluetooth адаптер подключен и не заблокирован с помощью rfkill:
Если устройство заблокировано, программной или аппаратной блокировкой, необходимо разблокировать его с помощью команды rfkill:
sudo rfkill unblock bluetooth
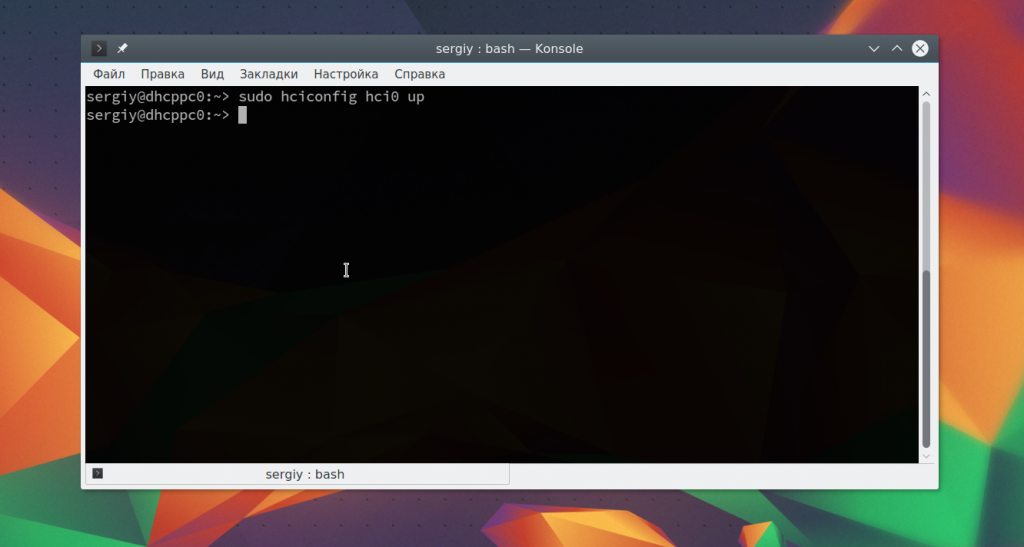
Включить адаптер можно с помощью команды hciconfig:
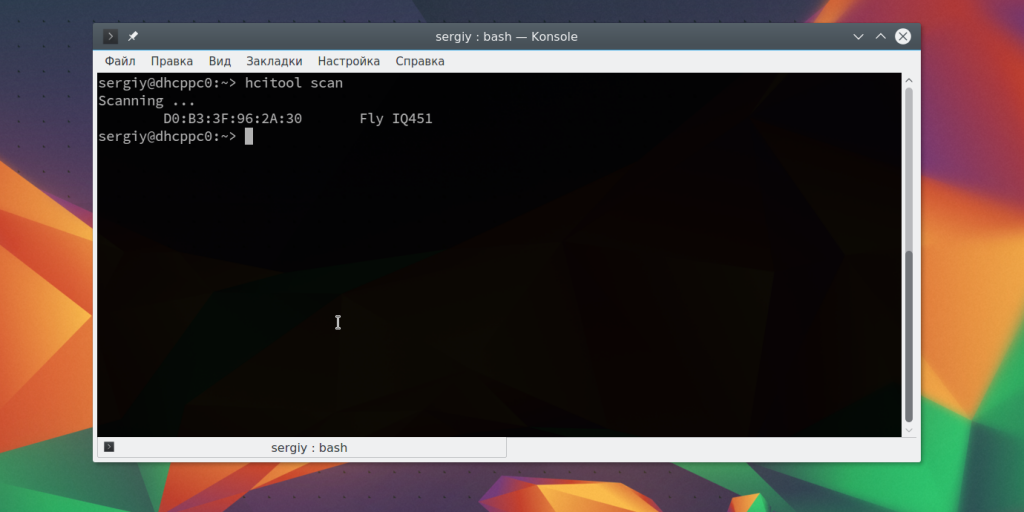
Дальше можно начать сканирование. Только перед этим убедитесь, что на другом устройстве Bluetooth включен и не находится в скрытом режиме. Для сканирования выполните:
После завершения вы увидите доступное устройство. Здесь будет отображаться его имя и MAC адрес.
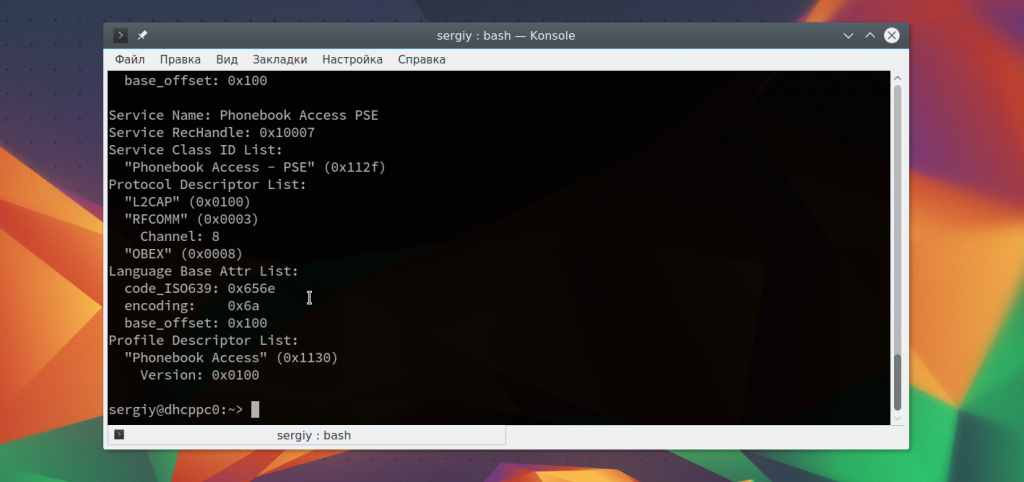
Чтобы узнать более подробную информацию об устройстве, вы можете использовать утилиту sdptool:
sdptool browse D0:B3:3F:96:2A:30
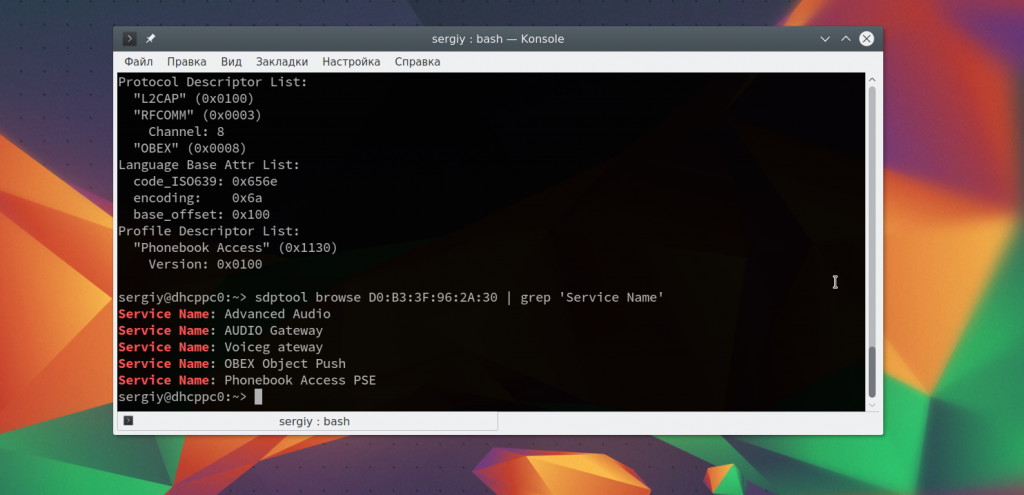
Вы можете сразу отфильтровать какие возможности поддерживает обнаруженное устройство:
sdptool browse D0:B3:3F:96:2A:30 | grep ‘Service Name:’
Также вы можете использовать интерактивный инструмент bluetoothctl:
[bluetooth]# info D0:B3:3F:96:2A:30
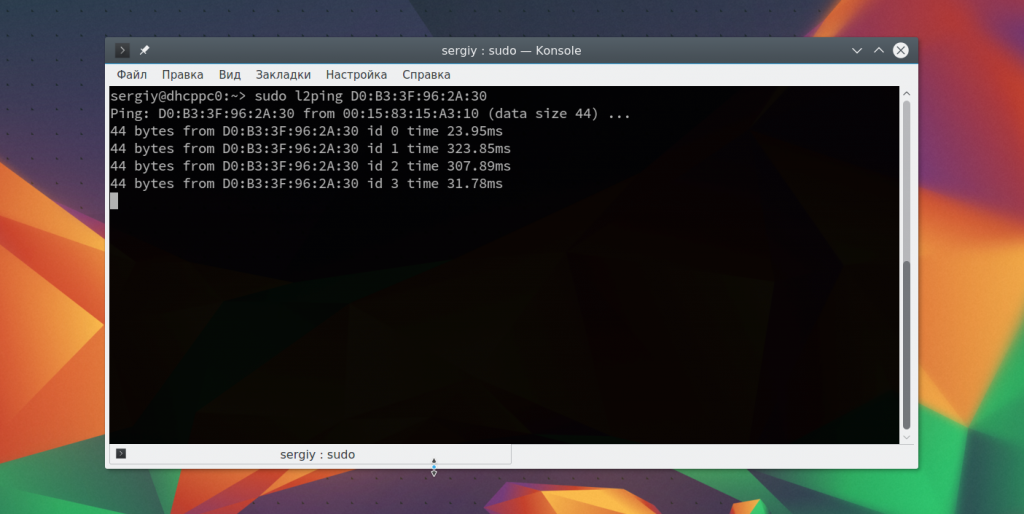
Также вы можете проверить доступность удаленного устройства с помощью утилиты ping:
Сопряжение устройств
Для совместной работы устройств Bluetooth нужно настроить их сопряжение. Для этого используется команда RFCOMM. Эта команда требует полномочий суперпользователя. Синтаксис команды такой:
sudo rfcomm connect устройство_адаптера mac_адрес_цели канал
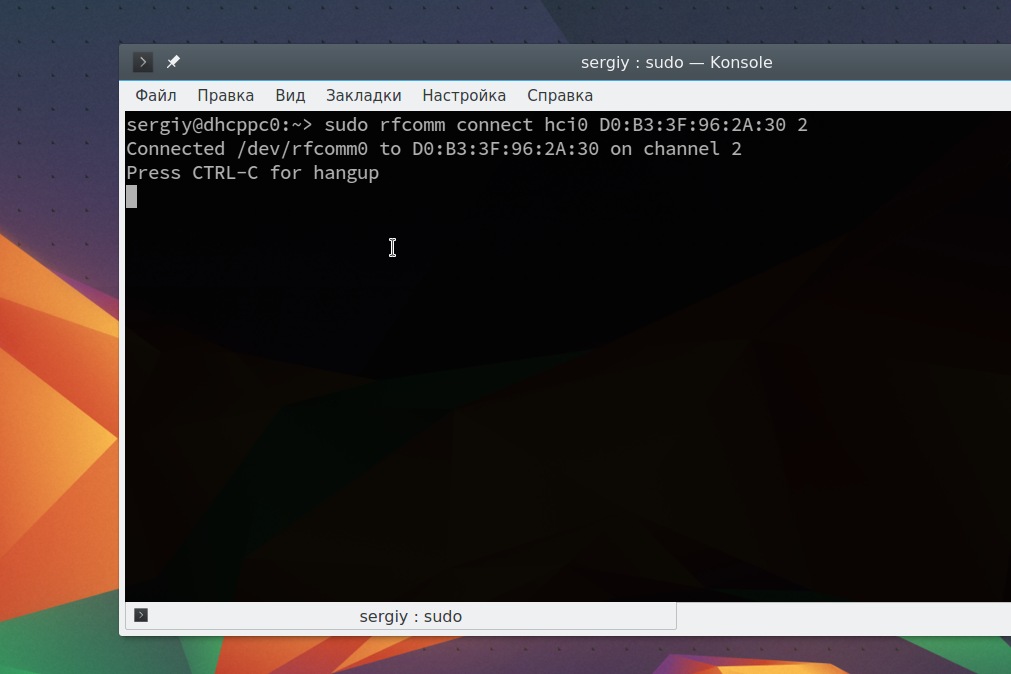
Например, подключимся к нашему устройству на втором канале:
sudo rfcomm connect hci0 D0:B3:3F:96:2A:30 2
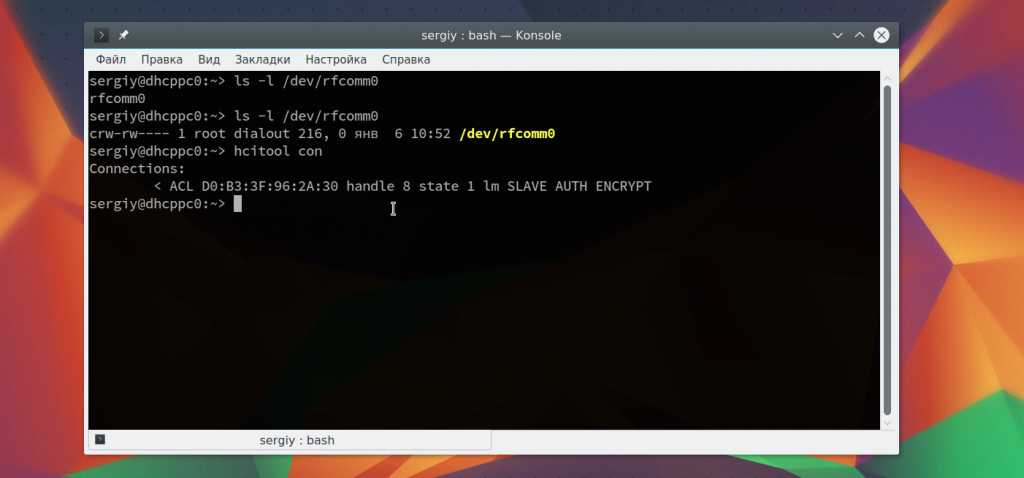
Теперь на другом устройстве появиться запрос на соединение и вам нужно будет ввести одинаковый pin на обоих устройствах. После этого оно будет доступно через файл /dev/rfcomm0. Не закрывайте терминал, чтобы соединение оставалось активным. Вы можете посмотреть список подключений с помощью hcitool:
Отправка и прием файлов по OBEX
Дальше вы можете очень просто отправить файл на удаленное устройство с помощью протокола OBEX. Синтаксис:
sudo bt-obex -p MAC_адрес_устройства /путь/к/файлу
sudo bt-obex -p D0:B3:3F:96:2A:30 ~/img/some_pic.png
Чтобы получить файл вам нужно запустить сервис obex в режиме прослушивания с помощью опции -s:
bt-obex -s /path/to/output/folder
Здесь вам нужно указать путь к папке, куда нужно сохранить полученный файл. После выполнения этих настроек Bluetooth Ubuntu, вы можете передать любой файл с телефона. Вы также можете запустить FTP сеанс с устройством, для просмотра файлов, которые на нем есть:
sudo bt-obex -f MAC_адрес_устройства
Интернет через Bluetooth
Раньше использование Dial-up сети было очень популярным. Сейчас эта технология почти не используется. Но, возможно, понадобиться раздать интернет от вашего телефона на компьютер. Для этого можно использовать два протокола: DUN — более старый и BNEP, более похожий на работу локальной сети.
Чтобы определить поддерживает ли устройство работу по протоколу DUN нужно использовать правильный канал rfcomm. Нужно использовать канал 15:
sudo rfcomm bind D0:B3:3F:96:2A:30 15
Если протокол поддерживается, то у вас появиться устройство rfcomm0. Дальше вы можете использовать NetworkManager для подключения к сети.
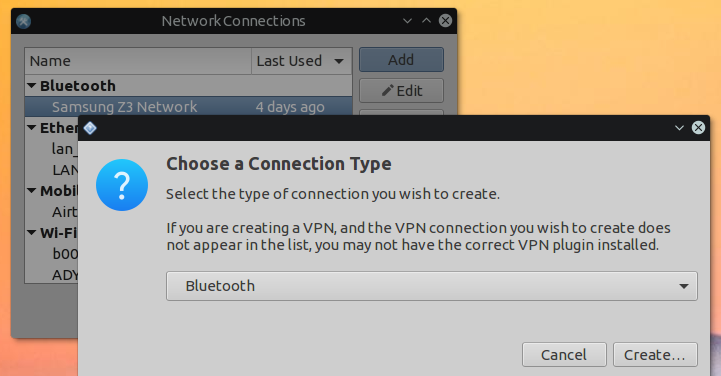
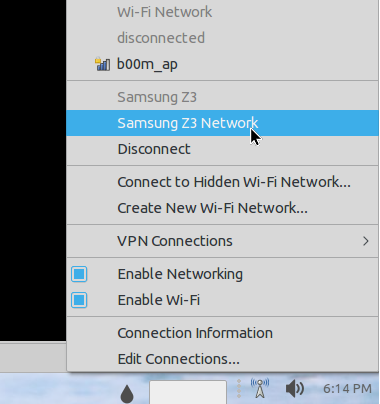
Что касается BNEP, то здесь вам уже не нужно использовать rfcomm, все протоколы будут обрабатываться bluez. Все что нужно, это Bluez и NetworkManager. Добавьте новое соединение Bluetooth:
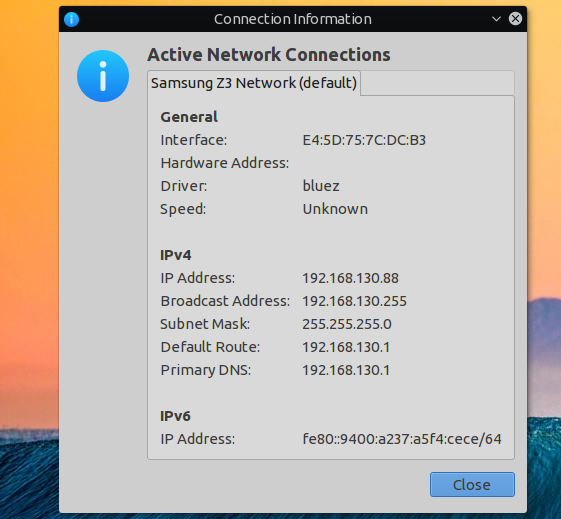
Дальше вы можете посмотреть информацию о подключении и использовать сеть:
Выводы
В этой статье мы рассмотрели как выполняется настройка Bluetooth Ubuntu 16.04. Все работает очень просто, и хотя в графическом интерфейсе может быть не совсем понятно как что настроить, то в терминале все точно и понятно. Если у вас остались вопросы, спрашивайте в комментариях!
Обнаружили ошибку в тексте? Сообщите мне об этом. Выделите текст с ошибкой и нажмите Ctrl+Enter.
Introduction
Bluetooth is a widely supported local area communications technology for communications with cellphones, headsets, keyboards, mice, PDAs, and storage devices. See also BluetoothRemoteControl and BluetoothAudio on Ubuntu.
Requirements
For a desktop or laptop without Bluetooth support use a Bluetooth dongle that connects through USB. While adapters can be found all over the web some do not work well with free software systems. The free software foundation recommends users purchase hardware with free drivers. Most cards are not clearly marked. ThinkPenguin.com is an exception and explicitly provide support for Ubuntu and other distributions. Alternatively users can investigate free software compatible bluetooth chipsets and try to locate a card based on this information.
For Dell laptops install the latest drivers from Dell’s website in Windows in order for the bluetooth module to work in Linux. (Required for D430 with Gutsy / Hardy and D830 and D630) (http://ubuntuforums.org/showthread.php?t=572335 https://wiki.ubuntu.com/LaptopTestingTeam/DellLatitudeD430#bluetooth)
For Dell laptops with a Dell Wireless 355 Bluetooth card where the card is turned off, reenable the card before installation. Go to a utility in Windows to turn it on before you can reinstall the driver. If you turn the card off in Windows reenable the card so Ubuntu can recognize it.
Installation and Configuration
Ubuntu 10.04 Install via the command line
sudo apt-get install bluez python-gobject python-dbus
python-gobject and python-dbus are needed for the python scripts in /usr/share/doc/bluez/examples/ to work.
cd /usr/share/doc/bluez/examples/
Here are the scripts located. Discover the hciX location of the dongle with:
Devices: hci0 00:11:95:00:1A:CF
Your Bluetooth device will have a different id.
sudo ./simple-agent hci0 XX:XX:XX:XX:XX:XX
XX:XX:XX:XX:XX:XX is the MAC or BT ADD or BlueTooth Address of the bt device. Press the reset or pair button on your keyboard, simple-agent will ask to specify a pin like 1111, then type that pin on the bt keyboard and your bt keyboard is paired.
sudo ./test-device trusted XX:XX:XX:XX:XX:XX yes
To set the device as trusted
#sudo /etc/init.d/bluetooth restart
To restart the bluetooth daemon.
Check if the device is added:
The last lines will list your device.
Ubuntu 11.04 Install via the command line
sudo apt-get install bluez python-gobject python-dbus
python-gobject and python-dbus are needed for the python scripts bluez-simple-agent and bluez-test-device to work.
Discover the hciX location of the dongle with:
Devices: hci0 00:11:95:00:1A:CF
Your Bluetooth device will have a different id.
sudo bluez-simple-agent hci0 XX:XX:XX:XX:XX:XX
XX:XX:XX:XX:XX:XX is the MAC or BT ADD or BlueTooth Address of the bt device. Press the reset or pair button on your keyboard, simple-agent will ask to specify a pin like 1111, then type that pin on the bt keyboard and your bt keyboard is paired.
sudo bluez-test-device trusted XX:XX:XX:XX:XX:XX yes
To set the device as trusted
sudo /etc/init.d/bluetooth restart
To restart the bluetooth daemon.
Check if the device is added:
The last lines will list your device.
Additionally, according to this thread (http://www.raspberrypi.org/phpBB3/viewtopic.php?f=27&t=6838), it may be necessary, after authenticating your keyboard, to run
sudo bluez-test-input connect XX:XX:XX:XX:XX:XX
to actually get the Bluetooth device to connect to the computer (I had to do this when using a Logitech Dinovo Edge with a generic Bluetooth adapter). After this, set the device to be trusted as above, and the connection should persist upon reboot.
Older documentation:
Before you begin open up the terminal and type the following:
sudo apt-get install bluez && sudo apt-get install bluez-utils
Restart the bluetooth server to ensure your pc can communicate with a bluetooth device
sudo /etc/init.d/bluetooth restart
By default the BlueTooth notification icon appears, although the service may not. If the service is not running try the service command, otherwise you can now connect.
For jaunty (9:04) and above verify you have a supported adapter connected. When the icon appears, right click and configure your preferences. Devices should auto connect to your PC where you configure your security options.
To configure mail for your phone, install the gnome-bluetooth package so the system finds it in the accessories menu. Send a file by right clicking the file and selecting Send-to. To automate, select System —> Preferences —> Sessions. Add a Startup program. For example you can name it, «Bluetooth File Transfer» and in the Command box, enter «gnome-obex-server». Click OK.
Manual Discovery
Open a terminal window and install the required packages with their dependencies:
sudo apt-get install bluez-utils
Connect your Bluetooth device and restart the Bluetooth services:
sudo /etc/init.d/bluez-utils restart
Verify your Bluetooth device is detected along with the appropriate modules. View the lsusb (in case of usb device) output: lsusb output:
Device 005: ID 0a12:0001 Cambridge Silicon Radio, Ltd Bluetooth Dongle (HCI mode)
Review the output of hcitool dev for all your system’s Bluetooth devices.
- hcitool dev output:
Devices: hci0 00:11:95:00:1A:CF
Your Bluetooth device will have a different id.
- If the id is all zeros, restart the bluez-utils service and retry.
Setup Devices
Find Device Addresses
Locate the device address, make the device discoverable (a «Connect» button for keyboards and mice or check the manual) and search for the device by the following:
sudo hidd --search (If that command doesn't work, try the following:) hcitool scan
Each device’s address has the aa:bb:cc:dd:ee:ff format. Hint: If no devices are shown for Edgy Eft (6.10), try the following:
sudo hciconfig hci0 inqmode 0
See bug #70718. If this helps, you may add the hciconfig command (without «sudo») to your /etc/rc.local file for a permanent workaround.
Connect Devices for Current Session Only
For a temporary connection, use the address of the device ‘aa:bb:cc:dd:ee:ff’
sudo hidd --connect aa:bb:cc:dd:ee:ff
Connect Devices at Startup
To connect automatically, edit the configuration file:
sudo cp /etc/default/bluetooth /etc/default/bluetooth_backup sudo nano /etc/default/bluetooth
Look in the same file for a line close to:
HIDD_OPTIONS="--master --server"
Leave the «—master» command or remove it, it depends on the device. If you have problems with «—master», remove it or vice versa.
Add additional «—connect» arguments for the device you want to connect to at startup:
HIDD_OPTIONS="--connect aa:bb:cc:dd:ee:ff --connect aa:bb:cc:dd:ee:ff --connect aa:bb:cc:dd:ee:ff --server"
Save and add HIDP to /etc/modules:
echo hidp | sudo tee -a /etc/modules
Your Bluetooth devices should now connect at startup.
Using Devices as Modems
Using audio devices
Troubleshooting
«obex://[xx:xx:xx:xx:xx:xx]» is not a valid location.
If you receive this error in Gutsy enter the following:
sudo apt-get install gnome-vfs-obexftp
Although this gives «Couldn’t display «obex://[xx:xx:xx:xx:xx:xx]».» for some. In this case try:
hcitool scan/dev/inq »’Connection timed out»’ Error
sudo hciconfig hci0 reset
The hcitool options can now connect and if often required despite an automatic connection setup.
Comments
BluetoothSetup (последним исправлял пользователь knome 2013-12-14 00:23:47)
The material on this wiki is available under a free license, see Copyright / License for details
You can contribute to this wiki, see Wiki Guide for details
