- Installing Mint 16 on an LVM, EFI boot setup
- Partitioning the disk
- Creating the boot and swap partitions
- Creating the EFI boot partition
- Creating the swap partition
- Creating the LVM partition
- Applying the changes
- Properly formatting the EFI partition
- Preparing the LVM volumes
- Creating a logical volume
- Creating the Volume Group
- Creating Physical Volumes
- Reviewing the created volumes
- Performing the Ubuntu Installation
- Installing Linux Mint/Ubuntu desktop edition with full-disk encryption and LVM
Installing Mint 16 on an LVM, EFI boot setup
On newer systems UEFI boot is either the only option or it is the default option. EFI (Extensible Firmware Interface) boot is a new way of faster, and secure booting which replaces the old MBR-based boot. In order to make an EFI-enabled installation, an EFI-enabled LiveCD/LiveUSB is needed, and must be booted in EFI mode from the BIOS startup.
Partitioning the disk
After booting into the Linux Mint 16 live environment, connect to the internet, open a terminal window and install the necessary packages as follows:
sudo apt-get install gdisk lvm2 gparted
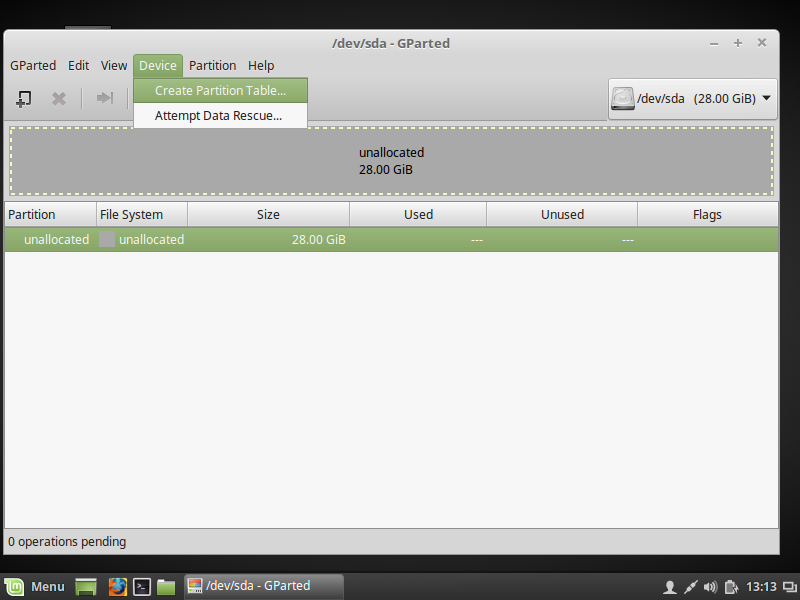
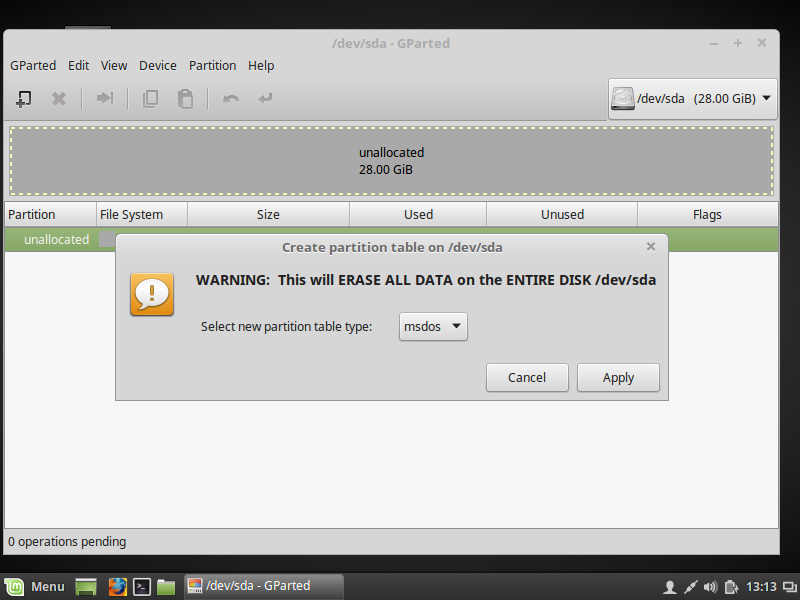
If the installation drive has not been previously set up with a GPT partition table, you will need to do this using GParted. After opening GParted, select the device (which should be unallocated, if it is not, unmount all partitions in it, and remove them), and go to Device → Create Partition Table. When the dialog shows (as shown below), “msdos” will be the default. Change this to gpt, and click OK. This will create a new GUI Partition table, necessary for EFI boot to work.

Creating the boot and swap partitions
After you have set the drive to work as GPT, you will no longer be able to use fdisk commands to create partitions. You will now have to use gdisk instead. We are intending to use LVM (Logical Volume Management) to set up our partitions, but it is recommended that the EFI boot partition and the swap partitions be created outside of the LVM, and preferably before the LVM partition. In order to do this, use gdisk as follows.
$sudo gdisk /dev/[device: sda, sdb, depending on your disk array] GPT fdisk (gdisk) version 0.8.7 Partition table scan: MBR: protective BSD: not present APM: not present GPT: present Found valid GPT with protective MBR; using GPT. Command (? for help):_
Creating the EFI boot partition
Type ‘n’ here to create the first partition, and press enter. It will be given the default number of 1. Leave this unchanged and press enter. Enter the first sector (2048 is default on GPTs), and press enter. Enter the last sector. You can enter a size like this: +250M. Press enter. Enter the code for the type of partition to create. We want an EFI partition, so enter code ef00.
Creating the swap partition
Type ‘n’ here to create the second partition, and press enter. It will be given the default number of 2. Leave this unchanged and press enter. Enter the first sector (use default), and press enter. Enter the last sector. Generally use .5 times your RAM: ie +10240M. Press enter. Enter the code for the type of partition to create. We want a Linux Swap partition, so enter code 8200.
Creating the LVM partition
After creating the 2 separate partitions, we are ready to create our LVM partition. Type ‘n’ here to create the second partition, and press enter. It will be given the default number of 3. Leave this unchanged and press enter. Enter the first sector (use default), and press enter. Enter the last sector. The default will be the end of the available space. Press enter. Enter the code for the type of partition to create. We want a Linux LVM parition, so enter code 8e00.
Applying the changes
After creating all needed partitions we need to apply the changes. Press ‘w’, enter, and confirm your changes. Exit gdisk by typing ‘q’ and enter.
Properly formatting the EFI partition
In order for Mint setup to work with the EFI partition we just created, we need to format it using a fat32 filesystem. Open GParted, select the device, and the EFI partition, and format it using fat32 .
Preparing the LVM volumes
The LVM volumes are managed through a totally different interface, and preparation/partitioning functions must be performed in a specific order. The sequence is as follows.
Creating a logical volume
In order to create our partitions we need a logical volume, which can be prepared as follows. Considering that the LVM partition we created is number 3 in order:
This gives the LVM an understanding of what physical volumes it has to offer for volume groups and logical volumes during your setup.
Creating the Volume Group
All physical volumes created will have to reside within a specific volume group. LVM is capable of spanning volume groups across multiple physical storage devices. In this particular case our group will be inside a single physical storage unit. Create the group as follows.
sudo vgcreate sysvg /dev/sdb3
Creating Physical Volumes
We are now ready to create our actual data partitions to be used by the installer. In this particular case, we are creating root (/) and home (/home) partitions. The beauty of creating them in our volume group is that they can be grown or shrunk at will without disrupting the Linux filesystem. Create the volumes as follows.
sudo lvcreate -L 30G -n lvroot sysvg
Where 30G is the size given to the partition (30GB is a good starting point for / where programs and and other non-user files are installed), lvroot is the name of our phyrical volume, and sysvg is the name of our volume group.
sudo lvcreate -L 200G -n lvhome sysvg
Where 200G is the size given to the partition (it is good practice to not use the entire space of the volume group, especially when using an SSD, and expand it as needed. In this case, the total size of the group is 430GB), lvhome is the name of our phyrical volume, and sysvg is the name of our volume group.
More volumes can be created to house /tmp, /var, etc. Otherwise they will use space in /.
Reviewing the created volumes
We can now display our newly-created volumes as follows.
$sudo lvdisplay --- Logical volume --- LV Path /dev/sysvg/lvroot LV Name lvroot VG Name sysvg LV UUID [your disk UUID] LV Write Access read/write LV Creation host, time mint, 2013-12-17 14:46:09 -0600 LV Status available # open 1 LV Size 30.00 GiB Current LE 7680 Segments 1 Allocation inherit Read ahead sectors auto - currently set to 256 Block device 252:0 --- Logical volume --- LV Path /dev/sysvg/lvhome LV Name lvhome VG Name sysvg LV UUID [your disk UUID] LV Write Access read/write LV Creation host, time mint, 2013-12-17 14:52:01 -0600 LV Status available # open 1 LV Size 200.00 GiB Current LE 51200 Segments 1 Allocation inherit Read ahead sectors auto - currently set to 256 Block device 252:1
Performing the Ubuntu Installation
After all our partitions have been created and our LVM volumes have been prepared, we can now proceed with installation. Double-click on the install icon on the desktop of the LiveCD environment. (Screens are approximate and not exact Mint 16 setup screens)

On the “Preparing to install” screen, you can select both “Download updates while installing” and “Install this third-party software” (this is optional). Click ‘Forward’.

On the “Allocate drive space” screen, make sure you select ‘Something else’ before pressing the ‘Forward’ button. After you press the ‘Forward’ button, go to picture 1.3 for what you should see when manually setting up your partitions:
 The “Allocated drive space” should look different now showing you a list of your logical volumes and the /dev/sdb partitions near the bottom. Assign the 2 /dev/sdb partitions to EFI boot and swap respectively. Then, find the logical volumes for lvroot and lvhome and assign them to / and /home.
  The partition /dev/sdb1 will be the /boot partition for your system. Make sure you select EFI as the type of filesystem. In the same manner, find partition /ev/sdb2 and assign it to swap.
Now lets scroll up to the top and highlight the /dev/mapper/sysvg-lvhome partition that has the “ext4” next to it. Press the “Change…”. Set it up to the ext4 filesystem, and select /home as the mountpoint. If this is a new install, make sure the volume is formatted.  This will be the /home directory for my system using ext4. Again, the file system is your choice and doesn’t need to be ext4. Do this same process for /dev/mapper/sysvg-root highlighting it and pressing the “Change…” button.

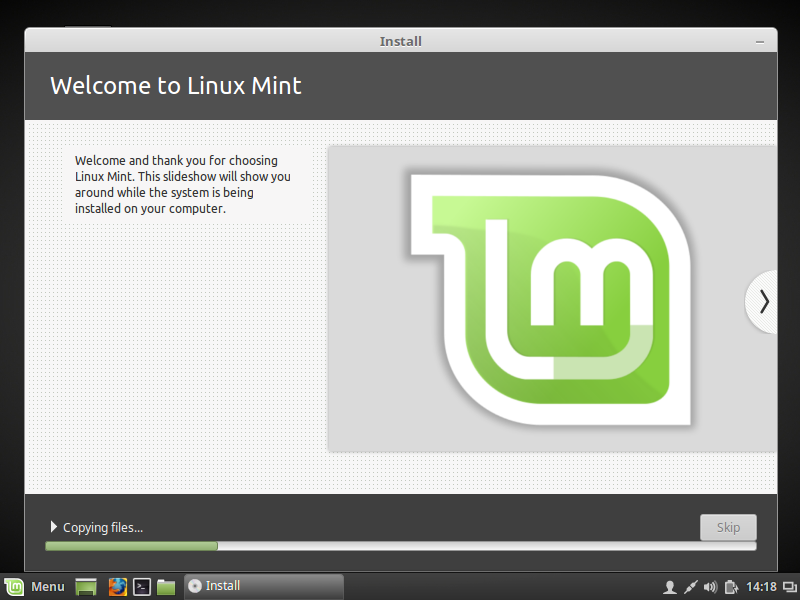
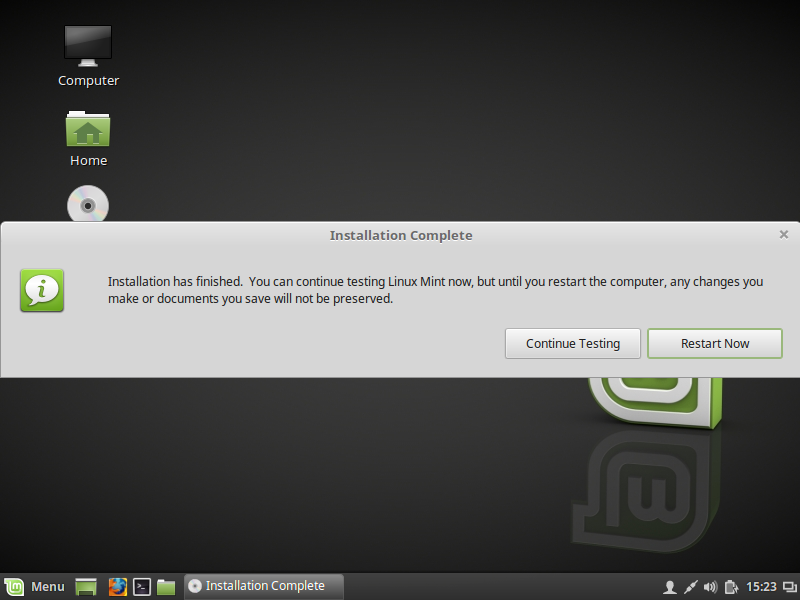
If you are all setup for your system to have all proper logical volumes, you press the “Install Now” button to start the installation process. This installation will ask for you additional information like your timezone, username, etc… please fill that in with what you want for your system. Once you are done, you can sit back and wait for the whole thing to comeplete. After the installation process is done, you will see:
Press ‘Restart’ to reboot the machine and you will then boot into your new EFI/LVM Linux installation.
Installing Linux Mint/Ubuntu desktop edition with full-disk encryption and LVM
For some reason (complexity perhaps) it is not possible to configure full-disk encryption and LVM from the graphical installer in the desktop edition. It is possible to select full-disk encryption but this only creates one filesystem (root).
I want to use LVM to allow me to have more than one filesystem without having to enter more than one password during boot-up. It is not impossible to install Ubuntu desktop (or Linux Mint as in this guide) with encryption and LVM but it does require a little more work.
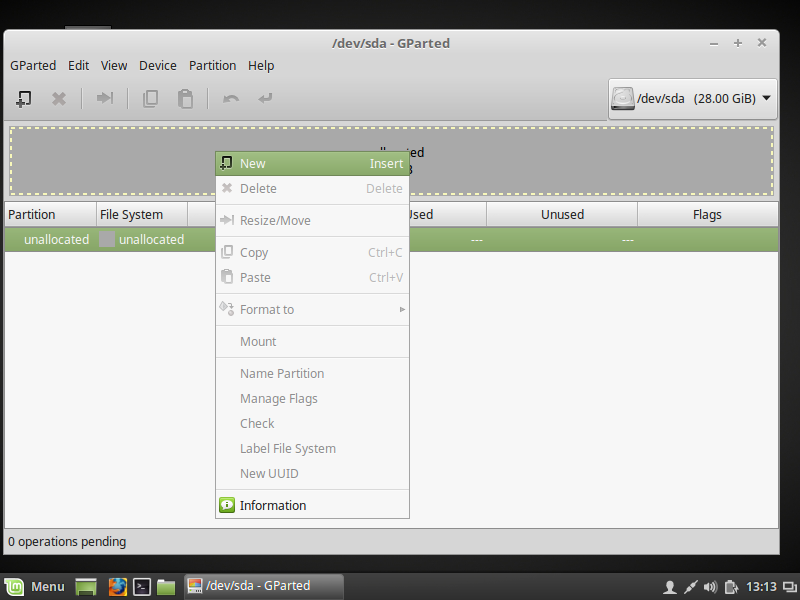
Before starting the installation, we need to prepare the harddisk. Start up GParted (as this is the easiest to work with, if you feel adventurous it can be done in parted or fdisk as well).
Start by creating a new partition table if needed (if you want to start over or the disk is empty)
Of course this will destory any data already on the disk, you may want to resize any existing partitions (Windows for instance) instead.
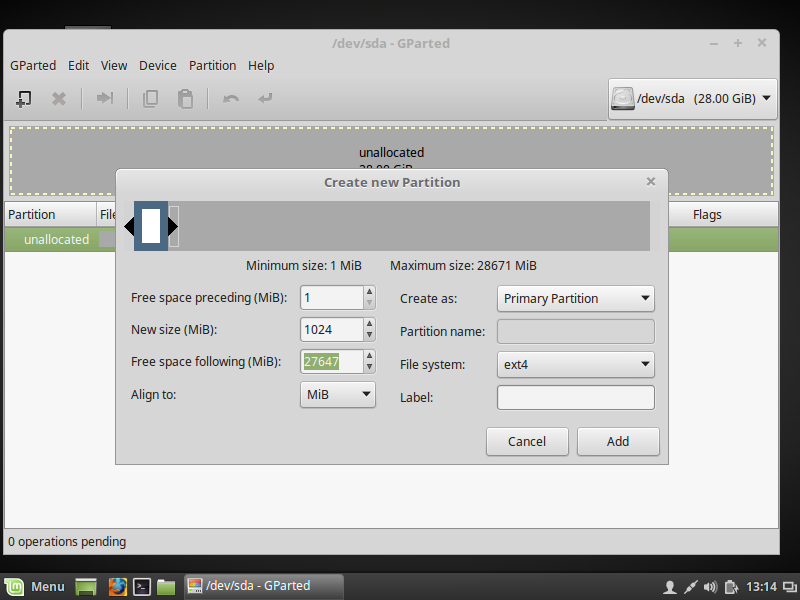
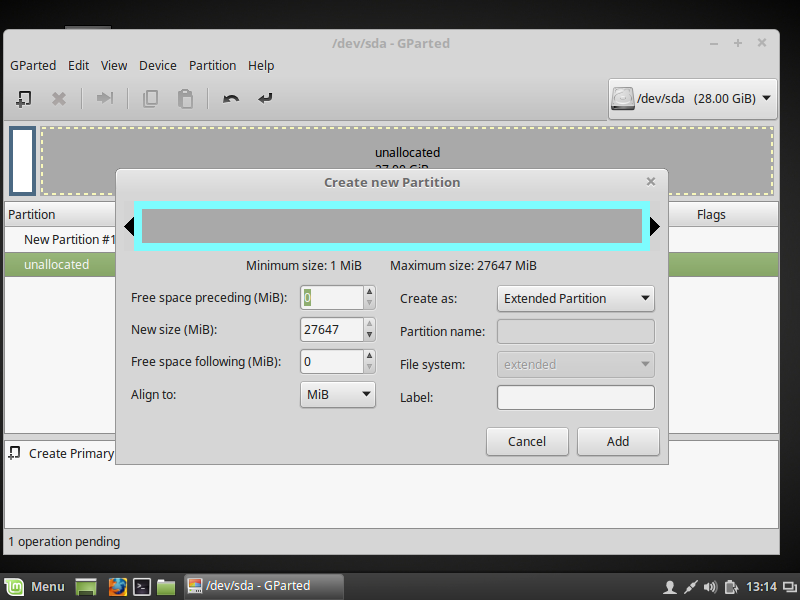
Next, create three new partitions
Second, create an extended partition
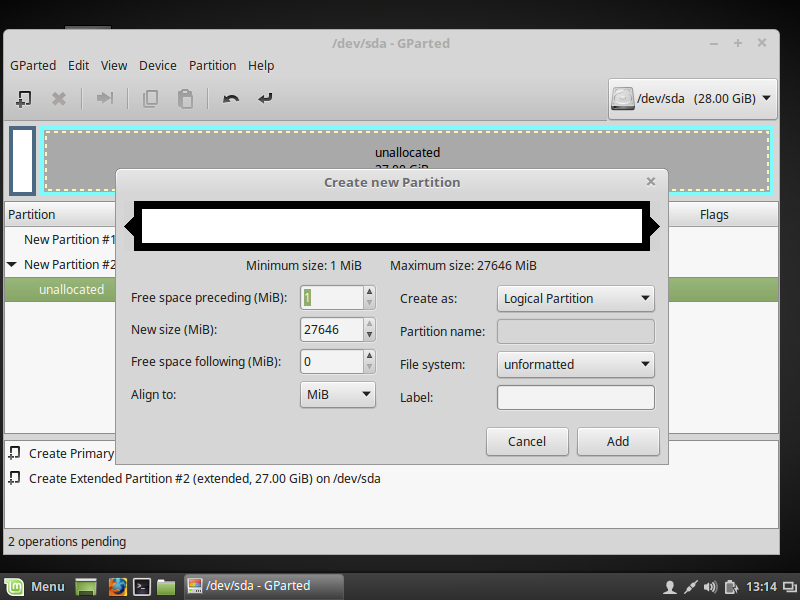
Lastly, the partition which will hold the encrypted data
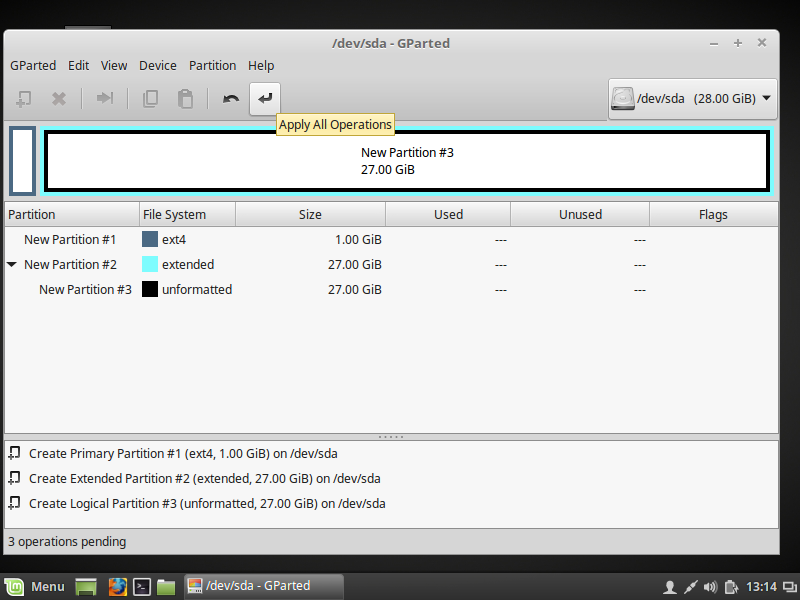
Now, apply the configuration
Now exit GParted and then start a terminal and sudo su —
First, create the encrypted partition (you need to double check the device names). Needless to say, you need to pick a good password.
# cryptsetup luksFormat /dev/sda5 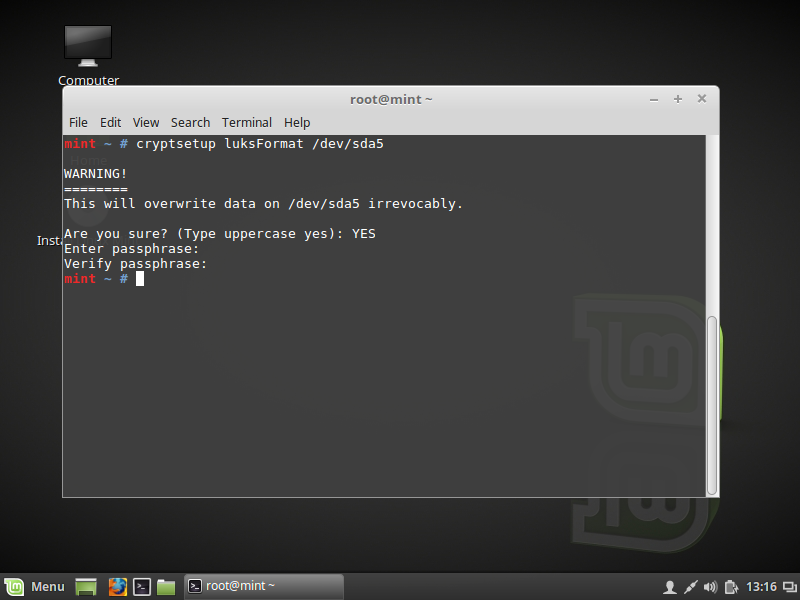
Open (activate) the encrypted container/partition
# cryptsetup open --type luks /dev/sda5 sda5_crypt 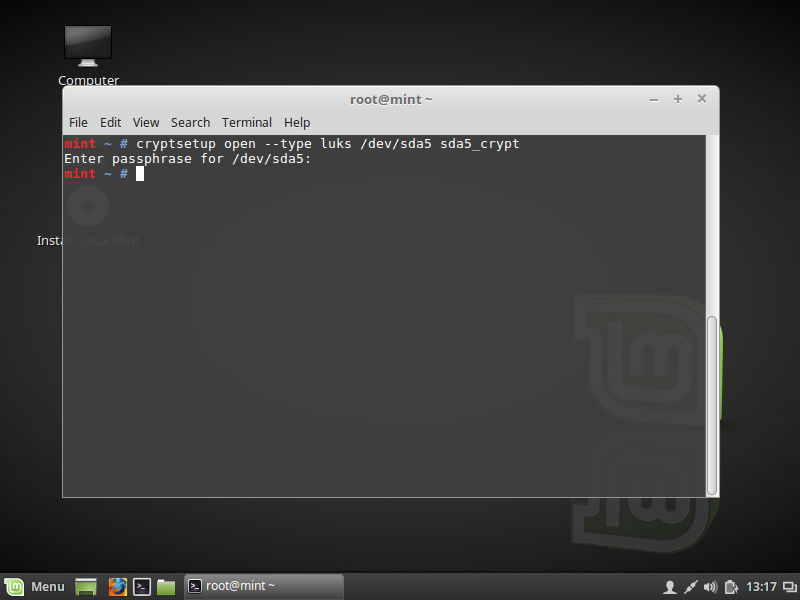
Create the volume group on the container
# vgcreate systemvg /dev/mapper/sda5_crypt 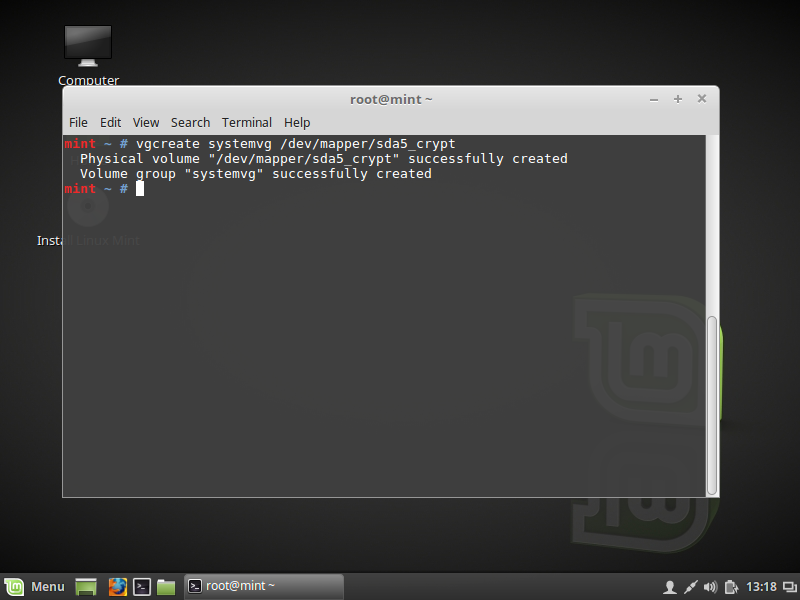
Final step in the terminal is to create the logical volumes — I’ve opted for three: /, /home and swap (having a separate /home makes reinstalling easier).
# lvcreate -n rootlv -L20G systemvg # lvcreate -n swaplv -L8G systemvg # lvcreate -n homelv -l100%FREE systemvg 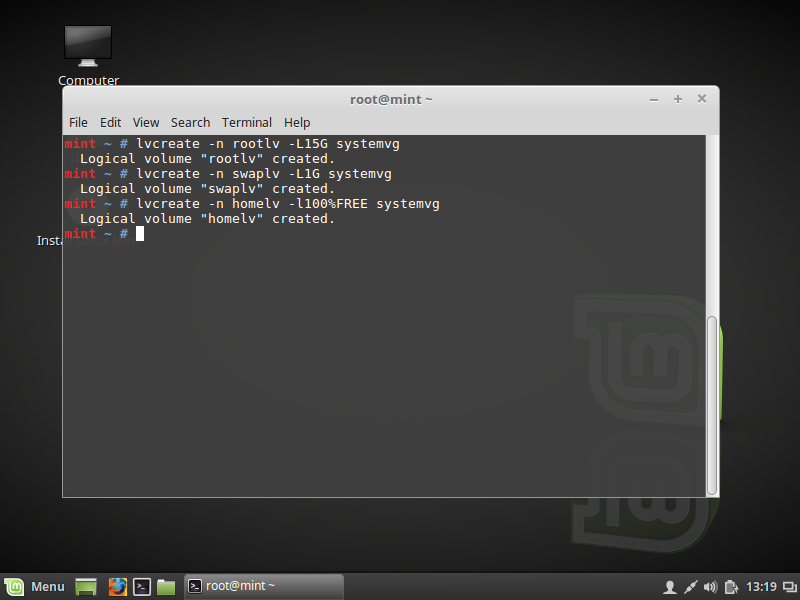
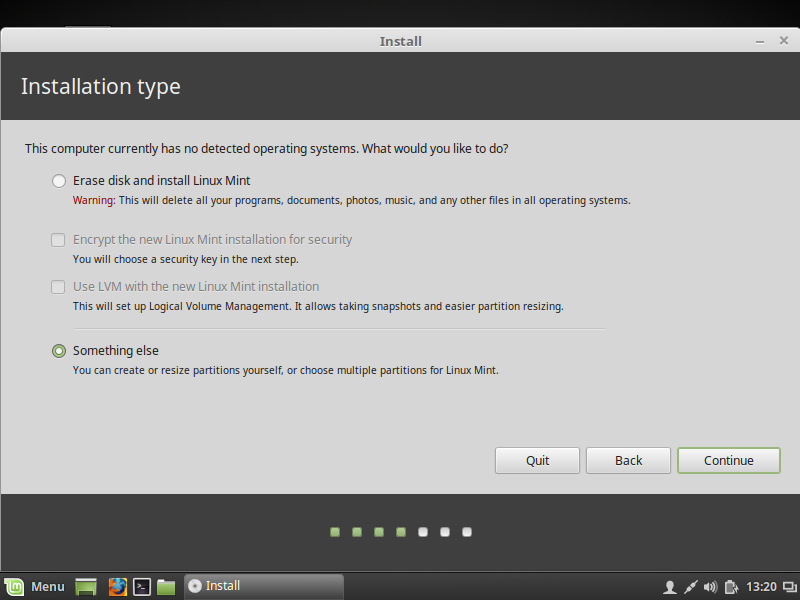
Next, start up the Installer and answer the questions until you get to the screen where to decide the way to install Ubuntu/Mint. Select Something else
Now, select the filesystems to create, they should be configured like so:
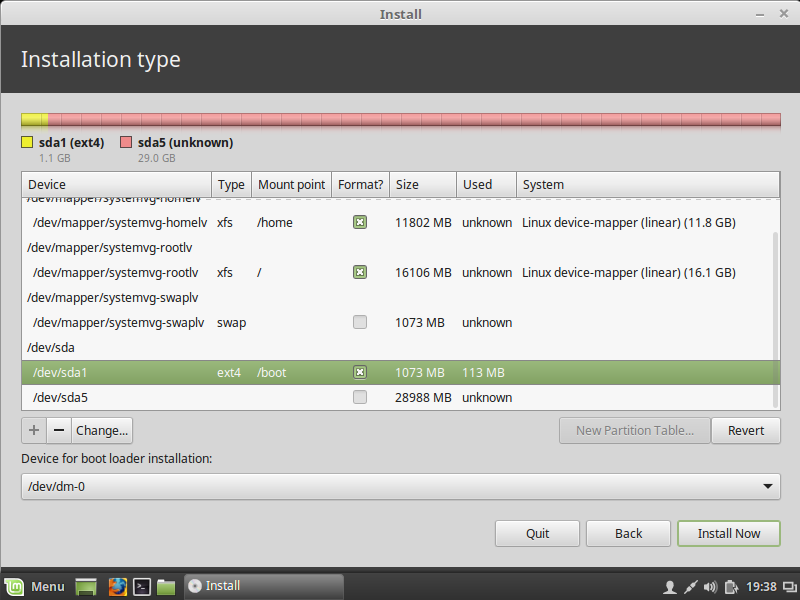
It is also important to select the correct device for bootloader installation. It should NOT be installed to /dev/dm-0
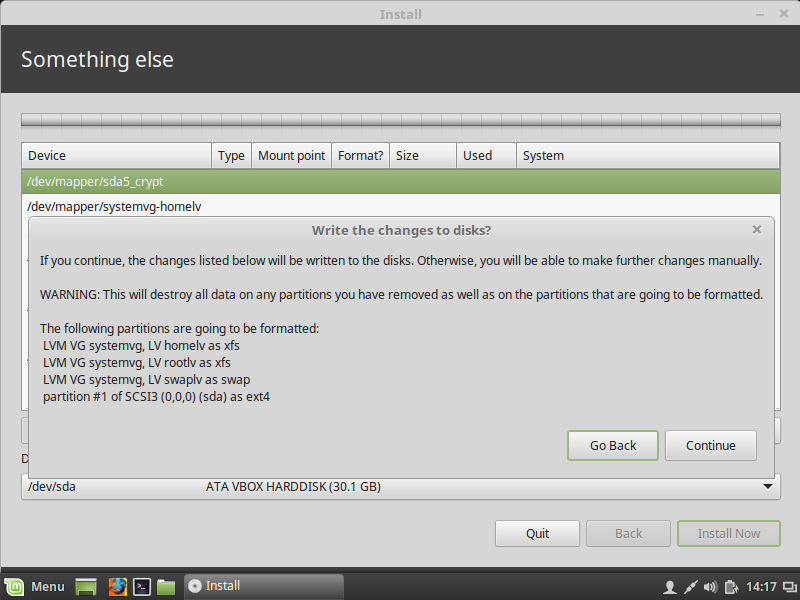
And continue to installation.
When the installation is done, do not reboot.
Go back to the terminal and setup a chroot with your new installation
# mount /dev/systemvg/rootlv /target # mount /dev/sda1 /target/boot # mount -o bind /proc /target/proc # mount -o bind /dev /target/dev # mount -o bind /sys /target/sys # chroot /target Last steps are to let your installation know you are using an encrypted root partition and re-generate the ramdisk used for booting
# echo "sda5_crypt /dev/sda5 none luks" >> /etc/crypttab # update-initramfs -k all -c 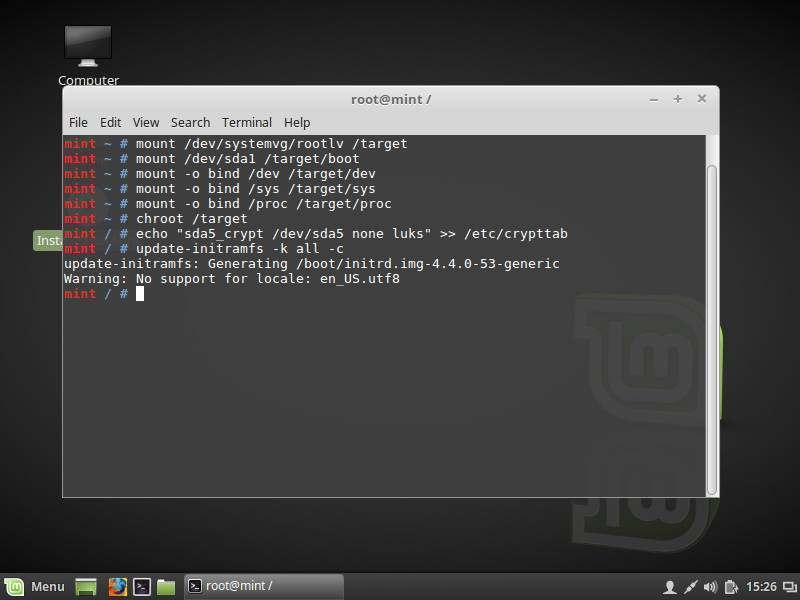
The line in crypttab may also use UUID (to prevent problems if your device names change)
# blkid /dev/sda5 # echo "cryptodisk UUID=63a28f07-6f16-4b00-93a1-1c95614efafb none luks" >> /etc/crypttab 63a28f07-6f16-4b00-93a1-1c95614efafb is the UUID of the disk.
Now exit the chroot (press CTRL-D or type exit ) and then reboot.