- Getting Started with Java in VS Code
- Setting up VS Code for Java development
- Coding Pack for Java
- Installing extensions
- Installing and setting up a Java Development Kit (JDK)
- Supported Java versions
- Installing a Java Development Kit (JDK)
- Creating a source code file
- Editing source code
- Running and debugging your program
- More features
- How to Run Java Programs in Ubuntu
- Running Java programs in Ubuntu
- Step 1: Install Java compiler
- Step 2: Compile Java program in Linux
- Step 3: Run the Java class file
- Your First Java Program in the Ubuntu Terminal
- Java Installation
- Your First Java Program
- Search
- About This Site
- Latest Tutorials
Getting Started with Java in VS Code
This tutorial shows you how to write and run Hello World program in Java with Visual Studio Code. It also covers a few advanced features, which you can explore by reading other documents in this section.
For an overview of the features available for Java in VS Code, see Java Language Overview.
If you run into any issues when following this tutorial, you can contact us by entering an issue.
Setting up VS Code for Java development
Coding Pack for Java
To help you set up quickly, you can install the Coding Pack for Java, which includes VS Code, the Java Development Kit (JDK), and essential Java extensions. The Coding Pack can be used as a clean installation, or to update or repair an existing development environment.
Note: The Coding Pack for Java is only available for Windows and macOS. For other operating systems, you will need to manually install a JDK, VS Code, and Java extensions.
Installing extensions
If you are an existing VS Code user, you can also add Java support by installing the Extension Pack for Java, which includes these extensions:
The Extension Pack for Java provides a Quick Start guide and tips for code editing and debugging. It also has a FAQ that answers some frequently asked questions. Use the command Java: Tips for Beginners from the Command Palette ( ⇧⌘P (Windows, Linux Ctrl+Shift+P ) ) to launch the guide.

You can also install extensions separately. The Extensions Guide is provided to help you. You can launch the guide with the Java: Extensions Guide command.
For this tutorial, the only required extensions are:
Installing and setting up a Java Development Kit (JDK)
To use Java within Visual Studio Code, you need to install a Java Development Kit (JDK) on your local environment. JDK is a software development environment used for developing Java applications.
Supported Java versions
The Extension Pack for Java supports Java version 1.5 or above.
Note: To configure JDKs for your projects, see Configure Runtime for Projects. To enable Java preview features, see How can I use VS Code with new Java versions.
Installing a Java Development Kit (JDK)
If you have never installed a JDK before and need to install one, we recommend you to choose from one of these sources:
Creating a source code file
Create a folder for your Java program and open the folder with VS Code. Then in VS Code, create a new file and save it with the name Hello.java . When you open that file, the Java Language Server automatically starts loading, and you should see a language status item with a loading icon on the right side of the Status Bar showing the language status is busy. After it finishes loading, you can hover on the language status item and find the loading process has been finished successfully. You can also choose to pin the status item in the status bar.
Note: If you open a Java file in VS Code without opening its folder, the Java Language Server might not work properly.
VS Code will also try to figure out the correct package for the new type and fill the new file from a template. See Create new file.
You can also create a Java project using the Java: Create Java Project command. Bring up the Command Palette ( ⇧⌘P (Windows, Linux Ctrl+Shift+P ) ) and then type java to search for this command. After selecting the command, you will be prompted for the location and name of the project. You can also choose your build tool from this command.
Visual Studio Code also supports more complex Java projects — see Project Management.
Editing source code
You can use code snippets to scaffold your classes and methods. VS Code also provides IntelliSense for code completion, and various refactor methods.
To learn more about editing Java, see Java Editing.
Running and debugging your program
To run and debug Java code, set a breakpoint, then either press F5 on your keyboard or use the Run > Start Debugging menu item. You can also use the Run|Debug CodeLens option in the editor. After the code compiles, you can see all your variables and threads in the Run and Debug view.
The debugger also supports advanced features such as Hot Code Replace and conditional breakpoints.
More features
The editor also has many more capabilities to assist with your Java workload.
- Editing Java explains how to navigate and edit Java in more details
- Debugging illustrates all the key features of the Java Debugger
- Testing provides comprehensive support for JUnit and TestNG framework
- Java Project Management shows you how to use a project view and work with Maven
- Spring Boot and Tomcat and Jetty demonstrate great framework support
- Java Web Apps shows how to work with Java Web App in VS Code
How to Run Java Programs in Ubuntu
So, you have started learning Java programming? That’s good.
And you want to run the java programs on your Linux system? Even better.
Let me show how to run Java in terminal in Ubuntu and other Linux distributions.
Running Java programs in Ubuntu
Let’s go in proper steps here.
Step 1: Install Java compiler
To run a Java program, you need to compile the program first. You need Java compiler for this purpose.
The Java compiler is part of JDK (Java Development Kit). You need to install JDK in order to compile and run Java programs.
First, check if you already have Java Compiler installed on your system:
If you see an error like “Command ‘javac’ not found, but can be installed with”, this means you need to install Java Development Kit.
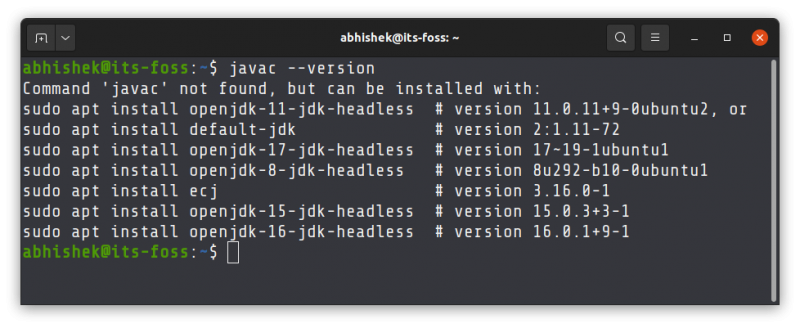
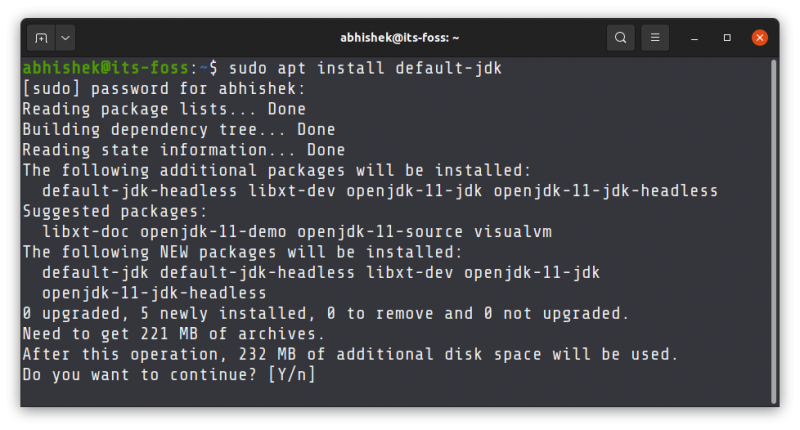
The simplest way to install JDK on Ubuntu is to go with the default offering from Ubuntu:
sudo apt install default-jdkYou’ll be asked to enter your account’s password. When you type the password, nothing is seen on the screen. That is normal. Just enter your password blindly. When asked, press the enter key or Y key.
The above command should work for other Debian and Ubuntu based distributions like Linux Mint, elementary OS etc. For other distributions, use your distribution’s package manager. The package name could also be different.
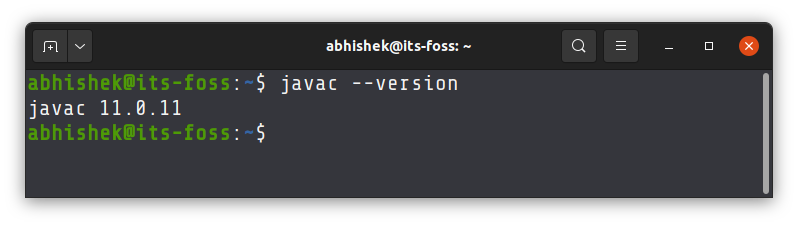
Once installed, verify that javac is available now.
Step 2: Compile Java program in Linux
You need to have a Java program file for this reason. Let’s say you create a new Java program file named HelloWorld.java and it has the following content:
You can use Nano editor in terminal or Gedit graphical text editor for writing your Java programs.
If there is no error, the above command produces no output.
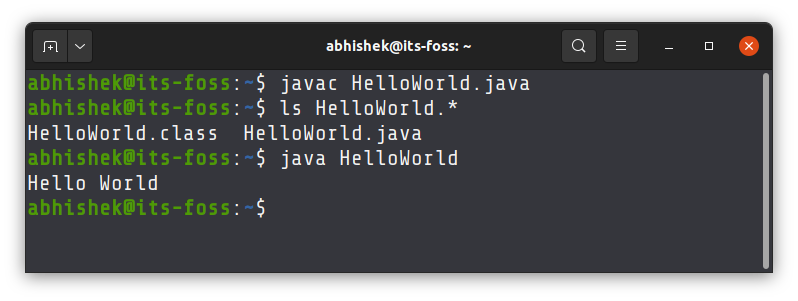
When you compile the Java program, it generates a .class file with the class name you used in your program. You have to run this class file.
Step 3: Run the Java class file
You do not need to specify the class extension here. Just the name of the class. And this time, you use the command java, not javac.
This will print Hello World on the screen for my program.
And that’s how you run a Java program in the Linux terminal.
This was the simplest of the example. The sample program had just one class. The Java compiler creates a class file for each class in your program. Things get complicated for bigger programs and projects.
This is why I advise installing Eclipse on Ubuntu for proper Java programming. It is easier to program in an IDE.
I hope you find this tutorial helpful. Questions or suggestions? The comment section is all yours.
Your First Java Program in the Ubuntu Terminal

If you are new to Java Programming in the Ubuntu operating system, this simple tutorial will guide you along in writing and compiling your first Java Hello World program. The applications that you need for this purpose include the Java Runtime Environment and the Java Development Kit. This article covers the installation of these two through the Ubuntu command line. You can then write your first program in a text editor such as gedit, nano or even some graphical text writing tool. You will then compile your program in order to create a class that you can then execute in order to run your Java program.
We have run the commands and procedures mentioned in this article on an Ubuntu 18.04 LTS system.
Java Installation
In order to compile and run a basic Java program, you need to have the following two software installed on your Ubuntu system:
Let us first open the Ubuntu command line, the Terminal, in order to install these two. You can open the Terminal either through the system Dash or the Ctrl+alt+T shortcut.
Since we will be installing Java through the apt utility, first let us update our apt repositories through the following command:
The next thing is to run the following command:
This will ensure either Java Runtime Environment is already installed on your system or not. If yes, it will also let you know which version of Java you have on your system.
In my case, the output shows that I do not have Java installed on my system yet.
![]()
In order to install the Java Runtime Environment on your system, run the following command as root:

The system will prompt a Y/n option for you to continue installation. Please enter Y to continue, after which JRE will be installed on your system.
You can then check the installed version of Java as follows:

After installing the JRE, let us check if we have the Java Development Kit installed on our system or not. This can be done by checking the version of your Java Compiler, javac, as follows:
![]()
The above output shows that I need to install the Java compiler or the JDK on my system.
You can install it through the following command as root:
$ sudo apt install default-jdk

The system will prompt a Y/n option for you to continue installation. Please enter Y to continue, after which JDK will be installed on your system.
You can then check the installed version of the Java Compiler as follows:
![]()
The basic installations you need to have before running a Java program are now complete.
Your First Java Program
Before starting to write Java programs, it is best practice to make a dedicated directory for all your Java related work. I am creating such a directory through the following command in my home folder:
Then move to that directory as follows:

The next step is to write your first Java program. You can write it in any of your favorite text editors. Here, I am using the gedit editor to write the program. Run the following command in order to open a new java file in the gedit editor:
![]()
Then copy the following code in your file:

This program is simply intended to print “Hello World” on your screen.
Save the file and close it.
Then is the time to compile your first program through the Java compiler as follows:
The ls command will show that the compiler will create a class based on the class in your Java code:

In order to run the compiled program, run the following program:

In this article, you have learned to install both the Java Runtime Environment and the Java Development Kit used to compile and run your java programs. We also wrote a simple Hello World program in Java and ran to see if you and your system are ready to move to the more complex world of Java Programming.
Search
About This Site
Vitux.com aims to become a Linux compendium with lots of unique and up to date tutorials.