- 64-bit java not working
- How to Fix the “java command not found” in Linux?
- Reason 1: Required Package ( JRE/java ) is Not Installed
- Solution: Add the Required Package ( JRE/java )
- Reason 2: Java PATH Environment Variable is Missing
- Solution: Add the java PATH Environment Variable
- Conclusion
- How to fix “java command not found”
- Add Java to PATH environment variable
- Reinstall JRE
- Java command not found on Linux
- 6 Answers 6
64-bit java not working
I feel like this should just naturally work, but for some reason it isn’t. I’ve gone through the following guide How can I install Sun/Oracle’s proprietary Java JDK 6/7/8 or JRE? And it seems that all the help isn’t working. I’m trying to get oracle’s 64-bit java to work. I already installed java using the ppa:
sudo add-apt-repository ppa:webupd8team/java sudo apt-get update sudo apt-get install oracle-java8-installer java version "1.8.0_45" Java(TM) SE Runtime Environment (build 1.8.0_45-b14) Java HotSpot(TM) Server VM (build 25.45-b02, mixed mode) $ java -d64 Error: This Java instance does not support a 64-bit JVM. Please install the desired version. ~/jdk1.7.0_79/bin$ ./java -bash: ./java: No such file or directory ~/jdk1.7.0_79/bin$ file java java: ELF 64-bit LSB executable, x86-64, version 1 (SYSV), dynamically linked (uses shared libs), for GNU/Linux 2.6.9, BuildID[sha1]=0x68582ab83ddaf6429310a6f841f0adda165ce880, not stripped So as you see, the file is there, but also not there at the same time. Which is hyper confusing. I next thought that maybe I didn’t actually have a 64-bit version of Ubuntu, but I checked and (if I’m reading everything correctly) it looks like I do have 64-bit ubuntu:
$ uname -a Linux random 4.0.4-x86_64-linode57 #1 SMP Thu May 21 11:01:47 EDT 2015 x86_64 x86_64 x86_64 GNU/Linux Also, I tried the same thing with version 7, and openjdk uses version 7 as well. Both of them did the 32-bit version. You can see all my versions of java here:
$ update-alternatives --config java There are 4 choices for the alternative java (providing /usr/bin/java). Selection Path Priority Status ------------------------------------------------------------ * 0 /usr/lib/jvm/java-8-oracle/jre/bin/java 1053 auto mode 1 /usr/lib/jvm/java-7-openjdk-i386/jre/bin/java 1051 manual mode 2 /usr/lib/jvm/java-7-oracle/jre/bin/java 1052 manual mode 3 /usr/lib/jvm/java-8-oracle/jre/bin/java 1053 manual mode 4 /usr/lib/jvm/jdk1.8.0_05/bin/java 1 manual mode Any help would be beneficial in order to get 64 bit working on ubuntu. Thanks in advance. EDIT Turns out uname is not as accurate as I thought. Turns out I am on a 32-bit machine:
$dpkg --print-architecture i386 $ file /sbin/init /sbin/init: ELF 32-bit LSB shared object, Intel 80386, version 1 (SYSV), dynamically linked (uses shared libs), for GNU/Linux 2.6.24, BuildID[sha1]=0x07075fcb55b05aeb6286efabba63534fa6ecd213, stripped How to Fix the “java command not found” in Linux?
The Java Runtime Environment utility is used to build Java-based websites using the default libraries from the JRE in most Linux distributions. The Java utility is used by some distros (Fedora, Arch Linux) to develop Java-founded applications. While working with the Java language, users can encounter the “java command not found” error; the causes and solutions will be discussed in this article.
This post will cover the following topics to remove the error “java not found” in Linux:
- Reason 1: Required Package ( JRE/java ) is Not Installed
- Solution: Add the Required Package ( JRE/java )
- Reason 2: Java PATH Environment Variable is Missing
- Solution: Add the Java PATH Environment Variable
Let’s start with discussing the java error.
Reason 1: Required Package ( JRE/java ) is Not Installed
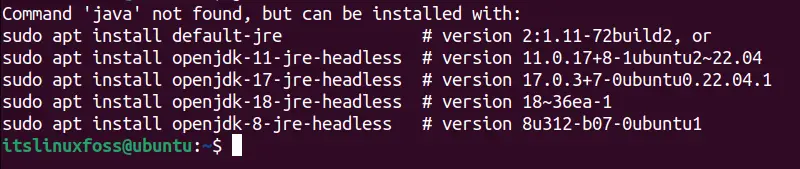
Most Linux distributions do not have java Runtime Environment (JRE) installed after installing the operating system. JRE/java allows the developers to build Java-based applications, so for operating the JAVA language, we must have JRE in Linux. If the operating system does not have JRE, the below error will show up:
Error: Command “java not found”.
Solution: Add the Required Package ( JRE/java )
The solution for the error ”java not found” is to install the Java Runtime Environment or Java package that helps to build the Java application, and java uses the JRE package libraries to execute Java. To install the JRE in Linux, use the below-mentioned steps:
Step 1: Update the System Libraries
Before installing the JRE, it’s recommended to update the system libraries so the packages in the default repository are updated. To update, use:
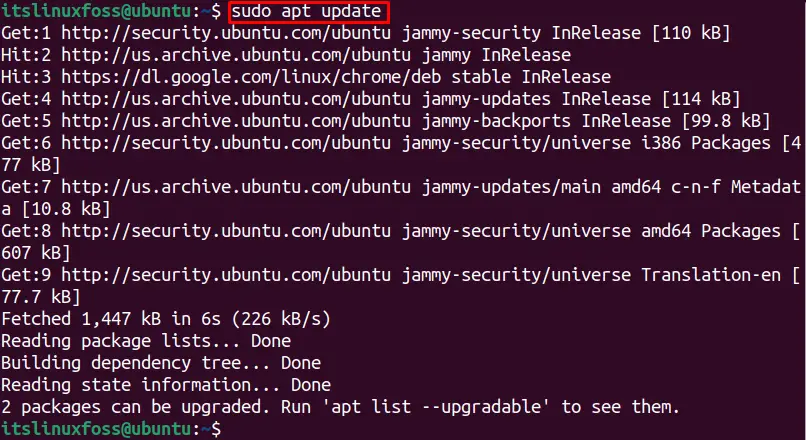
The JRE is updated to the latest version in the system repository.
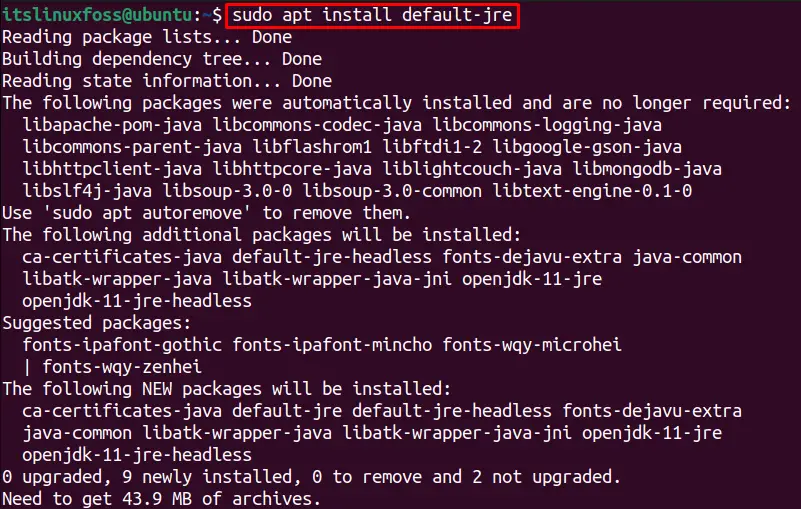
Step 2: Install the Required ( JRE/java ) Package
Let’s install the JRE package to remove the “java not found” error. Use the below command utilities to install the JRE according to your operating system:
$ sudo apt install default-jre #Debian-based distros. $ sudo yum install java #CentOS/RHEL. $ sudo pacman -sS java | grep jre #Arch-based distros.
You can verify the installation of the java/JRE package using the following command:
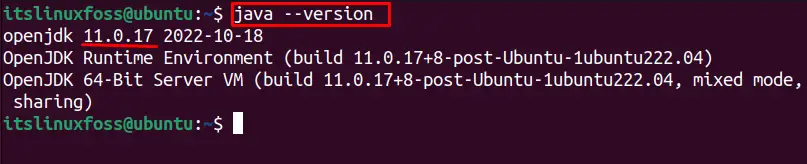
The required JRE package is successfully installed in the system having version “11.0.17”; now, the “java not found” error will be removed.
Reason 2: Java PATH Environment Variable is Missing
After installing the JRE/java packages in the system, the error is still not removed, which means the java PATH environment variables are missing in your system. For adding the PATH variable, follow the below solution.
Solution: Add the java PATH Environment Variable
The java PATH environment can be added to its default “/etc/profile” file to remove this error. For that, follow the below-performed steps:
Step 1: Find the java PATH Variables Details
To find the required details for the Java PATH variables, run the below-mentioned command:
$ sudo update-alternatives --config java
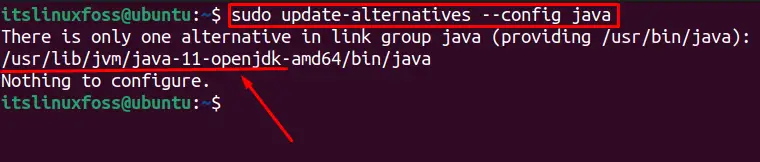
The output shows the absolute path that will be used to update the environment PATH variable. Now, copy the highlighted path address to use in the next step.
Step 2: Create a Code for Adding PATH Variable
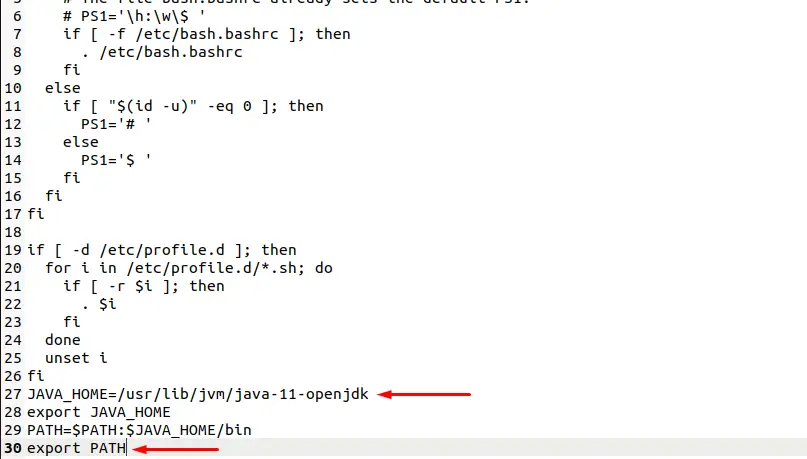
Update the “JAVA_HOME” variable with the path variable we found in the previous step. The below code is shown to update the PATH variables in the default system file:
JAVA_HOME=/usr/lib/jvm/java-11-openjdk export JAVA_HOME PATH=$PATH:$JAVA_HOME/bin export PATH
Step 3: Add/Update the PATH Variable in the
After creating the PATH variable, now use the below command to open the “/etc/profile” file to add the PATH variable.
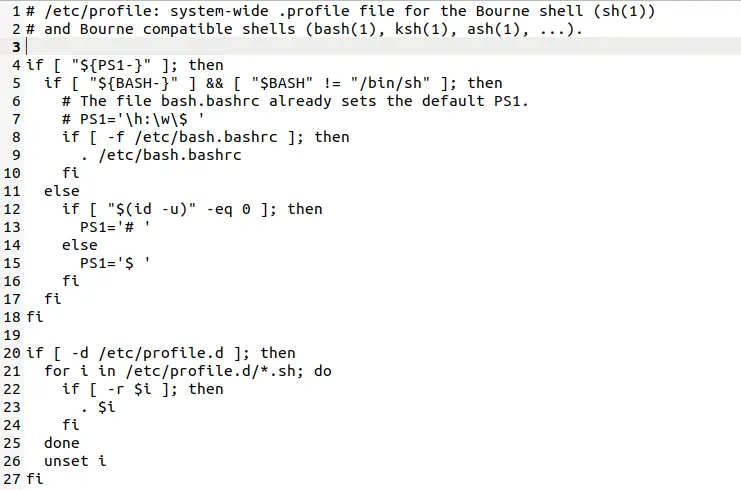
After executing the command, the above file will open up. Add the PATH variable code (step 2 code) in the end as shown below and save the file:
Step 4: Reboot the System
Now, reboot the system to update the PATH variable in the system by executing this command:
That’s how you will get rid of the “java command not found error”.
Conclusion
The error “Command ‘java’ not found” in Linux can be removed by installing the missing required package (JRE or Java). After installing the required package, if the error is not removed, add the PATH environment variable in the “/etc/profile” file manually, as performed in the article, and the error will be removed. This post has explained the possible reasons and solutions for the error “java command not found”.
How to fix “java command not found”

Java Runtime Environment (JRE) is a powerful set of software that allow you to develop Java applications quickly and easily. It includes the Java Virtual Machine (JVM), essential core classes and libraries, and everything else you need to get started with Java. JRE is a part of the Java Development Kit (JDK), but can be installed separately. The Java Runtime Environment was originally created by Sun Microsystems Inc., a subsidiary of Oracle Corporation. It’s also known as the Java Runtime.
Installing Java in Linux should be easy using package managers, such as apt , yum , or pacman , depending on your Linux distribution. However, there are times that you may encounter «java: command not found» error, even though you think you have installed it. The full error message may look something like this :
Command 'java' not found, but can be installed with: 1. sudo apt install default-jre 2. sudo apt install openjdk-11-jre-headless 3. sudo apt install openjdk-8-jre-headlessIn this article, we will show you a few solutions that you can use to fix java command not found error.
Add Java to PATH environment variable
Most operating systems look for executables and binaries in a specific set of places. The list of all those places is stored in an environment variable, often named PATH .
If you knew where the Java binary is placed, you can add one of the Java path to PATH variable using the following command.
export PATH=$PATH:/path/to/java/binary/
Reinstall JRE
The quickest way to fix java command not found error is to reinstall JRE. In order to do so, run the following command:
sudo apt install default-jreThere are other alternative packages that you can choose instead of default-jre , which installs the latest version of JRE (11 at the time of this writing).
You can choose to install one of the two LTS version of JRE (8 and 11) by installing openjdk-8-jre and openjdk-11-jre . There are also headless packages that don’t provide any graphical functionalities, which often used in servers.
The difference between Java packages can quickly be summed up as the following:
- The openjdk—jre-headless package is used when you don’t need to draw anything in the graphical user interface. For example a background service or a terminal application. It’s commonly used on servers.
- The openjdk—jre package includes the openjdk—jre-headless package since it contains most of the Java features. Desktop users should install this package.
- The openjdk—jre package provides more functionality, but heavier than its headless counterpart. It’s not recommended to install on a server since it installs extra software that is not commonly used on a server.
Replacing the version number allows you to install multiple versions of Java in the same machine. In that case, you can run sudo update-alternatives —config java to manage which version you want to use at the exact moment.
There are 3 choices for the alternative java (providing /usr/bin/java). Selection Path Priority Status ------------------------------------------------------------ * 0 /usr/lib/jvm/java-6-openjdk/jre/bin/java 1061 auto mode 1 /usr/bin/gij-4.4 1044 manual mode 2 /usr/lib/jvm/java-6-openjdk/jre/bin/java 1061 manual mode 3 /usr/lib/jvm/java-6-sun/jre/bin/java 63 manual mode Press enter to keep the current choice[*], or type selection number:We hope that the information above is useful to you and helped you fix java command not found error. If you have any questions, then please feel free to ask in the comments below.
Java command not found on Linux
when you ran update-alternatives —config java, did you select 2? what happened after you select 2 , then ran java command? do you still get the error, java: command not found ?
if you do ls -l /etc/alternatives/java, it should symlink to /usr/java/jre1.6.0_24/bin/java . Then you need to check which java is called, which java and the path given (e.g. /usr/bin/java) , it should symlink to /etc/alternatives/java
yes, that configuration is per user basis. The one with alternative is applicable to system wide. But if you are happy with the solution, that’s great! 🙂
6 Answers 6
You can add one of the Java path to PATH variable using the following command.
export PATH=$PATH:/usr/java/jre1.6.0_24/bin/ You can add this line to .bashrc file in your home directory. Adding this to .bashrc will ensure everytime you open bash it will be PATH variable is updated.
----------------------------------------------- * 1 /usr/lib/jvm/jre-1.6.0-openjdk.x86_64/bin/java + 2 /usr/lib/jvm/jre-1.7.0-openjdk.x86_64/bin/java 3 /home/ec2-user/local/java/jre1.7.0_25/bin/java When I chose 3, it didn’t work. When I chose 2, it did work.
Hi and welcome to Stack Overflow, this site isn’t a forum, it’s a question and answer site and your other answer is a question. Please don’t do this, thanks!
I found the best way for me was to download unzip then symlink your new usr/java/jre-version/bin/java to your main bin as java.
I use the following script to update the default alternative after install jdk.
#!/bin/bash export JAVA_BIN_DIR=/usr/java/default/bin # replace with your installed directory cd $ a=(java javac javadoc javah javap javaws) for exe in $; do sudo update-alternatives --install "/usr/bin/$" "$" "$/$" 1 sudo update-alternatives --set $ $/$ done