- Getting Started
- Windows
- Mac
- Linux
- Setup
- How do I configure Media Center to.
- Listen to Audio
- My music is stored on disk and I want use Media Center to navigate through it
- I want to route audio from other software through Media Center
- I want to listen to Internet Radio
- Watch Video
- My videos are stored on disk and I want Media Center to catalogue it
- My videos are played by other software and I want Media Center to process the audio
- I need a ten foot Interface
- Watch and Record Live TV
- Stream content
- Setup a Media Server
- Add another Media Center Client
- Serve content to DLNA capable devices
- Listen/Watch Content on my Phone or Tablet
- Access content outside my home network
- Use a Remote Control
- Gizmo
- Panel
- JRemote
- Organise my Content
- Managing Metadata
- Organising Views
- How do I extend Media Center to.
- Write my own Apps that can control Media Center
- Change the skin
- What else can I do?
- How do I get help?
- Purchasing and Licensing
- How to install JRiver Media Center on Ubuntu 18.04
- Installation
- JRiver Id — Moving Your Media
- Available Several Ways
- Which One Fits?
- Order Now
Getting Started
Installation varies based on the operating system chosen.
Windows
Download and Install JRiver Media Center. Please see Installation & Removal for details.
Mac
Download and Install JRiver Media Center. Please see Mac Installation & Removal for details.
Linux
Linux MC uses the debian apt package management system for installation, updating and removal.
JRiver hosts the repository for this.
The easiest way to get a new installation going is to use a contributed script called InstallJRMC.
The current version for MC30 is here: InstallJRMC
Setup
Next Import your files. MC makes a record of them in its database, but does not move or change them. By default, MC will import all your files, but you can set it to import only some folders and file types by using Auto-Import.
Please review the sections below for more specific guidance on how to configure Media Center for your intended use.
How do I configure Media Center to.
Listen to Audio
Media Center supports a wide variety of audio file formats and can play content indexed by its internal Library as well as internet streams and, on Windows, audio played by other Windows applications.
My music is stored on disk and I want use Media Center to navigate through it
Import your music into your Library then complete Audio Setup so you can listen to it. Review Standard View to understand how to use the Media Center UI.
I want to route audio from other software through Media Center
Complete Audio Setup so that you can be sure Media Center can play audio itself and then setup the WDM Driver which allows Media Center to process audio for any other app on your PC.
Review Standard View to understand how to use the Media Center UI.
This feature is only available to Windows users.
I want to listen to Internet Radio
Complete Audio Setup and then follow the Connected Media guide.
Watch Video
Media Center can play a wide variety of Video Formats, including Blu Ray, DVD and mkv, using a choice of high quality playback engines such as Red October. In combination with its DSP engine, it can handle a variety of surround formats and can up or down mix them to play on a variety of hardware. It also supports Subtitles which can be accessed via its OSD.
My videos are stored on disk and I want Media Center to catalogue it
Import your videos into your Library then complete Audio Setup and Video Setup so you can watch them.
Review DSP (and Output Format in particular) to make sure all formats can are played back correctly on your system.
Review Standard View to understand how to use the Media Center UI.
My videos are played by other software and I want Media Center to process the audio
NB: This feature is only available to Windows users.
Complete Audio Setup so that you can be sure Media Center can play audio itself and then setup the WDM Driver which allows Media Center to process audio for any other app on your PC.
Review DSP (and Output Format in particular) to make sure all formats can are played back correctly on your system.
Review Standard View to understand how to use the Media Center UI.
I need a ten foot Interface
Theatre View is Media Center’s interface for viewing MC on a TV across the room. Launch it using the Ctrl+4 keyboard shortcut or via the View > Theater View menu option.
Watch and Record Live TV
MC can record television signals using a variety of sources and hardware types, including via a Set-Top Box, OTA (Over-the-Air) signals, and clear channels from cable and satellite.
Check out the Television topic for more information.
You will need to install a TV tuner or connect to a Set Top Box (cable) and select it in MC. Then scan for channels and set up an EPG (Electronic Program Guide).
Stream content
Setup a Media Server
Media Server allows other devices to access, and playback, content indexed by the Media Center Library.
Follow the steps in Media_Server#Configuration_of_Media_Server to understand how to configure a Media Center install to act as a Media Server/
Add another Media Center Client
A Media Center instance can also be used as a client of a Media Server, see [1] to understand how to configure a Media Center install to work in this mode.
Serve content to DLNA capable devices
Media Center can serve content to both Media Center clients and DLNA devices, follow the DLNA#Setup_Instructions to setup Media Center to do this.
If you hit problems then post on the Media Network forum and be prepared to post the results of the digital media renderer analyser
Listen/Watch Content on my Phone or Tablet
There are several choices for media playback on a phone or tablet. Please see Remotes for more information.
Gizmo is a free Android app JRemote is an app available on both Android and iOS which can be bought via the respective app stores. Panel is a webapp served by Media Center and which can be accessed with any browser on any device.
Access content outside my home network
If your network is configured appropriately then it is possible to access your content from outside your home network, review Network Access for details on how to achieve this.
Use a Remote Control
Gizmo
Gizmo is available for Android and allows you to select content for playback on a selected Zone available via the connected Media Server.
Gizmo also provides a simple remote control for Theatre View
Panel
Panel is a modern webapp that runs in your browser and allows you to select content for playback on the selected Zone.
JRemote
JRemote is available for iOS and Android and allows you to select content for playback on a selected Zone available via the connected Media Server.
Organise my Content
Media Center provides a variety of ways to organise both your content and how you view that content.
Managing Metadata
Tagging enables you to add metadata to Library items. There are also Library Tools which enable some bulk operations.
These tags enable the use of Media Center’s powerful Expression Language (either directly or via the Search Wizard) which underpins much Media Center’s flexible user interface.
Organising Views
Playlists are ordered lists of specific media files while Smartlists are essentially a saved search which you can use like a playlist.
The Media Center Standard View is a Tree based view which ships with a set of default View Schemes and Media Views. Review those links to understand how to customise Media Center to your preference.
How do I extend Media Center to.
Write my own Apps that can control Media Center
Some community examples include
- https://github.com/3ll3d00d/ezmote : a react redux app with a material ui theme
- https://github.com/rlebrette/jrmc-jqm-gizmo : a jquery based webapp
- https://github.com/rlebrette/jrmc-ws-server : exposes MCWS via websockets
Change the skin
See the DevZone for details on how to create skins for both Theater View and Standard View.
What else can I do?
Take a look at Up and Running for some more advanced topics.
How do I get help?
All user support is done via our forum.
Purchasing and Licensing
MC has a 30 day trial which provides access to the full version of the software with no limitations.
Once you’re ready to purchase, you can do so from the Help menu in the program. The license is installed automatically but you will also receive e-mail from buybutton at jriver with a copy of your Registration Code. This is a permanent code that can be used to restore your license at any time in the future.
A full list of Old Versions is also available.
Review the Release Notes for a full changelog.
How to install JRiver Media Center on Ubuntu 18.04
JRiver Media Center is a multimedia application that allows the user to play and organize various types of media on a computer. Its supports several operating system such us Linux, Windows and Mac OS X. In this tutorial, we will cover the installation of JRiver Media Center on Ubuntu 18.04.
Installation
Download the JRiver Media Center debian package by using wget command.
[email protected]:~# wget http://files.jriver.com/mediacenter/channels/v24/latest/MediaCenter-24.0.28-amd64.deb --2018-09-17 15:44:18-- http://files.jriver.com/mediacenter/channels/v24/latest/MediaCenter-24.0.28-amd64.deb Resolving files.jriver.com (files.jriver.com). 52.216.168.243 Connecting to files.jriver.com (files.jriver.com)|52.216.168.243|:80. connected. HTTP request sent, awaiting response. 200 OK Length: 37746638 (36M) [application/octet-stream] Saving to: ‘MediaCenter-24.0.28-amd64.deb’ MediaCenter-24.0.28-amd64.deb 100%[==============================================>] 36.00M 685KB/s in 70s 2018-09-17 15:45:29 (525 KB/s) - ‘MediaCenter-24.0.28-amd64.deb’ saved [37746638/37746638] Install the JRiver Media Center application by using gdebi command.
[email protected]:~# gdebi MediaCenter-24.0.28-amd64.deb Reading package lists. Done Building dependency tree Reading state information. Done Reading state information. Done Media Player Provides a Media Player and DLNA server/renderer/control point Do you want to install the software package? [y/N]:y Selecting previously unselected package mediacenter24. (Reading database . 129637 files and directories currently installed.) Preparing to unpack MediaCenter-24.0.28-amd64.deb . Unpacking mediacenter24 (24.0.28) . Setting up mediacenter24 (24.0.28) . Processing triggers for gnome-menus (3.13.3-11ubuntu1) . Processing triggers for desktop-file-utils (0.23-1ubuntu3) . Processing triggers for mime-support (3.60ubuntu1) . Processing triggers for shared-mime-info (1.9-2) . 
Once Installation is done you can access the JRiver Media Center from the Menu as shown here,
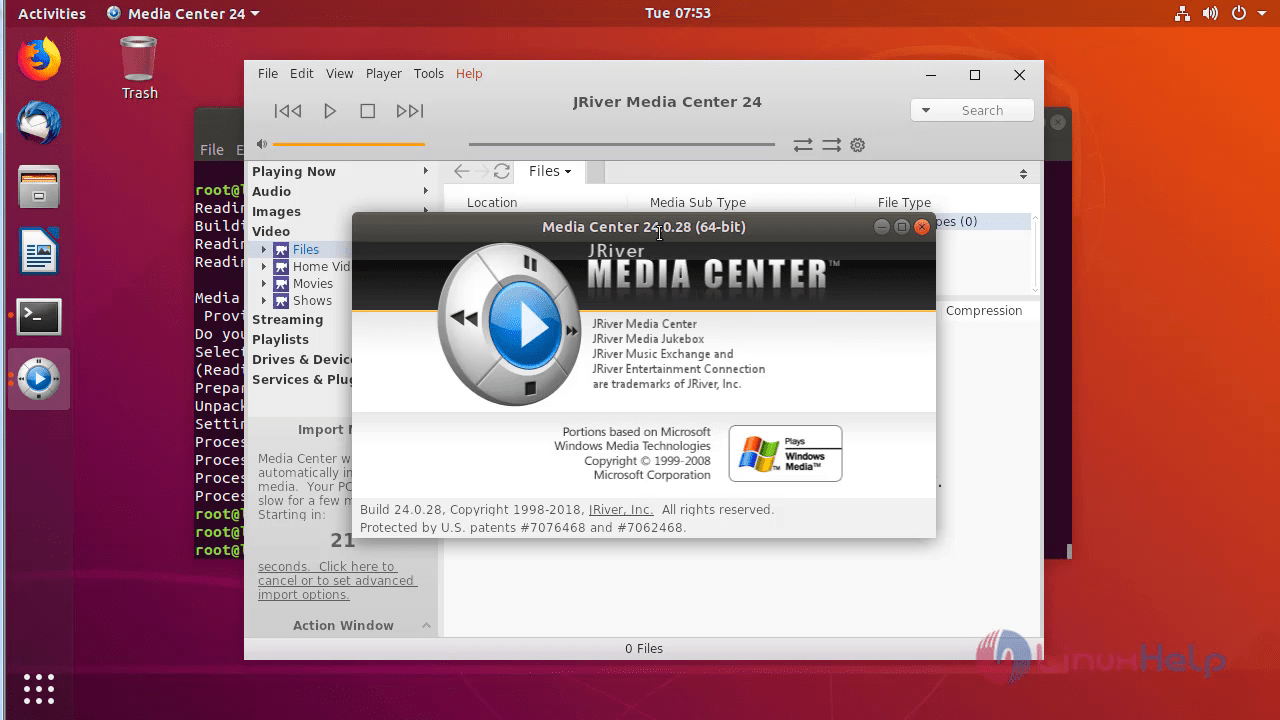
The version of JRiver Media Center can be found in Help-> about With this, the method to install JRiver Media Center on Ubuntu 18.04 comes to an end.
JRiver Id — Moving Your Media
You can use an Id as a stand-alone media computer, or as a basic HTPC, and control it with a phone. You can play to it as a DLNA Renderer, or from it as a DLNA Server. It can be a Backup Server. It’s small (about 4″ wide) and low power (about 10 watts) so you can run it 24/7. It has the audio features of JRiver Media Center. The Id 300 and above also play video. It works with JRiver’s Media Network.
Available Several Ways
Each choice below includes the Linux OS, JRiver Media Center for Linux, the Id firmware, and the license for MC.
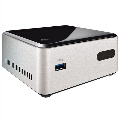 | Id 300 $315 | Intel NUC7, 4GB RAM, 240GB SSD. More Details |
| Id 302 $395 | NUC 7, 4GB RAM, 2TB spinning drive |
| IdPi $39 | The Id software, including JRiver Media Center, Raspbian Linux, and Engen, on a 32GB microSD card. Ready to insert in your Raspberry Pi 4 Model B. Only the micro SD card is included. Requires a case and power supply. Makes a good player for audio when used as a DLNA Renderer. No video. Other models | |
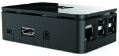 | IdPi $115 (fully baked) | Raspberry Pi 4 Model B with Id installed. Includes a case and power supply. Makes a good player for audio when used as a DLNA Renderer. No video. No storage. |
All Id devices require a receiver, TV, or DAC for audio output. A USB mouse and keyboard may also be needed.
Which One Fits?
| Model | Storage Available | CD’s Ripped to Lossless |
| Id 300 | 200GB | 500 |
| 302 | 2 TB | 5000 |
| IdPi mSD | None | 0 |
Order Now
Paypal — You can order by contacting sales at jriver d o t c o m. If you tell us your Paypal address, we will send you a Paypal invoice for your approval. When you pay the invoice, we will ship the device.
Credit Card — Please call 612 677 8200 and ask for Id Sales. We’re in the U.S. Central Time Zone.
Shipping will add approximately 10% to U.S. orders and 20% to those shipped outside the United States.
When we receive your order, we’ll advise on delivery. Normally it ships within 1 or 2 days.
Returns are accepted for 30 days from shipment date, and are subject to a 20% restocking charge. All products have a one year warranty. Prices are subject to change without notice. The shipment may be subject to import duties in your country.