- How to completely uninstall Java?
- 9 Answers 9
- Как удалить Java в Ubuntu
- Как удалить Java в Ubuntu 20.04
- 1. Как узнать тип Java
- 2. Как узнать версию Java
- 3. Как узнать способ установки Java
- 4. Удаление Java
- Выводы
- How to Completely Uninstall Java for Linux?
- How to Completely Uninstall Java for Linux?
- Conclusion
- Uninstall Java From Ubuntu
- How to uninstall Java from Ubuntu using apt
- Remove JDK from Ubuntu (Default version)
- Remove JRE from Ubuntu (Default version)
- Remove a specific version of JDK from Ubuntu
- Remove a specific version of JRE from Ubuntu
- How to remove Java manually from Ubuntu
- Want to install Java again? Here you have it
How to completely uninstall Java?
How can I completely remove all traces of Java on my system? I already know how to install it in case I need it again.
9 Answers 9
dpkg-query -W -f='$\n' | grep -E -e '^(ia32-)?(sun|oracle)-java' -e '^openjdk-' -e '^icedtea' -e '^(default|gcj)-j(re|dk)' -e '^gcj-(.*)-j(re|dk)' -e '^java-common' | xargs sudo apt-get -y remove sudo apt-get -y autoremove dpkg -l | grep ^rc | awk '' | xargs sudo apt-get -y purge sudo bash -c 'ls -d /home/*/.java' | xargs sudo rm -rf for g in ControlPanel java java_vm javaws jcontrol jexec keytool mozilla-javaplugin.so orbd pack200 policytool rmid rmiregistry servertool tnameserv unpack200 appletviewer apt extcheck HtmlConverter idlj jar jarsigner javac javadoc javah javap jconsole jdb jhat jinfo jmap jps jrunscript jsadebugd jstack jstat jstatd native2ascii rmic schemagen serialver wsgen wsimport xjc xulrunner-1.9-javaplugin.so; do sudo update-alternatives --remove-all $g; done sudo updatedb sudo locate -b '\pack200' @JorgeCastro, absolutely. I built those commands one by one, then piped it all together and I ran all of them in different Java installation scenarios that I have for test purposes in some workstations at work. I really paid attention to the output of grep that is piped to apt-get remove , I think that it covers almost all possibilities regarding installation by deb packages.
Although the presented sequence of commands works on most cases, I think my answer needs some improvements. Everybody, please, feel free to suggest changes that can improve it, like better explanation of each command or pointing out a scenario not covered by them.
+1 for the answer. I recently found a scenario where removing openjdk causes installation of other java packages. A workaround for this problem is disabling all of the repository and then execute the removal command.
To completely remove OpenJDK on Ubuntu 11.10 (this may or may not be sufficient on other versions of Ubuntu), run:
sudo apt-get purge openjdk-\* icedtea-\* icedtea6-\* If you want instructions for removing the proprietary Oracle («Sun») version of Java, then you’ll have to specify how you installed it. (If you edit your question to indicate this and leave a comment to this answer, I’ll try to add information about how to remove that too.)
I tried the above, and it completed without error on Ubuntu 11, but after I can still run java -version and get back openjdk version «11.0.3» 2019-04-16
To uninstall Oracle Java 7, just press Ctrl + Alt + T on your keyboard to open Terminal. When it opens, run the command below.
sudo update-alternatives --display java To check the setup before uninstalling Java.
Next, remove symlinks
(replace the word (version)with your Java version. DO java -version to get yours. So if your version is 1.7.0_03, you would type sudo update-alternatives —remove «java» «/usr/lib/jvm/jdk1.7.0_03/bin/java» )
sudo update-alternatives --remove "java" "/usr/lib/jvm/jdk/bin/java" sudo update-alternatives --remove "javac" "/usr/lib/jvm/jdk/bin/javac" sudo update-alternatives --remove "javaws" "/usr/lib/jvm/jdk/bin/javaws" verify that the symlinks were removed
java -version javac -version which javaws The next 2 commands must be type excatly perfectly to avoid permanently destroying your system.
cd /usr/lib/jvm sudo rm -rf jdk
sudo update-alternatives --config java sudo update-alternatives --config javac sudo update-alternatives --config javaws Delete the line with JAVA_HOME 1
To uninstall OpenJDK (if installed). First check which OpenJDK packages are installed.
sudo dpkg --list | grep -i jdk sudo apt-get purge openjdk* Uninstall OpenJDK related packages.
sudo apt-get purge icedtea-* openjdk-* Check that all OpenJDK packages have been removed.
sudo dpkg --list | grep -i jdk Как удалить Java в Ubuntu
Java — это очень популярный язык программирования, разработанный в компании Sun Microsystems, ныне принадлежащей корпорации Oracle. Существует две реализации Java открытая и свободная OpenJDK и проприетарная Oracle Java.
Если вы захотите установить одну из них, а другая уже установлена, то первую придется удалить. В этой статье будет рассмотрено удаление Java в Ubuntu 20.04, а также будет показано как определять тип и версию Java установленной на устройстве.
Как удалить Java в Ubuntu 20.04
1. Как узнать тип Java
Перед удалением Java с компьютера сначала необходимо узнать какой тип Java установлен в системе. Если Java ставилась только для запуска приложений, скорее всего это будет JRE (Java Runtime Environment — содержит только окружение для запуска программ). Если Java устанавливалась для разработки ПО, то в данном случае будет одна из следующих версий — Open JDK (полностью открытая версия) или Oracle Java (проприетарная версия от Oracle с дополнительными возможностями и поддержкой).
2. Как узнать версию Java
Чтобы узнать какая версия Java установлена в системе, а также узнать какой тип установлен необходимо выполнить команду в терминале:
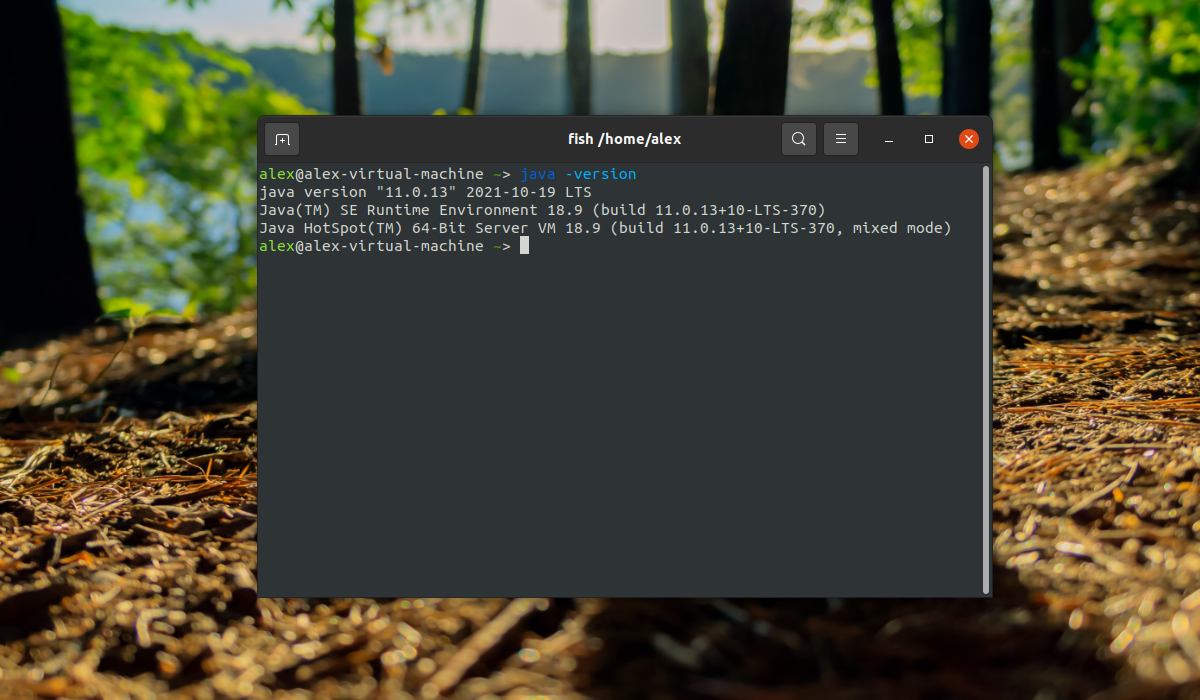
В данном примере в системе установлена Java с типом JRE и версией 11.0.13.
3. Как узнать способ установки Java
Иногда требуется определить способ установки Java. Чтобы узнать это, необходимо выполнить команду:
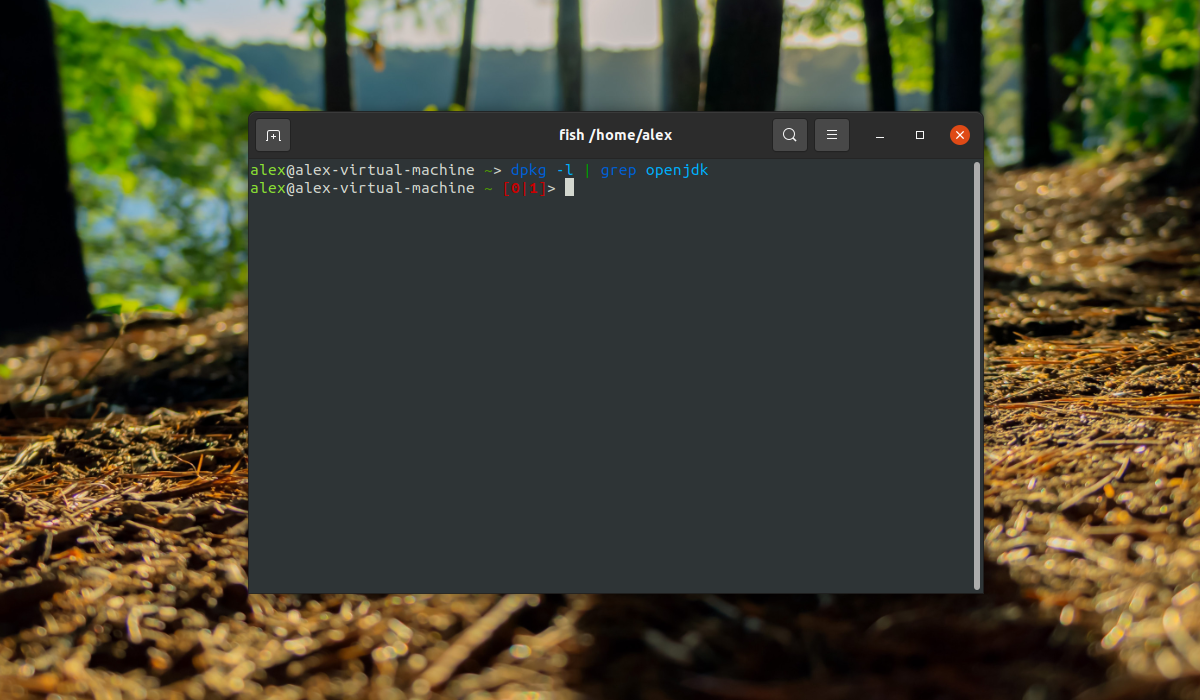
Если команда ничего не вернула значит в система установлена Java от Oracle. Чтобы это проверить необходимо выполнить команду:

Также из вывода команды можно узнать, установлен ли пакет из официального репозитория или же из стороннего репозитория. На скриншоте выше можно увидеть, что Java в системе установлен при помощи стороннего репозитория под названием linuxprising. Если в выводе команды имя репозитория не отображается, значит Java была установлена при помощи официального репозитория Ubuntu.
4. Удаление Java
Для удаления Java из Ubuntu необходимо использовать команду:
sudo apt purge oracle-java11*

Команда выше удалит версию Java от Oracle. Если в системе установлена бесплатная версия (OpenJDK) необходимо выполнить следующую команду:
Также вместо 11 версии необходимо подставить ту, которая установлена в системе.
Выводы
В этой статье было описано удаление Java в Ubuntu 20.04. Сама процедура удаления несложная и буквально выполняется при помощи одной команды. Надеюсь, информация из статьи была вам полезной.
Обнаружили ошибку в тексте? Сообщите мне об этом. Выделите текст с ошибкой и нажмите Ctrl+Enter.
How to Completely Uninstall Java for Linux?
In Linux, Java is a widely used and well-reputed programming language. Like other programming languages, it offers “JDK (Java Development Kit)” a complete environment for the execution of code. It contains development tools and the “JRE(Java Runtime Environment)” that stores libraries.
While working with Java in Linux, its installation and uninstallation have a key role.
This post shows the procedure to completely remove Java for Linux:
How to Completely Uninstall Java for Linux?
The uninstallation procedure of Java follows some essential steps that are described below:
Step 1: Check the JDK Version
First, check the “JDK” services installed in the system. It may be “Openjdk” or the “Oracle JDK”. To perform this task use the “java” followed by the “–version” flag in the terminal:

The currently installed “openjdk” version is “11.0.17”.
Step 2: Uninstall OpenJDK
Now, execute the uninstallation command with the help of the default package manager of majorly used Linux distributions. The commands need the administrator privileges i.e “sudo”:
$ sudo yum remove jdk[version] #For CentOS/RHEL $ sudo dnf remove openjdk* #For Fedora $ sudo apt remove --purge openjdk* #For Ubuntu/Debain-Based
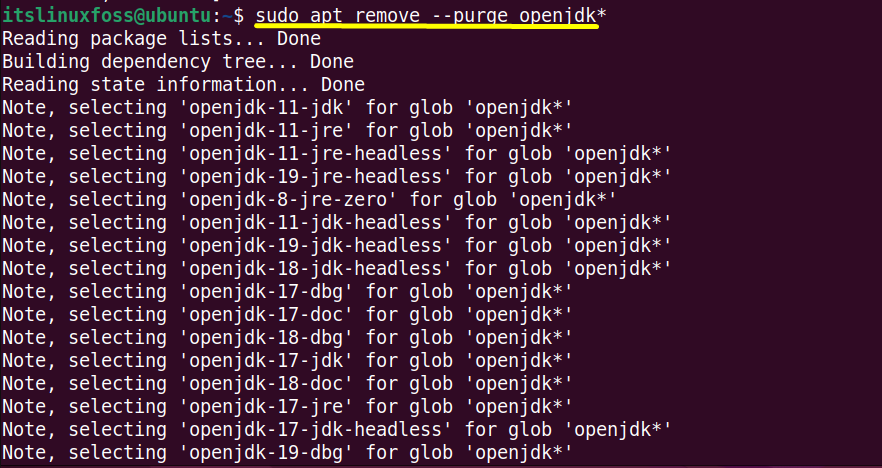
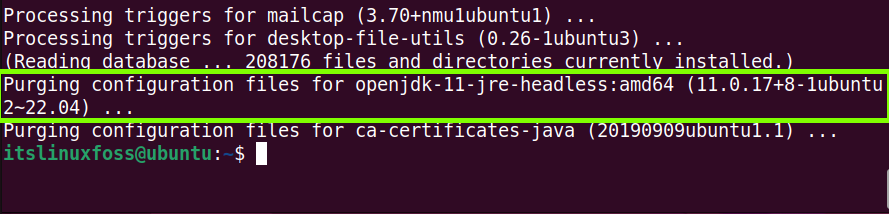
All the configuration and installation files of “OpenJDK” have been removed from the system completely.
Step 3: Completely Remove Java Files
The additional dependencies are installed while installing any application in a Linux system. These dependencies are useless after uninstalling the application.
It is recommended to “auto-remove” all these unneeded dependencies using the default package managers of your Linux system:
$ sudo yum autoremove jdk[version] #For CentOS/RHEL $ sudo dnf autoremove java[version]openjdk #For Fedora $ sudo apt autoremove openjdk* #For Ubuntu/Debain-Based
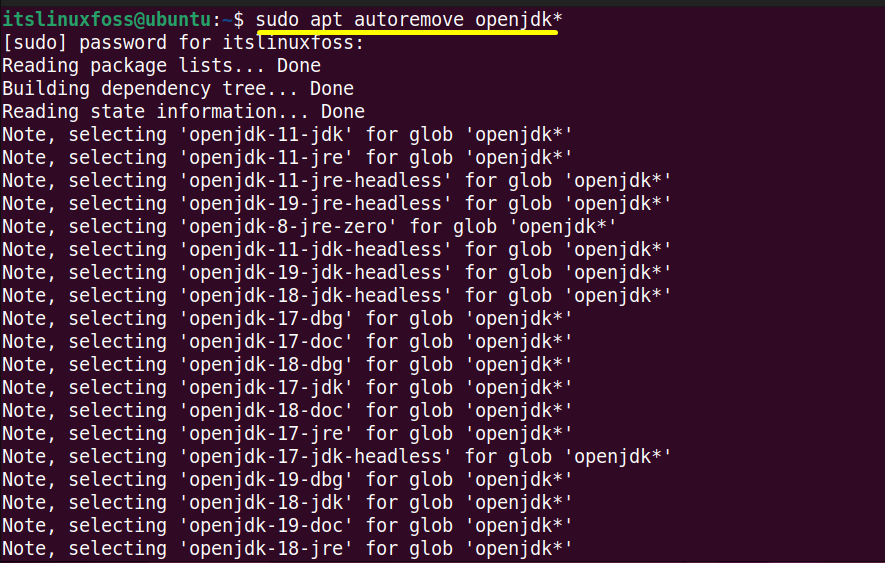
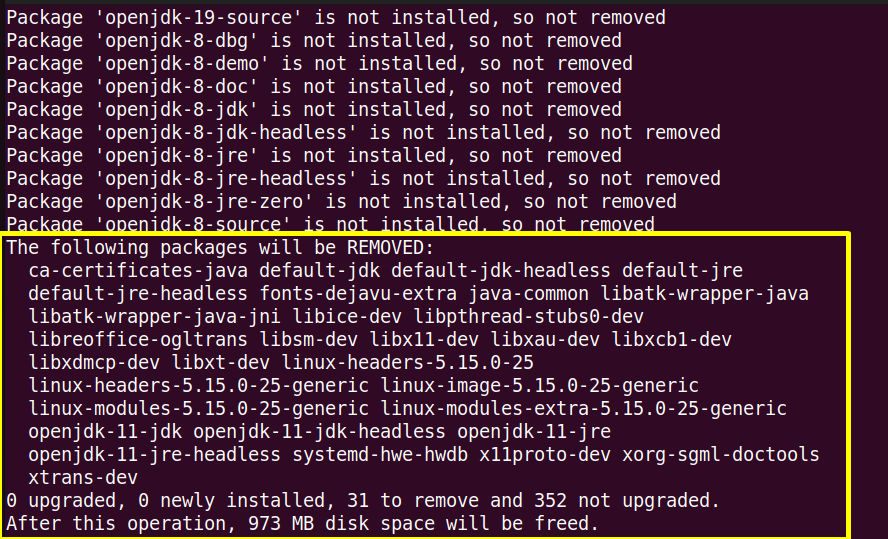
Here “31” Java packages have been removed from the current Linux system Ubuntu.
Step 4: Verify the Java
Again execute the “java” version command to verify whether it is completely removed or not:
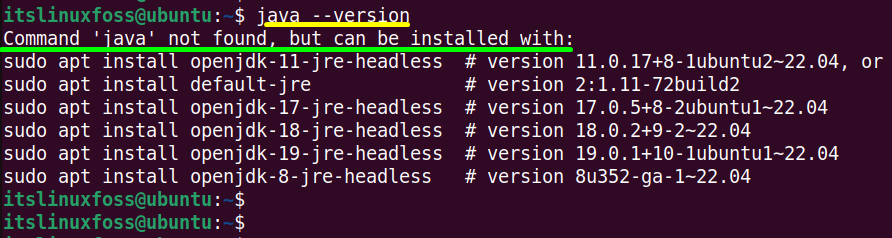
Now, the output shows that “java not found” which means that it is no more in the system.
Conclusion
In Linux and its frequently used distros, “java” can be completely uninstalled using their default package managers. For this purpose, the “remove” flag uninstalls the executable files of Java while “purge” removes its configuration files. This post has provided a brief detail to completely remove java for Linux.
Uninstall Java From Ubuntu


Once you are done with your Java projects, you may want to remove Java from Ubuntu.
So in this guide, I will walk you through the uninstallation process for different scenarios:
- Removal process if you used the apt package manager for the installation
- Uninstallation if you manually installed .deb package
So let’s start with the first one.
How to uninstall Java from Ubuntu using apt
There are 2 ways by which you can install Java in Ubuntu:
And using Ubuntu, you can also specify which version you want to install of JDE and JRE.
So I will be addressing all of them.
Remove JDK from Ubuntu (Default version)
So if you installed a default version given by the apt of JDK, you will have to use the following command to remove the JDK:
sudo apt remove default-jdkRemove JRE from Ubuntu (Default version)
And if you’ve installed the default version of JRE with apt, all you have to do is execute the following command for removal:
sudo apt remove default-jreBut what if you went with a specific version of JDK and JRE?
Remove a specific version of JDK from Ubuntu
So if you’ve installed a specific version of JDK, for removal, you will have to execute the apt remove command in the following manner:
sudo apt remove openjdk-[version_no]-jdkFor reference, I have installed JDK version 17 so if I were to remove it, I will be using the following:
sudo apt remove openjdk-17-jdkRemove a specific version of JRE from Ubuntu
If you installed a specific version of JRE on your Ubuntu machine, you can use the similar command syntax as above to remove JRE:
sudo apt remove openjdk-[version_no]-jreSo let’s say I want to remove the JRE version 17, then, I will be using the following:
sudo apt remove openjdk-17-jreHow to remove Java manually from Ubuntu
This section is useful for those who used the .deb file to install Java in Ubuntu.
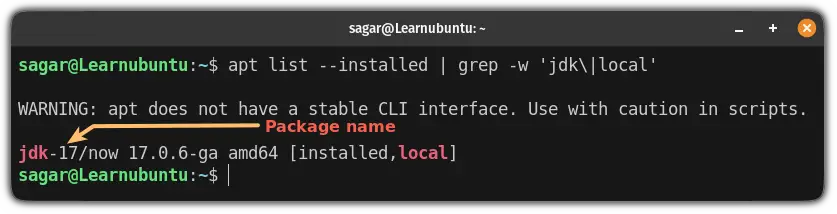
The first step is to find the name of the installed package as you have to know the exact name of the package for removal.
To do so, here, I will be using the grep command with the apt command:
apt list --installed | grep -w 'jdk\|local'If you get multiple results, look for the [installed,local] and the first word will be the package name:
Once you find the package name, you can use the traditional apt remove command to remove the package:
sudo apt remove [package_name]In my case, its jdk-17 so I will be using the following command for uninstallation:
Want to install Java again? Here you have it
In case you want to install Java again, we have a detailed guide for that purpose covering almost every aspect of installing Java:
I hope you will find this guide helpful.
And if you have any questions, drop a comment.