- Установка MongoDB в Ubuntu
- Установка MongoDB
- 1. Установка из репозитория дистрибутива
- 1. Установка из репозитория разработчиков
- Настройка MongoDB
- Удаление MongoDB
- Install MongoDB Community Edition on Ubuntu
- Overview
- MongoDB Version
- Considerations
- Platform Support
- Note
- EOL Notice
- Production Notes
- Official MongoDB Packages
- Important
- Install MongoDB Community Edition
- Import the public key used by the package management system.
- Create a list file for MongoDB.
- Reload local package database.
- Install the MongoDB packages.
- Run MongoDB Community Edition
- Note
- Procedure
Установка MongoDB в Ubuntu
MongoDB — популярная реализация нереляционной базы данных. Если в двух словах, то базы данных бывают нескольких типов. Базы реляционного типа — самые популярные, хранят данные в записях таблицы, которая состоит из столбцов и строк. MongoDB принадлежит к объектно-ориентированному типу. Главное отличие этого типа в том, что работа и хранение данных осуществляется с помощью объектов, точно так же, как это делается в популярных объективно-ориентированных языках программирования (C++, Java).
Реляционные базы данных обычно используются для данных, которым важна сохранность и максимальная надёжность. Объектно-ориентированные базы данных более быстрые, но менее надёжные и часто используются для хранения различных событий и статистических данных. В этой инструкции я расскажу, как выполняется установка MongoDB Ubuntu 20.04.
Установка MongoDB
1. Установка из репозитория дистрибутива
В современных дистрибутивах утилита добавлена в официальный репозиторий современных версий Ubuntu. Для её установки достаточно выполнить:
sudo apt install mongodb-server
Затем можно посмотреть состояние службы:
sudo systemctl status mongod

И добавить её в автозагрузку, если это необходимо:
sudo systemctl enable mongod
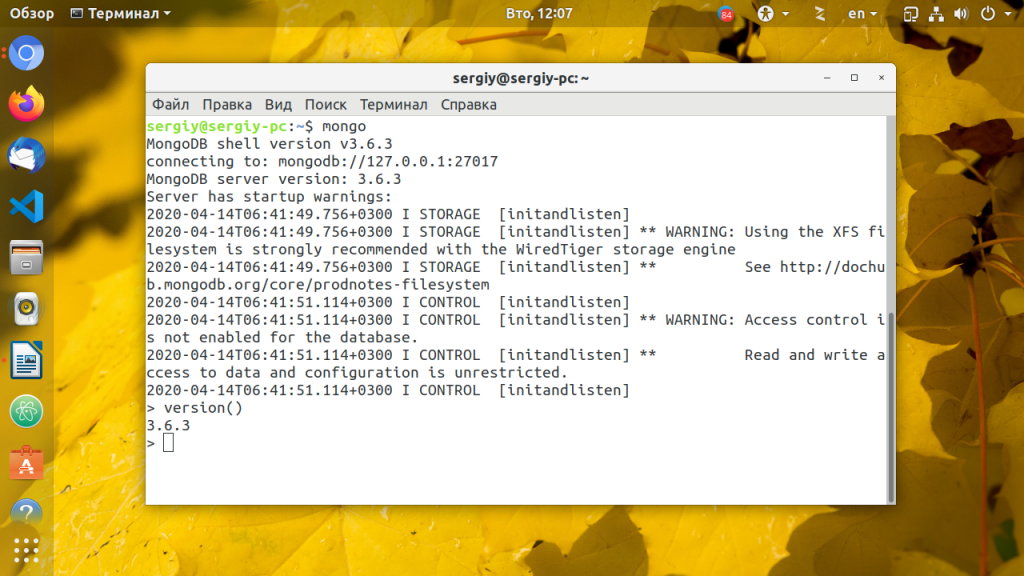
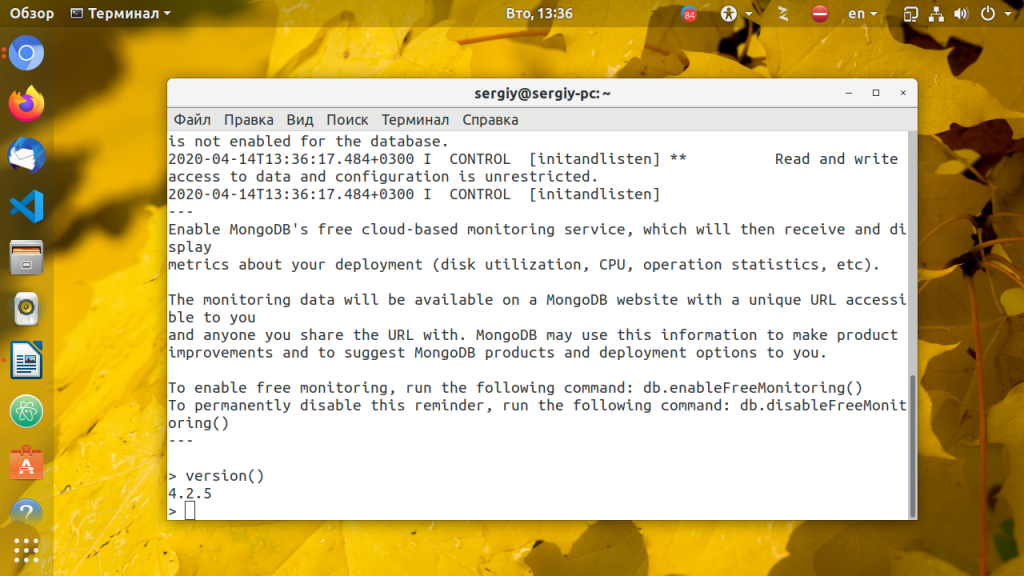
Работать с базой данных можно через клиент командной строки Mongo. Например, давайте посмотрим версию базы данных:
Если вы собираетесь удалить MongoDB, то обратите внимание, что эта база данных может уже использоваться каким-либо приложением, поэтому сначала убедитесь, что, удалив её, вы ничего не сломаете.
1. Установка из репозитория разработчиков
Если вы хотите получить самую свежую версию программы, то необходимо устанавливать её из репозитория разработчиков MongoDB. Прежде чем устанавливать эту версию, надо удалить версию из официальных репозиториев, если она была установлена:
Далее нужно интегрировать публичный ключ, чтобы система приняла пакет, для этого наберите в терминале:
wget -qO — https://www.mongodb.org/static/pgp/server-4.2.asc | sudo apt-key add —
С помощью следующей команды создаём список файлов пакета:
echo «deb [ arch=amd64,arm64 ] https://repo.mongodb.org/apt/ubuntu bionic/mongodb-org/4.2 multiverse» | sudo tee /etc/apt/sources.list.d/mongodb-org-4.2.list
Обновим базу данных локальных пакетов:
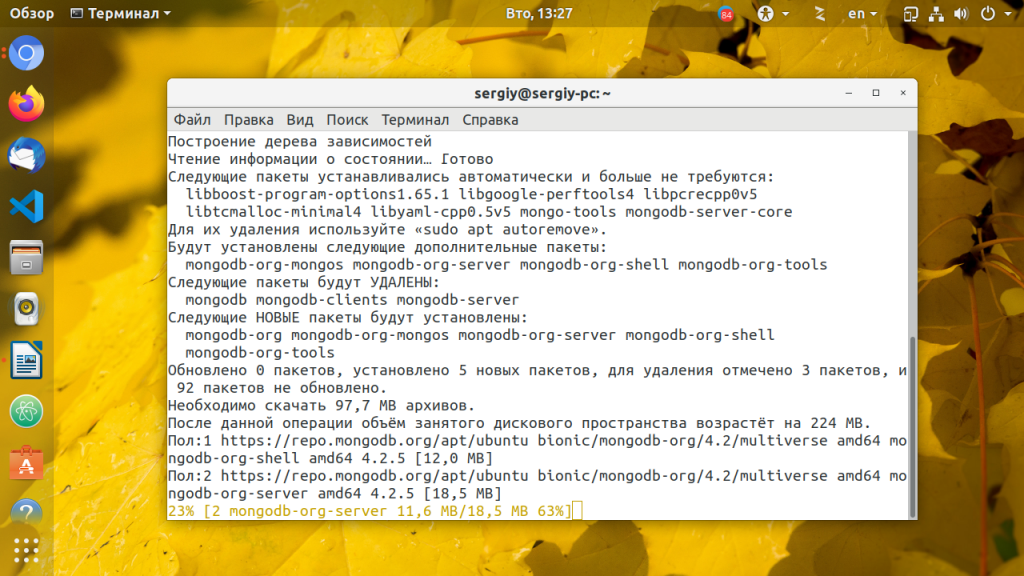
И можно переходить к установке:
sudo apt install -y mongodb-org
Далее надо запустить сервис mongod и добавить его в автозагрузку:
sudo systemctl start mongod
sudo systemctl enable mongod
sudo systemctl status mongod
Если что-то не работает, логи сервиса можно посмотреть в папке /var/log/mongodb, файлы баз данных — /var/lib/mongodb.
Настройка MongoDB
По умолчанию база данных не защищена паролем и подключится к ней может кто угодно. Чтобы этого избежать, надо защитить базу данных. Для этого нужно создать базу данных и пользователя для неё, который сможет управлять всеми базами данных. Войдите в интерфейс управления Mongo:
Переключитесь в базу данных admin и создайте нового пользователя:

Здесь мы задаём имя пользователя Admin и разрешаем ему доступ ко всем базам данных. После нажатия Enter программа запросит пароль для нового пользователя. Введите пароль и всё будет готово.
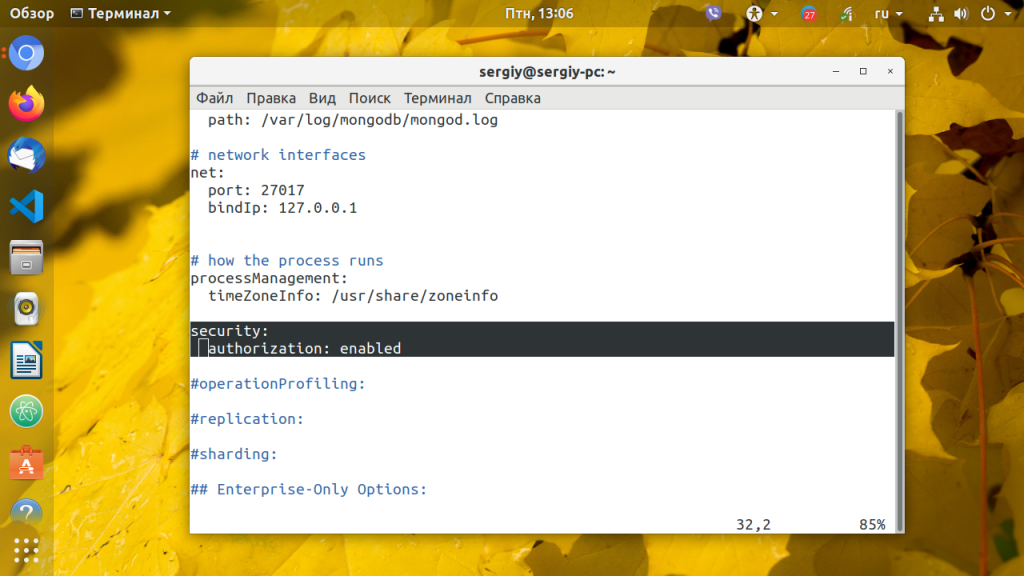
Далее откройте конфигурационный файл /etc/mongod.conf и добавьте туда такие строчки:
security:
authorization: enabled
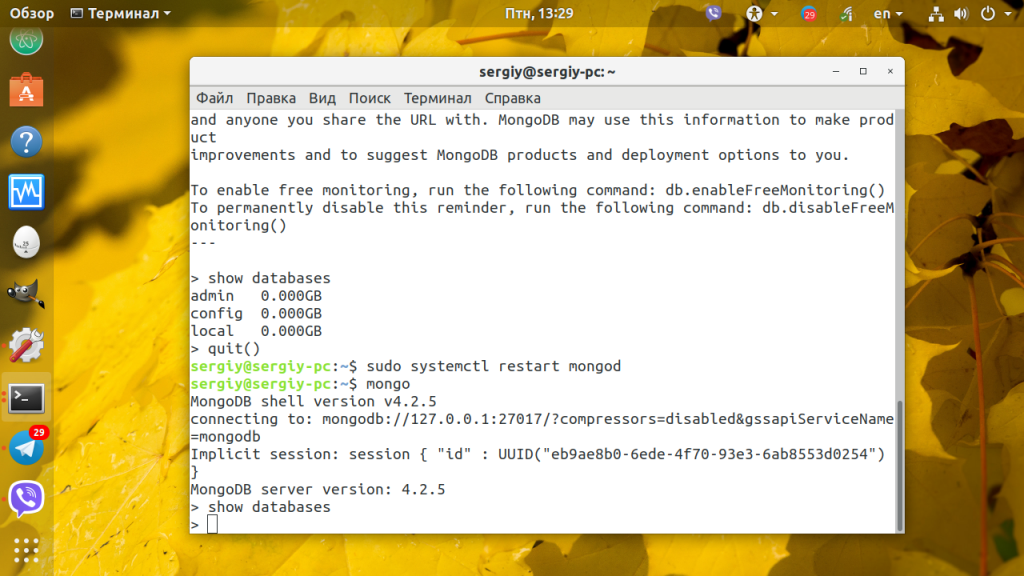
Затем перезапустите MongoDB:
sudo systemctl restart mongod
После этого вы все ещё сможете подключится к MongoDB с помощью клиента Mongo, но чтобы выполнить какие-либо действия, вам понадобится авторизация. Например, вы не сможете посмотреть список баз данных, создать пользователя или получить данные из базы. Например, команда show databases вернёт пустой результат:
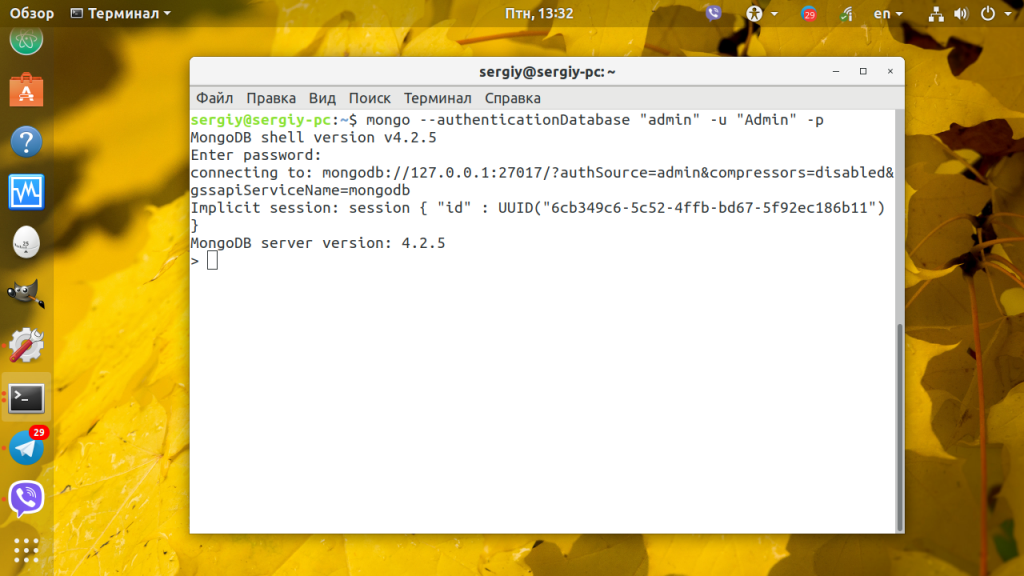
Для подключения с авторизацией используйте команду:
$ mongo —authenticationDatabase имя_базы_данных -u имя_пользователя -p
mongo —authenticationDatabase «admin» -u «Admin» -p
Удаление MongoDB
Чтобы удалить MongoDB с компьютера, наберите:
sudo apt purge mongodb-org*
Или если вы устанавливали программу из официальных репозиториев, используйте:
Теперь вы знаете, как установить MongoDB Ubuntu 18.04 на ваш компьютер, а также как проверить, какая версия у вас установлена, и работает ли вообще эта база данных.
Обнаружили ошибку в тексте? Сообщите мне об этом. Выделите текст с ошибкой и нажмите Ctrl+Enter.
Install MongoDB Community Edition on Ubuntu
is a hosted MongoDB service option in the cloud which requires no installation overhead and offers a free tier to get started.
Overview
Use this tutorial to install MongoDB 6.0 Community Edition on LTS (long-term support) releases of Ubuntu Linux using the apt package manager.
MongoDB Version
This tutorial installs MongoDB 6.0 Community Edition. To install a different version of MongoDB Community , use the version drop-down menu in the upper-left corner of this page to select the documentation for that version.
Considerations
Platform Support
Note
EOL Notice
- MongoDB 5.0 Community Edition removes support for Ubuntu 16.04 on x86_64
- MongoDB 5.0 Community Edition removes support for Ubuntu 18.04 on s390x
MongoDB 6.0 Community Edition supports the following 64-bit Ubuntu LTS (long-term support) releases on x86_64 architecture:
- 22.04 LTS («Jammy») (Starting in MongoDB 6.0.4)
- 20.04 LTS («Focal»)
- 18.04 LTS («Bionic»)
- 16.04 LTS («Xenial»)
MongoDB only supports the 64-bit versions of these platforms.
MongoDB 6.0 Community Edition on Ubuntu also supports the ARM64 architecture on select platforms.
See Platform Support for more information.
Production Notes
Before deploying MongoDB in a production environment, consider the Production Notes document which offers performance considerations and configuration recommendations for production MongoDB deployments.
Official MongoDB Packages
To install MongoDB Community on your Ubuntu system, these instructions will use the official mongodb-org package, which is maintained and supported by MongoDB Inc. The official mongodb-org package always contains the latest version of MongoDB, and is available from its own dedicated repo.
Important
The mongodb package provided by Ubuntu is not maintained by MongoDB Inc. and conflicts with the official mongodb-org package. If you have already installed the mongodb package on your Ubuntu system, you must first uninstall the mongodb package before proceeding with these instructions.
See MongoDB Community Edition Packages for the complete list of official packages.
Install MongoDB Community Edition
Follow these steps to install MongoDB Community Edition using the apt package manager.
Import the public key used by the package management system.
From a terminal, install gnupg and curl if they are not already available:
sudo apt-get install gnupg curl
Issue the following command to import the MongoDB public GPG Key from https://pgp.mongodb.com/server-6.0.asc
curl -fsSL https:/ /pgp.mongodb.com/server- 6.0.asc | \ sudo gpg -o /usr/share/keyrings/mongodb-server- 6.0.gpg \ --dearmor
Create a list file for MongoDB.
Create the list file /etc/apt/sources.list.d/mongodb-org-6.0.list for your version of Ubuntu.
Click on the appropriate tab for your version of Ubuntu. If you are unsure of what Ubuntu version the host is running, open a terminal or shell on the host and execute lsb_release -dc .
Reload local package database.
Issue the following command to reload the local package database:
Install the MongoDB packages.
You can install either the latest stable version of MongoDB or a specific version of MongoDB.
Optional. Although you can specify any available version of MongoDB, apt-get will upgrade the packages when a newer version becomes available. To prevent unintended upgrades, you can pin the package at the currently installed version:
echo "mongodb-org hold" | sudo dpkg --set-selections echo "mongodb-org-database hold" | sudo dpkg --set-selections echo "mongodb-org-server hold" | sudo dpkg --set-selections echo "mongodb-mongosh hold" | sudo dpkg --set-selections echo "mongodb-org-mongos hold" | sudo dpkg --set-selections echo "mongodb-org-tools hold" | sudo dpkg --set-selections
For help with troubleshooting errors encountered while installing MongoDB on Ubuntu, see our troubleshooting guide.
Run MongoDB Community Edition
ulimit Considerations Most Unix-like operating systems limit the system resources that a process may use. These limits may negatively impact MongoDB operation, and should be adjusted. See UNIX ulimit Settings for the recommended settings for your platform.
Note
Starting in MongoDB 4.4, a startup error is generated if the ulimit value for number of open files is under 64000 .
If you installed via the package manager, the data directory /var/lib/mongodb and the log directory /var/log/mongodb are created during the installation.
By default, MongoDB runs using the mongodb user account. If you change the user that runs the MongoDB process, you must also modify the permission to the data and log directories to give this user access to these directories.
Configuration File The official MongoDB package includes a configuration file ( /etc/mongod.conf ). These settings (such as the data directory and log directory specifications) take effect upon startup. That is, if you change the configuration file while the MongoDB instance is running, you must restart the instance for the changes to take effect.
Procedure
Follow these steps to run MongoDB Community Edition on your system. These instructions assume that you are using the official mongodb-org package — not the unofficial mongodb package provided by Ubuntu — and are using the default settings.
Init System
To run and manage your mongod process, you will be using your operating system’s built-in init system. Recent versions of Linux tend to use systemd (which uses the systemctl command), while older versions of Linux tend to use System V init (which uses the service command).
If you are unsure which init system your platform uses, run the following command:
Then select the appropriate tab below based on the result:
- systemd — select the systemd (systemctl) tab below.
- init — select the System V Init (service) tab below.