- Kali linux 2021 virtualbox
- Wizard
- Kali linux 2021 virtualbox
- Preparation
- Download
- Setup
- Easily Install Kali Linux 2021.3 on VirtualBox
- Install Kali Linux 2021.3 on VirtualBox
- Download Kali Linux 2021.3 Image
- Create New Virtual Machine on VirtualBox
- Set the Name and OS type of the VM
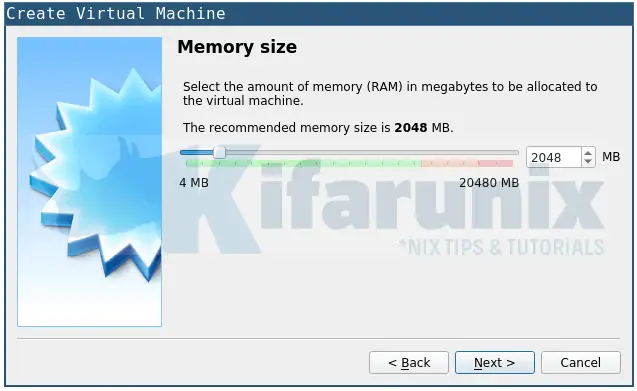
- Define the Memory Size of the VM
- Create Virtual Hard Disk for the VM
- Define VM Hard Disk File Type
- Define Kali Linux Virtual Machine Settings
- Allocate vCPU cores to the VM
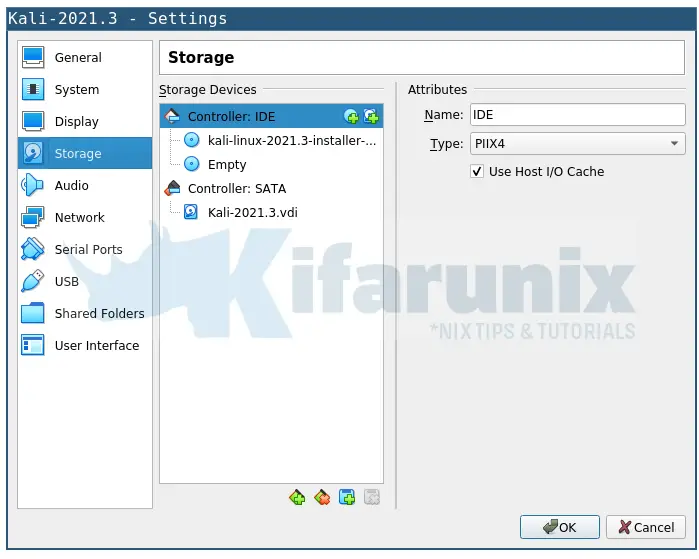
- Attach the Installation Medium
- Set the VM Networks
- Install Kali Linux 2021.3 on VirtualBox
- Booting into Kali Linux 2021.3 on VirtualBox
- Related Tutorials
- SUPPORT US VIA A VIRTUAL CUP OF COFFEE
Kali linux 2021 virtualbox
This guide is about virtualizing Kali Linux inside of VirtualBox, allowing you to have a Kali VM. This is a great way to use Kali, as it is completely separate from the host, allows you to interact with other VMs (as well as the host machine and other machines on the network), and allows you to revert to snapshots.
You may wish to follow our other guide if you are trying to install VirtualBox on Kali Linux (as a host).
The guide below is what we use to generate our pre-made Kali Linux VirtualBox images. You may alter this to your needs. We always generate the images using the latest version of VirtualBox.
You may need to enable virtualization in your BIOS/UEFI for (e.g. Intel VT-x/AMD-V)
Wizard
Upon starting up VirtualBox, select “New” (Machine -> New).
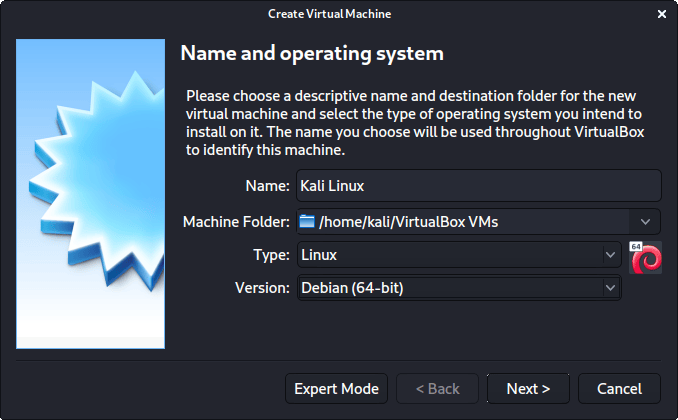
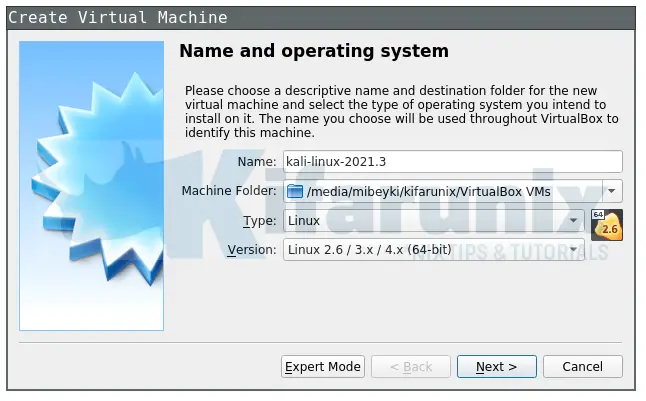
The next screen is “Name and operating system” which is where you name the VM. This name is also used in any filenames (such as the configuration, hard disk and snapshot — which isn’t changed from this point).
We are keeping it generic in this guide (as Kali is a rolling distribution, and we update it), however for our releases, we use the version number in the name as it is a fixed release ( kali-linux-YYYY.N-vbox-ARCH . Example: kali-linux-2023.2-vbox-amd64 ).
For the “Type”, we set it as Linux . For the “Version”, we are going to be using the x64 desktop image, so we are going to select Debian (64-bit) .
“Memory size” is the next section, where we can define how much RAM to use. Again, the higher the amount of RAM, the more applications can be open and at increased performance. Various tools inside of Kali can be demanding of resources. When we make the general VMs, we select 2048 MB (2GB) for RAM, but we often increase this for our personal machines as we have high-performing devices with spare RAM which Kali can utilize.

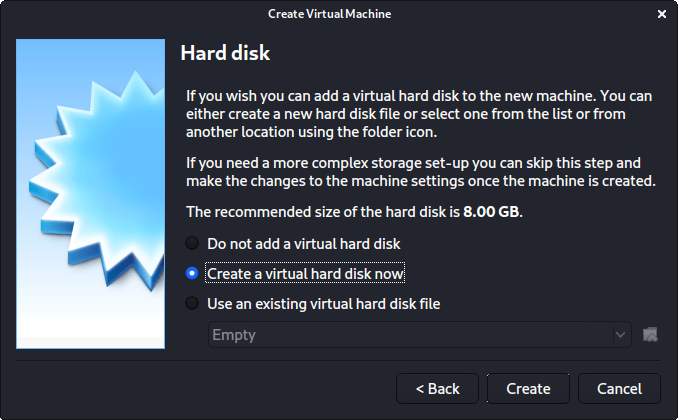
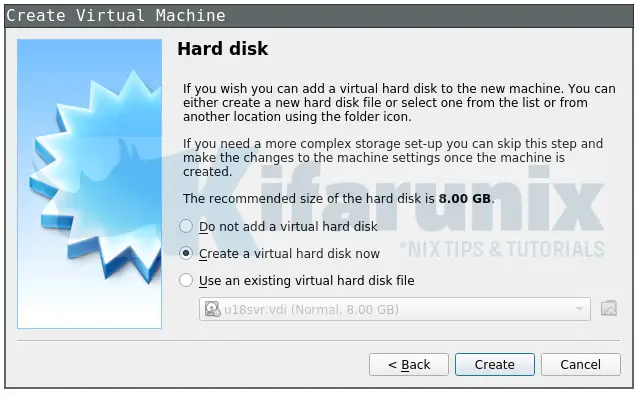
This screen below, “Hard disk”, allows us to Create a new virtual disk now .
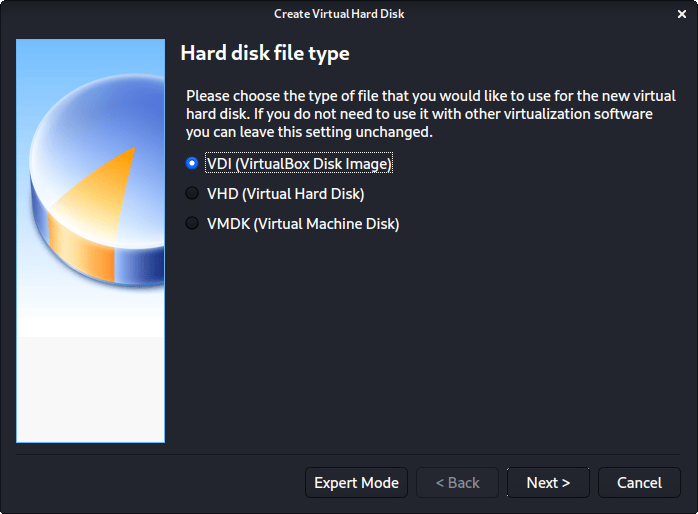
For the “Hard disk file type”, we select VDI (VirtualBox Disk Image) (and its the default option).
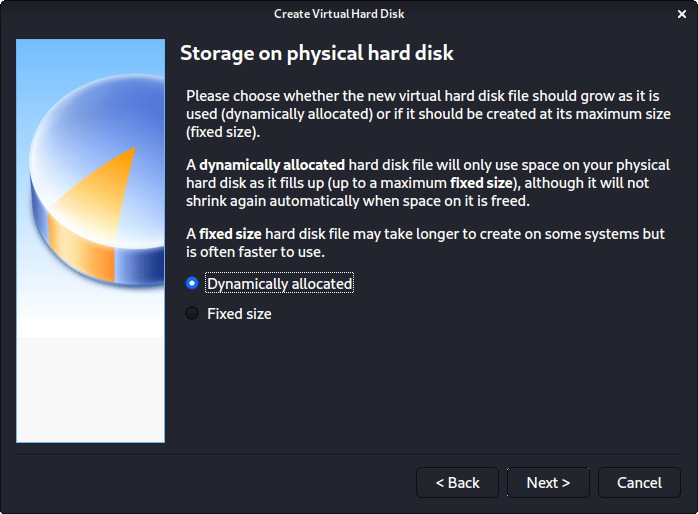
For the following screen, “Storage on physical hard disk”, we go with the default option of Dynamically allocated .
Now with “File location and size”, we can now define how large the virtual hard disk will be. We use 80.00 GB for our VMs.
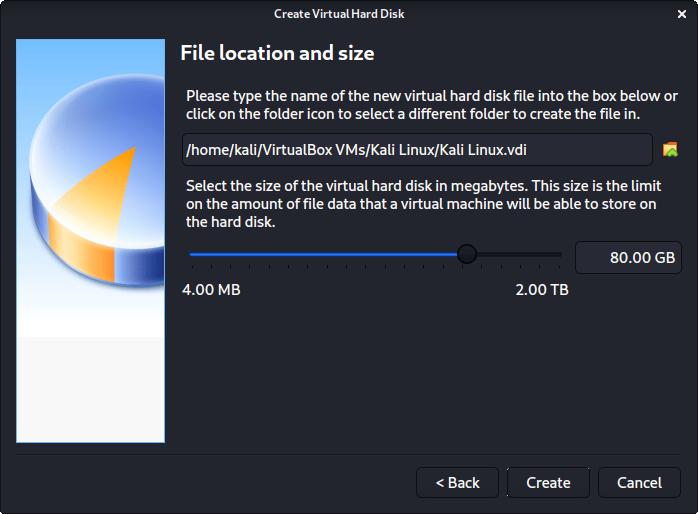
After clicking on “Create”, the wizard is complete.
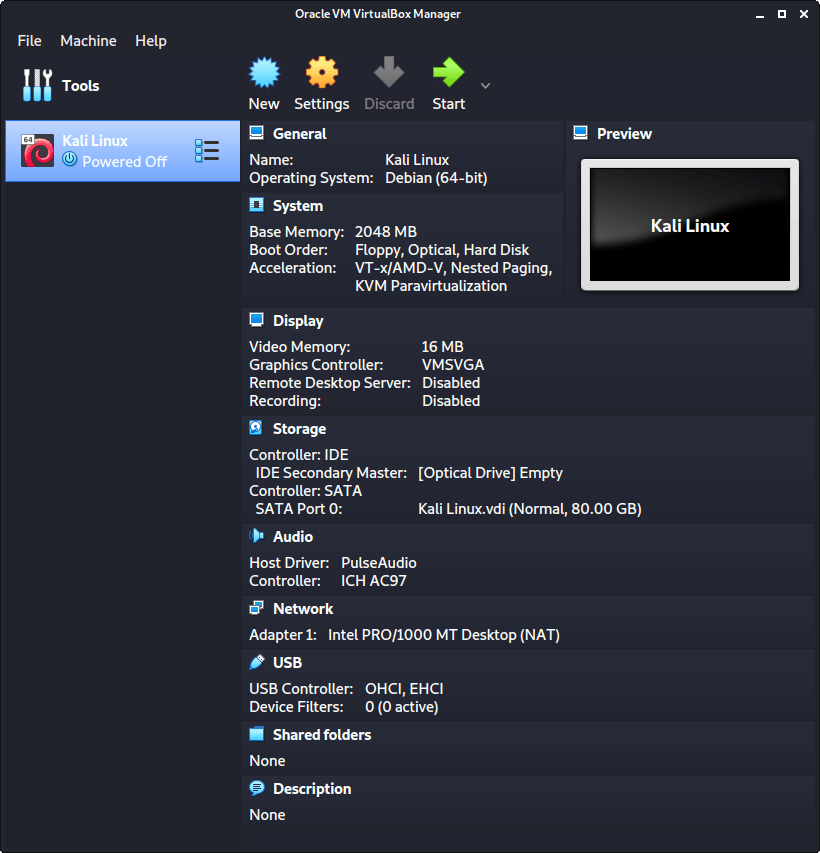
Now we click on “Settings”, to customize the VM further.
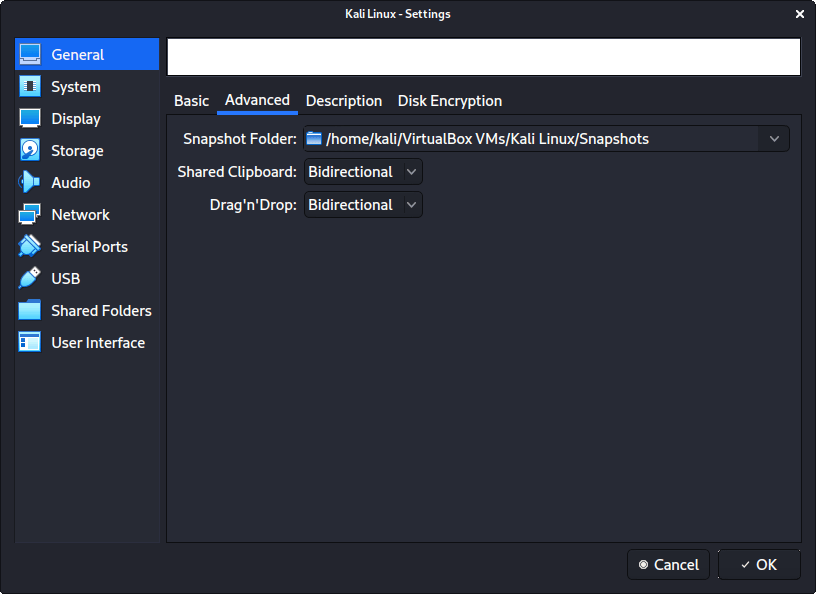
In “General” -> “Advanced”, we make sure to set “Shared Clipboard” to bidirectional , as well as “Drag’n’Drop” to bidirectional
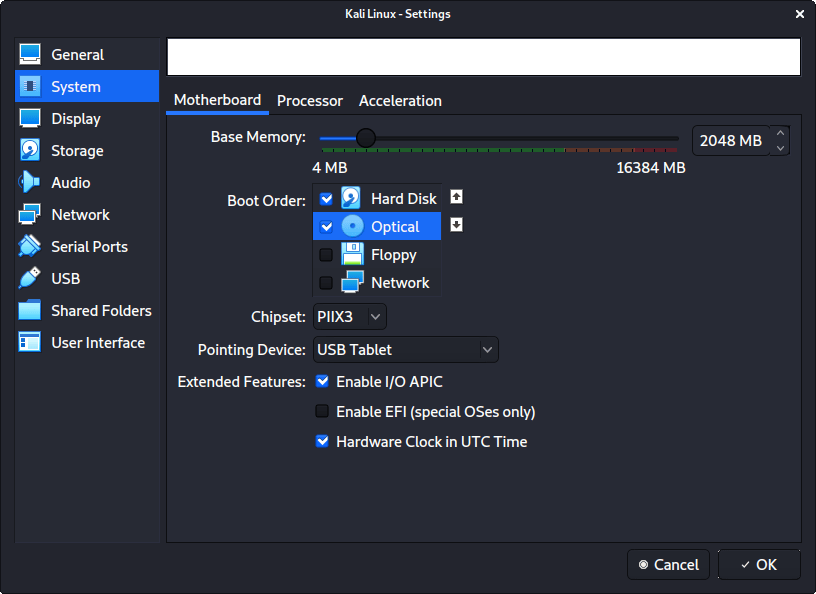
In “System” -> “Motherboard”, we change the “Boot Order” to make sure Hard Disk is top and Optical is the second. Everything else is disabled.
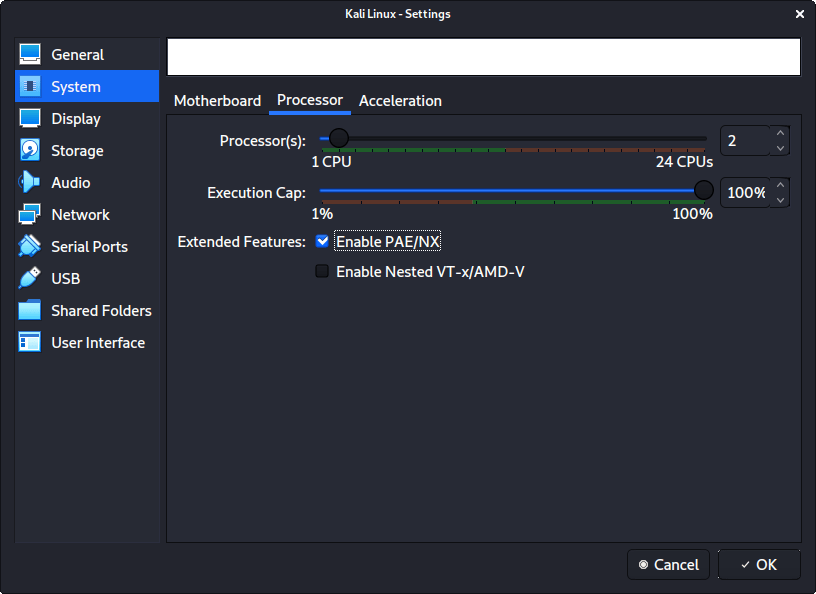
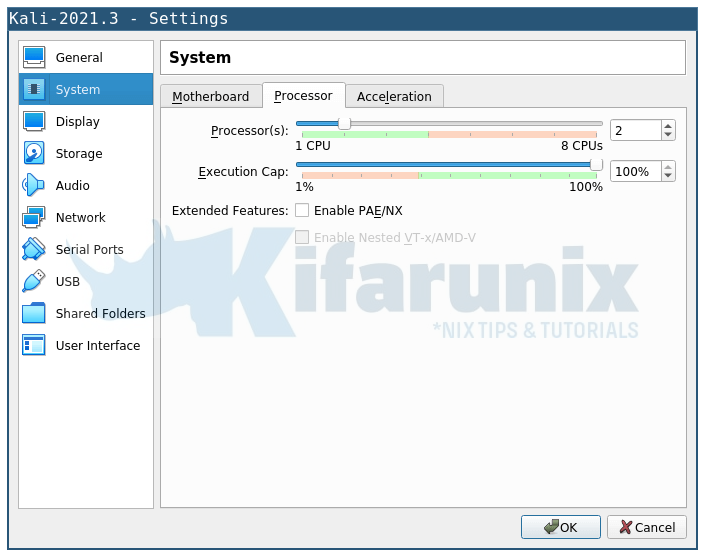
In “System” -> “Processor”, we increase the “Processor(s)” to be 2 .
At the same time, we also enable “Extended Features” for Enable PAE/NX .
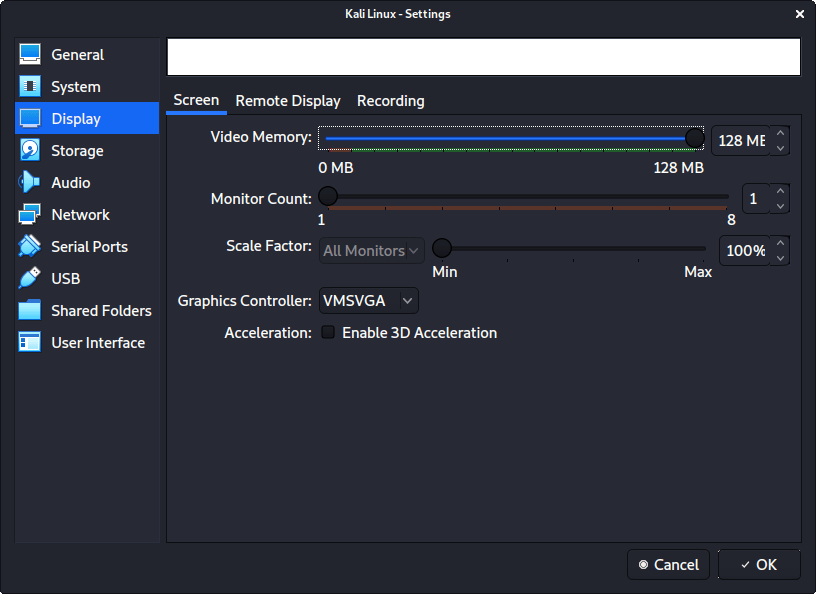
In “Display” -> “Screen”, we make sure to have “Video Memory” set to 128 MB
Another item to point out is to make sure that “Accelerated 3D graphics” is disabled, as people have reported that causes issues.
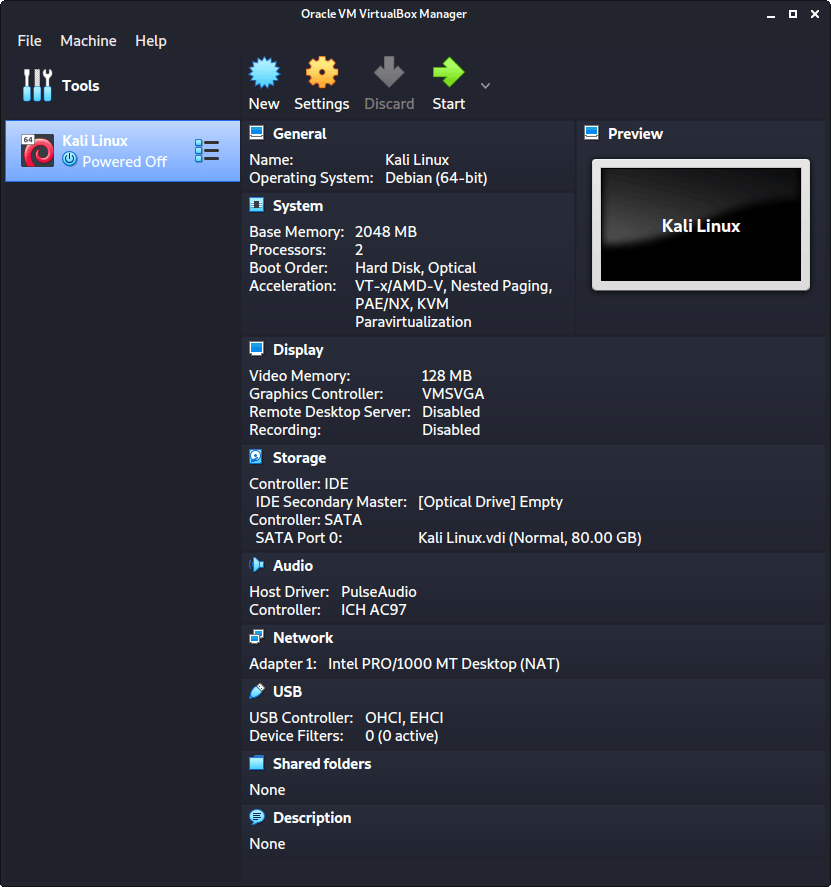
The final settings view looks like the following:
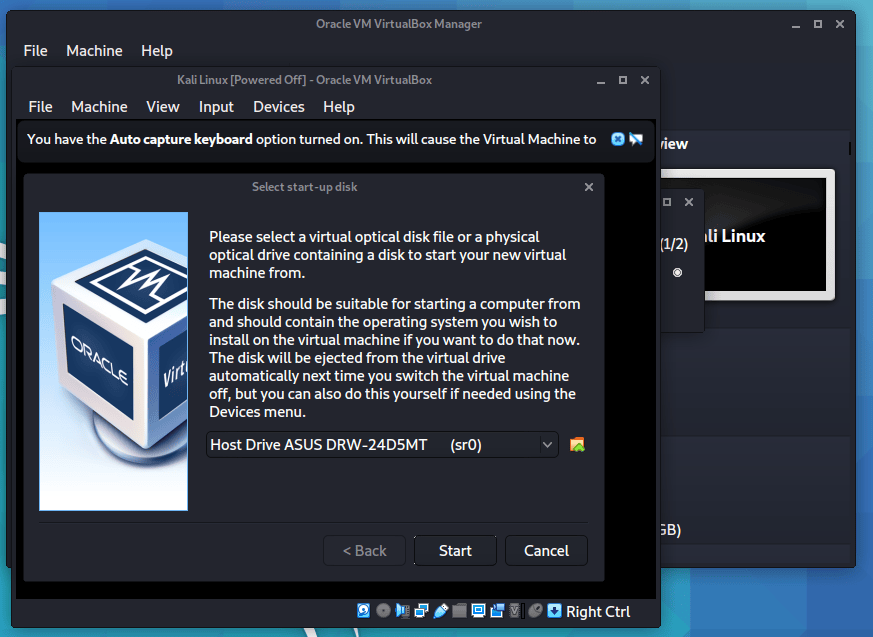
When we are ready to go, press “Start”.
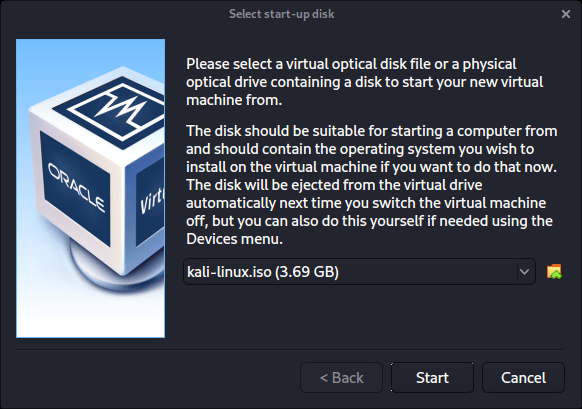
The first time we run it, we will get a prompt saying do we wish to mount an image to use as a “start-up disk”. We want to use our Kali image, rather than a physical drive, so we select the icon to the side of the drop down.
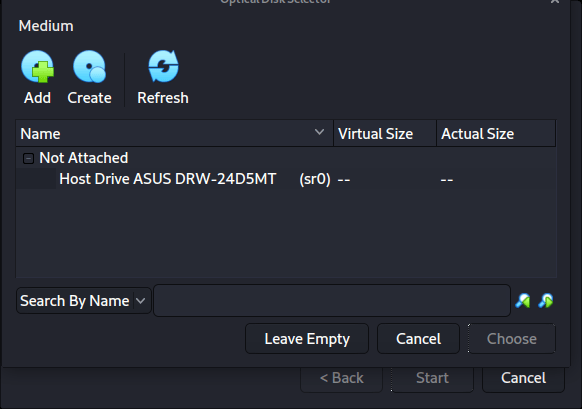
A new pop up will open, “Optical Disk Selector”. We will now press “Add”, then navigate to where our ISO is located.
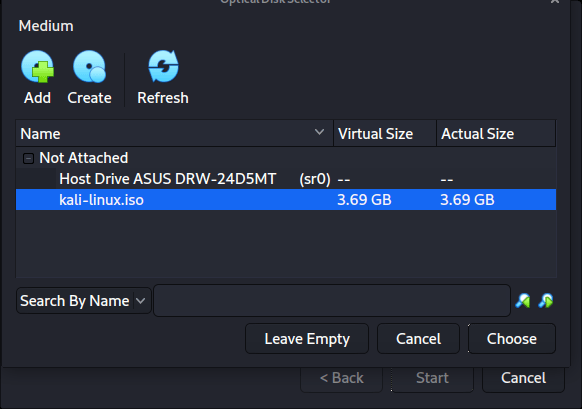
After pressing “Open”, we can see its been added, so we make sure its selected and press “Choose”.
All that is left now to do is press “Start”.
After all this is done, we save, start up the VM, and then continue installing Kali Linux as we normally would for a bare metal install.
During Kali Linux setup process, the install wizard should detect if its inside a VM. If it is, should then automatically install any additional tools (such as virtualbox-guest-x11 ) to give a better user experience. If you want to manually re-install it, you can see our VirtualBox Guest Guide.
Updated on: 2023-May-30
Author: g0tmi1k
Kali linux 2021 virtualbox
You can install VirtualBox on Kali Linux, allowing you to use virtual machines (VMs) inside of Kali Linux. However if you are wanting to install Kali Linux as a VM, you want our Kali Linux Guest VirtualBox guide.
VMs are great. There are many upsides with using them. One of the being, able to run multiple Operating Systems (OSs) at the same time. You can have your host machine “untouched”, and then only interact with the guest VMs. Another is when something is going right, take a snapshot. When something goes wrong, revert back.
VirtualBox is free and open source. There are a few other software such as QEMU, KVM/Xen with virt-manager. Then there is also VMware Workstation & Fusion, which is a commercial software (there is VMware Player which is free but it is limited in features).
Preparation
Before trying to install VirtualBox, please make sure your version of Kali Linux is up-to-date, and if required, reboot the machine:
[email protected]:~$ sudo apt update [. ] [email protected]:~$ [email protected]:~$ sudo apt full-upgrade -y [. ] [email protected]:~$ [email protected]:~$ [ -f /var/run/reboot-required ] && sudo reboot -f [email protected]:~$ Download
The first thing we are going to do is import VirtualBox’s repository key:
[email protected]:~$ curl -fsSL https://www.virtualbox.org/download/oracle_vbox_2016.asc|sudo gpg --dearmor -o /etc/apt/trusted.gpg.d/oracle_vbox_2016.gpg [. ] [email protected]:~$ curl -fsSL https://www.virtualbox.org/download/oracle_vbox.asc|sudo gpg --dearmor -o /etc/apt/trusted.gpg.d/oracle_vbox.gpg [. ] [email protected]:~$ We then move onto adding VirtualBox’s repository. We add this to a separate file, so it does not interfere with Kali Linux’s main repository. We also will be making sure to state where the keyring is at so the files can be properly signed. Our CPU architecture is amd64. You may need to alter the example below if yours is different.
One thing to bear in mind, Kali Linux is based on Debian, so we need to use Debian’s current stable version (even though Kali Linux is a rolling distribution). At the time of writing, its “bullseye”:
[email protected]:~$ echo "deb [arch=amd64] https://download.virtualbox.org/virtualbox/debian bullseye contrib" | sudo tee /etc/apt/sources.list.d/virtualbox.list [email protected]:~$ As we have altered our network repository, we need to re-build the cache:
[email protected]:~$ sudo apt update [. ] [email protected]:~$ As VirtualBox has various kernel modules (e.g. vboxdrv , vboxnetflt and vboxnetadp ), we need to make sure they are kept up-to-date when Kali Linux’s kernel gets updated. This can be achieved using dkms:
[email protected]:~$ sudo apt install -y dkms [. ] [email protected]:~$ Setup
Now its time to install VirtualBox itself (along with its Extension Pack to expand VirtualBox’s advanced features):
[email protected]:~$ sudo apt install -y virtualbox virtualbox-ext-pack [. ] [email protected]:~$ When prompted, read and accept the license.
You can now find VirtualBox in the menu or start it via the command line:
[email protected]:~$ virtualbox [email protected]:~$ If you now wish, you are able to install Kali Linux in a VirtualBox VM (on Kali Linux).
Easily Install Kali Linux 2021.3 on VirtualBox

In this tutorial, you will learn how to install Kali Linux 2021.3 on VirtualBox. Kali Linux is an Advanced Penetration Testing Debian-based Linux distribution used for Penetration Testing, Ethical Hacking and network security assessments.
Kali Linux 2021.3 is the third (Quarter 3) 2021 Kali Rolling release. It comes pimped with various awesome updates.
Want to upgrade to the just release Kali Linux 2021.4? follow the link below;
- OpenSSL – Wide compatibility by default – Keep reading for what that means
- New Kali-Tools site – Following the footsteps of Kali-Docs, Kali-Tools has had a complete refresh
- Better VM support in the Live image session – Copy & paste and drag & drop from your machine into a Kali VM by default
- New tools – From adversary emulation, to subdomain takeover to Wi-Fi attacks
- Kali NetHunter smartwatch – first of its kind, for TicHunter Pro
- KDE 5.21 – Plasma desktop received a version bump
You can also check this guide to learn how to install VirtualBox guest additions on Kali Linux 2021.3.
Install Kali Linux 2021.3 on VirtualBox
Download Kali Linux 2021.3 Image
Navigate to Official Kali Linux images downloads page and grab Kali Linux 2021.3 installation ISO. You can simply obtain the link to the ISO and pull it using wget or curl tools;
wget -c https://cdimage.kali.org/kali-2021.3/kali-linux-2021.3-installer-amd64.isocurl -L -O https://cdimage.kali.org/kali-2021.3/kali-linux-2021.3-installer-amd64.isoCreate New Virtual Machine on VirtualBox
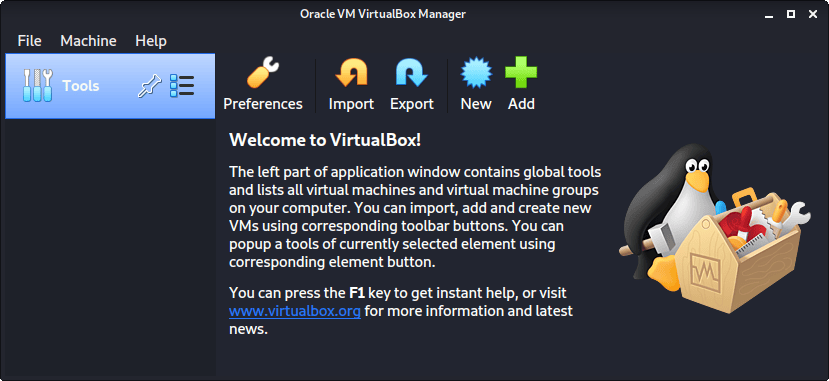
Once you have Kali Linux 2021.3 ISO file downloaded, launch VirtualBox and create a new VM. You can create a new virtual machine by clicking on the VirtualBox menu, Machine > New . You can simply press Ctrl+n ;
Set the Name and OS type of the VM
- Set the name of the VM
- Define the machine installation folder
- Select the type of OS and the version to install
Define the Memory Size of the VM
Allocate as much memory to the VM as you possibly can but should not be more than the host RAM.
Create Virtual Hard Disk for the VM
You can create a new Virtual Hard Disk or use an existing if you have, for the VM.
Define VM Hard Disk File Type
On the next page, choose whether to assign a dynamic or fixed size storage type to Kali Linux VM.
Set the storage location and size of the storage disk as well. Be sure to assign enough storage. We assigned 20G in this setup. Click Create when done.
Define Kali Linux Virtual Machine Settings
Once you create a Kali Linux virtual machine, it should now be listed among your other VMs on the left pane of the VirtualBox.
Right click on the Kali Linux VM and choose settings or simply highlight the VM and press Ctrl+s to open the VM settings wizard.
Allocate vCPU cores to the VM
Allocate more vCPUs to the VM by clicking on the settings menu and heading over to processor tab.
Attach the Installation Medium
Click on the Storage menu > Storage Devices > Controller: IDE > Add optical Drive. Choose the Kali Linux 2021.3 ISO file you downloaded.
Set the VM Networks
- On the first adapter 1, leave it with the default NAT so as to give the VM internet settings.
- On adapter 2, you can choose to either bridge or set the host-only interfaces.
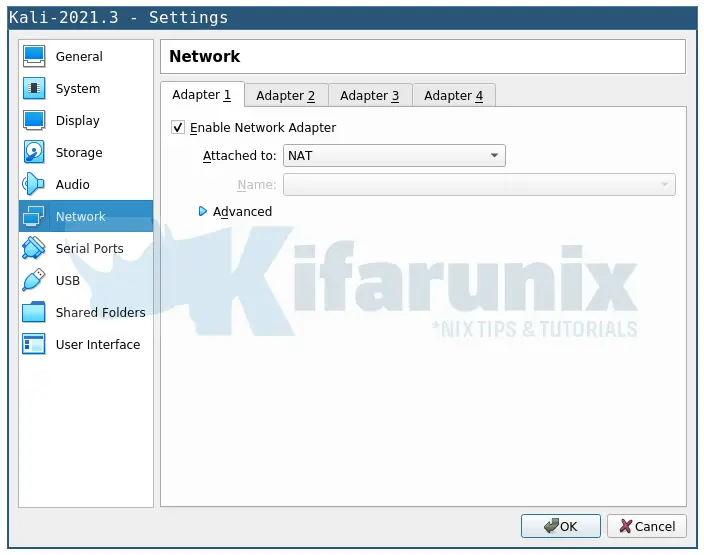
Define any other VM settings as you wish. Click Ok when done to close the VM settings wizard.
Install Kali Linux 2021.3 on VirtualBox
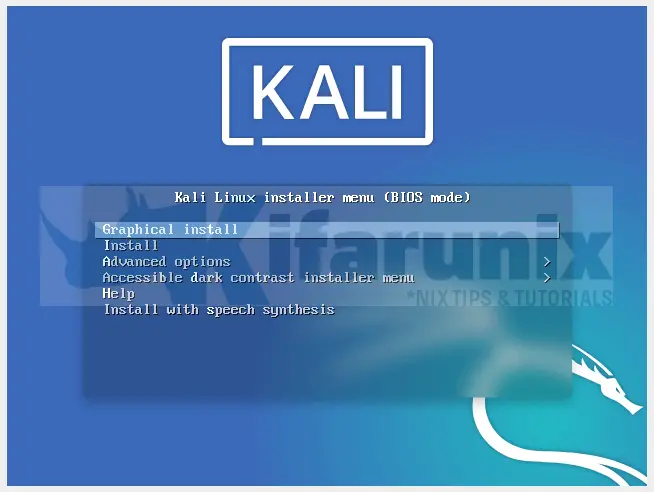
Click the VM to highlight it and click the start button at the top menu or simply right click on the vm and click Start > Normal Start to power on the VM and begin installation.
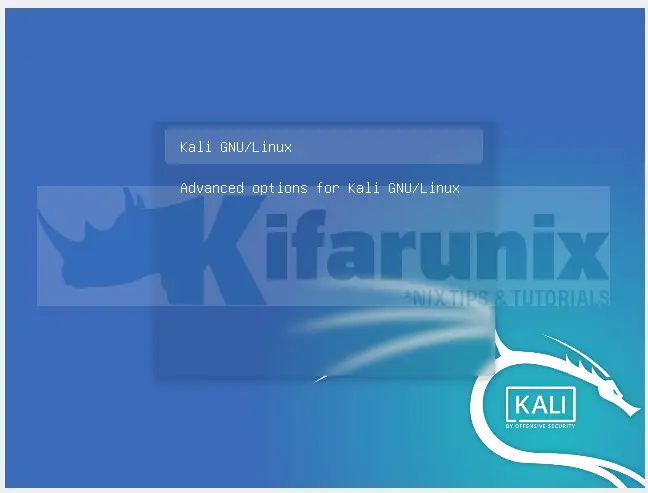
Once the VM starts, you are provided with multiple installation options. Choose Graphical Install and press enter to begin the installation.
Go through the installation process to install and setup Kali Linux 2021.3 on VirtualBox. The remaining steps are;
- Choose your Kali Linux 2021.3 installation language.
- Define your location. This is used to set your timezone and system local settings.
- Configure the Keyboard keymap to use. We choose the default option in this setup.
- In the next step, the system detects and mounts the installation media for the installation process.
- Configure system network.
- Select the primary network interface, choose the first interface, which is the NAT interface in this example.
- Set the hostname, the domain name
Booting into Kali Linux 2021.3 on VirtualBox
Once the installation process completes, reboot your system and boot into it.

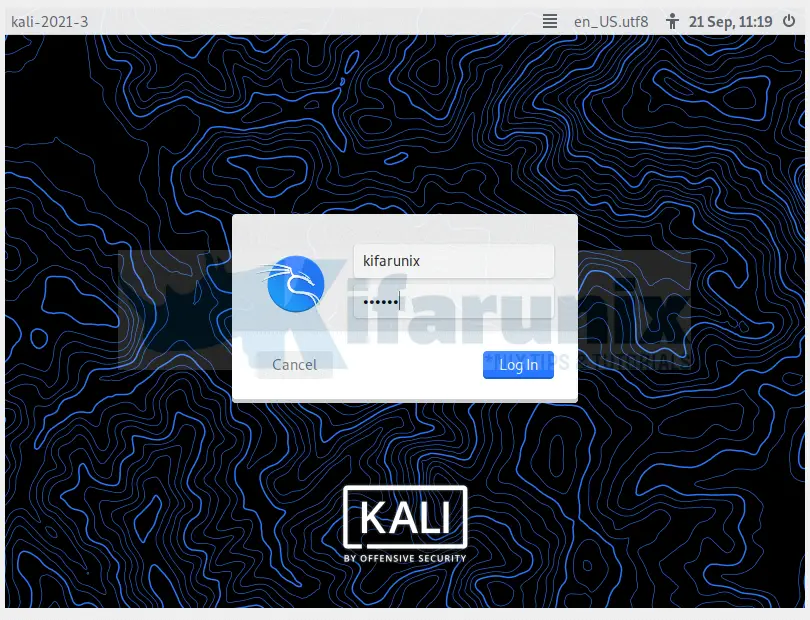
Login to your Kali Linux 2021.3 machine using the username and password setup before.
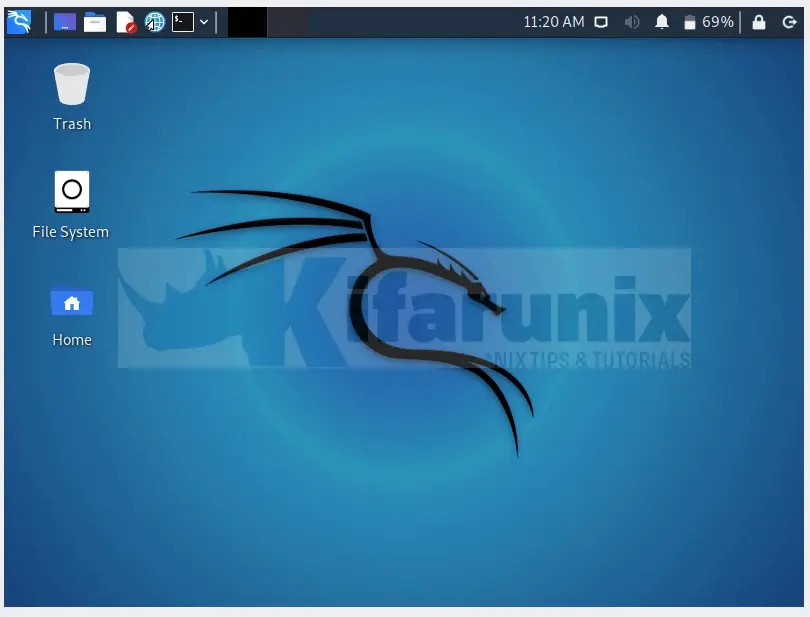
Upon successful login, you land on Kali Linux 2021.3 desktop.
You can now start to explore a thousand security tools that this awesome Kali system comes bundled with.
That marks the end of our guide on how to install Kali Linux 2021.3 on VirtualBox. Enjoy.
Related Tutorials
SUPPORT US VIA A VIRTUAL CUP OF COFFEE
We’re passionate about sharing our knowledge and experiences with you through our blog. If you appreciate our efforts, consider buying us a virtual coffee. Your support keeps us motivated and enables us to continually improve, ensuring that we can provide you with the best content possible. Thank you for being a coffee-fueled champion of our work!