- Подключаем репозитории Kali Linux к Debian 11
- Добавляем репозиторий Kali Linux в Debian
- Установка пакета kali-tools-top10
- Заключение
- Kali linux debian install
- System Requirements
- Installation Prerequisites
- Preparing for the Installation
- Kali Linux Installation Procedure
- Boot
- Language
- Network
- User Accounts
- Clock
- Disk
- Encrypted LVM
- Proxy Information
- Metapackages
- Boot Information
- Reboot
- Post Installation
Подключаем репозитории Kali Linux к Debian 11
В репозиториях Debian существует масса разного программного обеспечения, но, не всегда оно последних версий. Да и сама система устаревает со временем. В Kali Linux ситуация обстоит совершенно иначе, в этом дистрибутиве разработчики стараются использовать более свежее программное обеспечение. В этой статье мы рассмотрим вариант подключения репозиториев от Kali Linux в Debian 11, тем самым вы сможете устанавливать софт, который используется в Kali, да и система обновится до более актуальной версии. А так же можно будет установить некий набор из программного обеспечения, так называемый пакет – “kali-tools-top10”, это конечно при желании. Конечно, не стоит забывать, что Kali Linux, дистрибутив узконаправленный, и добавления репозиториев в Debian так же скажется на последнем, так как обновится само ядро системы.
Добавляем репозиторий Kali Linux в Debian
Для того что бы добавить репозиторий необходимо отредактировать файл “sources.list”, который отвечает за эти самые репозитории. Для его редактирования воспользуемся текстовым редактором Nano, о котором вы можете прочесть в этой статье. Итак, открываем файл с репозиториями в терминале:
sudo nano /etc/apt/sources.listВ открывшемся окне спускаемся в самый низ, где заканчиваются репозитории и вписываем репозиторий от Kali Linux.
Тут стоит заметить, что существует несколько репозиториев для Kali Linux, так называемый kali-rolling, который обновляется довольно часто, и не каждому подойдет. А так же репозиторий kali-last-snapshot, который предпочтительнее для повседневного использования, и обновляется реже. Есть еще kali-experimental, но он явно не для наших нужд. В данной статье рассмотрим добавление kali-rolling и kali-last-snapshot, а на каком из них останавливаться, решаете только вы.
Итак, для добавления репозитория kali-rolling, в открывшемся окне вписываем строчку:
Kali Rolling
deb http://http.kali.org/kali kali-rolling main contrib non-free
Для подключения репозитория kali-last-snapshot строчка будет выглядеть немного иначе:
Kali Last Snapshot
deb http://http.kali.org/kali kali-last-snapshot main non-free contrib
Сохраняем отредактированный файл “sources.list” нажав сочетание клавиш “ctrl + o” и выходим из текстового редактора Neno – “ctrl + x”. Теперь обновляем списки пакетов выполнив команду:
При выполнении этой команды произойдет ошибка, так как добавлений репозиторий не имеет необходимого GPG ключа. Что бы это исправить, выполним команду:
sudo apt-key adv --keyserver hkp://keyserver.ubuntu.com:80 --recv-keys ED444FF07D8D0BF6 Обращаю ваше внимание на последние цифры, они должны соответствовать цифрам выводимым в терминале:

При правильном добавлении GPG ключа в терминале появится соответствующее сообщение:

Теперь можно производить обновление системы:
sudo apt update && sudo apt dist-upgradeУстановка пакета kali-tools-top10
Для установки программного обеспечения, а именно пакета “kali-tools-top10”, который как можно догадаться, включает в себя подборку из 10 часто используемых утилит достаточно выполнить команду:
sudo apt install kali-tools-top10

Заключение
Вот таким не сложным образом, мы подключили репозиторий Kali Linux в Debian 11, тем самым сделав гибрид. Хотя, как известно, Kali Linux базируется на Debian, а соответственно, можно сказать что мы просто модифицировали Debian. По сути, весь необходимый софт можно установить из репозиториев Debian или с GitHub.
Если вы хотите просто обновить ядро Debain, то необязательно подключать репозиторий от Kali Linux, это можно реализовать из родных репозиториев Debain, описанных в этой статье.
Стоит так же учесть, что можно создать и свою сборку Kali Linux, по этому не всегда есть необходимость рисковать стабильность Debain. Это в том случае, если вы преследуете цель сменить графическое окружение или сделать минимальный набор программного обеспечения в Kali Linux.
В любом случае данный способ имеет право на жизнь и в некоторых случаях возможно пригодится. Более подробно о каждом из этих дистрибутивах написано на WIKI, статья про Debian, статья про Kali Linux.
А на этом сегодня все, надеюсь, данная статья будет вам полезна.
Если вам нравится данный проект и вы хотите что бы он процветал, то вы можете поддержать журнал “Cyber-X” перейдя в сооветствующий раздел на сайте.
Журнал Cyber-X
Kali linux debian install
Installing Kali Linux (single boot) on your computer is an easy process. This guide will cover the basic install (which can be done on bare metal or guest VM), with the option of encrypting the partition. At times, you may have sensitive data you would prefer to encrypt using Full Disk Encryption (FDE). During the setup process you can initiate an LVM encrypted install on either Hard Disk or USB drives.
First, you’ll need compatible computer hardware. Kali Linux is supported on amd64 (x86_64/64-bit) and i386 (x86/32-bit) platforms. Where possible, we would recommend using the amd64 images. The hardware requirements are minimal as listed in the section below, although better hardware will naturally provide better performance. You should be able to use Kali Linux on newer hardware with UEFI and older systems with BIOS.
Our i386 images, by default use a PAE kernel, so you can run them on systems with over 4 GB of RAM.
In our example, we will be installing Kali Linux in a fresh guest VM, without any existing operating systems pre-installed. We will explain other possible scenarios throughout the guide.
System Requirements
The installation requirements for Kali Linux will vary depending on what you would like to install and your setup. For system requirements:
- On the low end, you can set up Kali Linux as a basic Secure Shell (SSH) server with no desktop, using as little as 128 MB of RAM (512 MB recommended) and 2 GB of disk space.
- On the higher end, if you opt to install the default Xfce4 desktop and the kali-linux-default metapackage, you should really aim for at least 2 GB of RAM and 20 GB of disk space.
- When using resource-intensive applications, such as Burp Suite, they recommend at least 8 GB of RAM(and even more if it is a large web application!) or using simultaneous programs at the same time.
Installation Prerequisites
This guide will make also the following assumptions when installing Kali Linux:
- Using the amd64 installer image.
- CD/DVD drive / USB boot support.
- Single disk to install to.
- Connected to a network (with DHCP & DNS enabled) which has outbound Internet access.
We will be wiping any existing data on the hard disk, so please backup any important information on the device to an external media.
Preparing for the Installation
- Download Kali Linux(We recommend the image marked Installer).
- Burn The Kali Linux ISO to DVD or image Kali Linux Live to USB drive. (If you cannot, check out the Kali Linux Network Install).
- Backup any important information on the device to an external media.
- Ensure that your computer is set to boot from CD/DVD/USB in your BIOS/UEFI.
- In the UEFI settings, ensure that Secure Boot is disabled. The Kali Linux kernel is not signed and will not be recognized by Secure Boot.
Kali Linux Installation Procedure
Boot
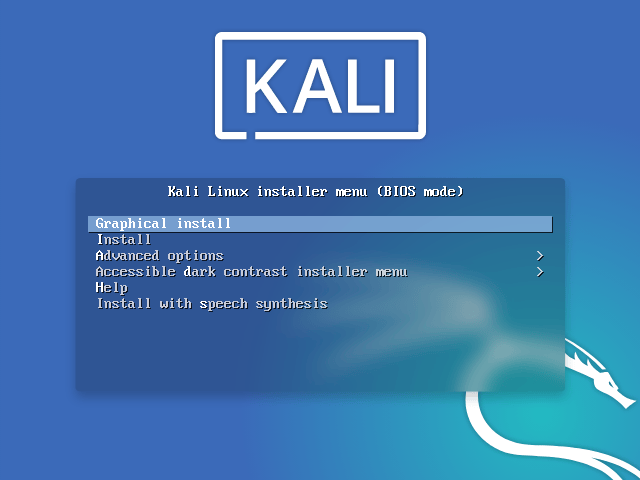
- To start your installation, boot with your chosen installation medium. You should be greeted with the Kali Linux Boot screen. Choose either Graphical install or Install (Text-Mode). In this example, we chose the Graphical install.

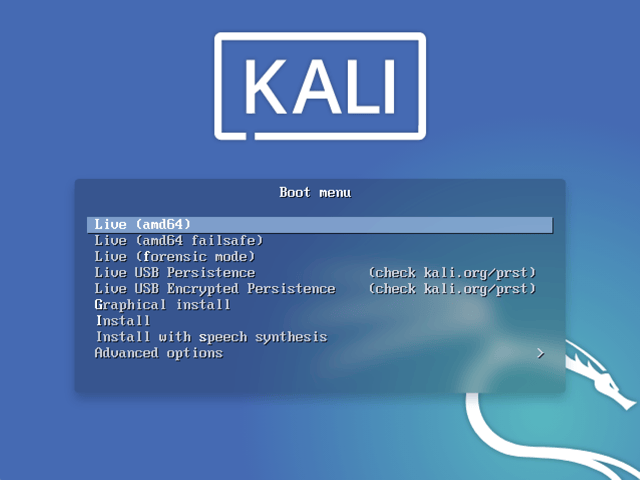
If you’re using the live image instead, you will see another mode, Live, which is also the default boot option.
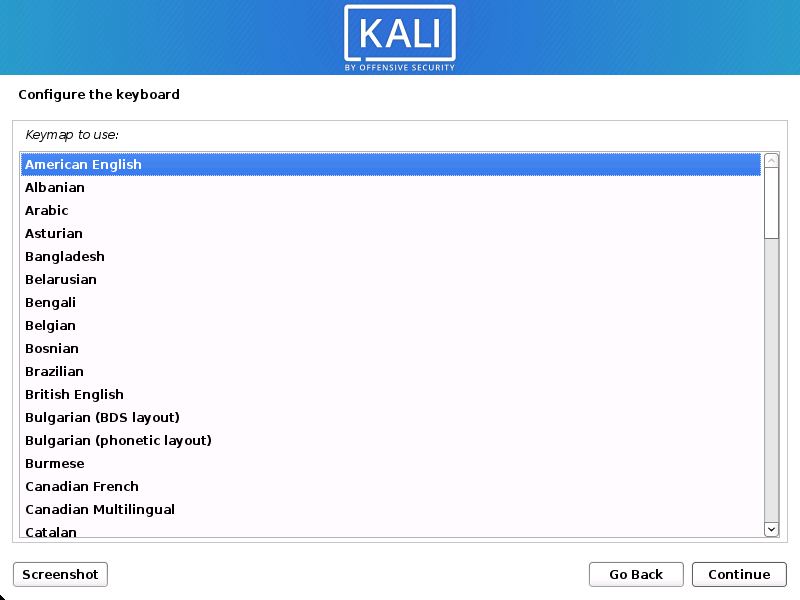
Language
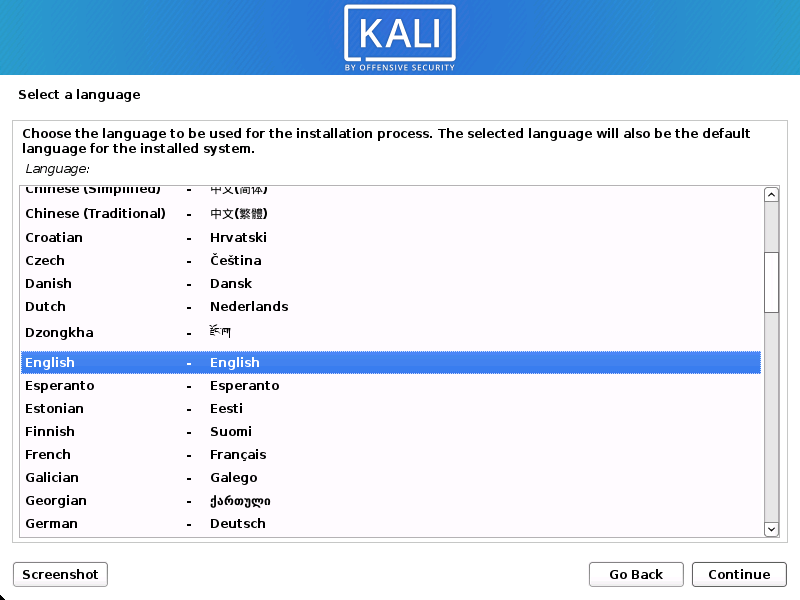
- Select your preferred language. This will be used for both the setup process and once you are using Kali Linux.
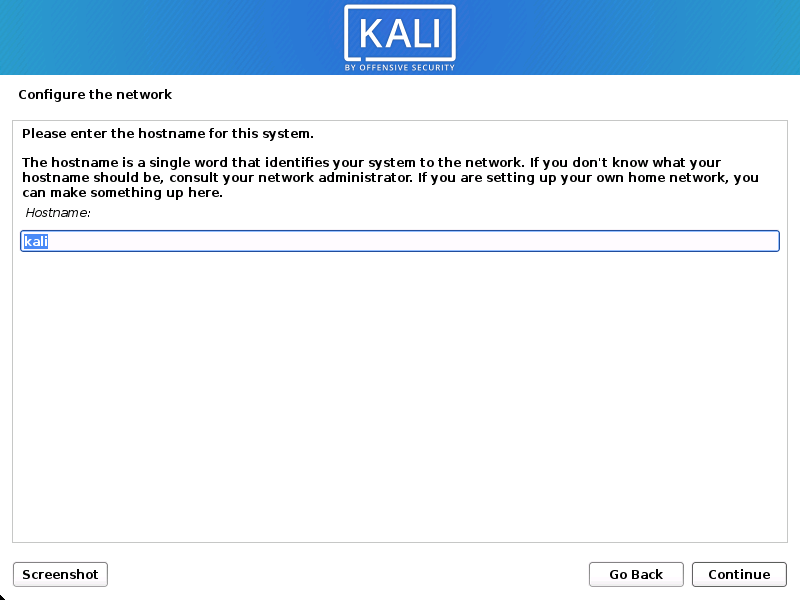
Network
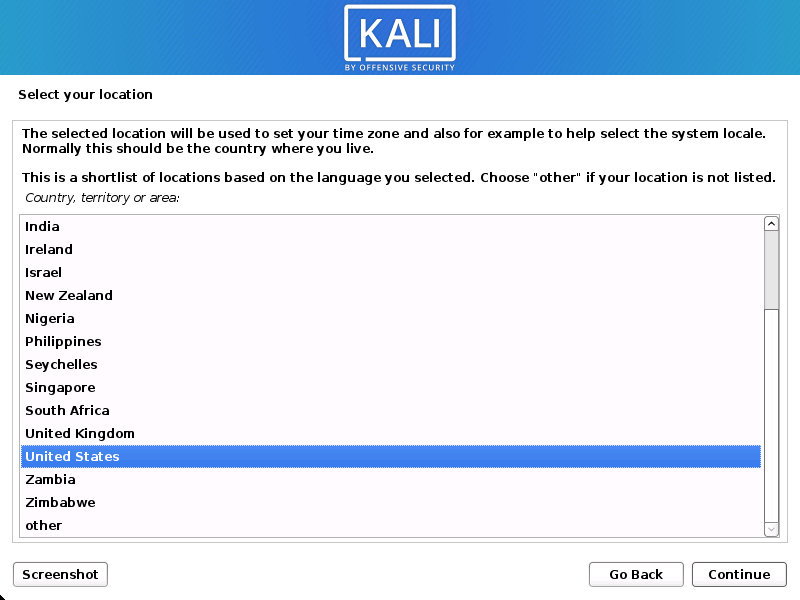
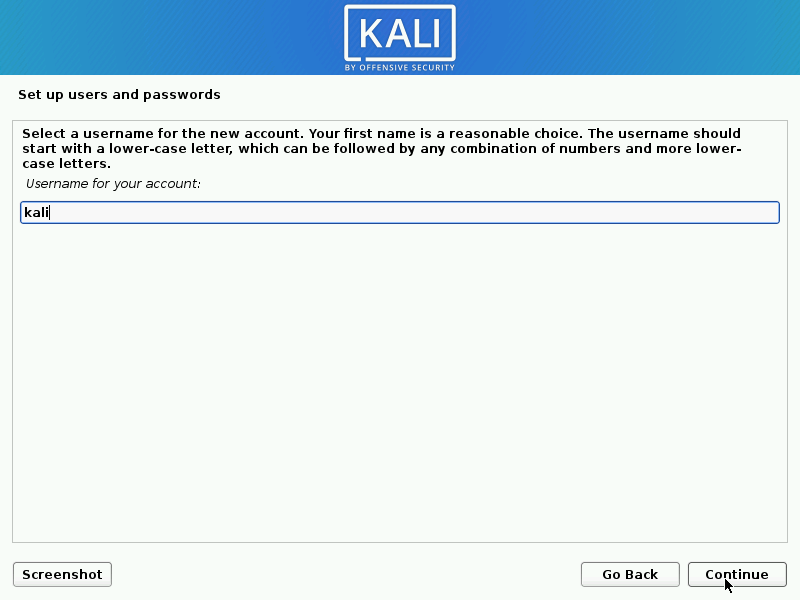
- The setup will now probe your network interfaces, looks for a DHCP service, and then prompt you to enter a hostname for your system. In the example below, we’ve entered kali as our hostname.
If there is no network access with DHCP service detected, you may need to manually configure the network information or do not configure the network at this time.
- If there isn’t a DHCP service running on the network, it will ask you to manually enter the network information after probing for network interfaces, or you can skip.
- If Kali Linux doesn’t detect your NIC, you either need to include the drivers for it when prompted, or generate a custom Kali Linux ISO with them pre-included.
- If the setup detects multiple NICs, it may prompt you which one to use for the install.
- If the chosen NIC is 802.11 based, you will be asked for your wireless network information before being prompted for a hostname.
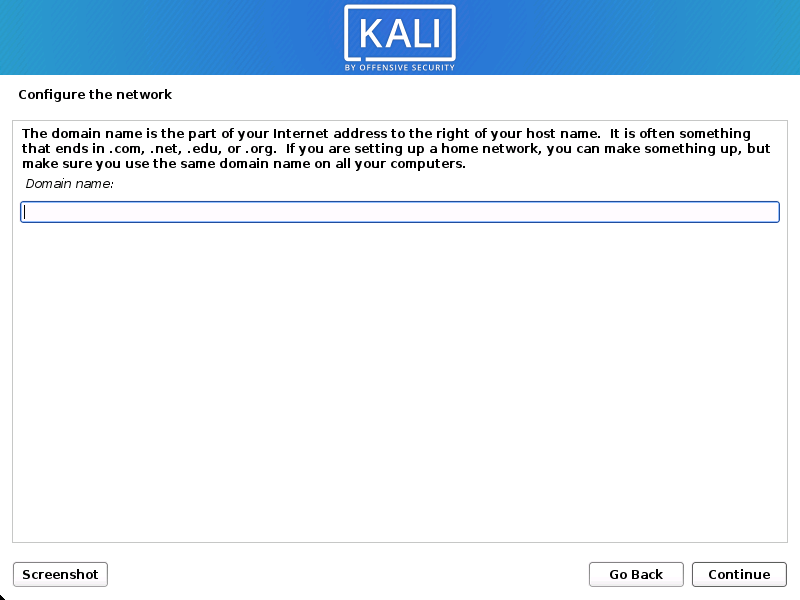
- You may optionally provide a default domain name for this system to use (values may be pulled in from DHCP or if there is an existing operating systems pre-existing).
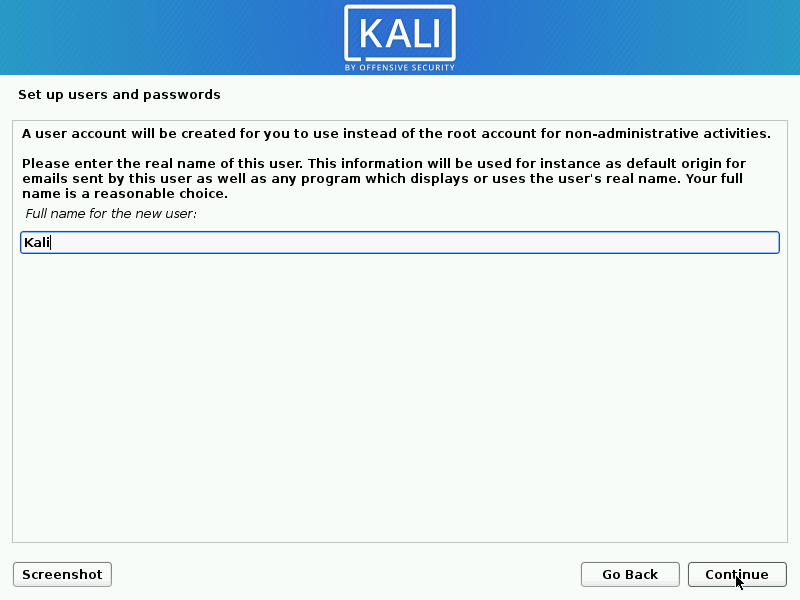
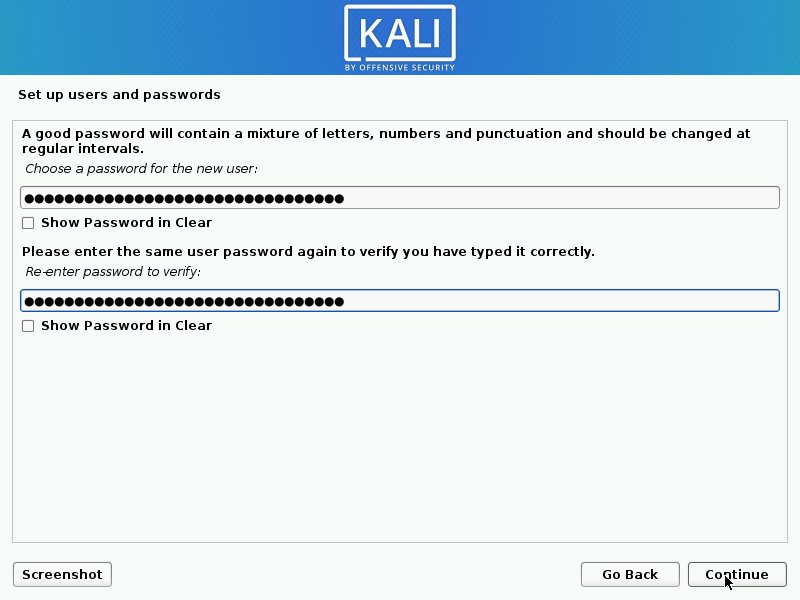
User Accounts
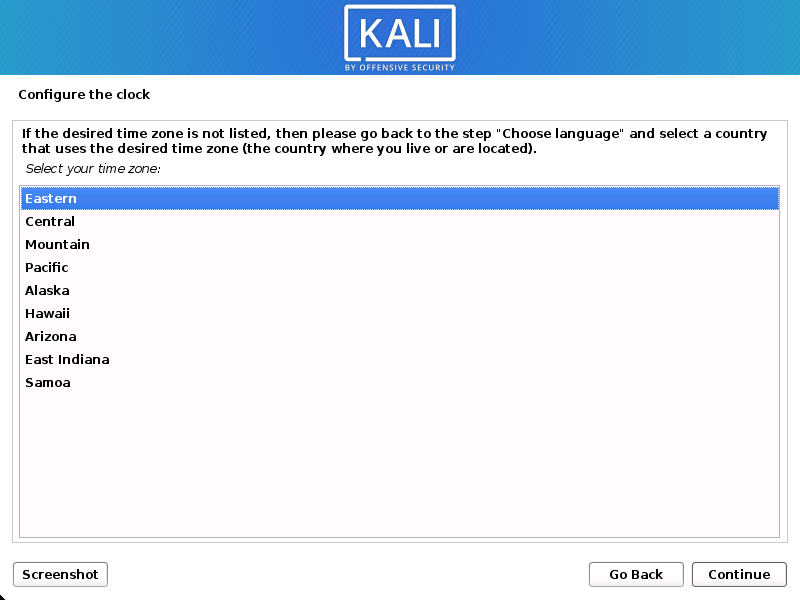
Clock
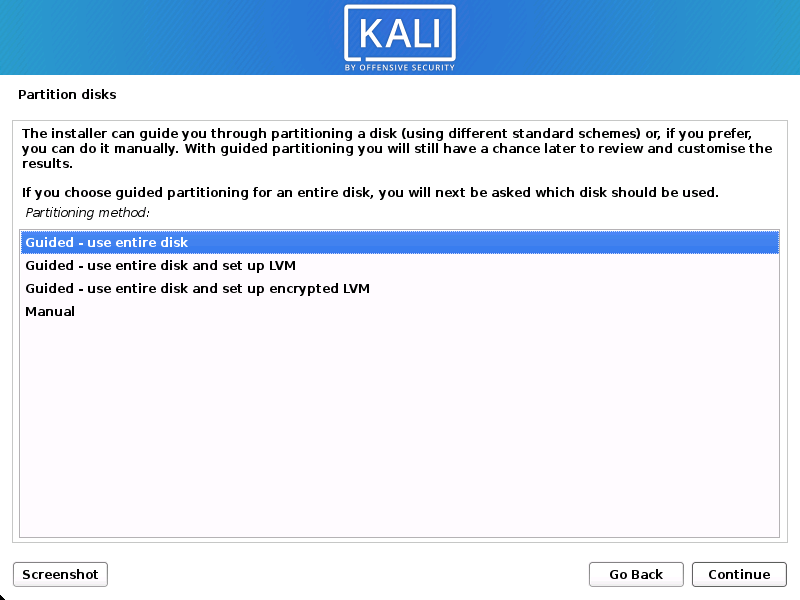
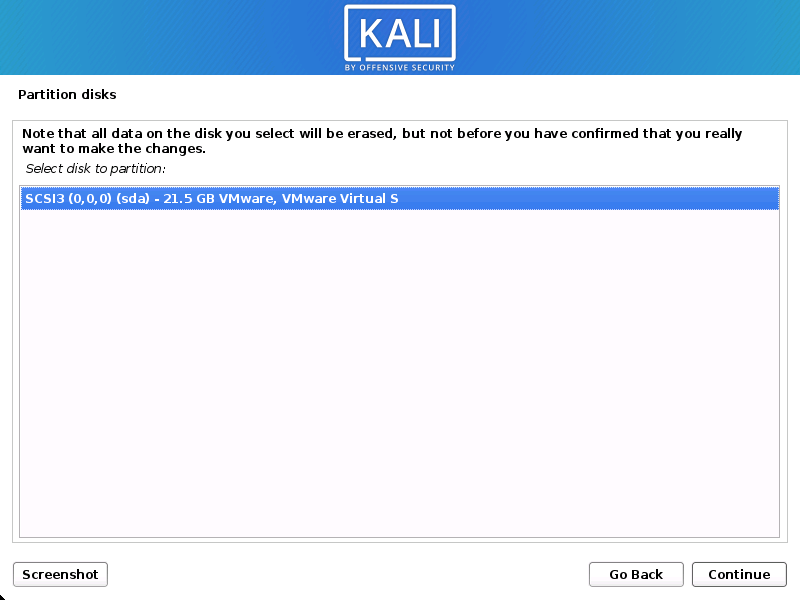
Disk
In our guide, we are using a clean disk, so we have four options to pick from. We will select Guided — the entire disk, as this is the single boot installation for Kali Linux, so we do not want any other operating systems installed, so we are happy to wipe the disk.
If there is an pre-existing data on the disk, you will have have an extra option (Guided — use the largest continuous free space) than the example below. This would instruct the setup not to alter any existing data, which is perfect for dual-booting into another operating system. As this is not the case in this example, it is not visible.
Experienced users can use the “Manual” partitioning method for more granular configuration options, which is covered more in our BTRFS guide.
If you want to encrypt Kali Linux, you can enable Full Disk Encryption (FDE), by selecting Guided — used entire disk and setup encrypted LVM. When selected, later on in the setup (not in this guide) prompt you to enter a password (twice). You will have to enter this password every time you start up Kali Linux.
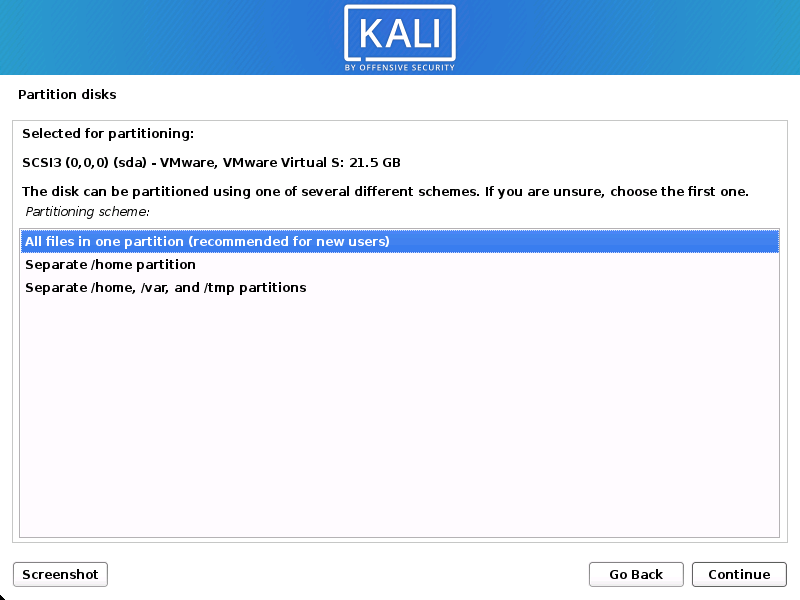
- Depending on your needs, you can choose to keep all your files in a single partition — the default — or to have separate partitions for one or more of the top-level directories.
If you’re not sure which you want, you want “All files in one partition”.
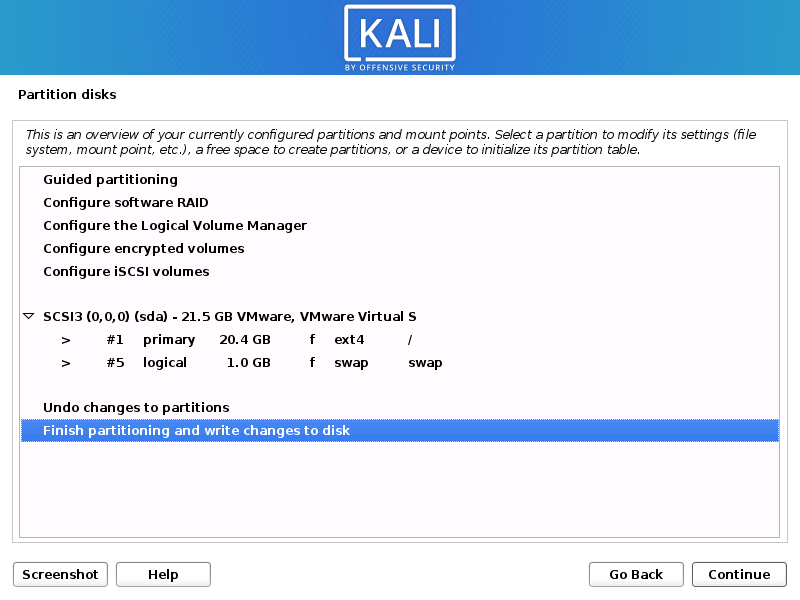
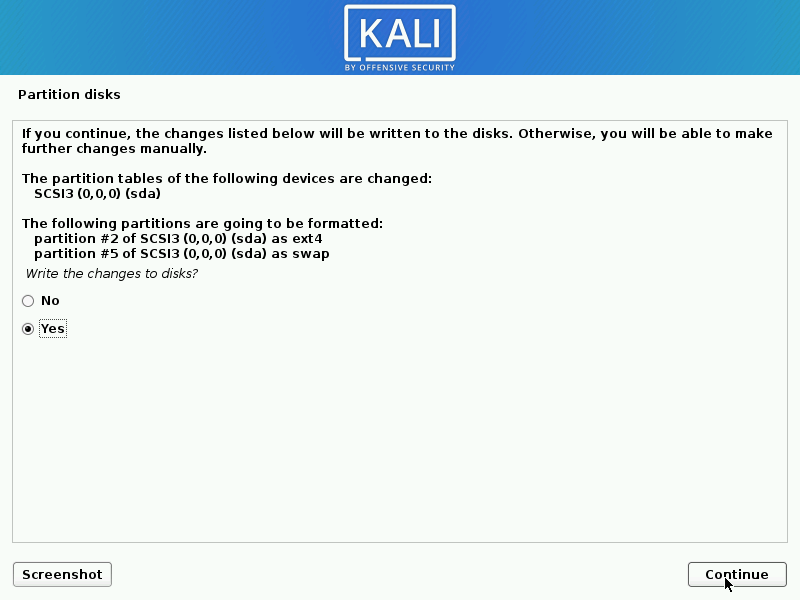
- Next, you’ll have one last chance to review your disk configuration before the installer makes irreversible changes. After you click Continue, the installer will go to work and you’ll have an almost finished installation.
Encrypted LVM
If enabled in the previous step, Kali Linux will now start to perform a secure wipe of the hard disk, before asking you for a LVM password.
Please be sure a strong password is used, or else you will be prompted with a weak passphrase warning.
This wipe may take “a while” (hours) depending on the size and speed of the drive.
If you wish to risk it, you can skip it.Proxy Information
- Kali Linux uses a central repository to distribute applications. You’ll need to enter any appropriate proxy information as needed.
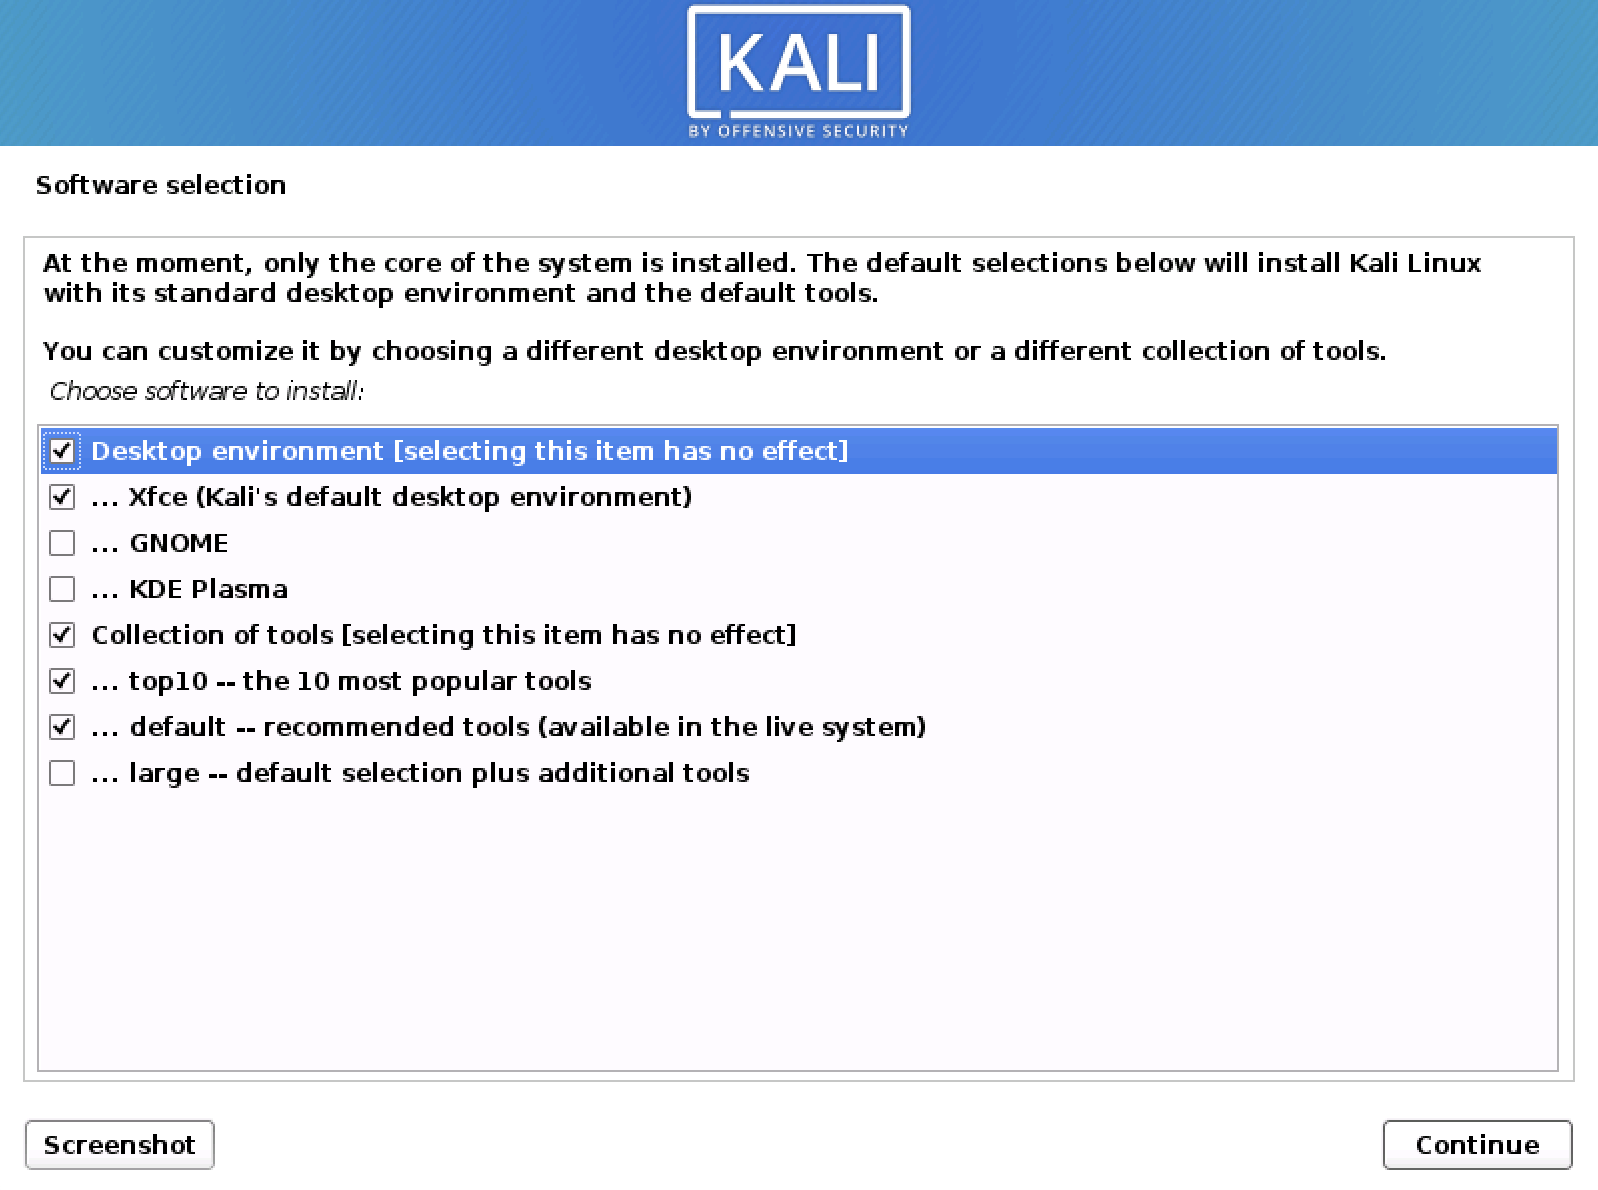
Metapackages
If network access was not setup, you will want to continue with setup when prompt.
If you are using the Live image, you will not have the following stage.
- Next you can select which metapackages you would like to install. The default selections will install a standard Kali Linux system and you don’t really have to change anything here.
Please refer to this guide if you prefer to change the default selections.
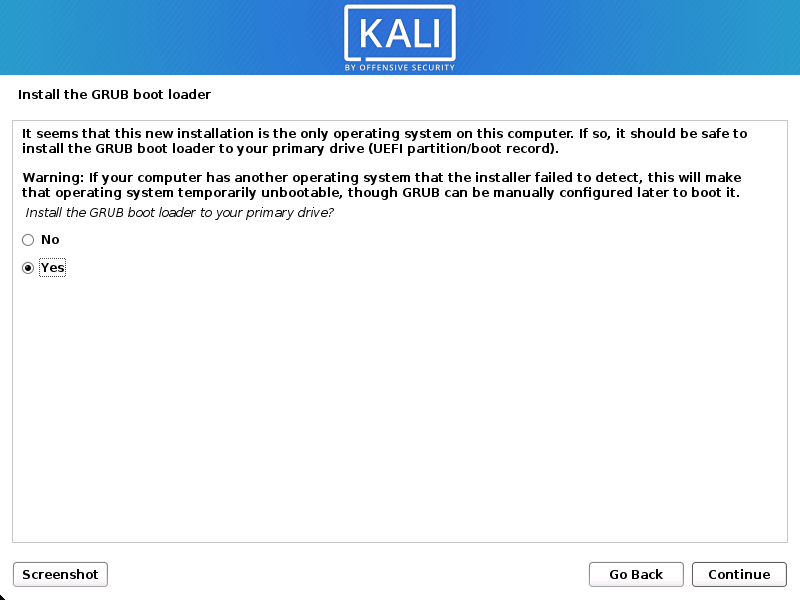
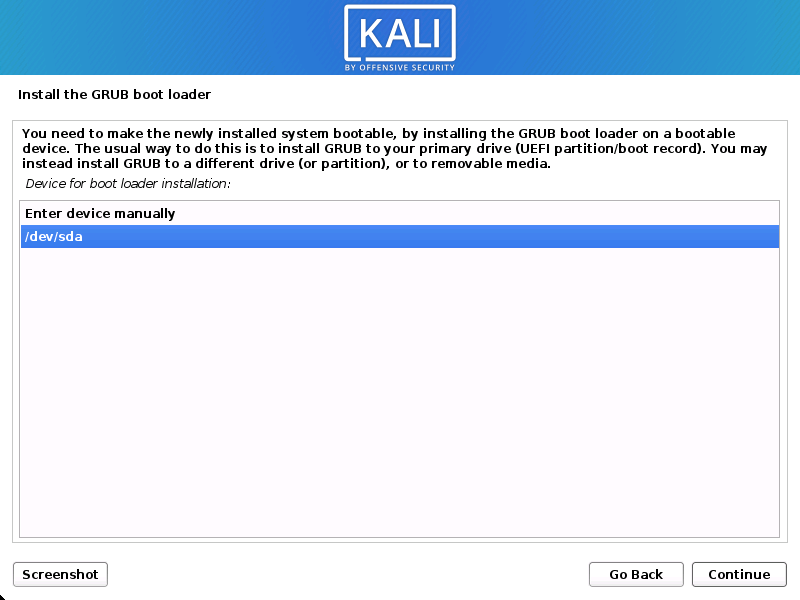
Boot Information
- Select the hard drive to install the GRUB bootloader in (it does not by default select any drive).
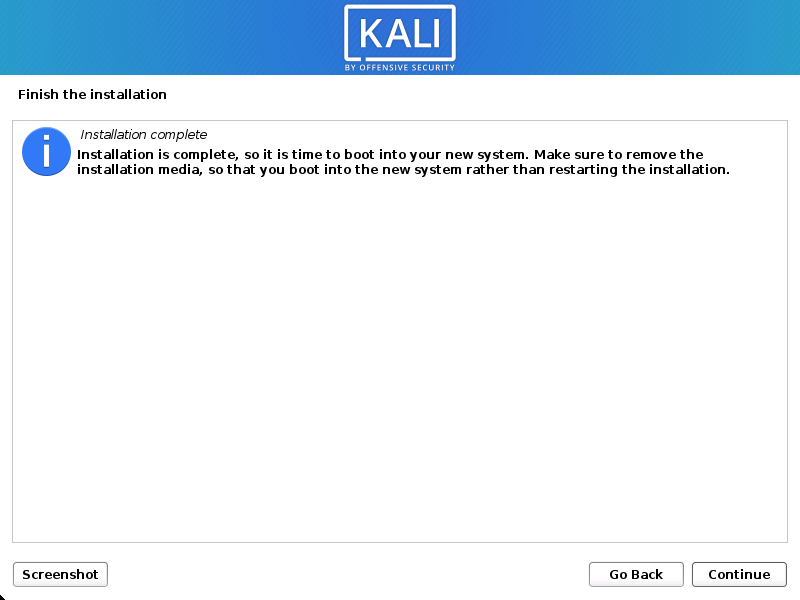
Reboot
Post Installation
Now that you’ve completed installing Kali Linux, it’s time to customize your system.
The General Use section has more information and you can also find tips on how to get the most out of Kali Linux in our User Forums.
Updated on: 2023-Mar-13
Author: gamb1t