- Kali linux grub windows
- Installation Prerequisites
- Resize Windows Procedure
- Kali Linux Installation Procedure
- Post Installation
- Time/System Clock
- Статья Восстанавливаем GRUB в Kali Linux после обновления до Windows 10
- Пропала Windows из меню загрузки Grub Кали Линукс.
- Пропала Windows: возвращаем запись о Windows в Grub-загрузчик
- Ничего не получается…
Kali linux grub windows
Installing Kali Linux next to a Windows installation has its benefits. However, you need to exercise caution during the setup process. First, make sure that you’ve backed up any important data on your Windows installation. Since you’ll be modifying your hard drive, you’ll want to store this backup on external media. Once you’ve completed the backup, we recommend you peruse our Kali Linux Hard Disk install guide, which explains the normal procedure for a basic Kali Linux install.
In our example, we will be installing Kali Linux alongside an installation of Windows (10), which is currently taking up 100% of the disk space in our computer. We will start by resizing our current Windows partition to occupy less space and then proceed to install Kali Linux in the newly-created empty partition.
Installation Prerequisites
This guide will make the following assumptions:
- You have read our single boot Kali Linux install guide, as this has the same Installation Prerequisites (System requirements & setup assumptions).
- When downloading Kali Linux, pick the live image, rather than the installer option.
- A single disk to install to (rather than a dedicated disk per operating system).
We need to use a different image from the single boot Kali Linux install guide, as we need the live image. This is because we need to edit the disk structure without mounting any partitions (otherwise they would be in-use). After we have finished altering the disk layout, we can still install Kali Linux using the live image, but there will be a few differences such as:
Both of these can be addressed post installation, as it saves swapping to the installer image (as you will need either multiple CD/DVD/USBs or to re-image half way though).
This installation has the potential to go wrong very easily as it involves editing existing partitions. Be aware of what partitions you are modifying and where you are installing Kali Linux to.
Having a backup of your Linux files available is a good idea in the event something goes wrong.
Resize Windows Procedure
Before we can install Kali Linux, there needs to be room on the hard disk. By booting into a live Kali Linux session with your chosen installation medium, we can resize the partition to our desired size, as the disk will not be in use because Kali Linux will all be in memory.
- Before Resizing the disk, Make Sure Fast Startup is turned off in Windows 10 so that we don’t get an error while resizing the partition. If you don’t know how to do that:- Open Control Panel > Hardware and Sound > Power Options > On the left, click Choose what the power buttons do > Then at the top, click Change Settings that are currently unavailable (This will ask for administrator permissions) > Now Unselect the Turn on fast startup option and click Save Changes at the bottom. Now you are ready to resize the partition.
- To start resizing, make sure you insert your Kali Linux installation medium and power on the device. If needed, press any keyboard shortcuts for a “boot order menu” (depends on each manufacture) or boot into BIOS/UEFI and change the boot order to point to the installation medium first.
- When the boot menu/options appears, you should see at least one new option. Depending on the manufacture, hardware, how the system is configured and install medium, you may see more options (e.g. Can you boot into non-UEFI?).
You may need to try a few different options in order to find success.
You may need to disable secure boot
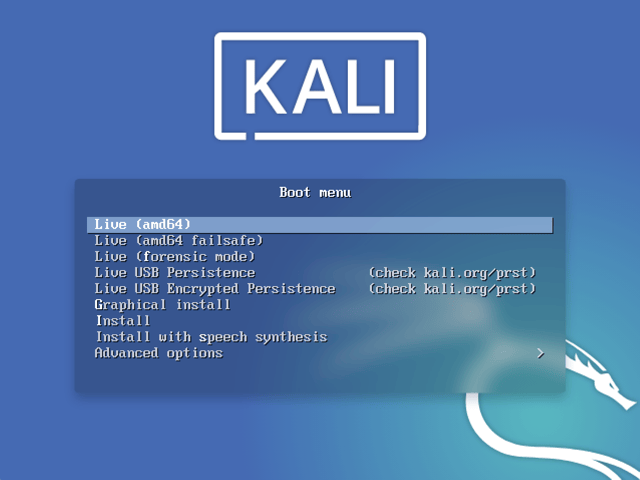
- You should be greeted with the Kali Linux boot screen. Select Live, and you should be booted into the Kali Linux default desktop.
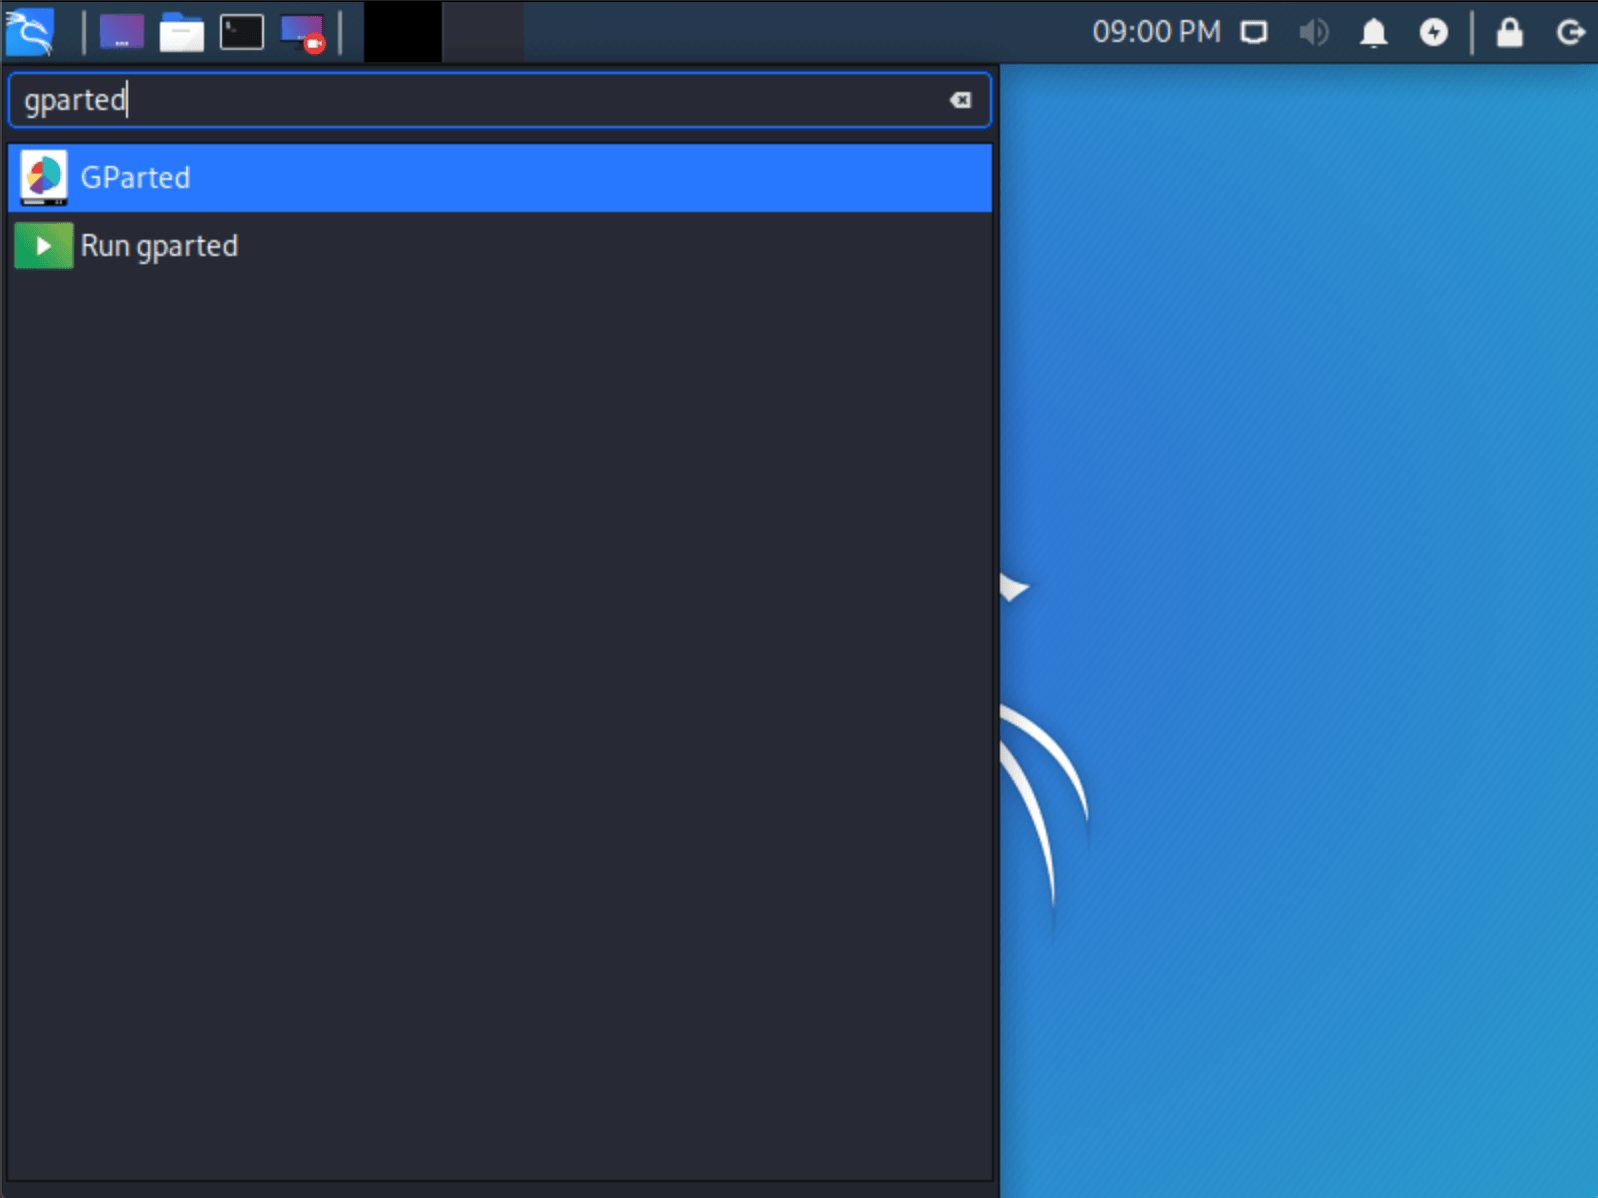
- Now launch GParted, which we’ll use to shrink the existing Windows partition to give us enough room to install Kali Linux in the free space.
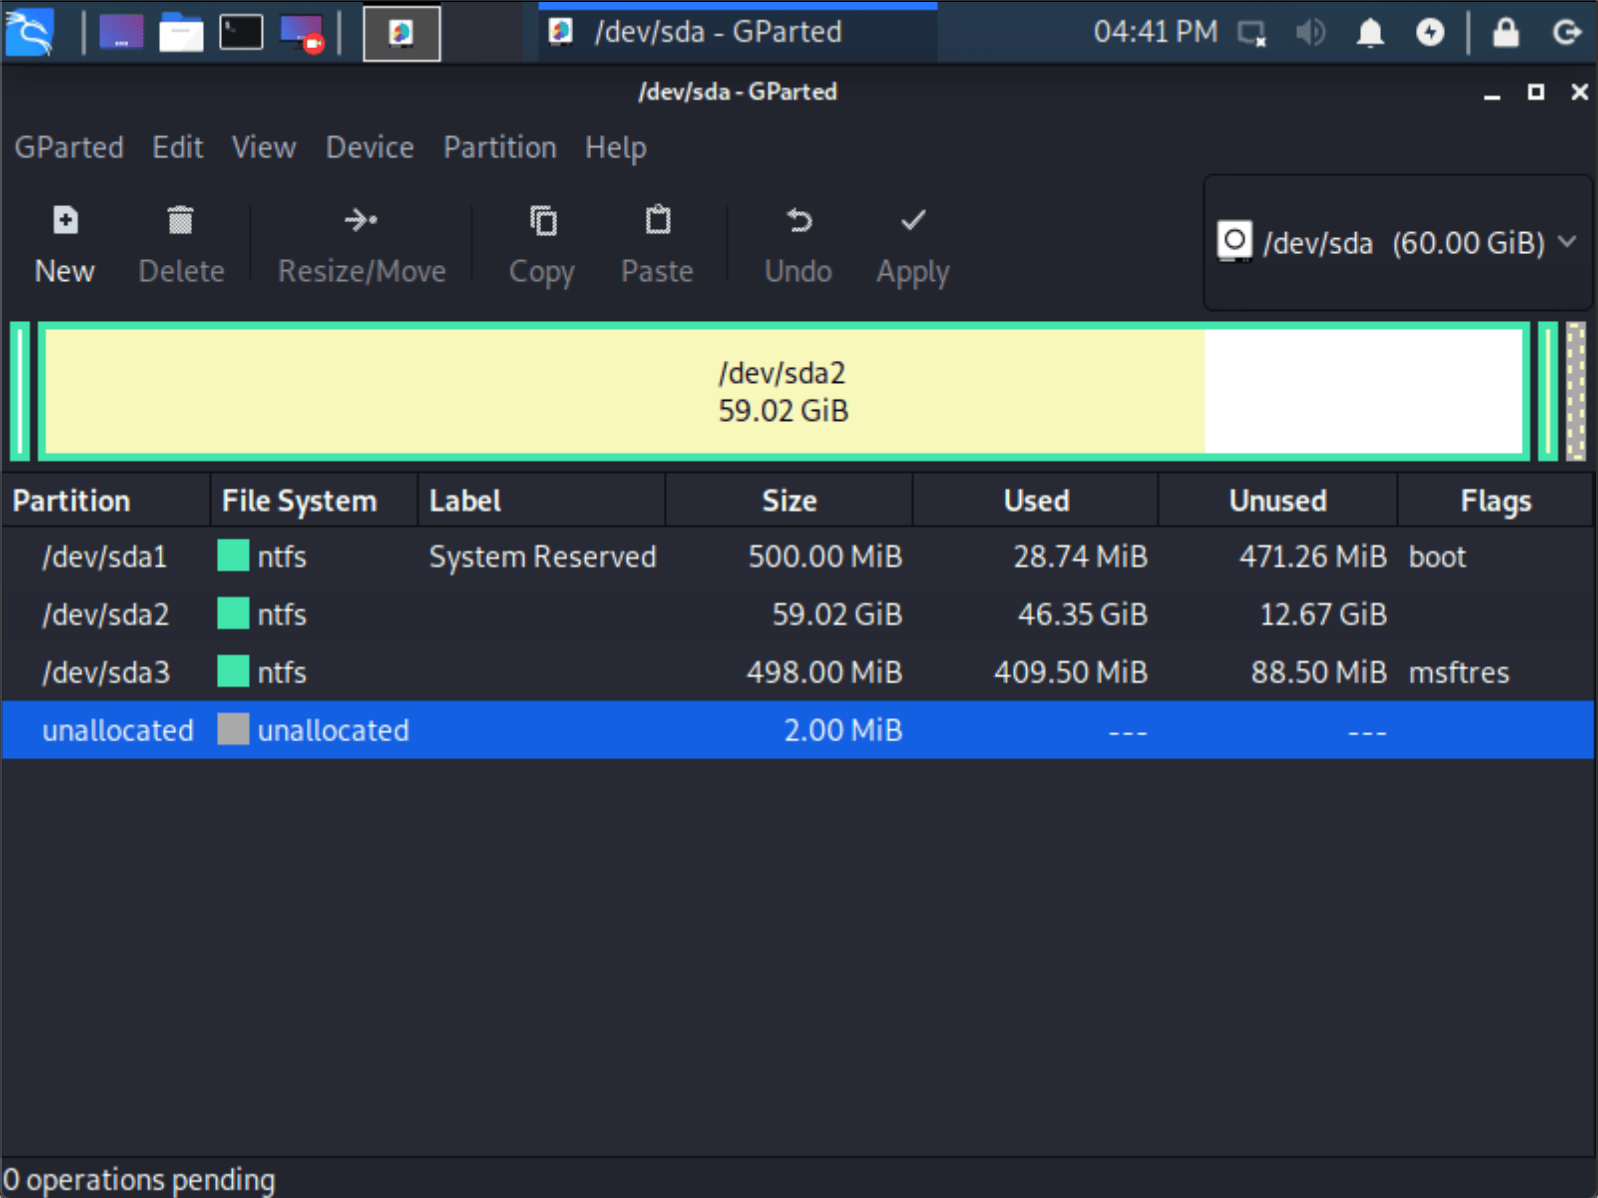
- Once GParted has opened, select your Windows partition ( /dev/sda2 ) & resize it leaving enough space (we recommend at least 20 GB) for the Kali Linux installation.
Depending on your setup, it is often the second option (the largest partition). In our example, there are three partitions:
- Window’s boot partition ( /dev/sda1 )
- Window’s main operating system itself ( /dev/sda2 )
- Window’s System Recovery partition ( /dev/sda3 )
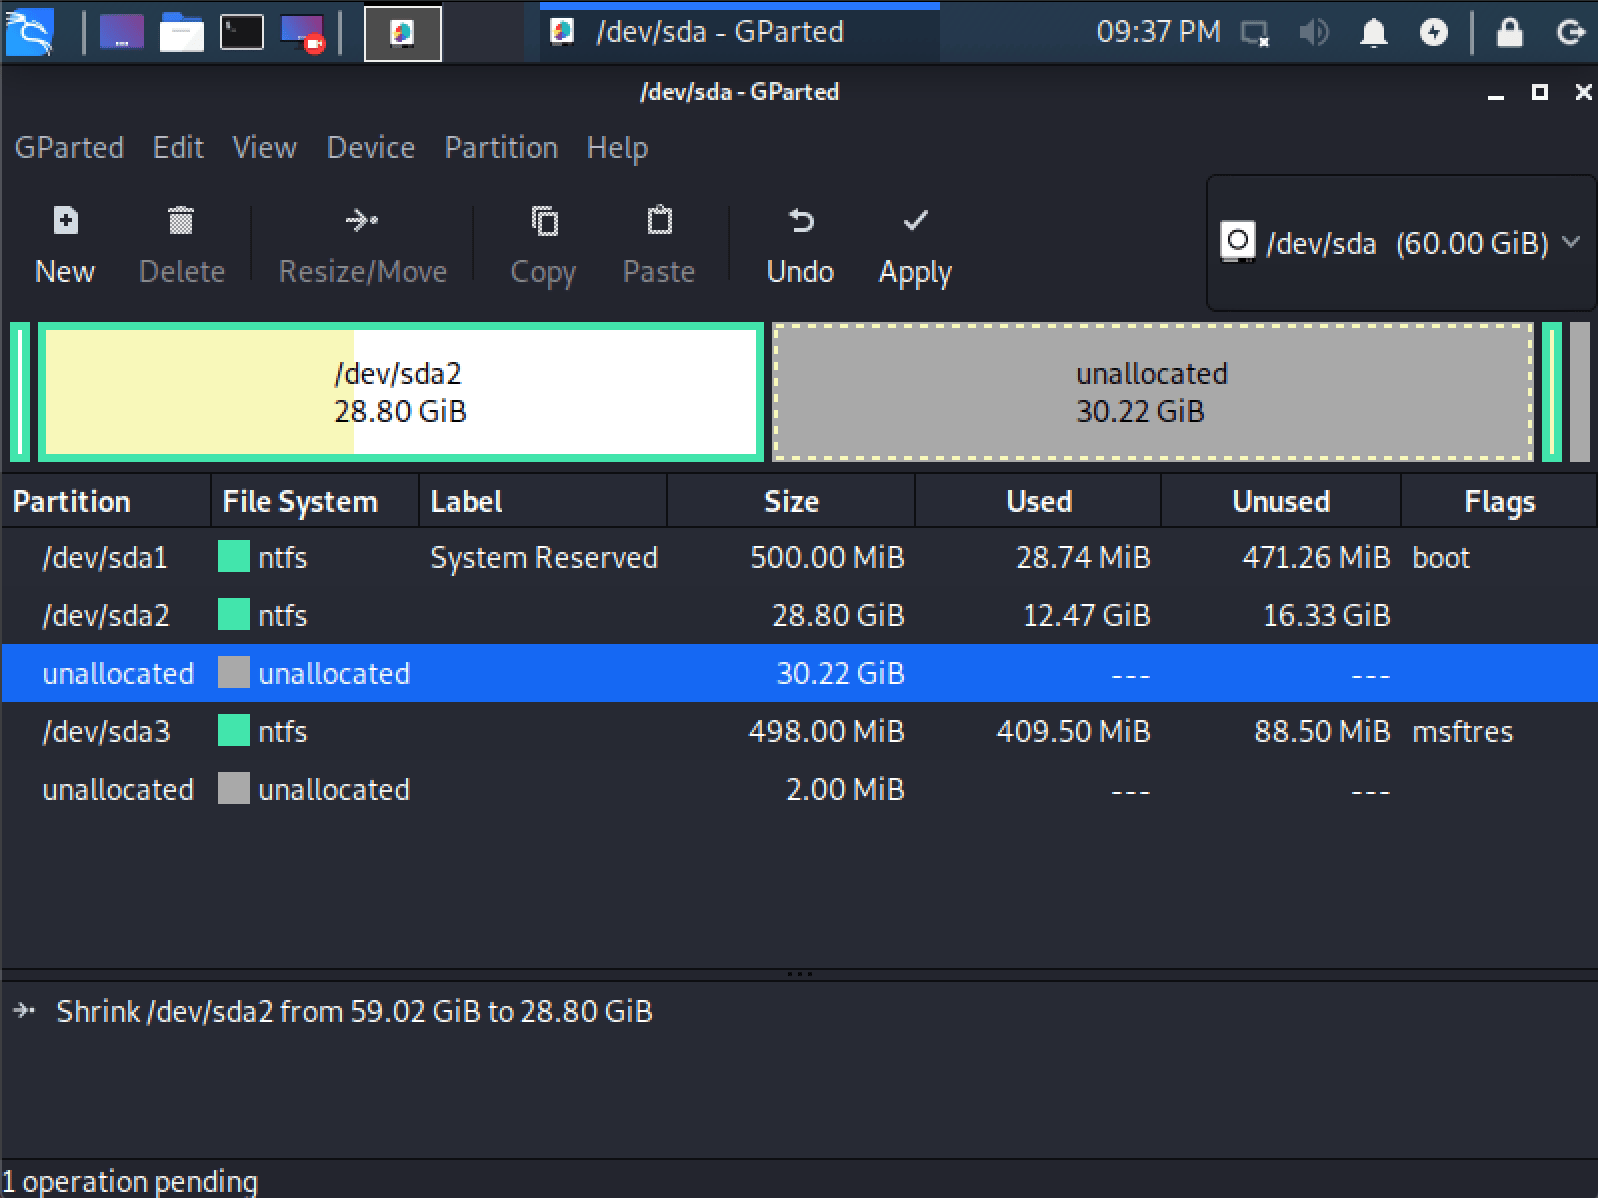
If you are moving past into any non-white in the partition then you are editing a section that is in use.
Only remove from the area of the partition that is not in use.
It is normal to leave the third partition ( /dev/sda3 ), and only shrink the actual install ( /dev/sda2 ).
If you wish to organize the partition to group all the Windows partitions together, placing the free space at the end, you may do so.
- Once you have resized your Windows partition, ensure you “Apply All Operations” on the hard disk. Exit gparted and reboot.
Kali Linux Installation Procedure
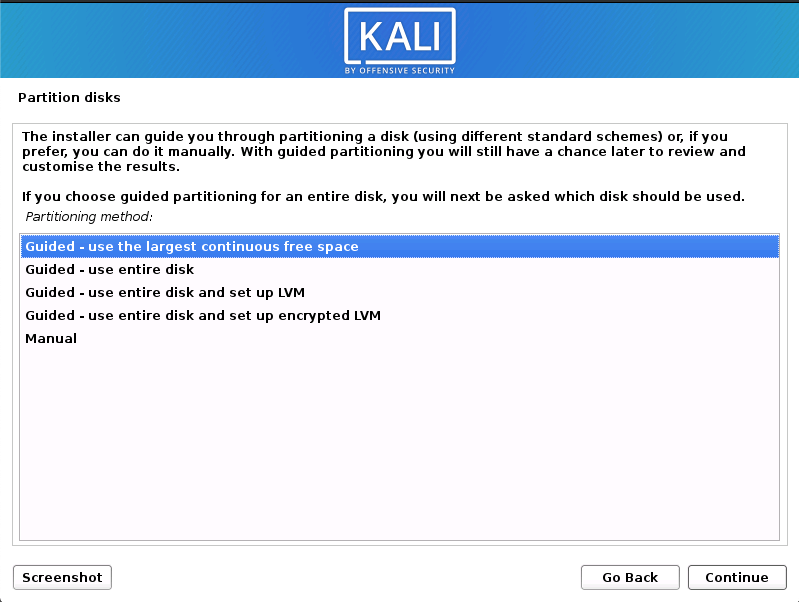
- The installation procedure from this point onwards is similar to a Kali Linux Hard Disk install, until the point of the partitioning. At this point, you need to select “Guided — use the largest continuous free space” (rather than “Guided — the entire disk”) which got created earlier with gparted.
- You can carry on following the single boot Kali Linux install guide, except you will not have the option to select desktop environment or metapackages as you are using the live image. Once the installation is done, reboot.
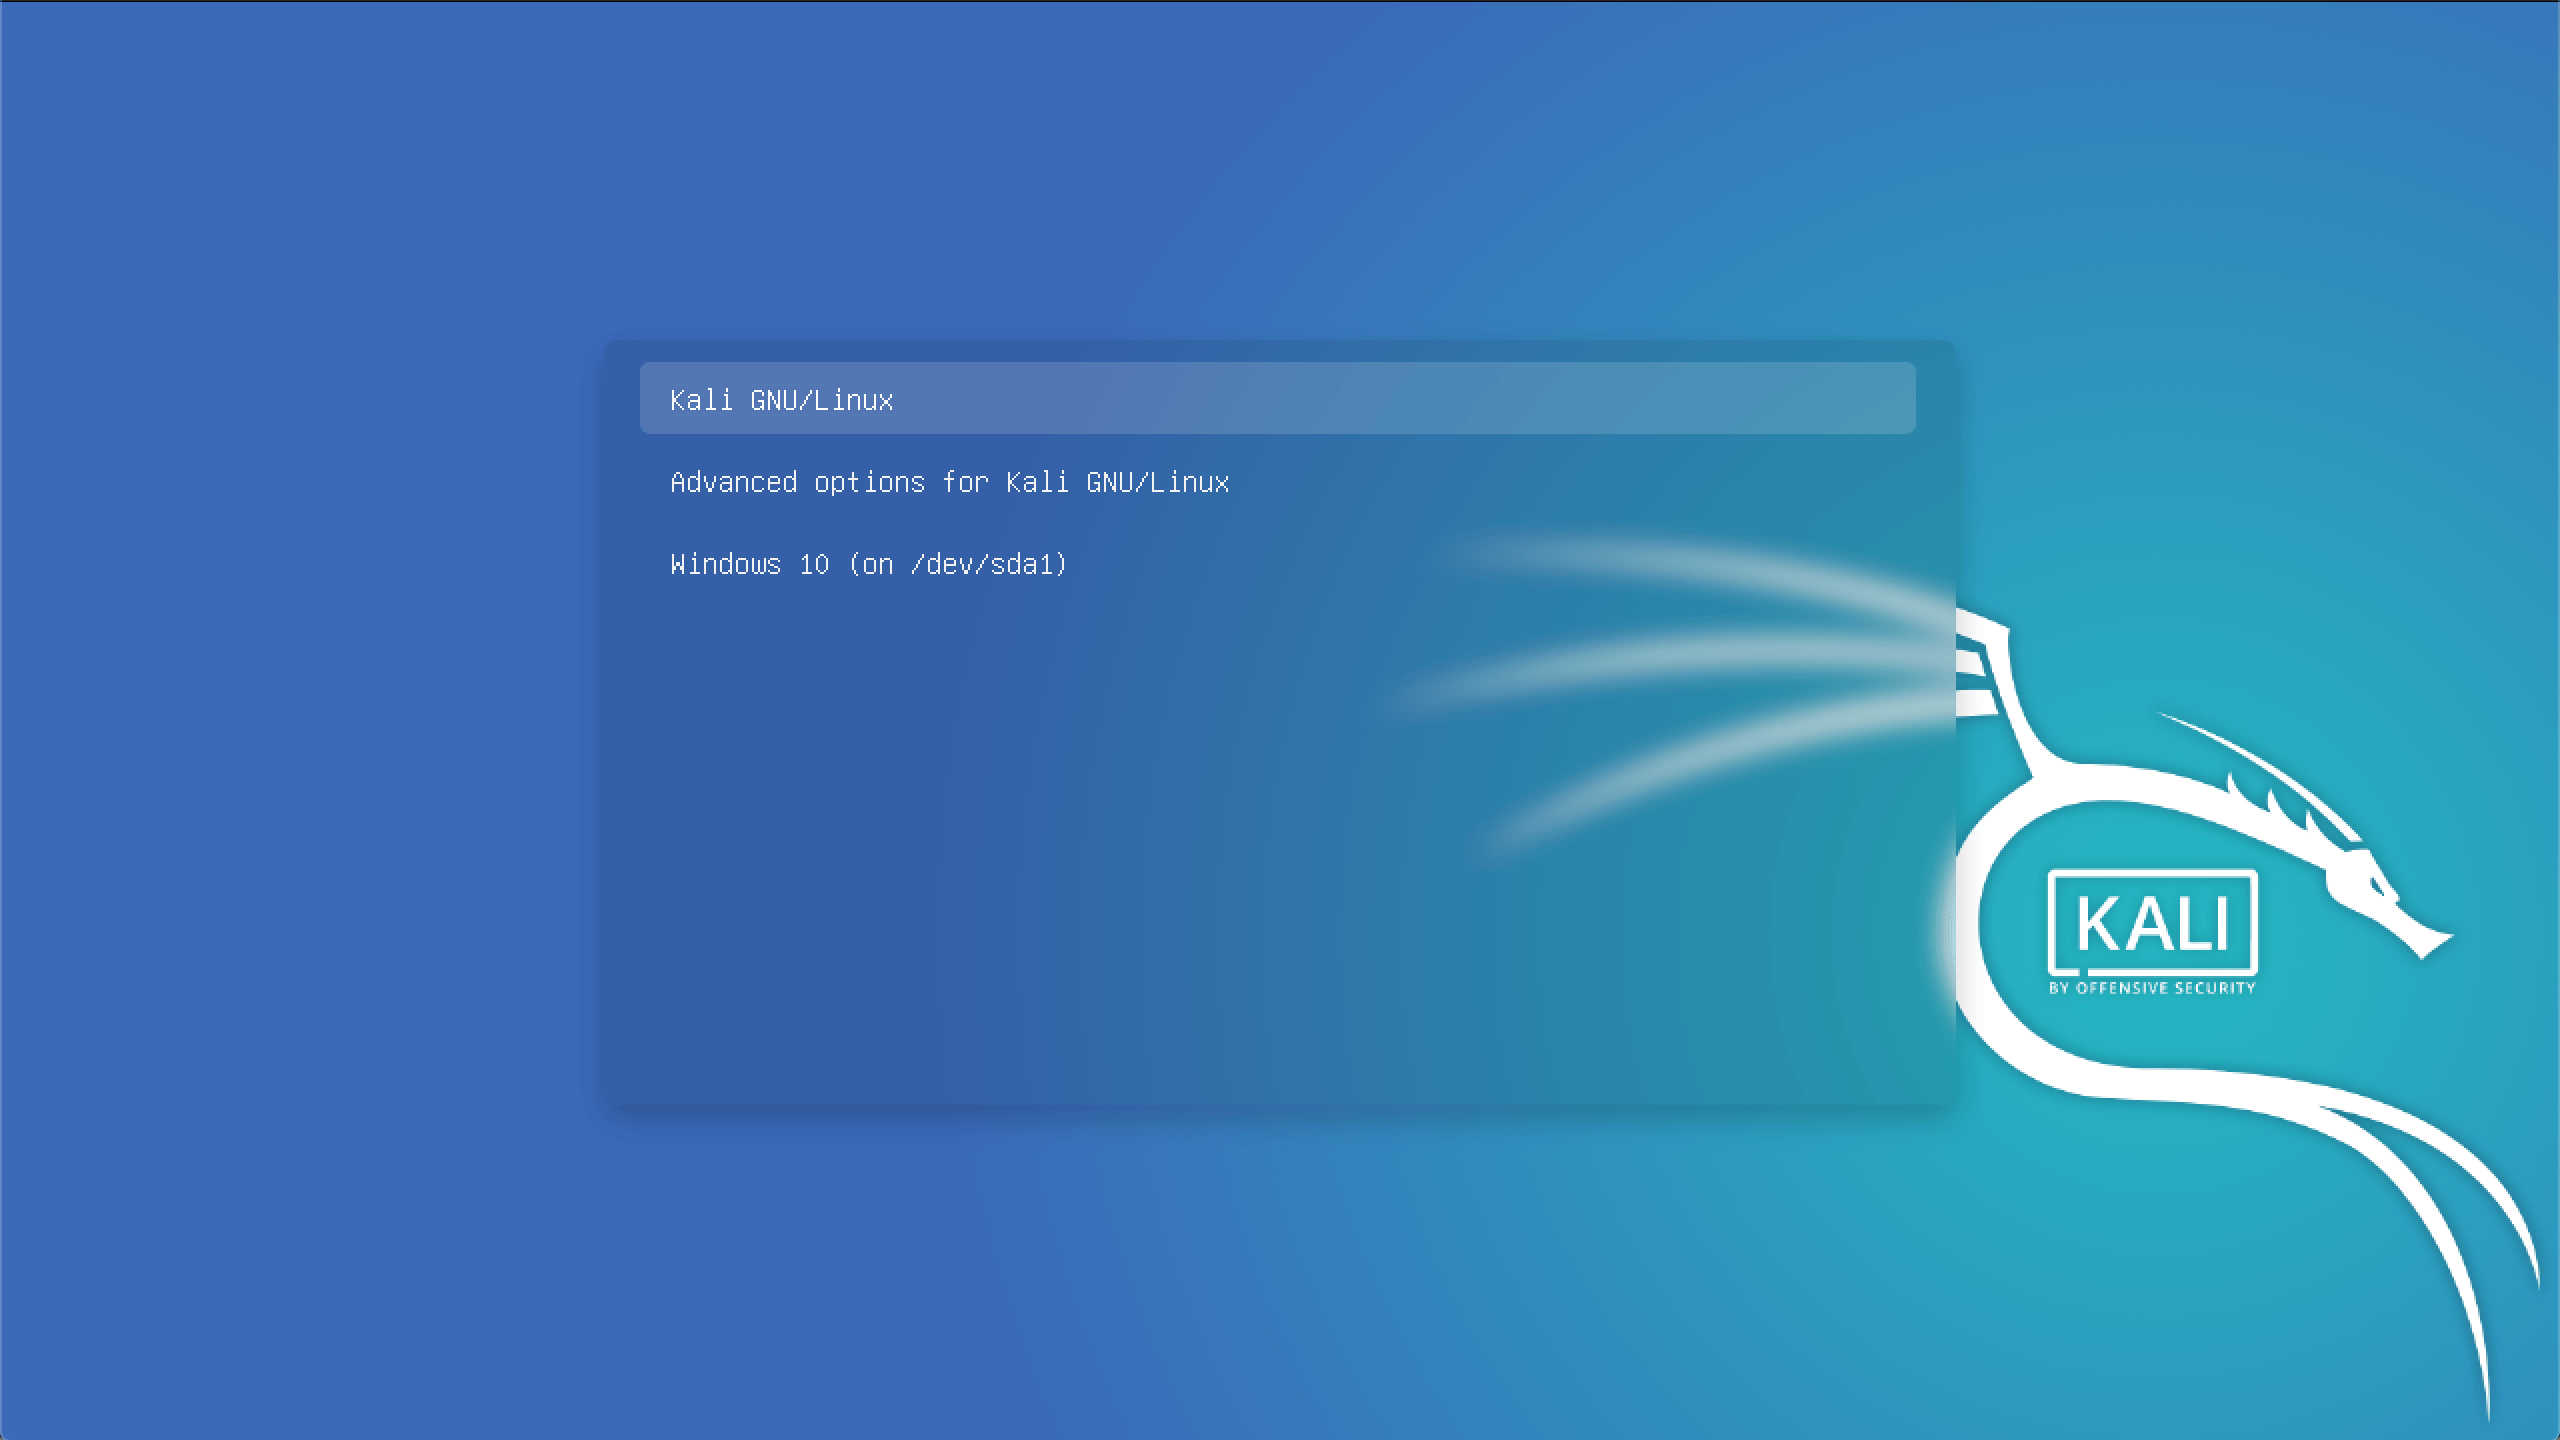
You should be greeted with a GRUB boot menu, which will allow you to boot either into Kali Linux or Windows.
Post Installation
Now that you’ve completed installing Kali Linux, it’s time to customize your system.
The General Use section has more information and you can also find tips on how to get the most out of Kali Linux in our User Forums.
Time/System Clock
One thing that may be worth knowing about is that occasionally the time will get changed between the Windows and the Linux system. To fix this, we can do the following:
[email protected]:~$ timedatectl set-local-rtc 1 --adjust-system-clock [email protected]:~$ To undo this we can simply do:
[email protected]:~$ timedatectl set-local-rtc 0 --adjust-system-clock [email protected]:~$ Статья Восстанавливаем GRUB в Kali Linux после обновления до Windows 10
Привет всем! Недавно столкнулся с такой проблемой, как восстановление загрузчика GRUB на ноуте с двумя операционками – Windows 10 и Kali Linux. В интернете пришлось довольно долго искать необходимый мануал, поскольку с подобным мало кто сталкивается. В основном пишут о восстановлении GRUB в Ubuntu, а это не совсем подходит для Kali. Поэтому решил поделиться своим опытом – возможно кому-то пригодится.
Вообще-то две (а иногда и более) принципиально различных ОС на моих компьютерах уживаются уже несколько лет, ничего удивительного в этом нет. Главное сохранить правильную очередность при установке ОС. Сначала ставим винду, оставляя часть диска неразмеченным под Linux, а после уже устанавливаем и последнюю ОС. Загрузчик Linux-а при этом автоматически определяет, что установлена Windows или другая ОС и вам остается только выбирать при загрузке нужную систему.
Так было до последнего времени и на новом ноуте – стояла Windows 8.1 и Kali Linux. Все работало без проблем, пока не решил попробовать новую Windows 10 (инсайдер-версию) для теста. Ее установил на место старой 8.1 при этом хитрая форточка, как всегда, перезаписала загрузчик GRUB. Переустанавливать Kali Linux не хотелось, поскольку там было сделано достаточно много настроек и наработок. Поэтому пришлось искать другой выход.
Для восстановления загрузчика нам понадобится LiveCD версия линукс, установленная на оптический диск, или usb носитель. Загружаемся с нашего носителя в обычном режиме, открываем консоль. Если вы не помните на каком разделе у вас стоит Linux, следует сначала воспользоваться командой:
/dev/sda1 29 8369 66999082+ 83 Linux /dev/sda2 * 8370 13995 45190845 7 HPFS/NTFS /dev/sda3 13996 14593 4803435 5 Extended Видим, что наша Linux стоит в разделе / dev / sda1Далее можем выполнять следующие команды (обращайте внимание на каком разделе у вас стоит Linux, его и подставляете вместо sda1)
mount /dev/sda1 /mnt mount --bind /dev /mnt/dev mount --bind /dev/pts /mnt/dev/pts mount --bind /proc /mnt/proc mount --bind /sys /mnt/sys chroot /mnt grub-install /dev/sda update-grub exit umount /mnt/dev/pts umount /mnt/dev umount /mnt/proc umount /mnt/sys umount /mntВсе! Делаем reboot и наблюдаем знакомое меню выбора ОС. Если вдруг пункт Windows в нем отсутствует (что очень маловероятно), выполняем в консоли под root-ом еще одну команду:
должно помочь. Успехов вам!
MIRK
05.10.2015 в 18:40
Прошу помочь в таком вопросе, перерыл кучу всего в гугле, но там либо нечего нет, либо я не понимаю что и как, а вопрос собственно вот в чем при установки кали линукс с флешки вместо стандартной установки появляется консоль grub и все что делать далее я вообще не понимаю, прошу обратить внимание на то что до этого стояла кали я ее не правильно снес и хотел поставить эту сверху но не фига не получилось конечно же, поставил другой вообще винт который фиг знает как отфарматирован но раб 100% биос его видит и флешку тоже, что и как уставновить подскажите пожалуйста, аж самому интересно взять и сделать научиться как нужно))заранее спасибо)
DOCENT
05.10.2015 в 22:07
Я если честно запутался в этой истории ))) Поподробней, неспеша, с запятыми. Может чем подскажу.
ANDREY
15.11.2015 в 01:25
Здравствуйте,
Правильно ли я понял, что если у меня /boot отдельным разделом, то мне проделывать все эти операции там?
ANDREY
15.11.2015 в 02:01
Не хватило терпения дождаться) Попробовал проделать все с boot разделом – нет этих папок (dev, proc, sys)
Пробовал через раздел с Линуксом – grub2 не видит Кали, только Винда…
Вот мой список разделов:
SSD
/dev/sdb1 * Linux (/boot)
/dev/sdb2 Linux (основной)
HDD
/dev/sda1 Linux (swap)
/dev/sda2 Linux (/home)
/dev/sda3 * Windows
Как быть? Что делать?
ANDREY
15.11.2015 в 02:33
Сам спросил, сам отвечу.
Сначало смонтировал как советовал автор.
mount /dev/sdb2 /mnt
А потом отдельно папку boot
mount /dev/sdb1 /mnt/boot
Ну и соответственно grub инсталил на sdb
grub-install /dev/sdb
В конце при umount /mnt Система руганулась что папка занята. После ребута полёт нормальный.
Большое спасибо Автору статьи, она мне очень помогла.
РОМАН
25.11.2015 в 19:00
что делать если kali linux 2.0 не может распознать команду update-grub?
АЛЕКСАНДР
27.02.2016 в 14:00
у меня ноутбук asus k56cb. стоит widows 8.1, рядом поставил kali linux 2.0. Grub не появился, грузится только винда. Получилось сделать из этой статьи всё кроме последнего. У меня тоже не знает команды update-grub. Может в биосе что-то поменять, но я ничего не нашел
АЛЕКСАНДР
27.02.2016 в 15:32
а почему update-grub команду не распознает не знаете?
КОНСТАНТИН
07.03.2016 в 07:18
в ubuntu восстанавливал загрузчик без проблем, тут грузанулся с kali live cd пишу –bind и т.д. – а в ответ –bind command not found
как решить эту проблему? grub-install тоже самое пишет!
Пропала Windows из меню загрузки Grub Кали Линукс.

В статье описывается приём, с помощью которого можно вернуть запись об операционной системе Windows, когда после появления загрузчика Grub вы вдруг обнаруживаете, что пропала Windows из списка установленных систем. Всем привет, короткое эссе на тему как вернуть пропавшую запись об установленной Windows в Grub-загрузчик Кали Линукс. Такая беда подстерегла меня после очередного обновления Кали, и после перезагрузки на экране в меню загрузчика я заметил, что в нём чего-то не хватает:
Речь, конечно же, не идёт о потере Windows и файлов, в ней содержащихся. Просто как и загрузчик Windows, Grub-загрузчик тоже может «потерять память». Тем более, что мы имеем дело с такой недружелюбной сборкой Debian как Кали. Но ладно, специальных инструментов нам никаких не понадобится, просто загружаемся в Кали привычным порядком…
Пропала Windows: возвращаем запись о Windows в Grub-загрузчик
Откроем окно терминала и вводим команду (если вы не root-пользователь, не забудьте вводит все команды через sudo):
Линукс прошерстит конфигурацию загрузчика, и, если вы не столкнулись с куда более серьёзными проблемами, он обязательно обнаружит запись о Windows:

Теперь закрепляем обнаруженную запись в загрузчике командой:

Перезагружаемся. У меня всё стало на свои места:
Ничего не получается…
Пакет os-prober установлен, терминал ошибок не возвращает, однако запись о Windows всё не появляется. Давайте внесём запись о Windows в загрузчик вручную.
cd /etc/grub.d/ leafpad 40_custom
menuentry «Windows X»
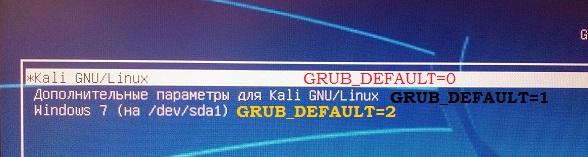
set root='(hd0,X)’
chainloader +1
где Windows X — имя системы так, как вы хотите её видеть (в принципе, можете написать что угодно, в том числе по-русски); hd0,X — диск и номер раздела, на которых Windows находится. 0 — единственный жёсткий диск (1 — второй, 2 — третий и т.д), Х — номер нужного раздела sda с Windows. Если вы не уверены в номере раздела, это легко установить, запустив, к примеру, gparted из терминала. Оттуда всё хорошо видно, где лежит Windows.
grub-mkconfig -o /boot/grub/grub.cfg
