- Kali Linux 2021.1 – Fresh Installation Guide
- System Requirements
- Create a Bootable USB Using dd Command
- Installation of Kali Linux Distribution
- Установка и базовая настройка Kali Linux
- Где скачать Kali Linux?
- Запуск Kali Linux из готового OVA образа Virtual Box
- Установка Kali Linux в виртуальную машину с помощью ISO образа
- Базовая настройка Kali Linux
Kali Linux 2021.1 – Fresh Installation Guide
Kali Linux is arguably one of the best out-of-the-box Linux distributions available for security testing. While many of the tools in Kali can be installed in most Linux distributions, the Offensive Security team developing Kali has put countless hours into perfecting their ready-to-boot security distribution.
Kali Linux is a secure Debian-based Linux distribution that comes pre-loaded with hundreds of well-known security tools and has gained quite a name for itself.
Kali even has an industry-respected certification available called “Pentesting with Kali”. The certification is a rigorous 24-hour challenge in which applicants must successfully compromise a number of computers with another 24 hours to write up a professional penetration test report that is sent to and graded by the personnel at Offensive Security. Successfully passing this exam will allow the test taker to obtain the OSCP credential.
The focus of this guide and future articles is to help individuals become more familiar with Kali Linux and several of the tools available within the distribution.
Please be sure to use extreme caution with the tools included with Kali as many of them can accidentally be used in a manner that will break computer systems. The information contained within all of these Kali articles is intended for legal usages.
System Requirements
Kali has some minimum suggested specifications for hardware. Depending upon the intended use, more may be desired. This guide will be assuming that the reader will want to install Kali as the only operating system on the computer.
- At least 20GB of disk space; strongly encouraged to have more.
- At least 2GBMB of RAM; more is encouraged especially for graphical environments.
- USB or CD/DVD boot support
- ISO is available from the Kali Linux download page.
Create a Bootable USB Using dd Command
This guide will be assuming that a USB drive is available to use as the installation media. Take note that the USB drive should be as close to 4/8GB as possible and ALL DATA WILL BE REMOVED!
The author has had issues with larger USB drives but some may still work. Regardless, following the next few steps WILL RESULT IN DATA LOSS ON THE USB DRIVE.
Please be sure to backup all data before proceeding. This bootable Kali Linux USB drive is going to be created from another Linux machine.
Step 1 is to obtain the Kali Linux ISO. This guide is going to use the current newest version of Kali with the XFCE Linux desktop environment.
To obtain this version, type the following wget command into a terminal.
$ cd ~/Downloads $ wget -c https://cdimage.kali.org/kali-2021.1/kali-linux-2021.1-installer-amd64.iso
The two commands above will download the Kali Linux ISO into the current user’s ‘Downloads’ folder.
The next process is to write the ISO to a USB drive to boot the installer. To accomplish this we can use the dd tool within Linux. First, the disk name needs to be located with the lsblk command though.
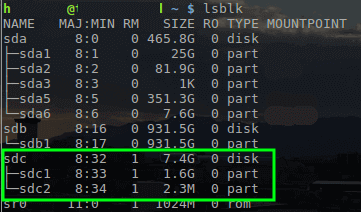
With the name of the USB drive determined as /dev/sdc , the Kali ISO can be written to the drive with the ‘dd’ tool.
$ sudo dd if=~/Downloads/kali-linux-2021.1-installer-amd64.iso of=/dev/sdc
Important: The above command requires root privileges so utilize sudo or login as the root user to run the command. Also, this command will REMOVE EVERYTHING on the USB drive. Be sure to backup needed data.
Once the ISO is copied over to the USB drive, proceed further to install Kali Linux.
Installation of Kali Linux Distribution
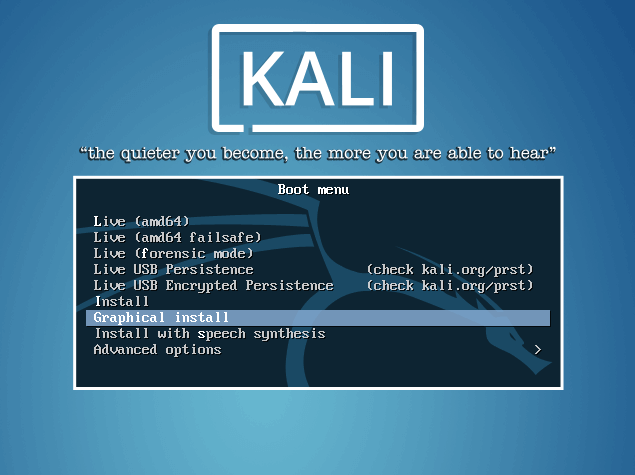
1. First, plug the USB drive into the respective computer that Kali should be installed upon and proceed to boot to the USB drive. Upon successful booting to the USB drive, the user will be presented with the following screen and should proceed with the ‘Install’ or ‘Graphical Install’ options.
This guide will be using the ‘Graphical Install’ method.
2. The next couple of screens will ask the user to select locale information such as language, country, and keyboard layout.
Once through the locale information, the installer will prompt for a hostname and domain for this install. Provide the appropriate information for the environment and continue installing it.


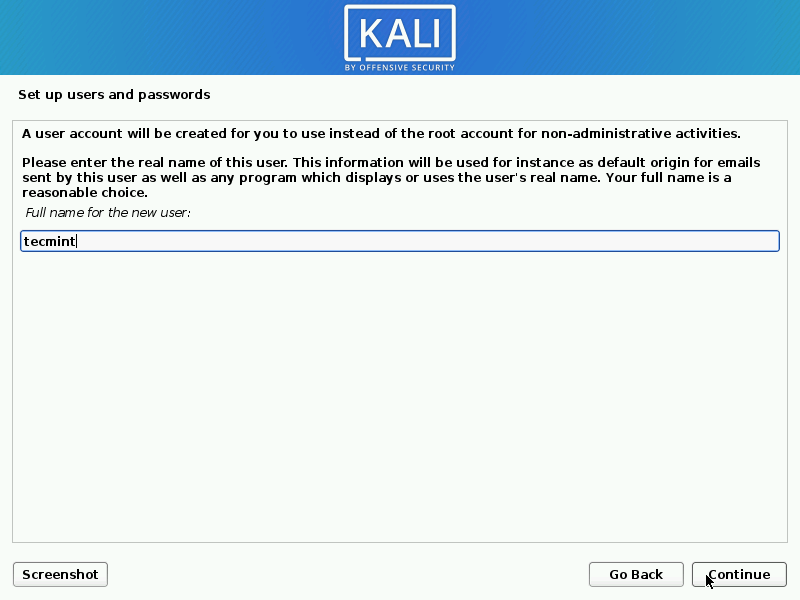
3. After setting up the hostname and domain name, you need to create a new user account to use instead of a root account for non-administrative activities.
4. After setting the password is set, the installer will prompt for time zone data and then pause at the disk partitioning.
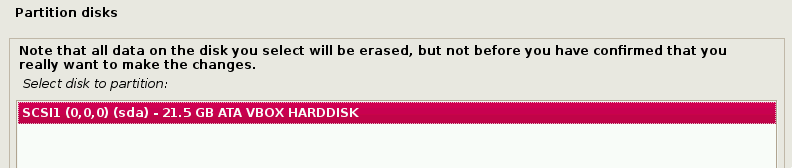
If Kali will be the only one operating on the machine, the easiest option is to use ‘Guided – Use Entire Disk’ and then select the storage device you wish to install Kali.

5. The next question will prompt the user to determine the partitioning on the storage device. Most installs can simply put all data on one partition though.

6. The final step asks the user to confirm all changes to be made to the disk on the host machine. Be aware that continuing will ERASE DATA ON THE DISK.

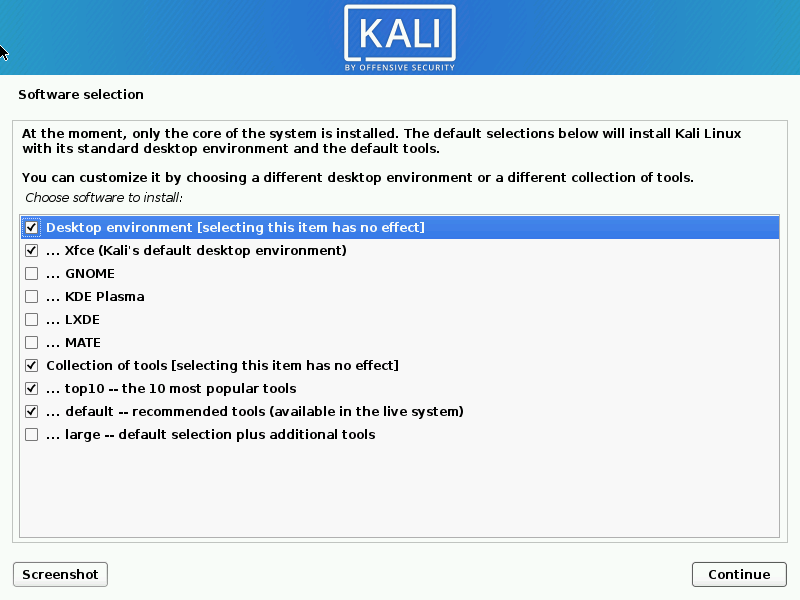
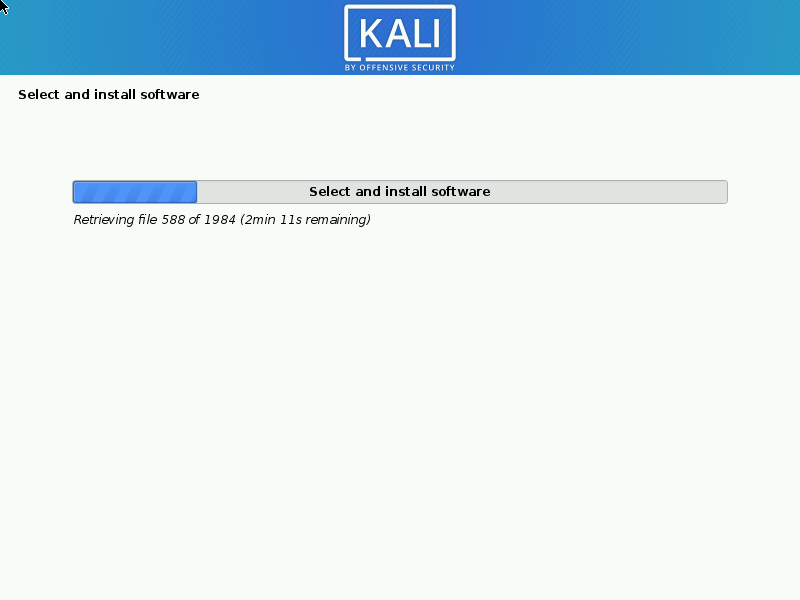
7. Once confirming the partition changes, the installer will run through the process of installing the files. Once it is completed, the system will prompt you to select software that will install a standard desktop environment with needed tools.
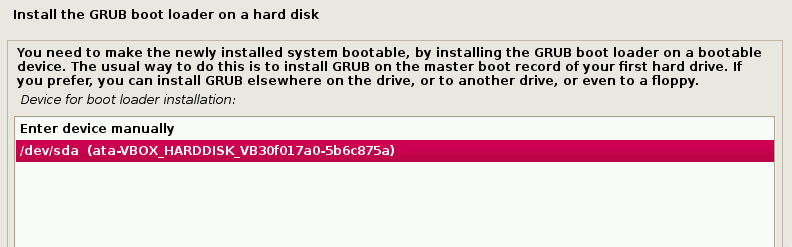
8. After the software installation is complete, the system will ask to install grub. Again this guide is assuming that Kali is to be the only operating system on this computer.
Selecting ‘Yes’ on this screen will allow the user to pick the device to write the necessary boot loader information to the hard drive to boot Kali.

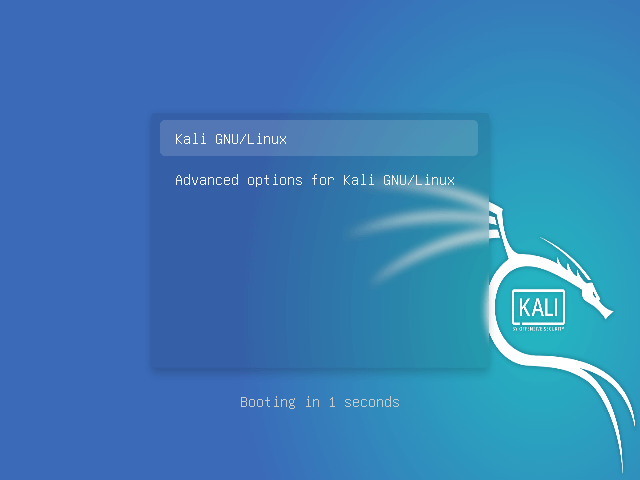
9. Once the installer finishes installing GRUB to the disk, it will alert the user to reboot the machine to boot into the newly installed Kali machine.

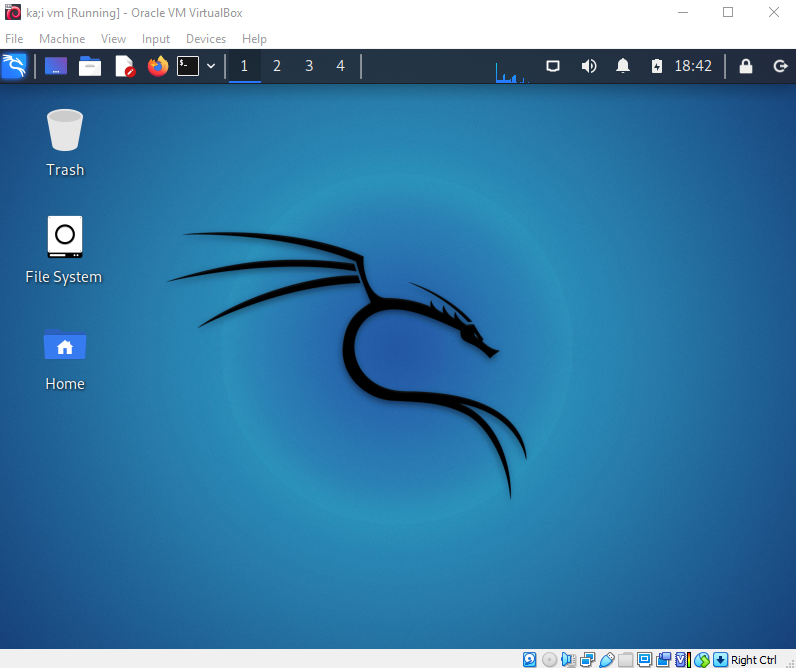
10. Since this guide installed the XFCE Desktop environment, it will likely default boot into it.
Once it booted, log in as the user ‘tecmint‘ with the password created earlier in the installation process.
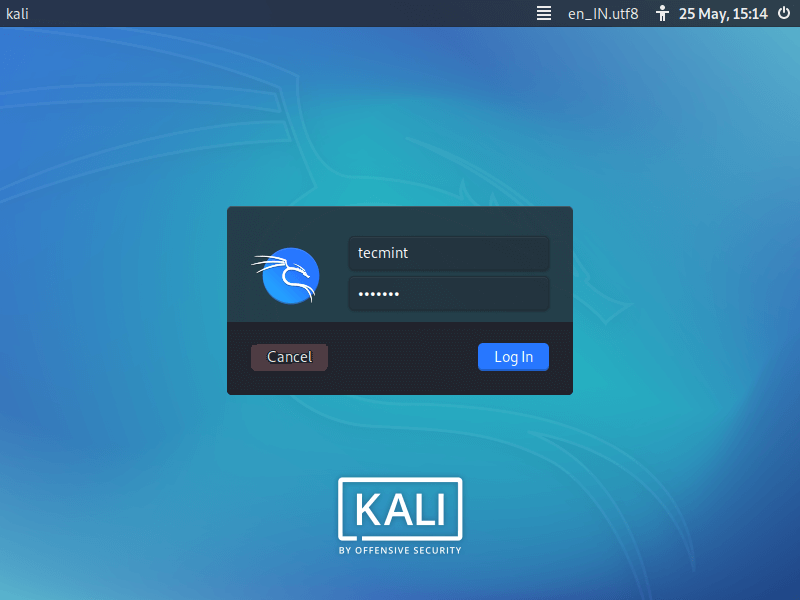

At this point, Kali Linux is successfully installed and ready to be used! Upcoming articles will walk through the tools available within Kali and how they can be utilized to test the security posture of hosts and networks. Please feel free to post any comments or questions below.
Установка и базовая настройка Kali Linux

12.08.2022

itpro

Kali, Linux, VirtualBox

Один комментарий
В этой статье мы рассмотрим начало работы с Kali Linux, одного из лучших инструментов для тестирования информационной безопасности компьютерных систем. В статье описано как скачать и запустить дистрибутив Kali Linux, типовые сценарии развёртывания, процесс установки и первоначальной настройки.
Kali является самым распространенным и одним из лучших Linux дистрибутивов в области тестирования защищенности. Дистрибутив Kali Linux основан на Debian и поставляется с множеством инструментов для тестирования безопасности от Offensive Security. Доступны несколько классов инструментов.
Где скачать Kali Linux?
Дистрибутив Kali Linux для различных аппаратных и виртуальных платформ можно скачать по ссылке: https://www.kali.org/get-kali/#kali-platforms
Доступны следующие виды дистрибутивов:
- Bare Metal версия для полноценной установки на физические компьютеры или сервера. Доступы образы
- x64 с максимальным количеством обновлений (2022-W02)
- x64 offline стабильный инсталлятор (2021-4a)
- x64 NetInstaller сетевая установка (2021-4a)
Далее мы покажем, как запустить готовый. ova образ Kali в виртуальной машине Virtual Box, и установить образ в чистую виртуальную машину с помощью ISO образа.
Запуск Kali Linux из готового OVA образа Virtual Box
Самый быстрый способ запустить Kali Linux на вашем компьютере – скачать готовый OVA образ для VirtualBox (не забудьте установить Extension Pack для Virtual Box).
Проверьте, что в BIOS/UEFI вашего компьютера включена виртуализация. Обычно это Intel VT-x или AMD-V.
Скачайте x64 .ova образ Kali Linux для Virtual Box здесь https://www.kali.org/get-kali/#kali-virtual-machines
Импортируйте готовый ova образ в Virtual Box (File -> Import Appliance -> Source – Local File System, File – выбираем ранее загруженный .ova и жмем Import).
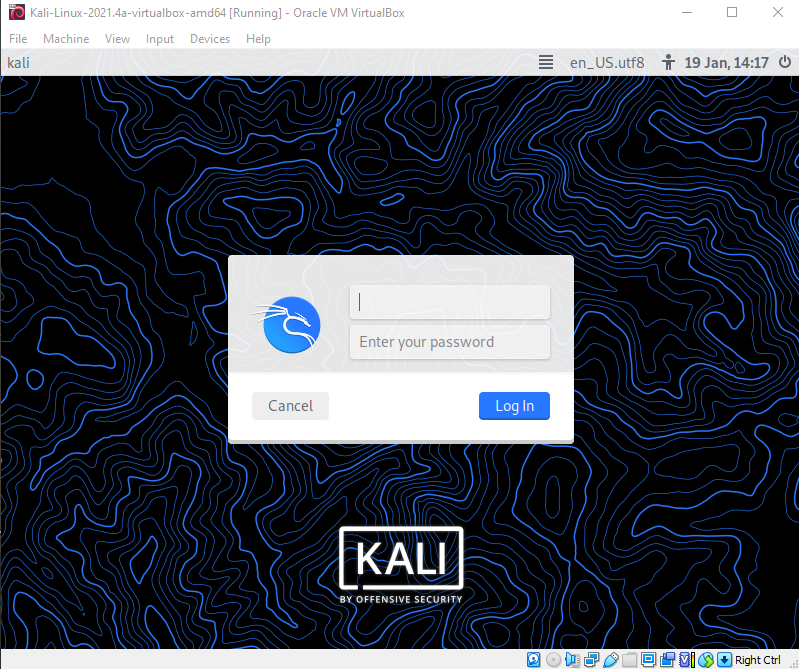
Kali готова к запуску, осталось запустить ВМ кнопкой Start и вы увидите экран входа.

Вводим стандартный логин и пароль kali/kali.
Виртуальная машина Kali запущена, можно приступать к дальнейшей работе. Рассмотренный способ является наиболее оптимальным для первого знакомства — занимает меньшее количество времени.
Установка Kali Linux в виртуальную машину с помощью ISO образа
Можно установить Kali Linux в виртуальную машину с помощью установочного ISO образа. Скачайте x64 образ Kali для офлайн установки (https://www.kali.org/get-kali/#kali-bare-metal).
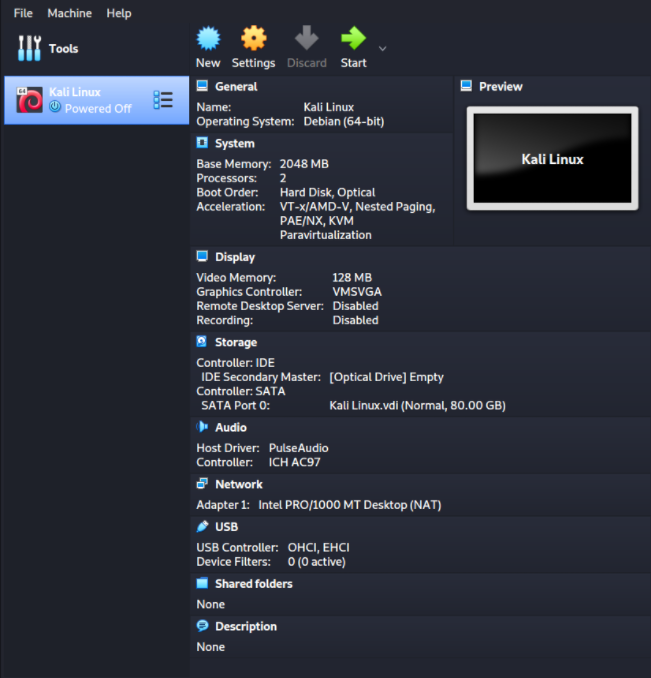
Создайте виртуальную машину со следующими параметрами:
- Type – Linux;
- Version – Debian (64-bit);
- Memory size (RAM) – 2048MB (не менее);
- Hard disk– VDI (VirtualBox Disk Image), Dynamically allocated, размером не менее 80 Гб.
В настройках виртуальной машины Virtual Box измените следующие параметры:
- Включите общий буфер обмена: General – Advanced, Shared Clipboard и Drag’n’Drop на bidirectional;
- Добавьте 2 vCPU, а также в Extended Features опцию Enable PAE/NX;
- Добавьте 128 Мб для видеопамяти (Display –> Screen -> Video Memory)
- Выделяем 128MB видеопамяти: Display – Screen, Video Memory в значение 128 MB;
Для начала установки смонтируйте скачанный ISO образ Kali Linux в виртуальный привод (Storage -> Controller –> IDE /CD).
Запустите виртуальную машину. Для упрощения рассмотрим графическую установку:
- Graphical Install
- Язык English, локация
- Выберите локацию и раскладку
- Имя хоста — vmkali
- Имя домена пропускаем
- Задайте имя пользователя
- Задайте пароль
- Настраиваем временную зону
- Разбивка диска – Guided – use entire disk .
Для первого знакомства этого достаточно, в будущем разбивку можно выполнять и вручную, в том числе с включением LVM, если требуется.
Если все сделано верно, как в случае с использованием готового образа Kali, вы увидите окно входа в учетную запись:
Войдите в Kali с помощью заданных ранее логином и паролем.
Базовая настройка Kali Linux
Теперь можно изменить базовые настройки Kali.
По умолчанию Kali настроена на автоматическое получение IP адреса через DHCP. Можно задать параметры сети вручную в Настройках -> Сеть. Здесь же можно указать адрес прокси-сервер для доступа в Интернет.
Можно задать параметры IPv4 адреса вручную из консоли
sudo ifconfig eth0 192.168.1.2 netmask 255.255.255.0
sudo route add default gw 192.168.1.2 eth0
sudo echo nameserver %DNS ADDRESS% > /etc/resolv.conf
Если вы используете дистрибутив NetInsall, Kali linux автоматически пропишет актуальное зеркало для устанавливаемого дистрибутива в системных параметрах.
Список депозитариев хранится в файле /etc/apt/source.list. По умолчанию использутся репозиторий:
deb http://http.kali.org/kali kali-rolling main contrib non-free
Обновите репозитории и установите обновления операционный системы:
apt-get clean && apt-get update && apt-get upgrade -y && apt-get dist-upgrade –y
По окончании установки обновлений операционной системы выполните перезагрузку:
Для установки группы программ (если она была пропущена при установке) нужно выполнить команду:
sudo apt install kali-tools-wireless
sudo apt -y install powershell
Список самых распространенных инструментов (если вы установили Kali в минимальной конфигурации):
sudo apt install kali-tools-information-gathering kali-tools-vulnerability kali-tools-web kali-tools-password kali-tools-exploitation
Либо можно установить сразу все:
sudo apt install kali-linux-large
Вывести список программ в пакете:
sudo apt depends kali-tools-wireless
Для удаленного подключения к консоли Kali Linux по SSH нужно включить автоматической запуск службы SSH (по умолчанию установлена, но отключена):
sudo systemctl start ssh.socket
sudo systemctl enable ssh.socketПроверьте, что служба SSH запущена:
sudo systemctl status ssh.socket
Чтобы разрешить удаленный доступ под Root, нужно в файле /etc/ssh/sshd_config найти строку
#PermitRootLogin prohibit-password и заменить ее на PermitRootLogin yes .
В этой статье мы показали, как быстро установить и запустить Kali Linux. Это позволит вам познакомится с ее интерфейсом и терминалом. Попробуйте выполнить простые задачи, описанные в сети Интернет, попытаться при помощи nmap провести первые сканирования, начать можно с личного роутера или аналогично установить на Oracle virtual box операционную систему Metasploitable 2 и отработать первые атаки. В следующих статьях мы рассмотрим использование различных инструментов Kali Linux.
Предыдущая статья Следующая статья