- Kali linux installer iso
- Content
- Which Image to Choose
- Which Desktop Environment and (Meta)Packages to Choose During Installation:
- Kali linux installer iso
- System Requirements
- Installation Prerequisites
- Preparing for the Installation
- Kali Linux Installation Procedure
- Boot
- Language
- Network
- User Accounts
- Clock
- Disk
- Encrypted LVM
- Proxy Information
- Metapackages
- Boot Information
- Reboot
- Post Installation
Kali linux installer iso
In this section, we will describe the process of installing Kali Linux on 32-bit and 64-bit hardware using the images published on the Kali Linux download page.
Content
Which Image to Choose
The Kali Linux download page offers different image types (Installer, NetInstaller and Live) for download, each available for both 32-bit and 64-bit architectures. Additionally, there is an Everything flavor of the Installer and Live images, for 64-bit architectures only.
If in doubt, use the “Installer” image. You will need to check your system architecture to know whether to get 32-bit or 64-bit. If you don’t know it, you’re best to research how to find out (As a rule of thumb, if your machine’s newer than 2005 you should be okay with amd64/x64/64-bit)
Installer
This is the recommended image to install Kali Linux. It contains a local copy of the (meta)packages listed (top10, default & large) so it can be used for complete offline installations without the need of a network connection.
This image cannot be used to boot a live system (such as directly running Kali from a USB). It is only an installer image.
NetInstaller
This image can be used if you want the latest package every time you install Kali Linux or the standard installer image is too big to download. This image is very small because it does not contain a local copy of (meta)packages to install. They will all be downloaded during installation, so as a result this requires a network connection which will slow down the installation time.
Only use this image if you have reasons not to use the standard installer image above.
This image cannot be used to boot a live system (such as directly running Kali from a USB). It is only an installer image.
Live
This image is for running Kali Linux without installing it first so it is perfect for running off a USB drive (or a CD/DVD).
You are able to install Kali Linux in its default configuration from this image but you will not be able to choose between desktop environments or to specify additional (meta)packages to install.
Everything
This image is meant for offline scenarios, when you want to use Kali Linux in a place that has no network connectivity. The image is huge (more than 9GB), as it contains nearly all of Kali’s tools already. It’s only available for the 64-bit architecture, and it can be downloaded via BitTorrent only.
Kali “everything” is not exactly an image, it’s a flavor. You can download either the Installer Everything image or the Live Everything image. In both case, all the tools are already there, no need for an Internet connection.
Which Desktop Environment and (Meta)Packages to Choose During Installation:
Each Kali Linux installer image (not live) allows the user to select the preferred “Desktop Environment (DE)” and software collection (metapackages) to be installed with operating system (Kali Linux).
We recommend sticking with the default selections and add further packages after the installation as required. Xfce is the default desktop environment, and kali-linux-top10 and kali-linux-default are the tools which get installed at the same time.
At this screen, you may wish to not install a desktop environment, then Kali Linux becomes “headless” (no graphic interface) which uses less system resources up and commonly found on servers, dropboxes, low powered ARM devices, and the cloud. This is meant for people who are completely comfortable with the command line. You are able to install multiple Desktop Environments, allowing you to switch, we wouldn’t recommend it. You may change your mind and switch desktop environments at a later date.
May wish to not to install any of the pre-defined software packages/bundles/collections (metapackages), giving you a finer degree of control of manually installing exactly what software you want. Alternatively you may want to be more prepared and install more than the default toolset. Please be aware, that there are more tools available in Kali which has be manually installed after the setup (as they all cannot be stored in the setup image).
Overall, these extra choices are for a more efficient installation experience, meant for advanced users. Please be aware of their pitfalls.
The following sections in the “Kali Documentation Installation” of this documentation, will be using the “Installer” image for the guides unless stated otherwise.
Updated on: 2023-Mar-06
Author: Re4son
Kali linux installer iso
Installing Kali Linux (single boot) on your computer is an easy process. This guide will cover the basic install (which can be done on bare metal or guest VM), with the option of encrypting the partition. At times, you may have sensitive data you would prefer to encrypt using Full Disk Encryption (FDE). During the setup process you can initiate an LVM encrypted install on either Hard Disk or USB drives.
First, you’ll need compatible computer hardware. Kali Linux is supported on amd64 (x86_64/64-bit) and i386 (x86/32-bit) platforms. Where possible, we would recommend using the amd64 images. The hardware requirements are minimal as listed in the section below, although better hardware will naturally provide better performance. You should be able to use Kali Linux on newer hardware with UEFI and older systems with BIOS.
Our i386 images, by default use a PAE kernel, so you can run them on systems with over 4 GB of RAM.
In our example, we will be installing Kali Linux in a fresh guest VM, without any existing operating systems pre-installed. We will explain other possible scenarios throughout the guide.
System Requirements
The installation requirements for Kali Linux will vary depending on what you would like to install and your setup. For system requirements:
- On the low end, you can set up Kali Linux as a basic Secure Shell (SSH) server with no desktop, using as little as 128 MB of RAM (512 MB recommended) and 2 GB of disk space.
- On the higher end, if you opt to install the default Xfce4 desktop and the kali-linux-default metapackage, you should really aim for at least 2 GB of RAM and 20 GB of disk space.
- When using resource-intensive applications, such as Burp Suite, they recommend at least 8 GB of RAM(and even more if it is a large web application!) or using simultaneous programs at the same time.
Installation Prerequisites
This guide will make also the following assumptions when installing Kali Linux:
- Using the amd64 installer image.
- CD/DVD drive / USB boot support.
- Single disk to install to.
- Connected to a network (with DHCP & DNS enabled) which has outbound Internet access.
We will be wiping any existing data on the hard disk, so please backup any important information on the device to an external media.
Preparing for the Installation
- Download Kali Linux(We recommend the image marked Installer).
- Burn The Kali Linux ISO to DVD or image Kali Linux Live to USB drive. (If you cannot, check out the Kali Linux Network Install).
- Backup any important information on the device to an external media.
- Ensure that your computer is set to boot from CD/DVD/USB in your BIOS/UEFI.
- In the UEFI settings, ensure that Secure Boot is disabled. The Kali Linux kernel is not signed and will not be recognized by Secure Boot.
Kali Linux Installation Procedure
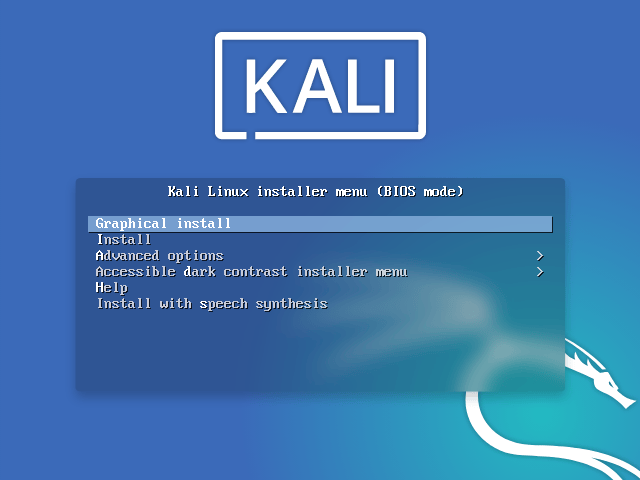
Boot
- To start your installation, boot with your chosen installation medium. You should be greeted with the Kali Linux Boot screen. Choose either Graphical install or Install (Text-Mode). In this example, we chose the Graphical install.

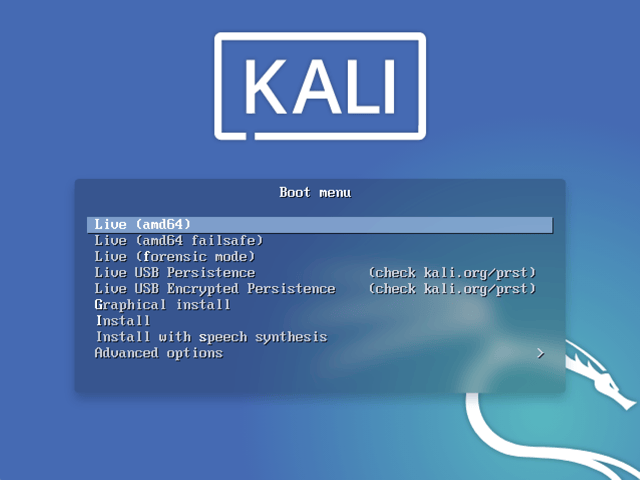
If you’re using the live image instead, you will see another mode, Live, which is also the default boot option.
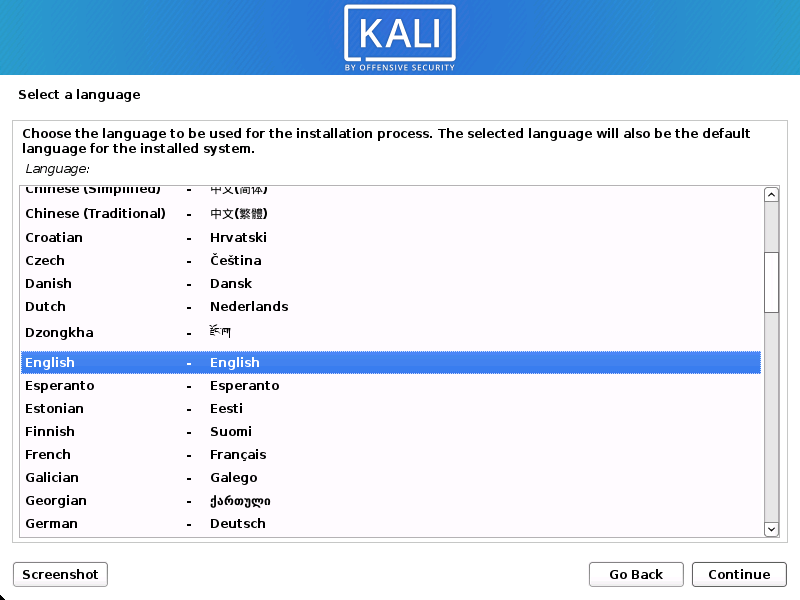
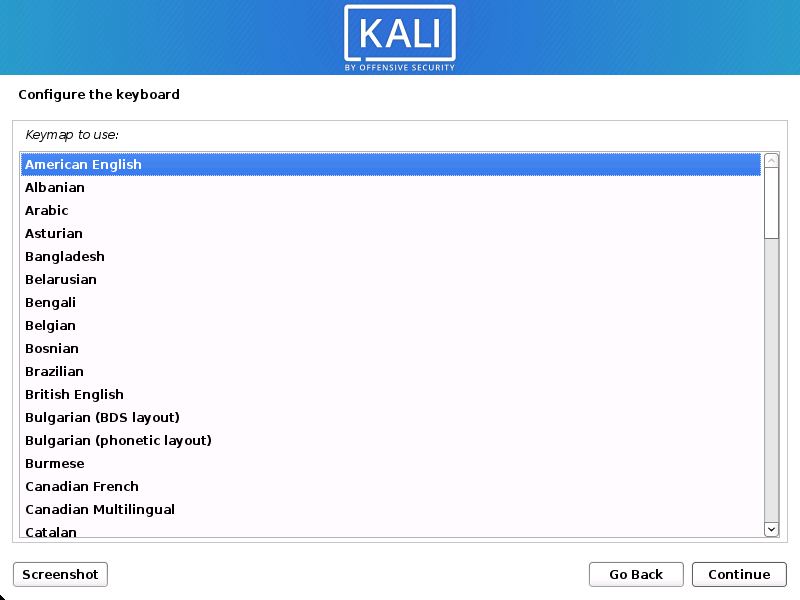
Language
- Select your preferred language. This will be used for both the setup process and once you are using Kali Linux.
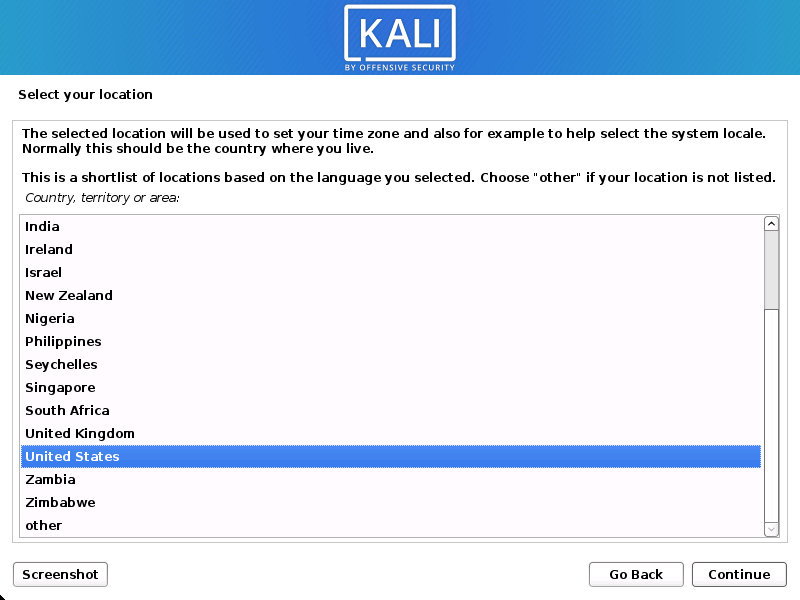
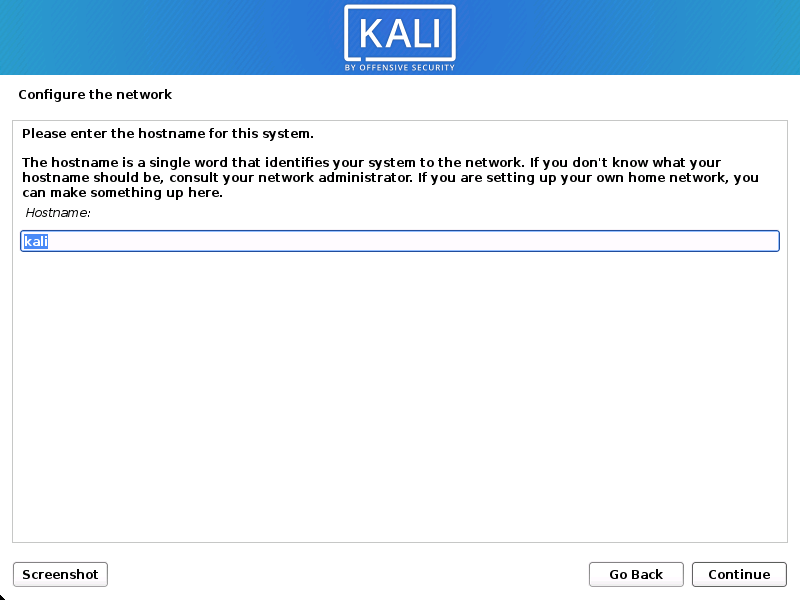
Network
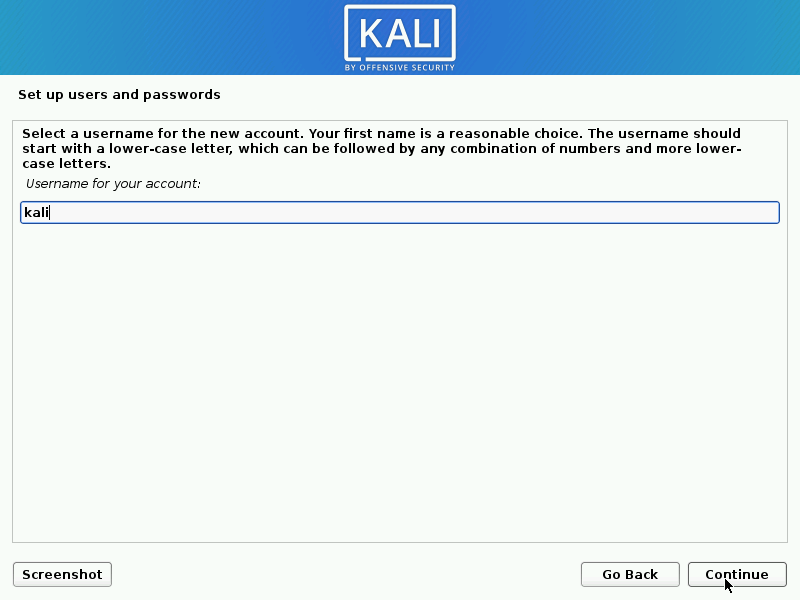
- The setup will now probe your network interfaces, looks for a DHCP service, and then prompt you to enter a hostname for your system. In the example below, we’ve entered kali as our hostname.
If there is no network access with DHCP service detected, you may need to manually configure the network information or do not configure the network at this time.
- If there isn’t a DHCP service running on the network, it will ask you to manually enter the network information after probing for network interfaces, or you can skip.
- If Kali Linux doesn’t detect your NIC, you either need to include the drivers for it when prompted, or generate a custom Kali Linux ISO with them pre-included.
- If the setup detects multiple NICs, it may prompt you which one to use for the install.
- If the chosen NIC is 802.11 based, you will be asked for your wireless network information before being prompted for a hostname.
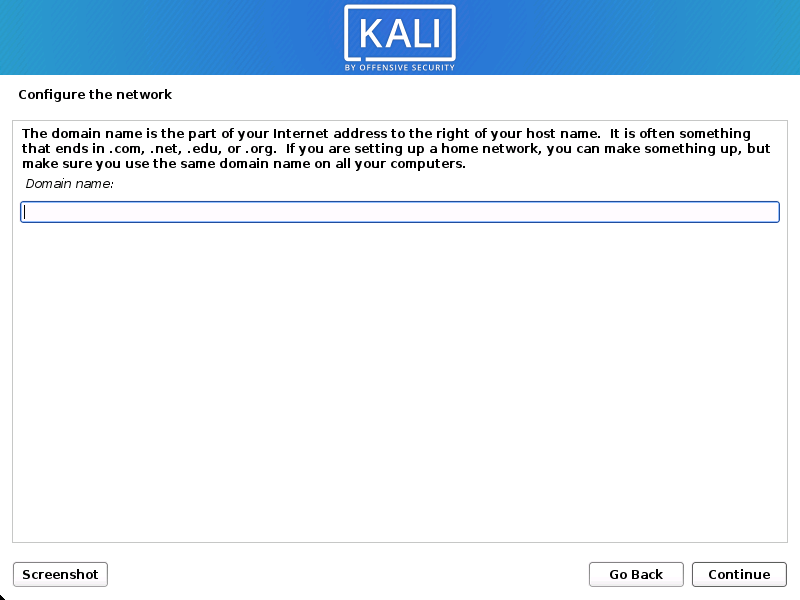
- You may optionally provide a default domain name for this system to use (values may be pulled in from DHCP or if there is an existing operating systems pre-existing).
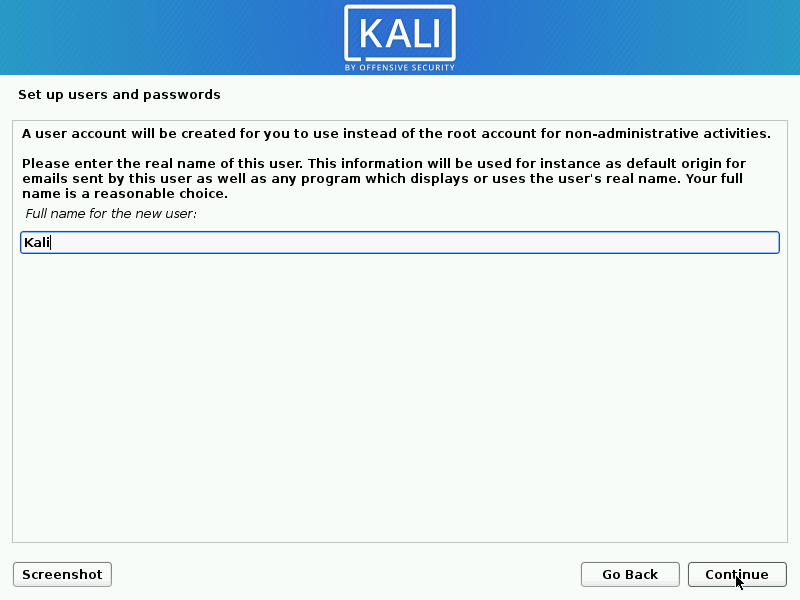
User Accounts
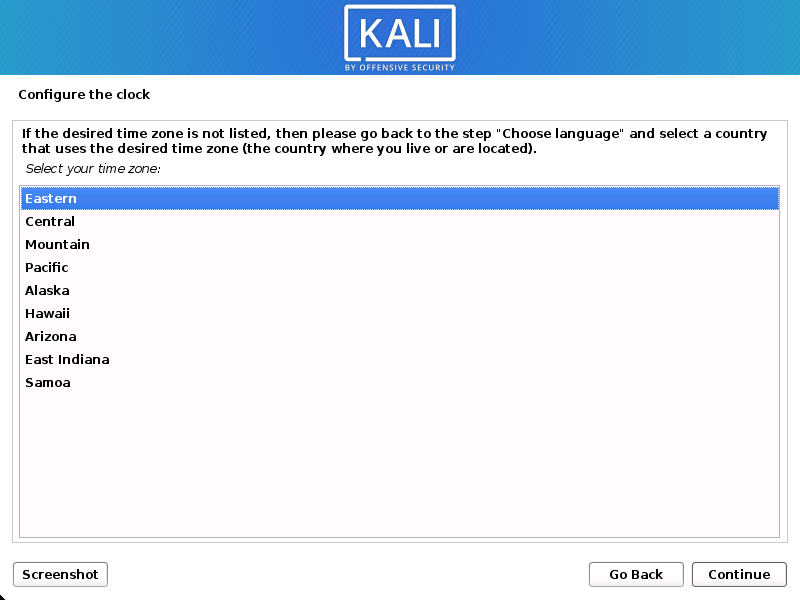
Clock
Disk
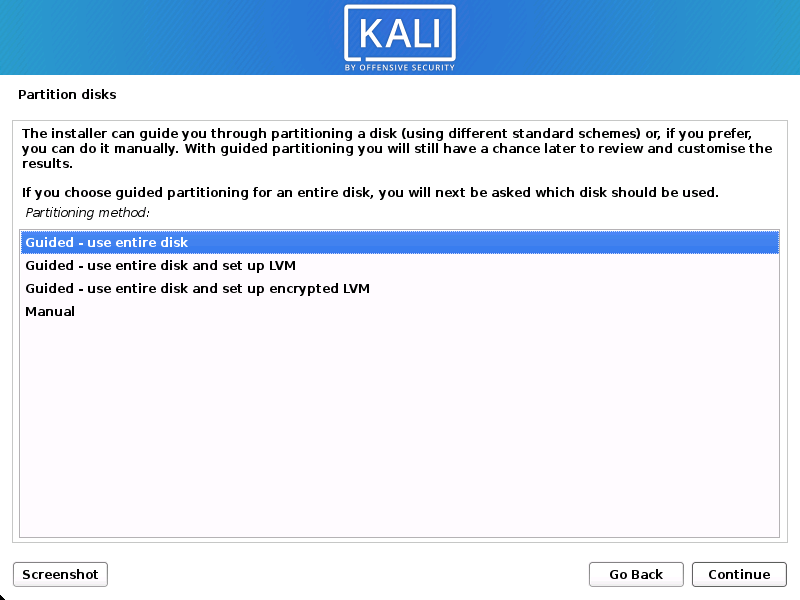
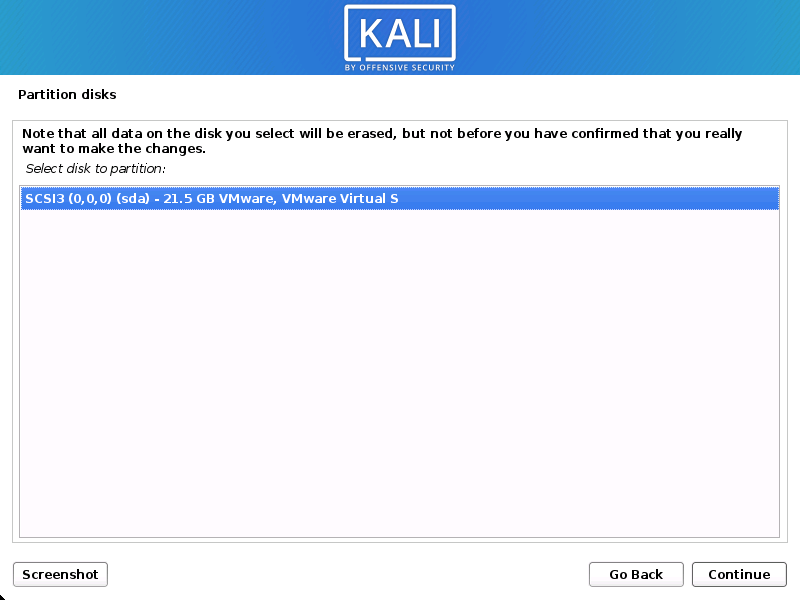
In our guide, we are using a clean disk, so we have four options to pick from. We will select Guided — the entire disk, as this is the single boot installation for Kali Linux, so we do not want any other operating systems installed, so we are happy to wipe the disk.
If there is an pre-existing data on the disk, you will have have an extra option (Guided — use the largest continuous free space) than the example below. This would instruct the setup not to alter any existing data, which is perfect for dual-booting into another operating system. As this is not the case in this example, it is not visible.
Experienced users can use the “Manual” partitioning method for more granular configuration options, which is covered more in our BTRFS guide.
If you want to encrypt Kali Linux, you can enable Full Disk Encryption (FDE), by selecting Guided — used entire disk and setup encrypted LVM. When selected, later on in the setup (not in this guide) prompt you to enter a password (twice). You will have to enter this password every time you start up Kali Linux.
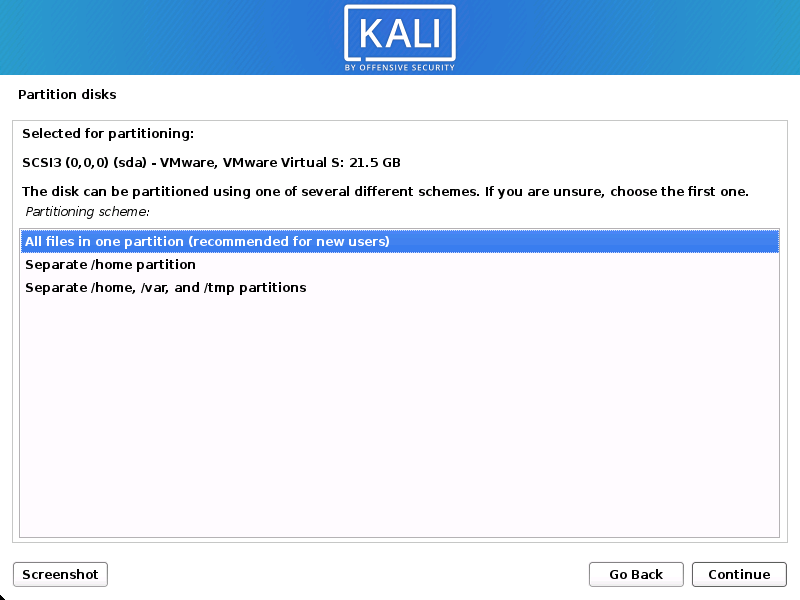
- Depending on your needs, you can choose to keep all your files in a single partition — the default — or to have separate partitions for one or more of the top-level directories.
If you’re not sure which you want, you want “All files in one partition”.
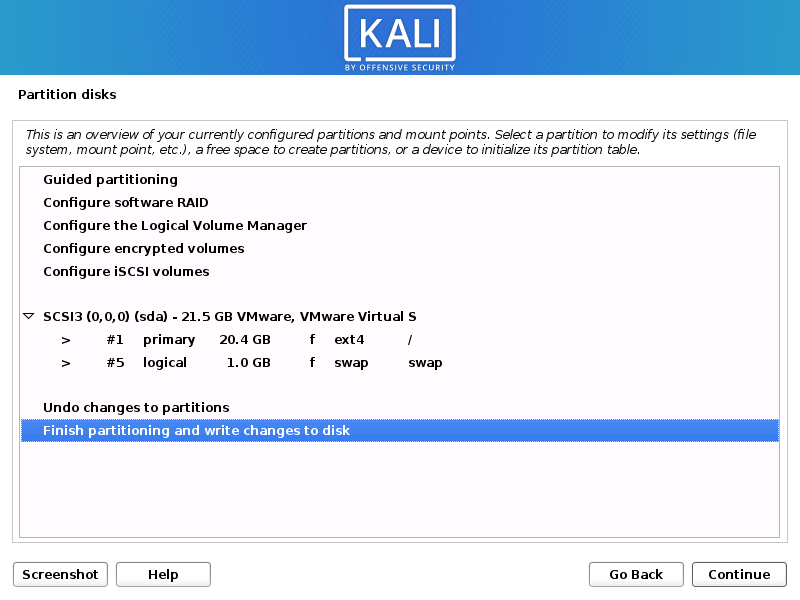
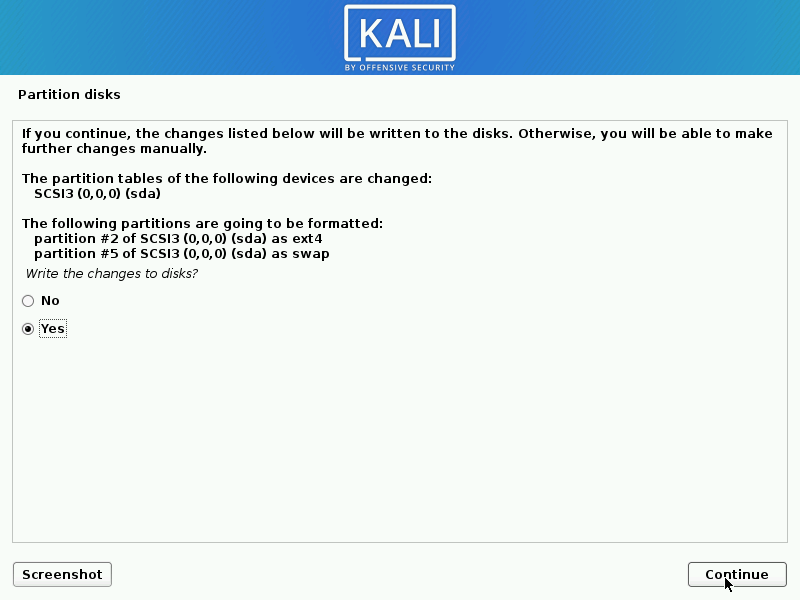
- Next, you’ll have one last chance to review your disk configuration before the installer makes irreversible changes. After you click Continue, the installer will go to work and you’ll have an almost finished installation.
Encrypted LVM
If enabled in the previous step, Kali Linux will now start to perform a secure wipe of the hard disk, before asking you for a LVM password.
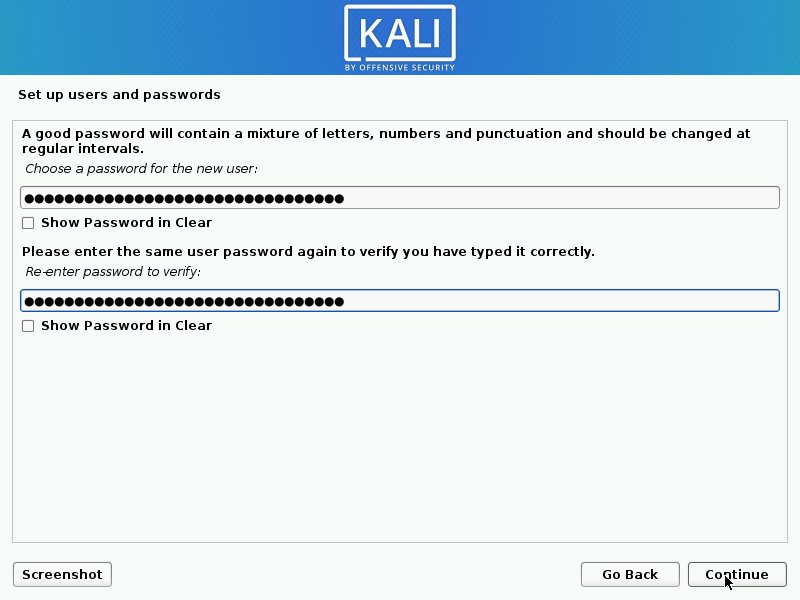
Please be sure a strong password is used, or else you will be prompted with a weak passphrase warning.
This wipe may take “a while” (hours) depending on the size and speed of the drive.
If you wish to risk it, you can skip it.Proxy Information
- Kali Linux uses a central repository to distribute applications. You’ll need to enter any appropriate proxy information as needed.
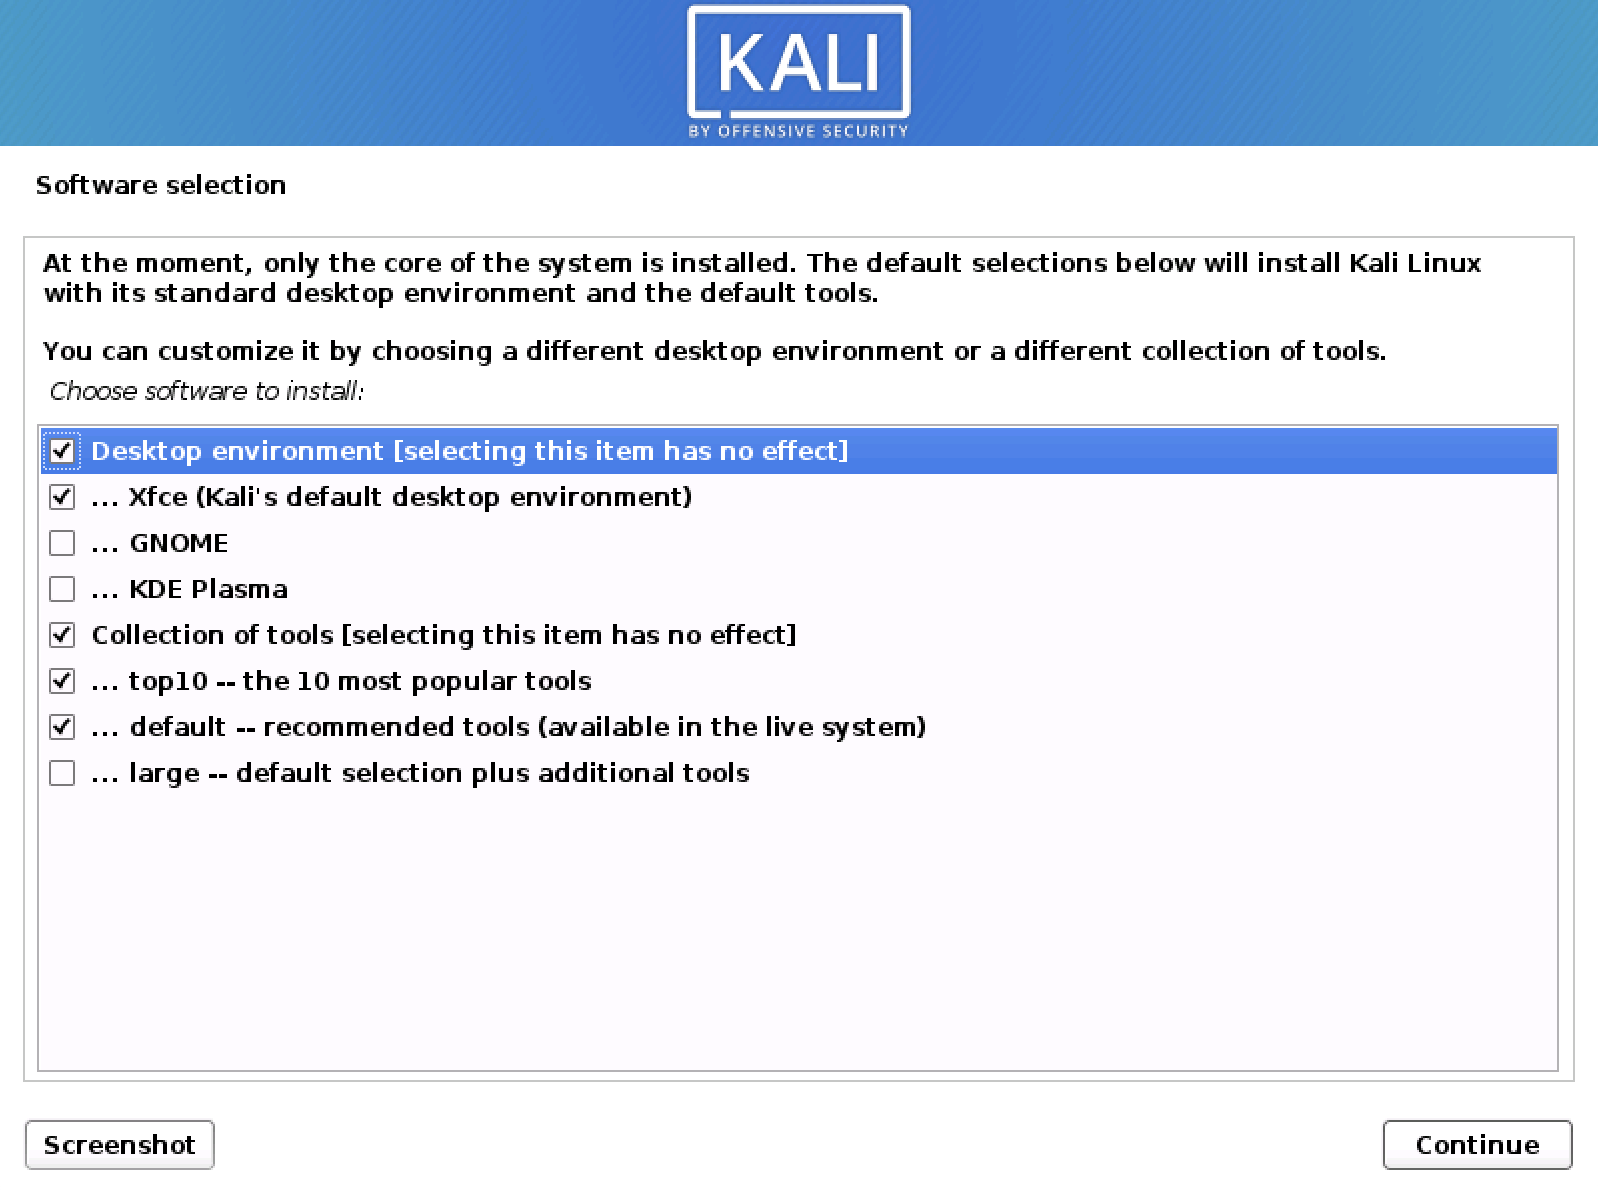
Metapackages
If network access was not setup, you will want to continue with setup when prompt.
If you are using the Live image, you will not have the following stage.
- Next you can select which metapackages you would like to install. The default selections will install a standard Kali Linux system and you don’t really have to change anything here.
Please refer to this guide if you prefer to change the default selections.
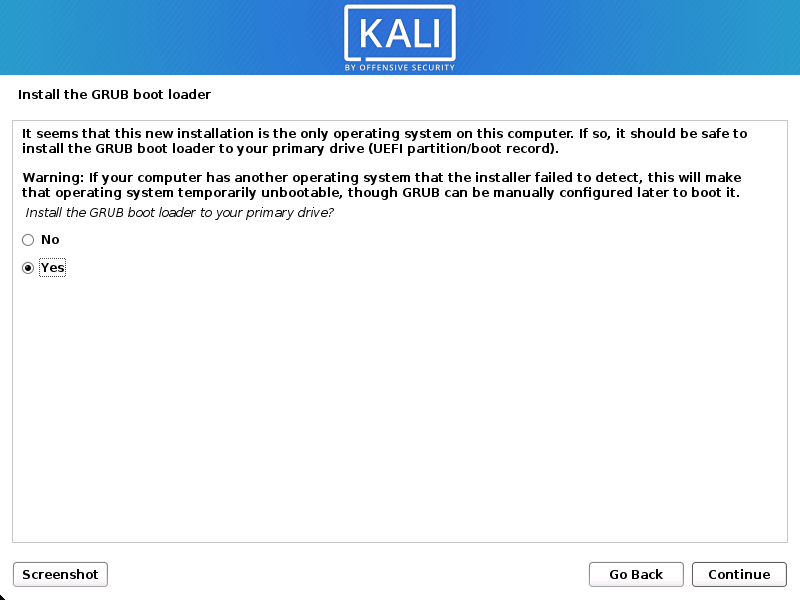
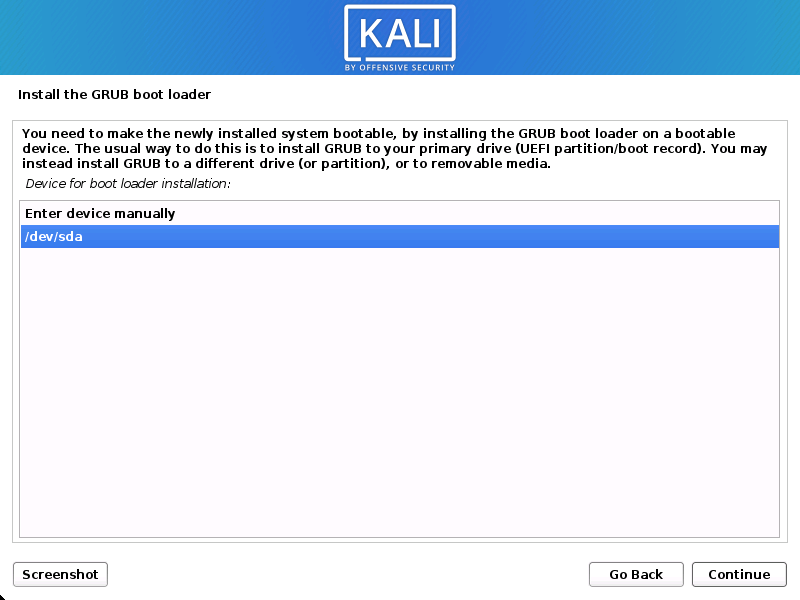
Boot Information
- Select the hard drive to install the GRUB bootloader in (it does not by default select any drive).
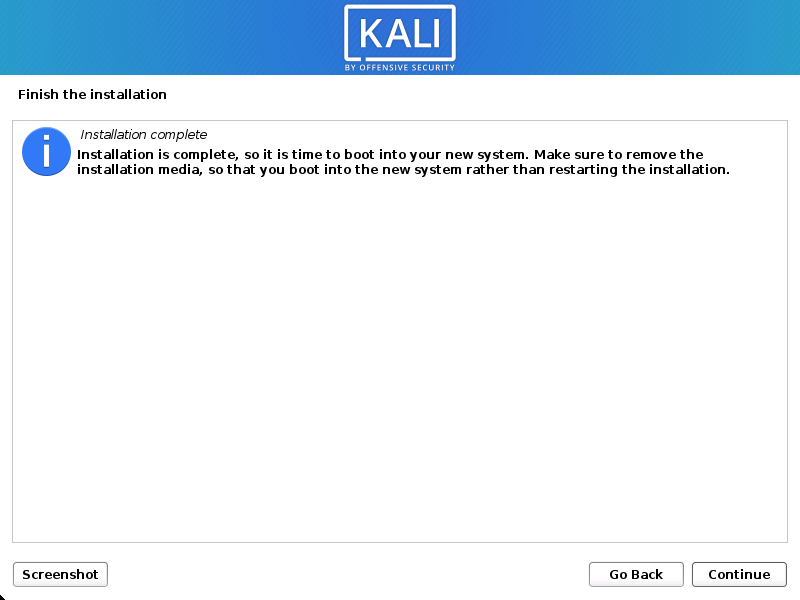
Reboot
Post Installation
Now that you’ve completed installing Kali Linux, it’s time to customize your system.
The General Use section has more information and you can also find tips on how to get the most out of Kali Linux in our User Forums.
Updated on: 2023-Mar-13
Author: gamb1t