- Kali Linux 2021.1 – Fresh Installation Guide
- System Requirements
- Create a Bootable USB Using dd Command
- Installation of Kali Linux Distribution
- Install deb package on Kali Linux [4 Methods]
- Method-1: Install DEB package with DPKG
- Method-2: Install DEB package With DPKG
- Method-3: Install DEB Files With APT Package Manager
- Method-4: Install DEB Files With GDEBI
- Conclusion
- 3 thoughts on “Install deb package on Kali Linux [4 Methods]”
Kali Linux 2021.1 – Fresh Installation Guide
Kali Linux is arguably one of the best out-of-the-box Linux distributions available for security testing. While many of the tools in Kali can be installed in most Linux distributions, the Offensive Security team developing Kali has put countless hours into perfecting their ready-to-boot security distribution.
Kali Linux is a secure Debian-based Linux distribution that comes pre-loaded with hundreds of well-known security tools and has gained quite a name for itself.
Kali even has an industry-respected certification available called “Pentesting with Kali”. The certification is a rigorous 24-hour challenge in which applicants must successfully compromise a number of computers with another 24 hours to write up a professional penetration test report that is sent to and graded by the personnel at Offensive Security. Successfully passing this exam will allow the test taker to obtain the OSCP credential.
The focus of this guide and future articles is to help individuals become more familiar with Kali Linux and several of the tools available within the distribution.
Please be sure to use extreme caution with the tools included with Kali as many of them can accidentally be used in a manner that will break computer systems. The information contained within all of these Kali articles is intended for legal usages.
System Requirements
Kali has some minimum suggested specifications for hardware. Depending upon the intended use, more may be desired. This guide will be assuming that the reader will want to install Kali as the only operating system on the computer.
- At least 20GB of disk space; strongly encouraged to have more.
- At least 2GBMB of RAM; more is encouraged especially for graphical environments.
- USB or CD/DVD boot support
- ISO is available from the Kali Linux download page.
Create a Bootable USB Using dd Command
This guide will be assuming that a USB drive is available to use as the installation media. Take note that the USB drive should be as close to 4/8GB as possible and ALL DATA WILL BE REMOVED!
The author has had issues with larger USB drives but some may still work. Regardless, following the next few steps WILL RESULT IN DATA LOSS ON THE USB DRIVE.
Please be sure to backup all data before proceeding. This bootable Kali Linux USB drive is going to be created from another Linux machine.
Step 1 is to obtain the Kali Linux ISO. This guide is going to use the current newest version of Kali with the XFCE Linux desktop environment.
To obtain this version, type the following wget command into a terminal.
$ cd ~/Downloads $ wget -c https://cdimage.kali.org/kali-2021.1/kali-linux-2021.1-installer-amd64.iso
The two commands above will download the Kali Linux ISO into the current user’s ‘Downloads’ folder.
The next process is to write the ISO to a USB drive to boot the installer. To accomplish this we can use the dd tool within Linux. First, the disk name needs to be located with the lsblk command though.
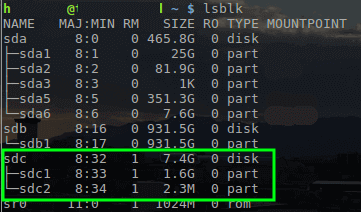
With the name of the USB drive determined as /dev/sdc , the Kali ISO can be written to the drive with the ‘dd’ tool.
$ sudo dd if=~/Downloads/kali-linux-2021.1-installer-amd64.iso of=/dev/sdc
Important: The above command requires root privileges so utilize sudo or login as the root user to run the command. Also, this command will REMOVE EVERYTHING on the USB drive. Be sure to backup needed data.
Once the ISO is copied over to the USB drive, proceed further to install Kali Linux.
Installation of Kali Linux Distribution
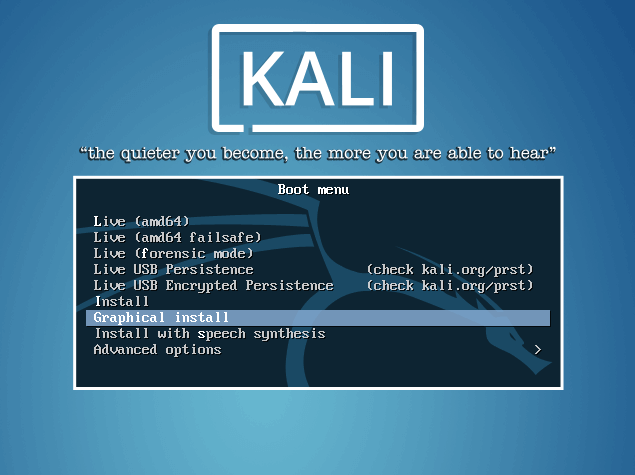
1. First, plug the USB drive into the respective computer that Kali should be installed upon and proceed to boot to the USB drive. Upon successful booting to the USB drive, the user will be presented with the following screen and should proceed with the ‘Install’ or ‘Graphical Install’ options.
This guide will be using the ‘Graphical Install’ method.
2. The next couple of screens will ask the user to select locale information such as language, country, and keyboard layout.
Once through the locale information, the installer will prompt for a hostname and domain for this install. Provide the appropriate information for the environment and continue installing it.


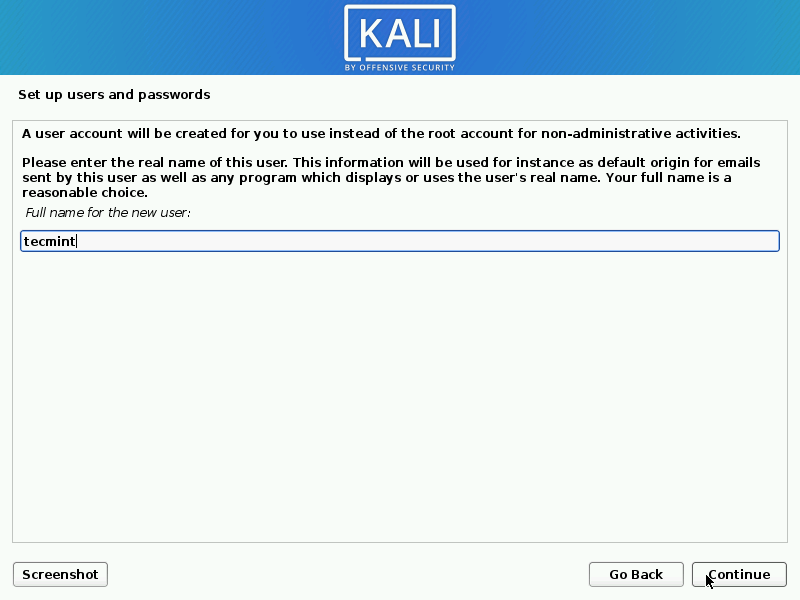
3. After setting up the hostname and domain name, you need to create a new user account to use instead of a root account for non-administrative activities.
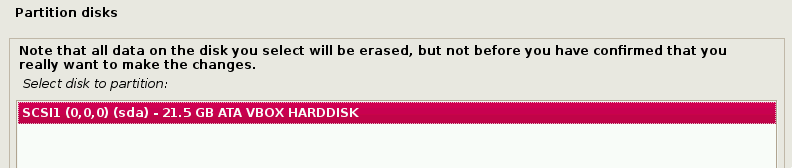
4. After setting the password is set, the installer will prompt for time zone data and then pause at the disk partitioning.
If Kali will be the only one operating on the machine, the easiest option is to use ‘Guided – Use Entire Disk’ and then select the storage device you wish to install Kali.

5. The next question will prompt the user to determine the partitioning on the storage device. Most installs can simply put all data on one partition though.

6. The final step asks the user to confirm all changes to be made to the disk on the host machine. Be aware that continuing will ERASE DATA ON THE DISK.

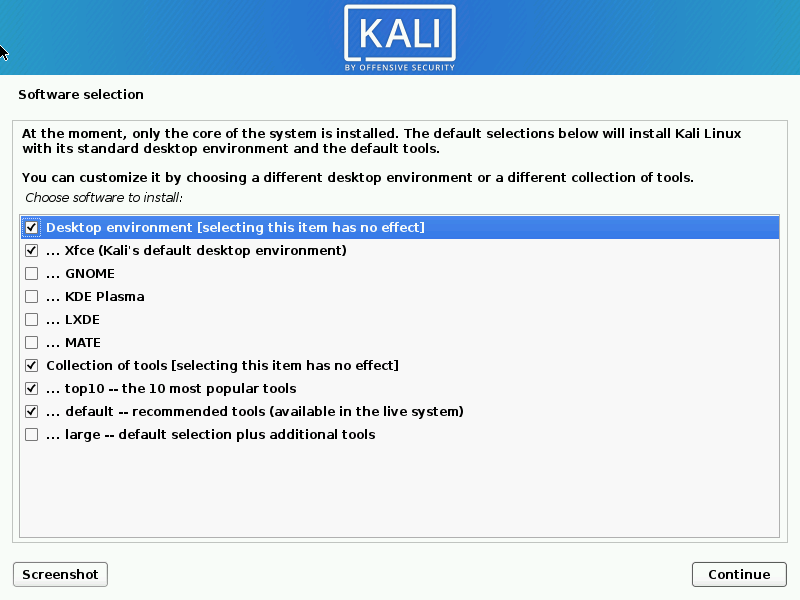
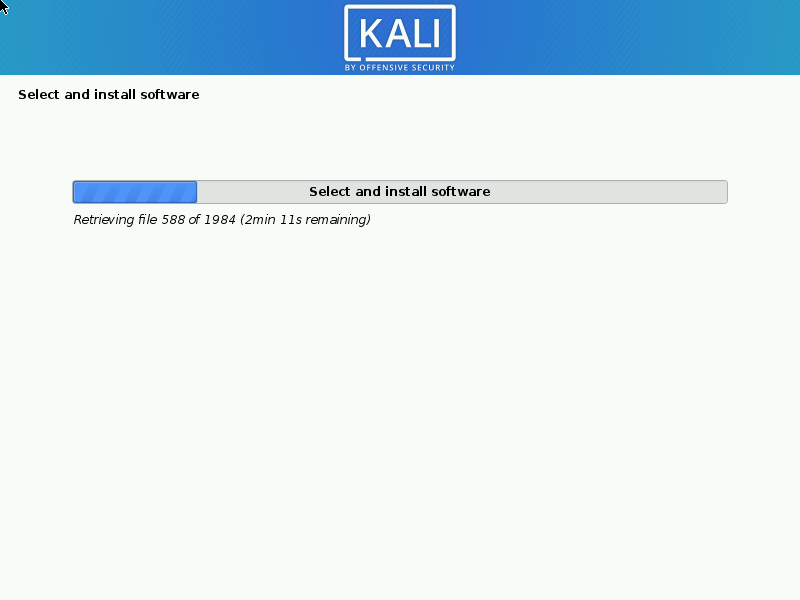
7. Once confirming the partition changes, the installer will run through the process of installing the files. Once it is completed, the system will prompt you to select software that will install a standard desktop environment with needed tools.
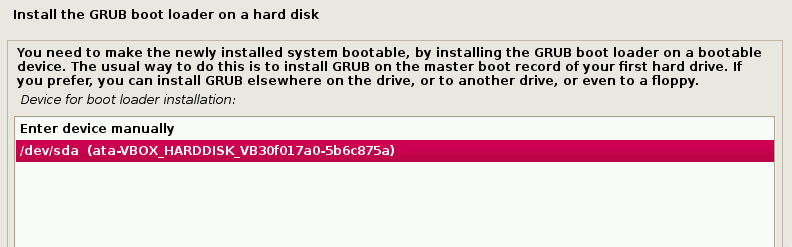
8. After the software installation is complete, the system will ask to install grub. Again this guide is assuming that Kali is to be the only operating system on this computer.
Selecting ‘Yes’ on this screen will allow the user to pick the device to write the necessary boot loader information to the hard drive to boot Kali.

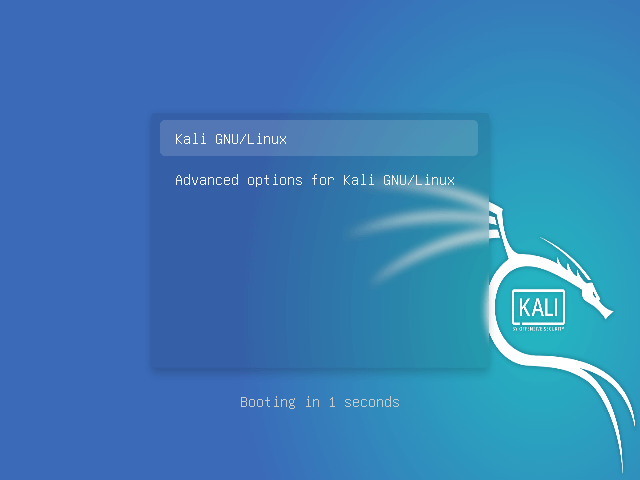
9. Once the installer finishes installing GRUB to the disk, it will alert the user to reboot the machine to boot into the newly installed Kali machine.

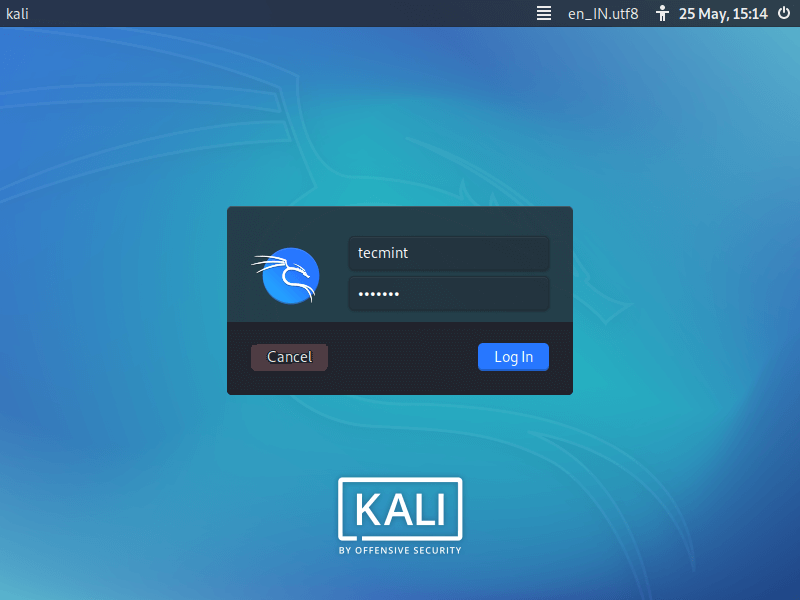
10. Since this guide installed the XFCE Desktop environment, it will likely default boot into it.
Once it booted, log in as the user ‘tecmint‘ with the password created earlier in the installation process.

At this point, Kali Linux is successfully installed and ready to be used! Upcoming articles will walk through the tools available within Kali and how they can be utilized to test the security posture of hosts and networks. Please feel free to post any comments or questions below.
Install deb package on Kali Linux [4 Methods]
There are two ways you can use to install software on your Kali Linux system. You can use the Terminal method, where you will use the apt package manager or other distribution-independent package platforms like Snap, AppImage, and FlatPak. The other way is downloading the installer file (usually the .deb file) and installing it on your system.
Installing Deb files on Debian-based distributions like Ubuntu and Debian distribution can be easy since these operating systems come with the software centre. The software centre is a utility where users can find, download and install software graphically. When you have a .deb file, you will right-click on the file and select the option «install with software centre. «Unfortunately, Kali Linux doesn’t have the software centre installed by default, and you will have to install the .deb file using the Terminal. Luckily, it’s not hard as you would think.
This post will give you a detailed guide to installing .deb files on Kali Linux. Let’s dive in.
Method-1: Install DEB package with DPKG
DPKG is a command-line tool used to install, build, remove and manage Debian packages on Linux systems. It comes with various options, which you can view by running the command:
To install a package with dpkg, launch the Terminal and use the cd command to navigate to the file’s location and install it with the syntax below.
In our case, we will install the VSCode.deb file. VSCode is a powerful IDE developed by Microsoft and includes support for different languages like Python, Java, C++, JavaScript, and more
cd Downloads sudo dpkg -i vscode.deb sudo apt install -f
![Install deb package on Kali Linux [4 Methods]](https://www.golinuxcloud.com/wp-content/uploads/Install-DEB-file-DPKG.png)
Sample Output:
You will notice that we have an additional command sudo apt install -f .
That’s because when you use dpkg to install a package on Linux, it will check your system for all the dependencies required to install and run the software. If even a single dependency is not satisfied (which is the case most of the time), the package is left in an «unconfigured» state and considered broken.
The apt install -f command tries to install any of the missing dependencies. When you read the apt man page, you will see the -f parameter stands for —fix-broken .
-f, --fix-broken Fix; attempt to correct a system with broken dependencies in place.
Method-2: Install DEB package With DPKG
Alternatively, you can avoid any dependency errors by first checking for the dependencies required by the package and install them first; You can do so by executing the command below.
That will list all the dependencies required to install the vscode.deb file. You can now install these dependencies using the apt command shown below:
sudo apt-get install [dependency] name
After installing all the required dependencies, proceed to install the deb file with the command below.
Method-3: Install DEB Files With APT Package Manager
Other than DPKG, you can also use the apt command to install deb files on your Kali Linux system. However, this method works in every unique way and requires one to have an active internet connection. That’s because apt first makes a list of all the required dependencies and installs them from the repository. When done, it calls the dpkg utility and uses it to install the file. Therefore, the apt method uses dpkg under the hood.
To install a package with apt, launch the Terminal and use the cd command to the file’s directory and use the syntax below to install the file.
cd Downloads sudo apt install ./vscode.deb
![Install deb package on Kali Linux [4 Methods]](https://www.golinuxcloud.com/wp-content/uploads/Install-VSCODE-with-apt.png)
Sample Output:
Method-4: Install DEB Files With GDEBI
GDEBI is a command-line utility that enables you to install deb files smoothly by proper handling of dependencies. We say «smooth installation» because dpkg can be pretty aggressive at times when installing specific packages.
For example, when I tried installing the skype deb file with dpkg, it attempted to remove 96 packages, including system libraries necessary for running other tools and software. GDEBI works similarly to the apt command. It will first install all the required dependencies before installing the deb package.
GDEBI does not come pre-installed in Kali Linux. To install it, use the command below:
sudo apt install gdebi-core
![Install deb package on Kali Linux [4 Methods]](https://www.golinuxcloud.com/wp-content/uploads/Install-gdebi.png)
Sample Output:
Once done, proceed to install the deb package with the syntax below.
cd Downloads sudo gdebi vscode.deb
![Install deb package on Kali Linux [4 Methods]](https://www.golinuxcloud.com/wp-content/uploads/Install-code-with-gdebi.png)
Sample Output:
Conclusion
That’s it! I believe you now have three ways you can use to install a deb file on your Kali Linux system. If you have an active internet connection, I highly advise you to use the apt install ./ method or gdebi. However, if you don’t have internet access, use the dpkg -i command, which does not install any required libraries. But if you encounter any error, you will need to run apt install -f to install any missing dependencies, which requires internet access. Feel free to hit the comments below in case you come across any challenges.
Didn’t find what you were looking for? Perform a quick search across GoLinuxCloud
If my articles on GoLinuxCloud has helped you, kindly consider buying me a coffee as a token of appreciation.

For any other feedbacks or questions you can either use the comments section or contact me form.
Thank You for your support!!
3 thoughts on “Install deb package on Kali Linux [4 Methods]”
thankk u very much it helped for my online class.i am using kali linux. officialy they said cisco webex is not avalable for kali but you helped me thank youuuuuuu very muchhhhhhh. Reply