- Kali linux iso dvd
- System Requirements
- Installation Prerequisites
- Preparing for the Installation
- Kali Linux Installation Procedure
- Boot
- Language
- Network
- User Accounts
- Clock
- Disk
- Encrypted LVM
- Proxy Information
- Metapackages
- Boot Information
- Reboot
- Post Installation
- Kali Linux 2021.1 Released – Download DVD ISO Images
- A Whole New Desktop and Login Screen Make-over
- Terminals Tweaks
- PowerShell Integration in Kali Linux
- New Tools in Kali
- Software Installer Changes
- Direct Download Kali Linux DVD ISO Images
- Upgrading Kali Linux to Latest Version
Kali linux iso dvd
Installing Kali Linux (single boot) on your computer is an easy process. This guide will cover the basic install (which can be done on bare metal or guest VM), with the option of encrypting the partition. At times, you may have sensitive data you would prefer to encrypt using Full Disk Encryption (FDE). During the setup process you can initiate an LVM encrypted install on either Hard Disk or USB drives.
First, you’ll need compatible computer hardware. Kali Linux is supported on amd64 (x86_64/64-bit) and i386 (x86/32-bit) platforms. Where possible, we would recommend using the amd64 images. The hardware requirements are minimal as listed in the section below, although better hardware will naturally provide better performance. You should be able to use Kali Linux on newer hardware with UEFI and older systems with BIOS.
Our i386 images, by default use a PAE kernel, so you can run them on systems with over 4 GB of RAM.
In our example, we will be installing Kali Linux in a fresh guest VM, without any existing operating systems pre-installed. We will explain other possible scenarios throughout the guide.
System Requirements
The installation requirements for Kali Linux will vary depending on what you would like to install and your setup. For system requirements:
- On the low end, you can set up Kali Linux as a basic Secure Shell (SSH) server with no desktop, using as little as 128 MB of RAM (512 MB recommended) and 2 GB of disk space.
- On the higher end, if you opt to install the default Xfce4 desktop and the kali-linux-default metapackage, you should really aim for at least 2 GB of RAM and 20 GB of disk space.
- When using resource-intensive applications, such as Burp Suite, they recommend at least 8 GB of RAM(and even more if it is a large web application!) or using simultaneous programs at the same time.
Installation Prerequisites
This guide will make also the following assumptions when installing Kali Linux:
- Using the amd64 installer image.
- CD/DVD drive / USB boot support.
- Single disk to install to.
- Connected to a network (with DHCP & DNS enabled) which has outbound Internet access.
We will be wiping any existing data on the hard disk, so please backup any important information on the device to an external media.
Preparing for the Installation
- Download Kali Linux(We recommend the image marked Installer).
- Burn The Kali Linux ISO to DVD or image Kali Linux Live to USB drive. (If you cannot, check out the Kali Linux Network Install).
- Backup any important information on the device to an external media.
- Ensure that your computer is set to boot from CD/DVD/USB in your BIOS/UEFI.
- In the UEFI settings, ensure that Secure Boot is disabled. The Kali Linux kernel is not signed and will not be recognized by Secure Boot.
Kali Linux Installation Procedure
Boot
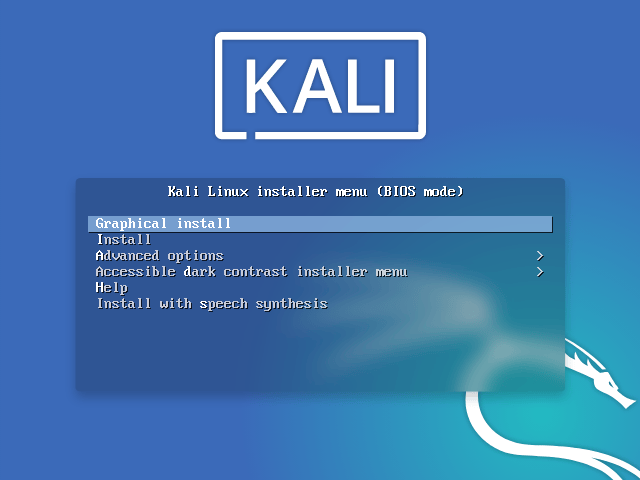
- To start your installation, boot with your chosen installation medium. You should be greeted with the Kali Linux Boot screen. Choose either Graphical install or Install (Text-Mode). In this example, we chose the Graphical install.

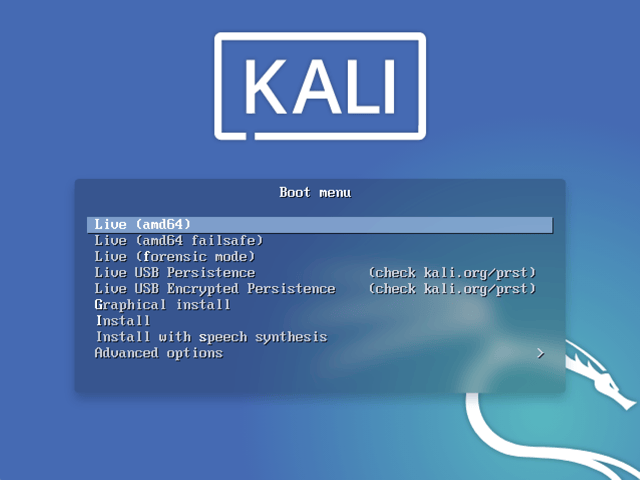
If you’re using the live image instead, you will see another mode, Live, which is also the default boot option.
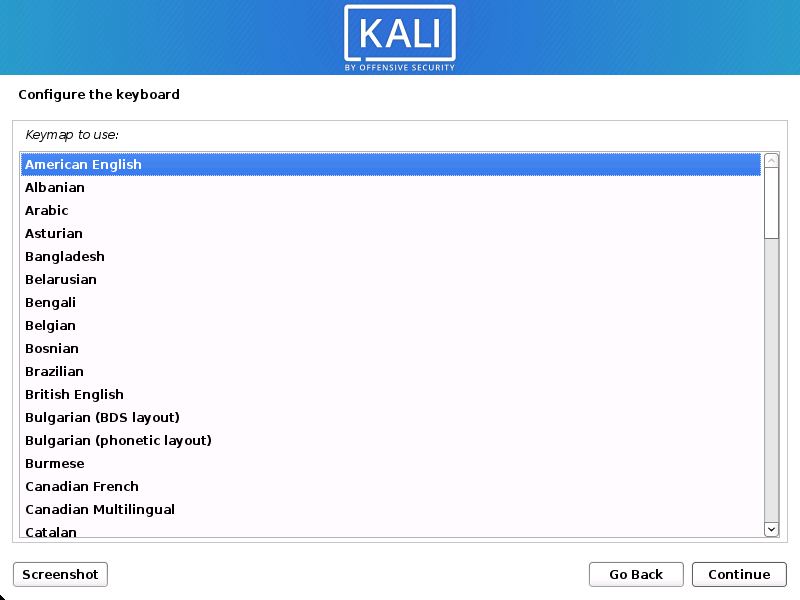
Language
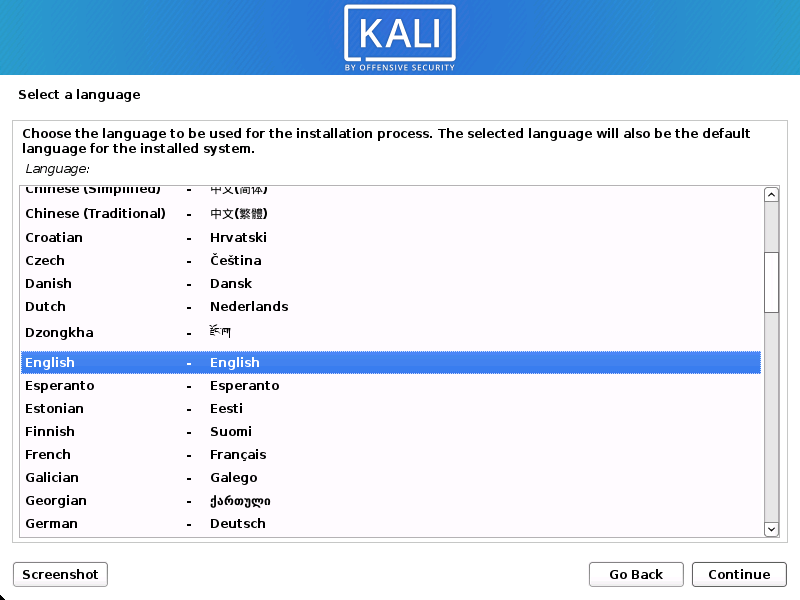
- Select your preferred language. This will be used for both the setup process and once you are using Kali Linux.
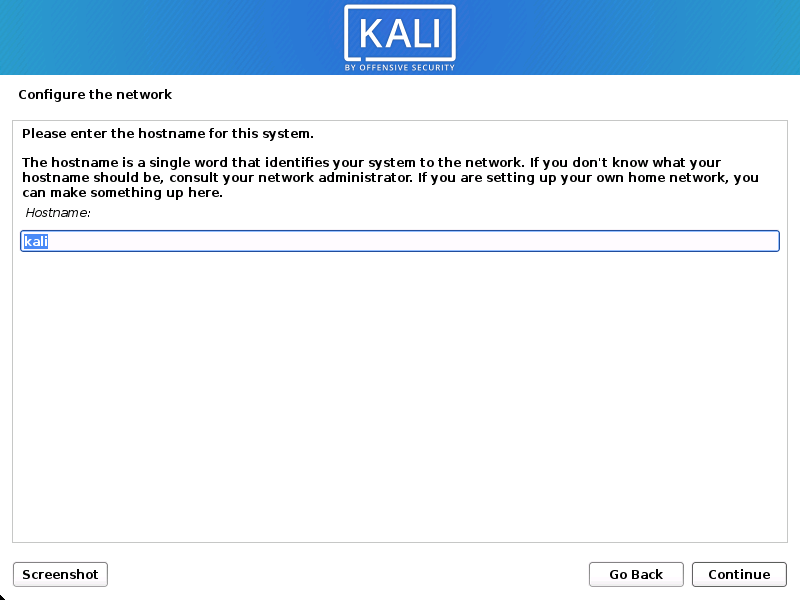
Network
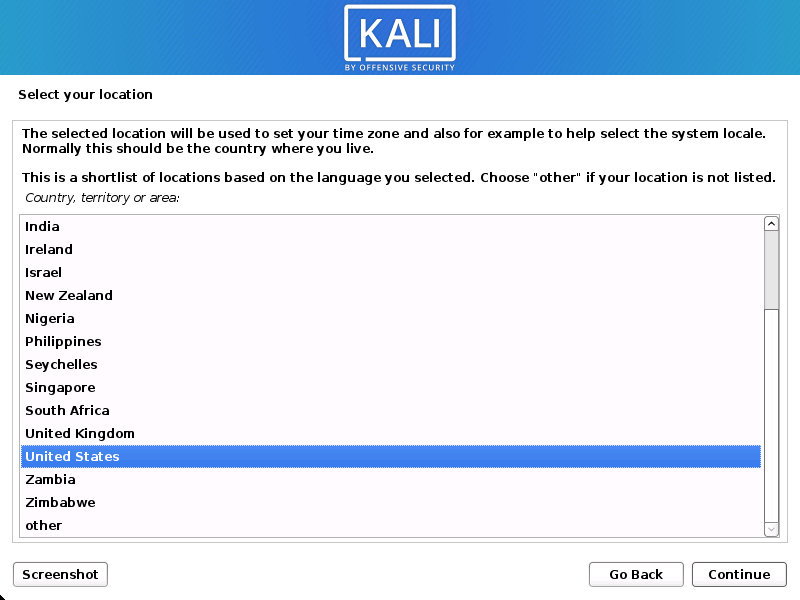
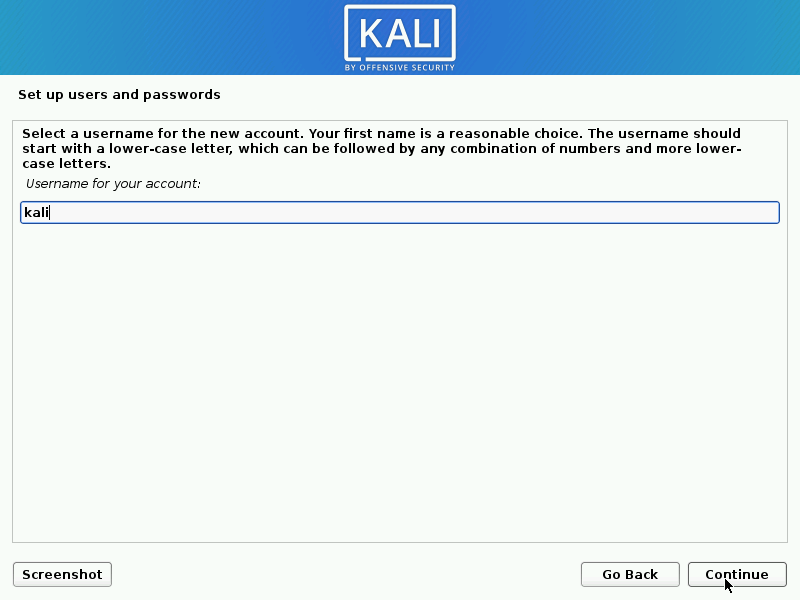
- The setup will now probe your network interfaces, looks for a DHCP service, and then prompt you to enter a hostname for your system. In the example below, we’ve entered kali as our hostname.
If there is no network access with DHCP service detected, you may need to manually configure the network information or do not configure the network at this time.
- If there isn’t a DHCP service running on the network, it will ask you to manually enter the network information after probing for network interfaces, or you can skip.
- If Kali Linux doesn’t detect your NIC, you either need to include the drivers for it when prompted, or generate a custom Kali Linux ISO with them pre-included.
- If the setup detects multiple NICs, it may prompt you which one to use for the install.
- If the chosen NIC is 802.11 based, you will be asked for your wireless network information before being prompted for a hostname.
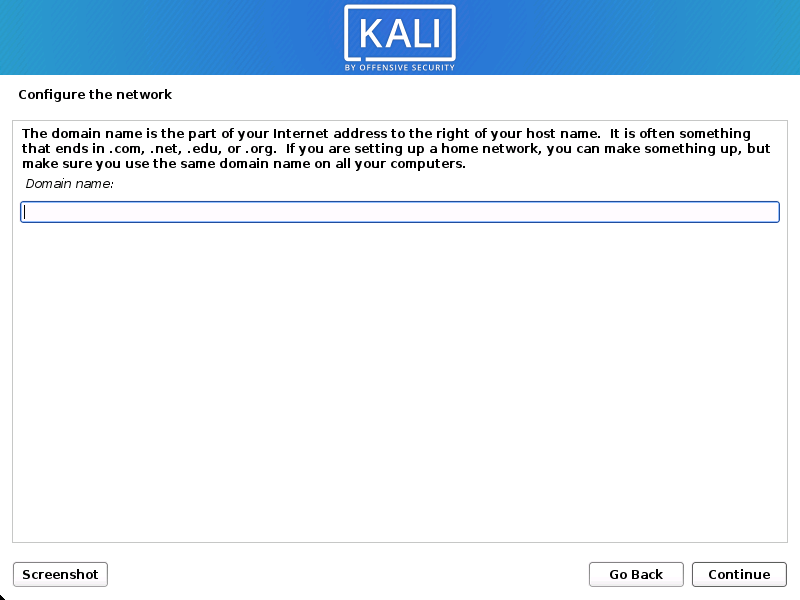
- You may optionally provide a default domain name for this system to use (values may be pulled in from DHCP or if there is an existing operating systems pre-existing).
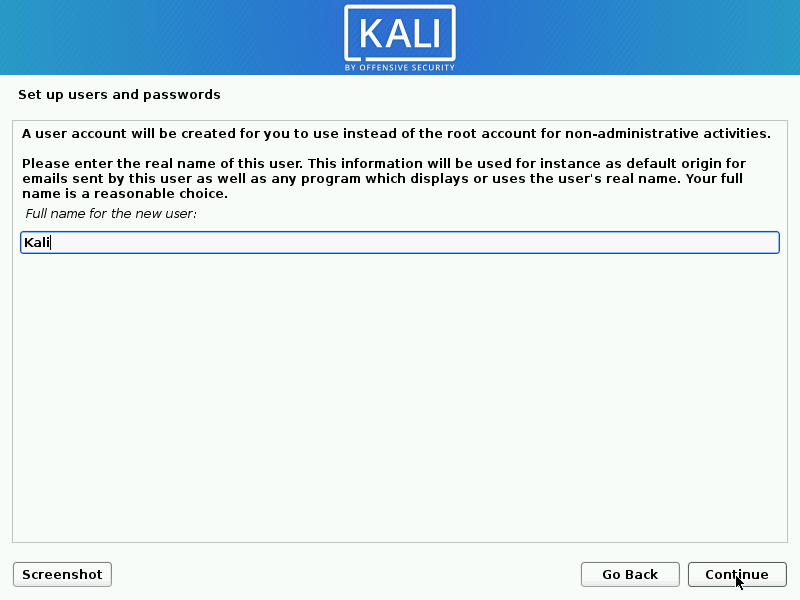
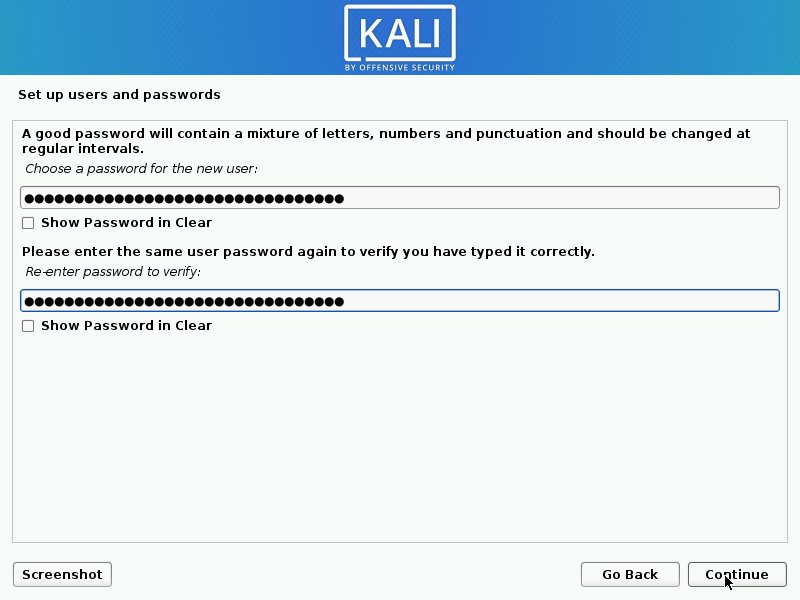
User Accounts
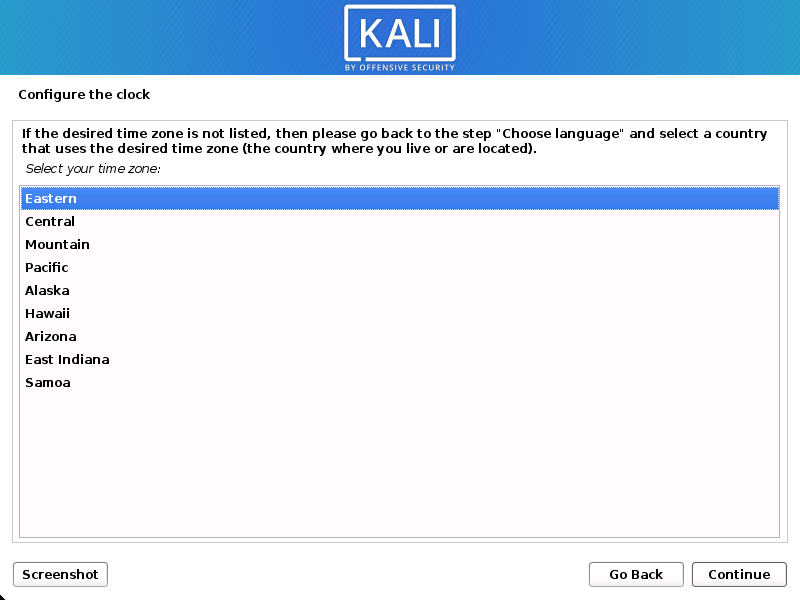
Clock
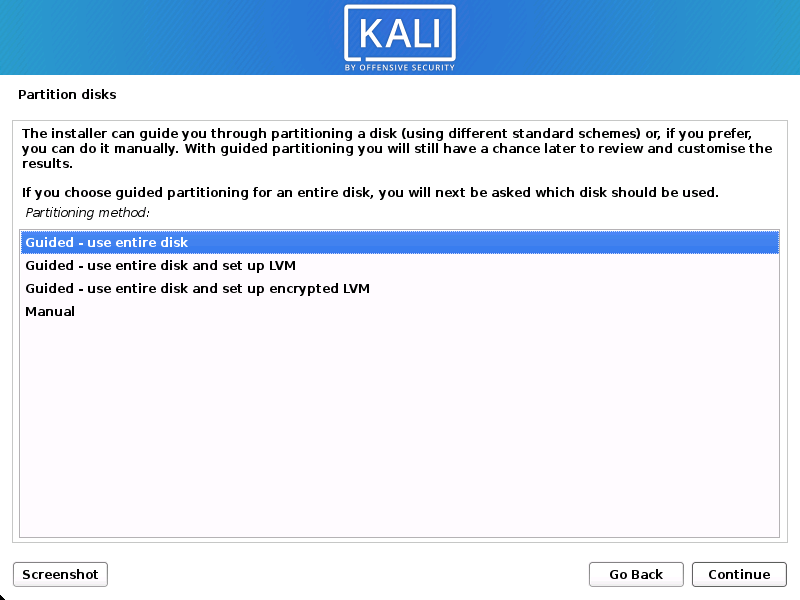
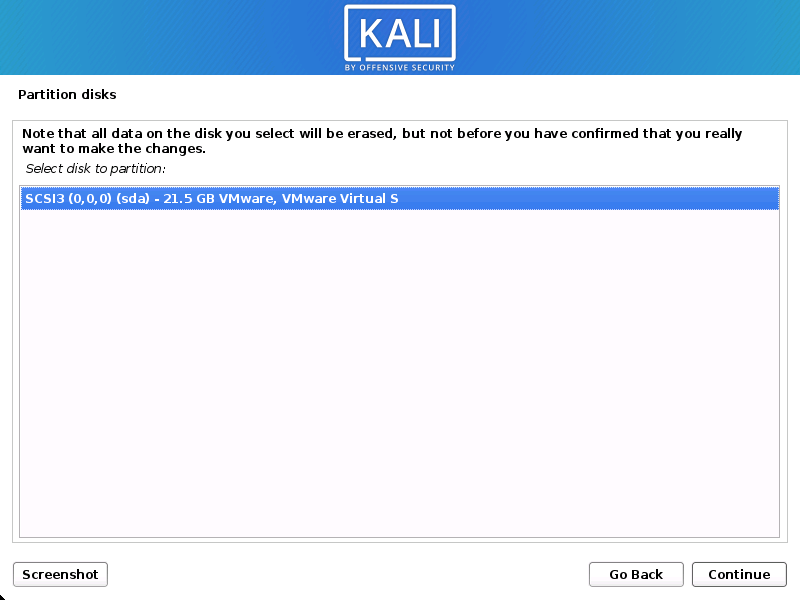
Disk
In our guide, we are using a clean disk, so we have four options to pick from. We will select Guided — the entire disk, as this is the single boot installation for Kali Linux, so we do not want any other operating systems installed, so we are happy to wipe the disk.
If there is an pre-existing data on the disk, you will have have an extra option (Guided — use the largest continuous free space) than the example below. This would instruct the setup not to alter any existing data, which is perfect for dual-booting into another operating system. As this is not the case in this example, it is not visible.
Experienced users can use the “Manual” partitioning method for more granular configuration options, which is covered more in our BTRFS guide.
If you want to encrypt Kali Linux, you can enable Full Disk Encryption (FDE), by selecting Guided — used entire disk and setup encrypted LVM. When selected, later on in the setup (not in this guide) prompt you to enter a password (twice). You will have to enter this password every time you start up Kali Linux.
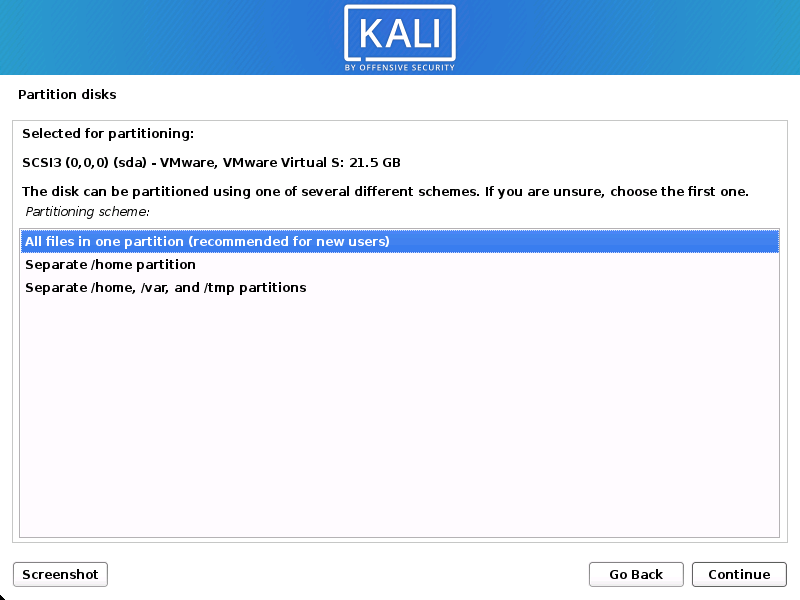
- Depending on your needs, you can choose to keep all your files in a single partition — the default — or to have separate partitions for one or more of the top-level directories.
If you’re not sure which you want, you want “All files in one partition”.
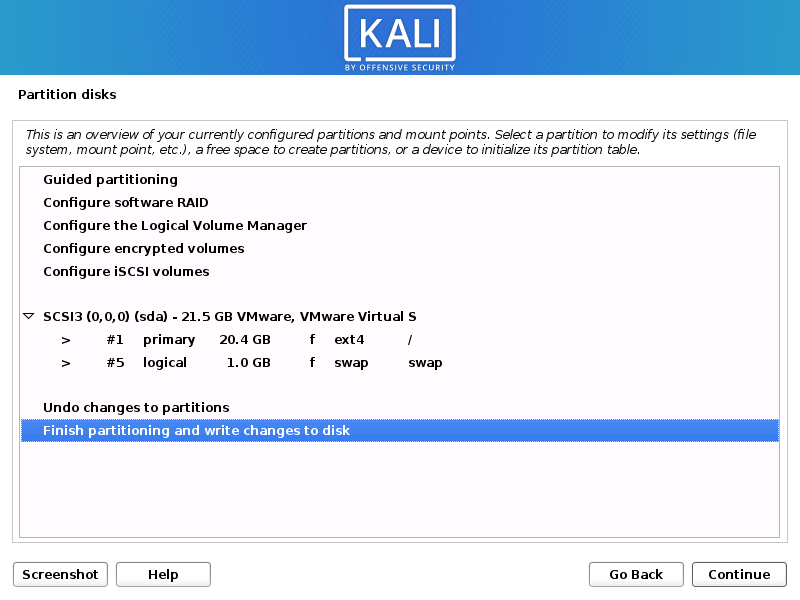
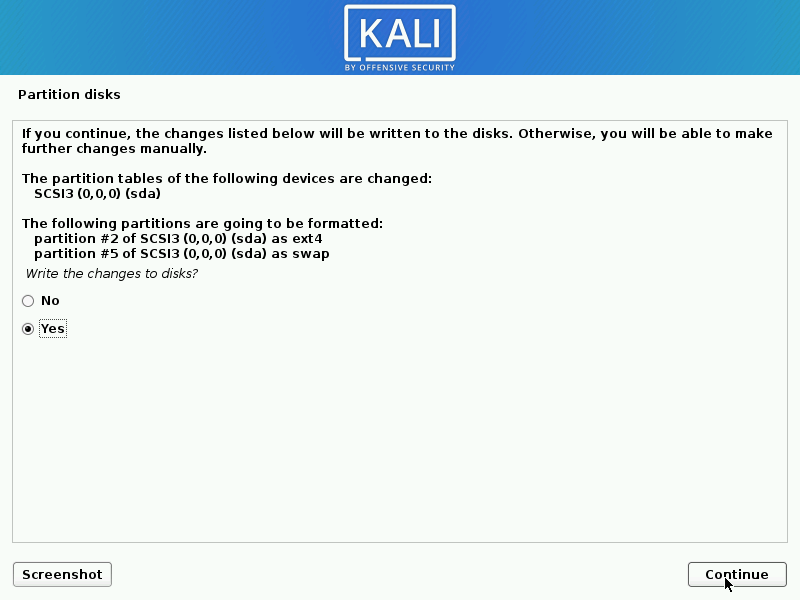
- Next, you’ll have one last chance to review your disk configuration before the installer makes irreversible changes. After you click Continue, the installer will go to work and you’ll have an almost finished installation.
Encrypted LVM
If enabled in the previous step, Kali Linux will now start to perform a secure wipe of the hard disk, before asking you for a LVM password.
Please be sure a strong password is used, or else you will be prompted with a weak passphrase warning.
This wipe may take “a while” (hours) depending on the size and speed of the drive.
If you wish to risk it, you can skip it.Proxy Information
- Kali Linux uses a central repository to distribute applications. You’ll need to enter any appropriate proxy information as needed.
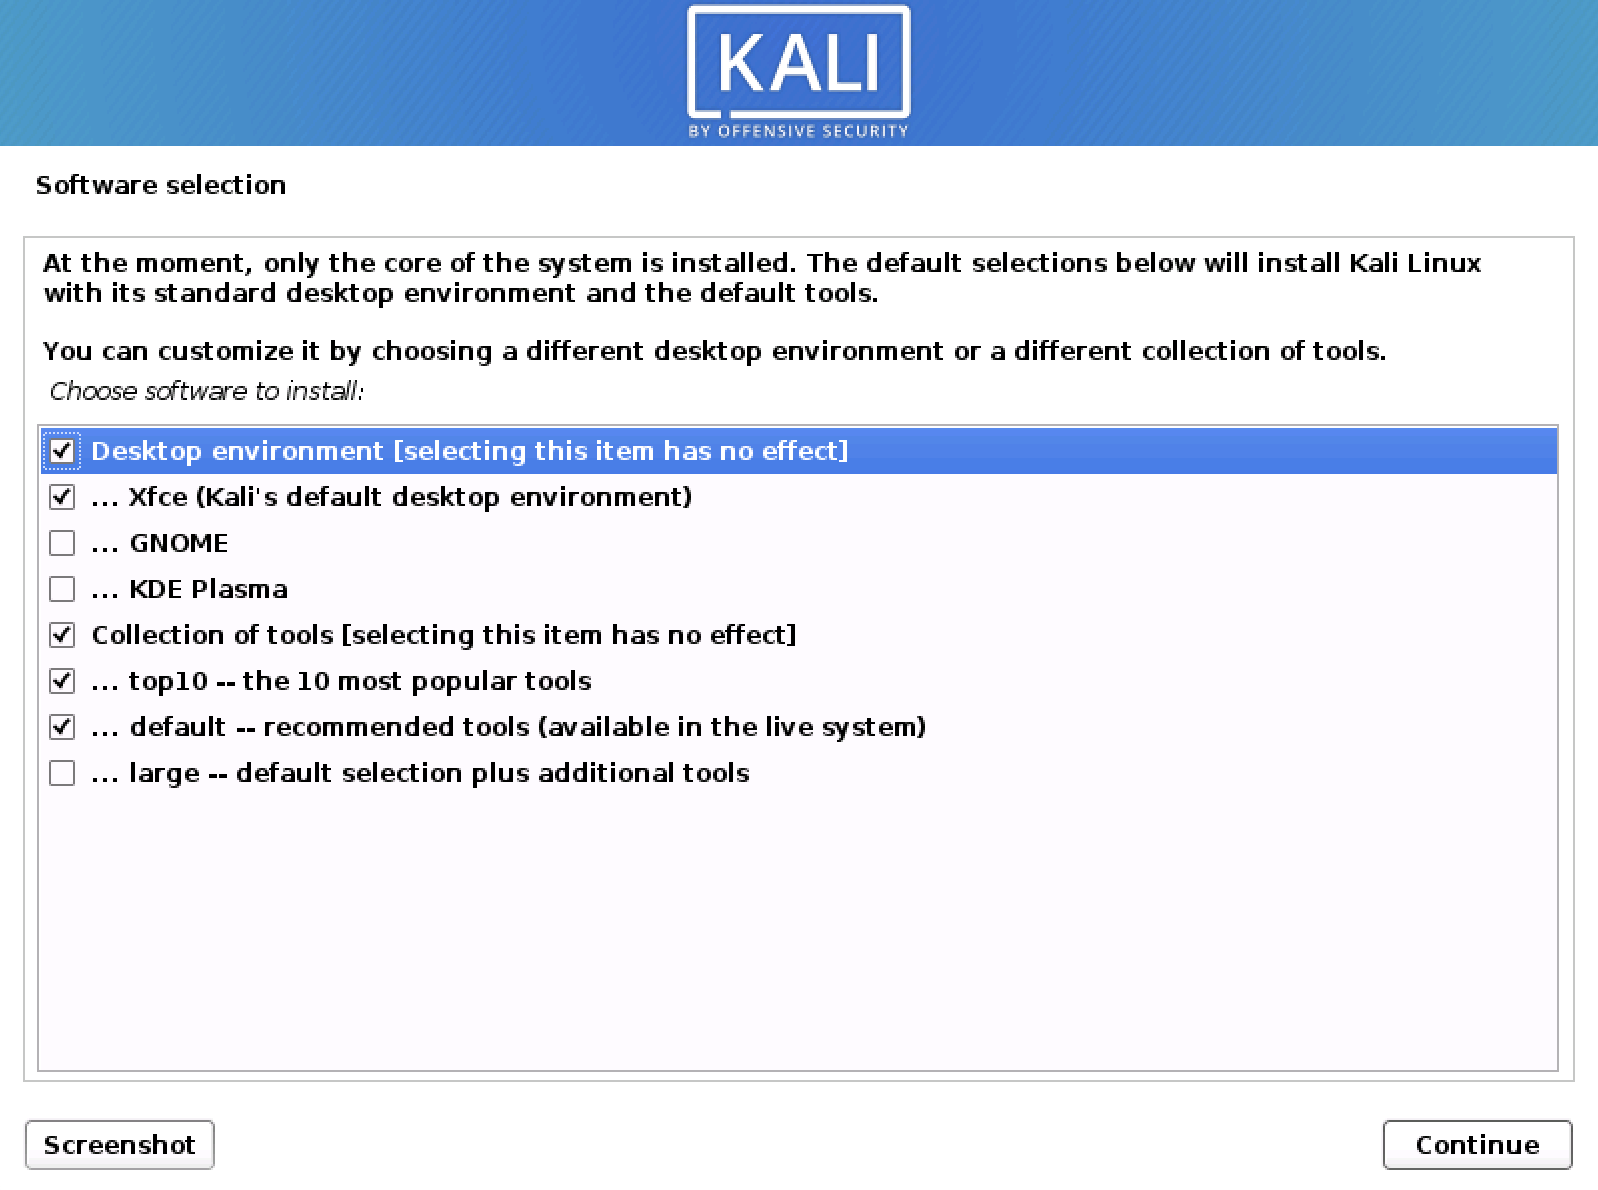
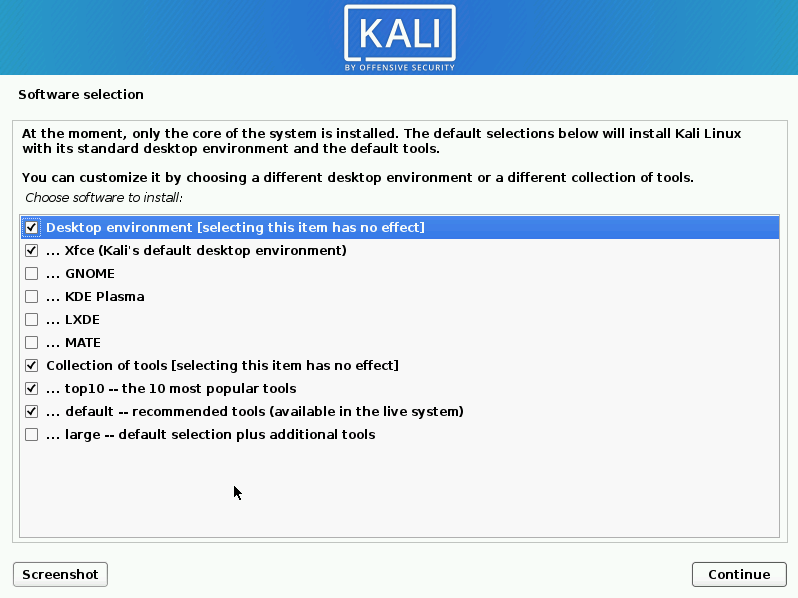
Metapackages
If network access was not setup, you will want to continue with setup when prompt.
If you are using the Live image, you will not have the following stage.
- Next you can select which metapackages you would like to install. The default selections will install a standard Kali Linux system and you don’t really have to change anything here.
Please refer to this guide if you prefer to change the default selections.
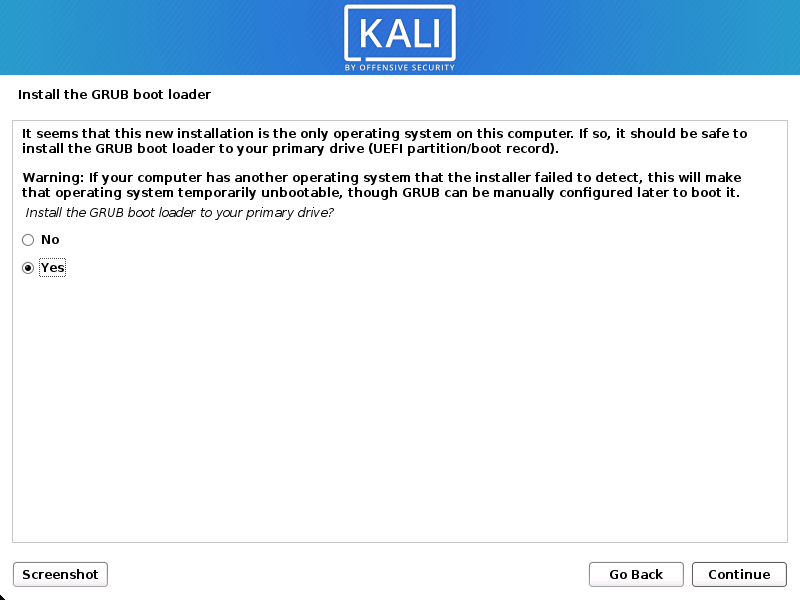
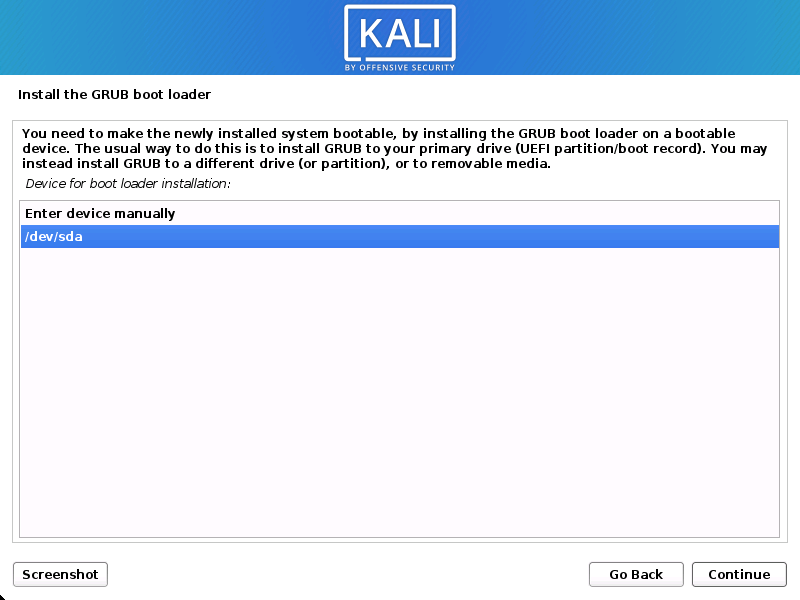
Boot Information
- Select the hard drive to install the GRUB bootloader in (it does not by default select any drive).
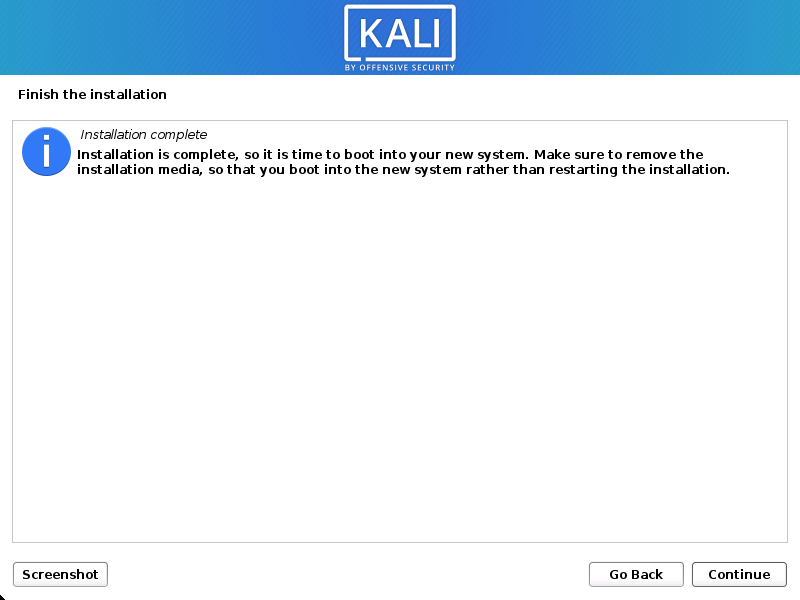
Reboot
Post Installation
Now that you’ve completed installing Kali Linux, it’s time to customize your system.
The General Use section has more information and you can also find tips on how to get the most out of Kali Linux in our User Forums.
Updated on: 2023-Mar-13
Author: gamb1tKali Linux 2021.1 Released – Download DVD ISO Images
Kali Linux (formerly known as BackTrack Linux) announced the release of Kali Linux Version 2021.1 on February 24th, 2021. Kali Linux is a Debian-based distribution specially focused on penetration testing and digital forensics use.
From Project Page
Kali Linux is the new generation of the industry-leading BackTrack Linux penetration testing and security auditing Linux distribution. Kali Linux is a complete re-build of BackTrack from the ground up, adhering completely to Debian development standards.
The latest version of Kali Linux ships with both feature and cosmetic changes as we shall see later on in this guide. In summary, here are some of the improvements included in Kali 2021.1.
A Whole New Desktop and Login Screen Make-over
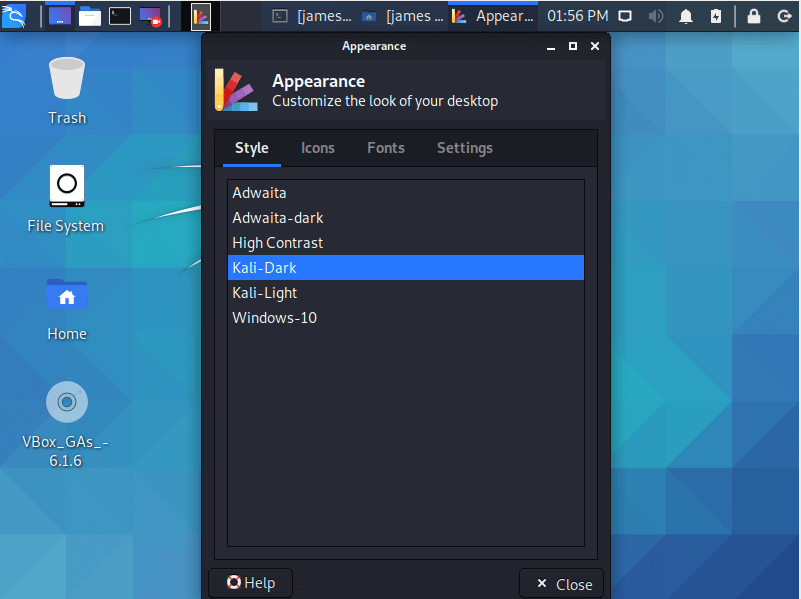
The new Kali Linux 2021.2 comes with a spruced-up desktop with light and dark themes. You can switch between the themes by going to ‘Settings’ and selecting your preferred theme.

Here’s a glimpse of the dark theme.

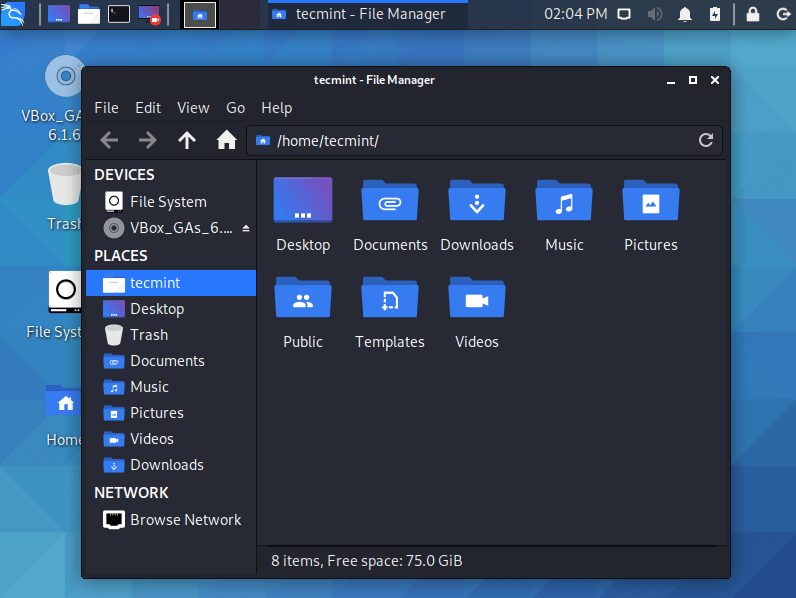
And here’s a taste of the light theme.

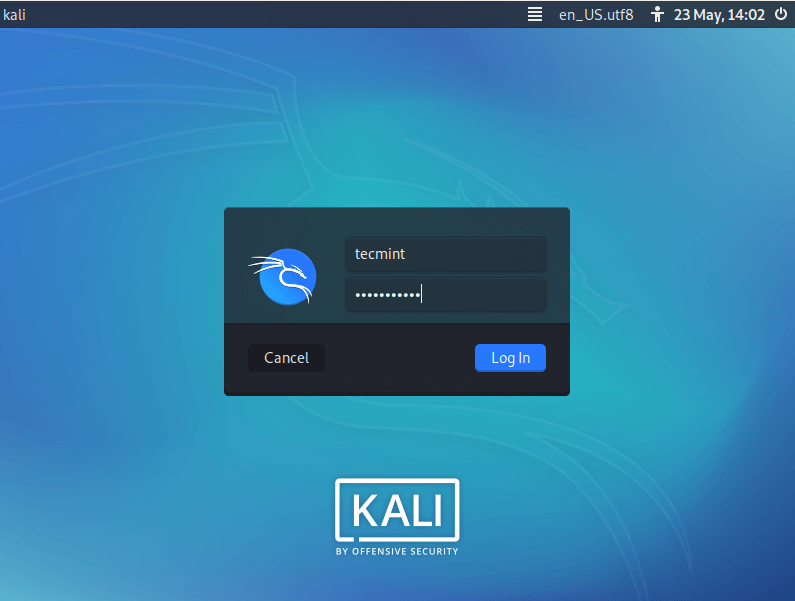
The login screen has also been tweaked and has received an enhanced layout with the login box centered to provide a more organized and cool appearance.

The GNOME desktop environment has also been updated to its latest version. The KDE Plasma and XFCE environments have also received a polished look.
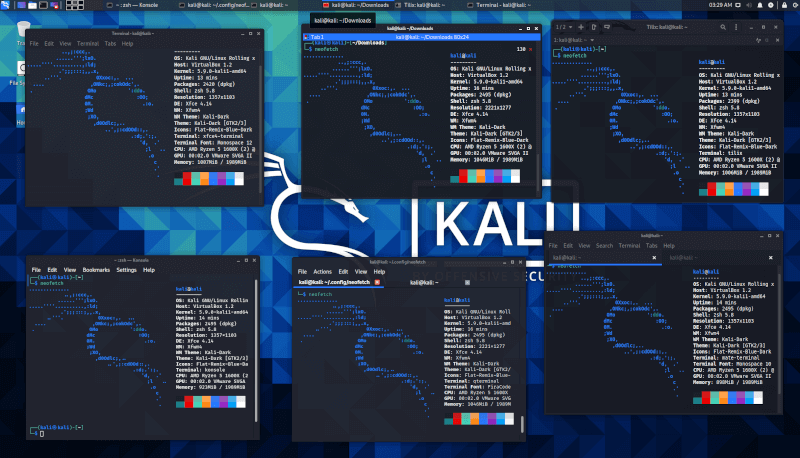
Terminals Tweaks
While using Kali, we spend most of the time using the local command line terminal (rather than in a console or remote SSH). With the variety of desktop environments, you will get options to use different terminals such as xfce4-terminal, tmux, tilix, konsole, qterminal, and mate-terminal.

PowerShell Integration in Kali Linux
Powershell has been moved from Kali Linux’s network repository to one of the primary metapackages known as kali-linux-large. This implies you can choose to install Powershell either during installation – since it’s now included in the kali-Linux-large metapackages – or once Kali is finally installed. This can be done on the terminal using the command shown
$ sudo apt install -y kali-linux-large
To invoke Powershell on the terminal, simply run the command.
New Tools in Kali
Some of the new tools in Kali 2021.1 include:
- Airgeddon – A bash script to audit wireless networks.
- Arjun – HTTP parameter discovery suite.
- Chisel – A fast TCP/UDP tunnel over HTTP.
- DNSGen – Creates a combination of domain names from the given input.
- DumpsterDiver – Find secrets in various file types.
- GitLeaks – Searches Git repo’s history for secrets and keys.
- HTTProbe – Pull a list of domains and study for working HTTP and HTTPS servers.
- MassDNS – A DNS stub resolver for mass lookups and reconnaissance.
- PSKracker – WPA/WPS toolkit for creating default keys/pins.
- WordlistRaider – Preparing existing wordlist.
Software Installer Changes
The new Kali 2021.1 gets rid of the ‘kali-linux-everything’ option from the installer. This resolves the issue that was present in the earlier version (Kali 2021.1) where users had to select “everything” which took much longer to retrieve very large meta-packages.
Now, every desktop environment and Kali-Linux-large meta-packages are cached in the ISO image and users get to select what they need to install.

Direct Download Kali Linux DVD ISO Images
To get the latest version of Kali Linux, simply head out to Kali’s download page and select your preferred ISO image corresponding to your system’s architecture.
Direct Download of Kali Linux for 64-Bit and 32-Bit ISO Images can be downloaded from the following links.
Additionally, you can download images for ARM devices such as Raspberry Pi and PineBook from this link.
Upgrading Kali Linux to Latest Version
Since Kali is a rolling release, you can upgrade your system by running the commands below to get the latest updates.
$ sudo apt -y update $ sudo apt -y full-upgrade
If you are looking for a fresh installation, read our guide: Kali Linux 2021.1 – Fresh Installation Guide.
That a brief round-up of what to look forward to in the latest Kali Linux 2021.1.