- «No root file system defined» error while installing ubuntu
- No Root File System is Defined [3 Best Solutions]
- About the issue: No Root File System is defined
- What is the Root File System?
- How does the Root File System work?
- What Causes the No Root File System Is Defined Issue?
- 3 Best Solutions to Fix No Root File System Is Defined issue
- 1. Create a Linux Partition and Assign a Root Partition
- 2. Delete Existing Windows Partition
- 3. Define a Root Partition
- Conclusion
- Related Posts:
- Корневая файловая система не определена Ubuntu
- Ошибка: корневая файловая система не определена при установке
«No root file system defined» error while installing ubuntu
Let me interrupt here to give my existing system details — HardDisk size: 640GB. Number of existing partitions — 5 C drive — label windows — 160GB — has windows 7 installed D drive — label linux — 160GB — does not have any data E drive — label backup — 100GB — has some data F drive — label entertainment — 100GB — has some data G drive — label work — 90GB — has some data All of the above are in NTFS format.
- In the screen that follows, an image is shown with 2 parts and each part is shown to have size equal to 80GB. There is a horizontal slider in the middle of these two images, with which I can resize the partitions. The right side partition is labeled Linux. There is also an option to do ‘advanced partitions’.
- On clicking advanced partitions on the above screen, a new screen is shown in which the partitions existing in my computer are shown — but the labels are different. I see that there are two partitions with size = 160GB each (as expected), and so I assumed that the first 160GB would be my existing C drive and the second on would be the partition which I had labeled as linux (drive D). So I selected the linux partition and clicked on proceed/ install now, and then this error was shown — «No root file system defined».. and I cannot proceed after this.
Please let me know two things here:
- During the screen in point number 3 above, the image with slider was shown. Which partition (drive c: or d: or anyother) is being referred to here? Which one am I actually resizing — is it the existing c: drive which has windows 7 installed already, that is getting shrunk and then ubuntu getting installed in the remaining space?
- What does «»No root file system defined» error mean? How do I select the proper partition and continue with the installation?
I had already partitioned my drives as mentioned above, and the D drive with 160GB was specifically left free for installing ubuntu. I would like to Select D drive during setup and install ubuntu here, while still keeping the already installed windows7 in C drive.
No Root File System is Defined [3 Best Solutions]
Even when you know a lot about computers and their programming, some errors can annoy you. In this article, we’ll take a look at one such case. We’ll discuss the No Root File System is defined error. This error usually appears while trying to install Ubuntu or other Linux distributions. I will explain all the needed information about the Root File System and 3 ways to fix this problem. Get aboard.
About the issue: No Root File System is defined
To understand the issue better, we shall briefly know about Root File System first, and then we’ll move up on the causes of this.
What is the Root File System?
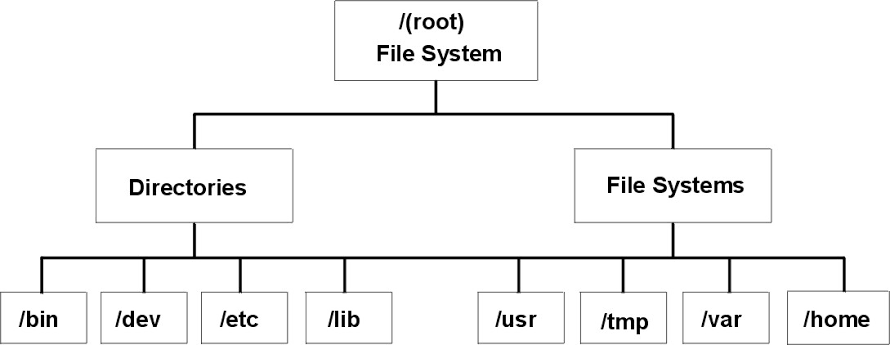
Basically, the root filesystem is the filesystem that is placed on the same partition on which the root directory is situated. It is the filesystem on which all the other filesystems are attached upon as the system starts up or booted. For further knowledge, a partition is a theoretically independent section of a hard disk drive (HDD). A filesystem is a hierarchy of directories that are used to organize files on a computer system. It is also known as a directory tree. When you are on Linux and other Unix-like operating systems , the directories start with the root directory, which further contains a series of subdirectories. Then each subdirectory also contains further subdirectories. A variant of this definition is the component of the entire directory tree that is located on a single partition or disk.
How does the Root File System work?
Only the root filesystem is available when a system is booted up in single-user mode . Single user mode is a method of booting a damaged system that has very limited capabilities so that repairs can be made to it. After completing the repairs, the other filesystems that are located on different partitions can then be mounted on the root filesystem in order to restore the complete functionality. The directories on which they are mounted are known as mount points . The root filesystem should usually be small because it contains critical files. A small, infrequently modified filesystem is less vulnerable to being corrupt. A corrupted root filesystem will generally state that the system becomes unbootable from the HDD, and must be booted by special options like Boot Floppy.
What Causes the No Root File System Is Defined Issue?
You have not learned enough about the Root file system and its tributaries. Now we shall move further to know about the cause of this issue. This error usually shows up while trying to install Ubuntu or other Linux distributions. Most of the users who suffered from this error reported that they faced it while trying to install Ubuntu. Now you must be wondering why this error message specifically pops up when you try to install Ubuntu. I’ll clear your query.
There are 3 major causes of this problem. They are as follows:
- You forgot to create a valid Linux partition.
- You are unknowingly trying to use a Windows partition (FAT or FAT32) to install Ubuntu, but it requires a Linux partition.
- A Linux partition exists but you have NOT defined the root partition (“/”), and you must define it to install Ubuntu or other Linux distributions.
You must have caught your fault by now. This error usually occurs with Ubuntu as people don’t have much information about Linux and its partitions. Now we shall move further to the solutions of this problem.
3 Best Solutions to Fix No Root File System Is Defined issue
I will present you with the 3 Best Solutions for the No Root File System is defined issue. You don’t have to use them all, just try them one after another. Nothing is much complex here. Simplified step-wise guides are available with the solutions. You just have to follow some simple steps in order to get rid of the issue. Also, the solution perfectly working for you depends upon the cause of error in your case. You can directly jump to the most specific solutions if you have understood the accurate cause in your case.
1. Create a Linux Partition and Assign a Root Partition
This method will work perfectly if you earlier forgot to create a Linux partition. Follow these simple steps in order to solve the issue:
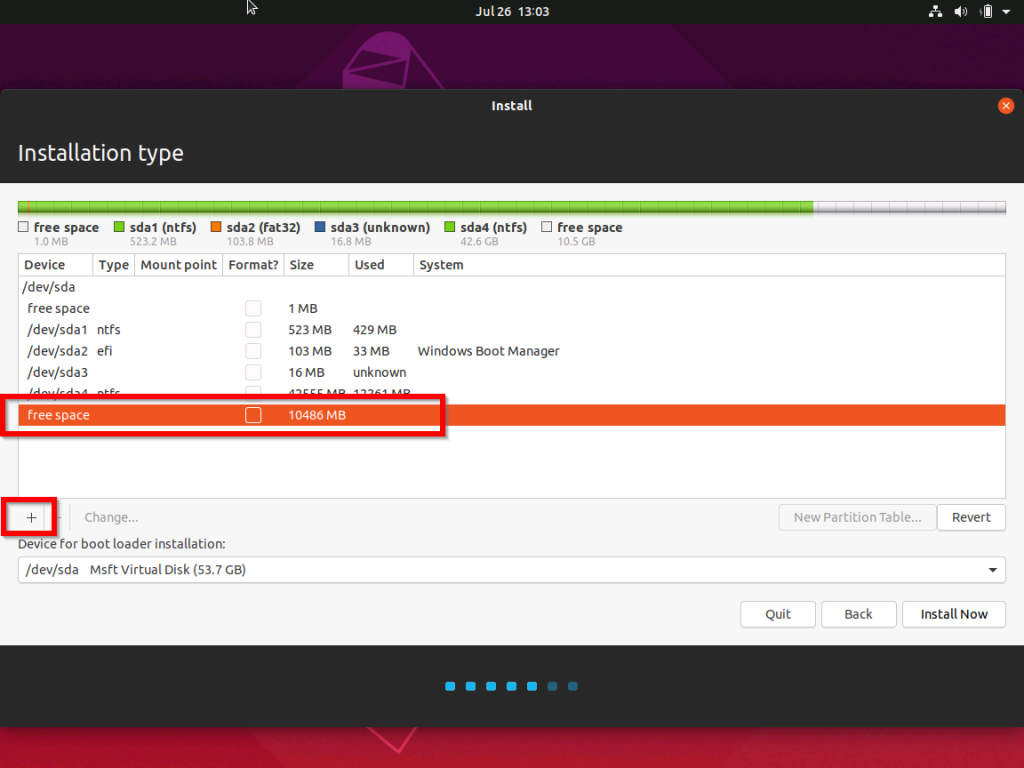
Step-1: Go to the Installation type page, choose a free partition.
Step-2: Now click on the + sign to add a partition. When you click on the + sign, the Create partition window will appear.
Step-3: In the Create partition window, go to the Size field , the default will be the full size of the partition. Enter a value here in MB.
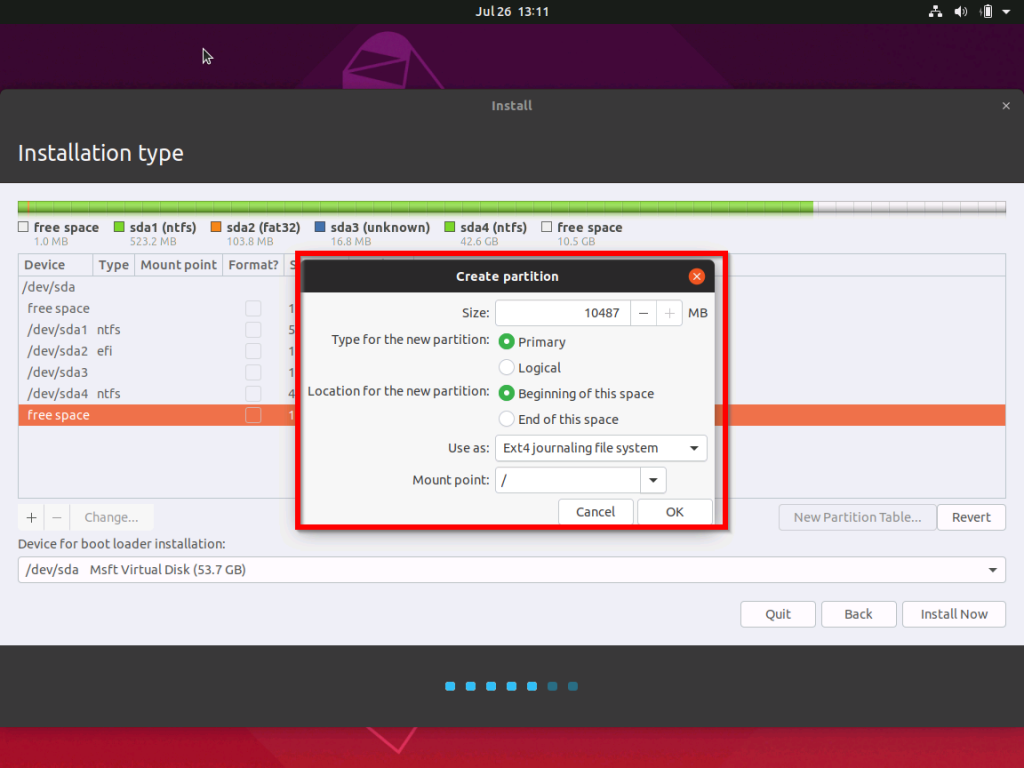
Step-4: Next, choose the type of partition, Primary or Logical partition.
Step-5: Next, on the Location for the new partition, choose the Beginning of space or End of space .
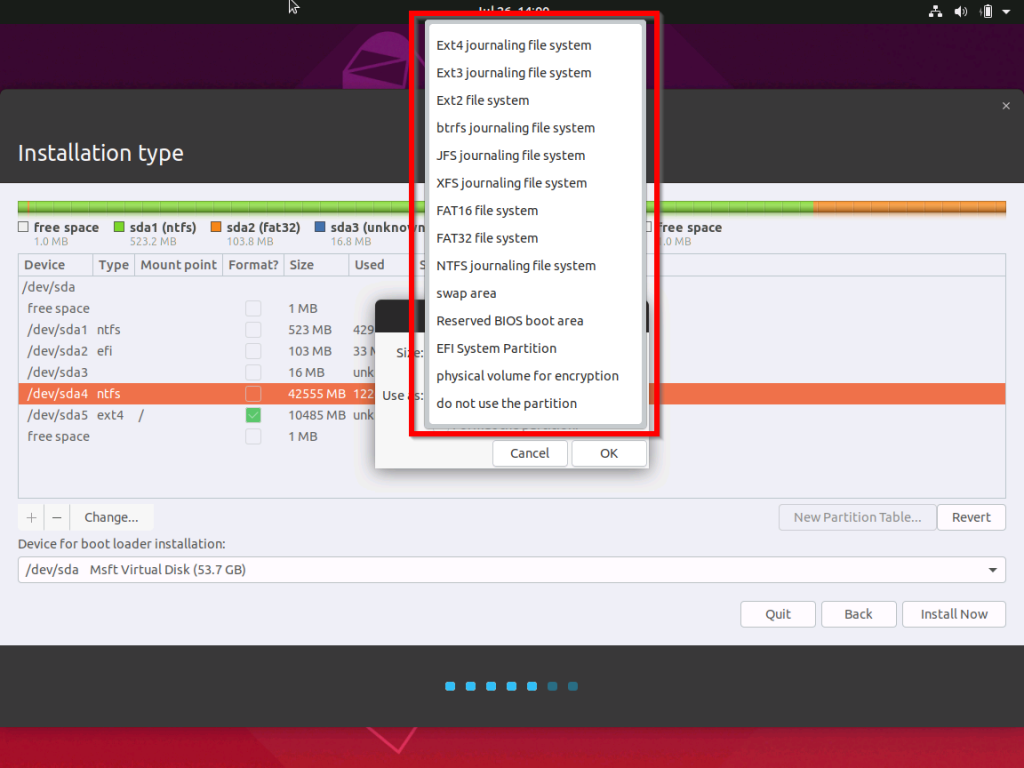
Step-6: Then choose a file system. You can select the default, Ext4 journaling File system.
Step-7: Finally, select a Mount point . The Mount point drop-down menu will show you certain options. Here, f or a root partition, select /.
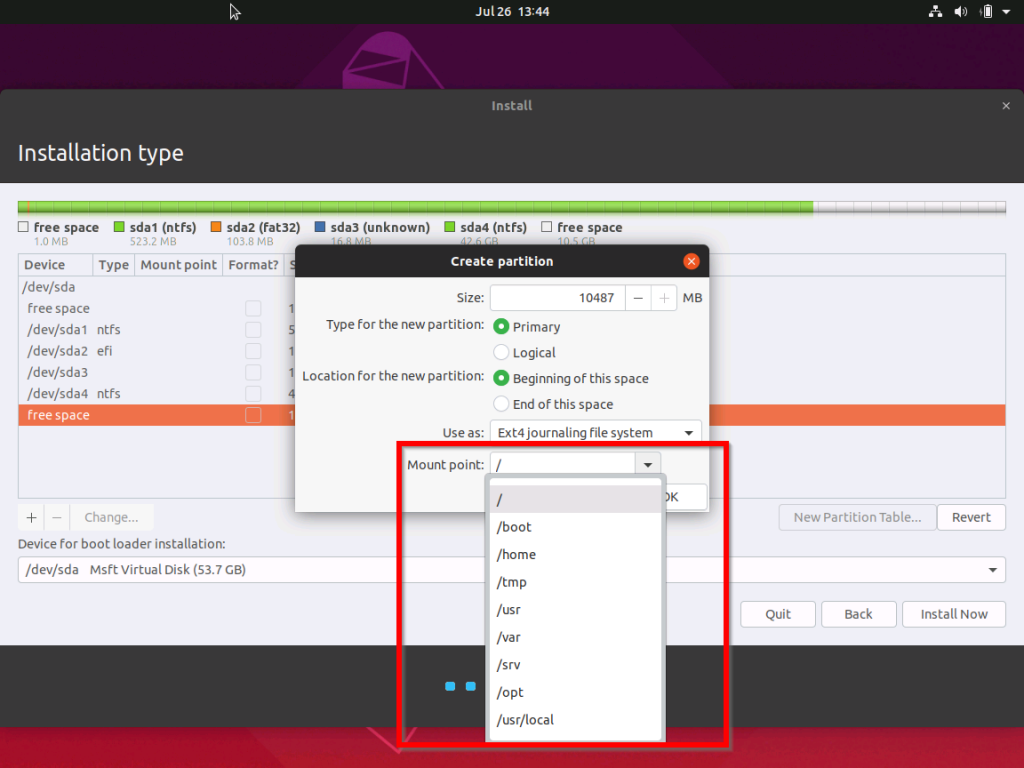
After finishing this, click on Ok.
Done. Check if this solved your problem.
2. Delete Existing Windows Partition
This method will work the best if you unknowingly selected a FAT32 or FAT file system to install Ubuntu. Now you have to delete it. When you will delete the partition, it will appear as a free partition. Then you can create a new partition. You may also visit our guide on deleting partitions. Follow these simple steps:
Note: You can also modify the partition.
Step-1: First you have to delete the partition. To do this, right-click on it and choose Delete .
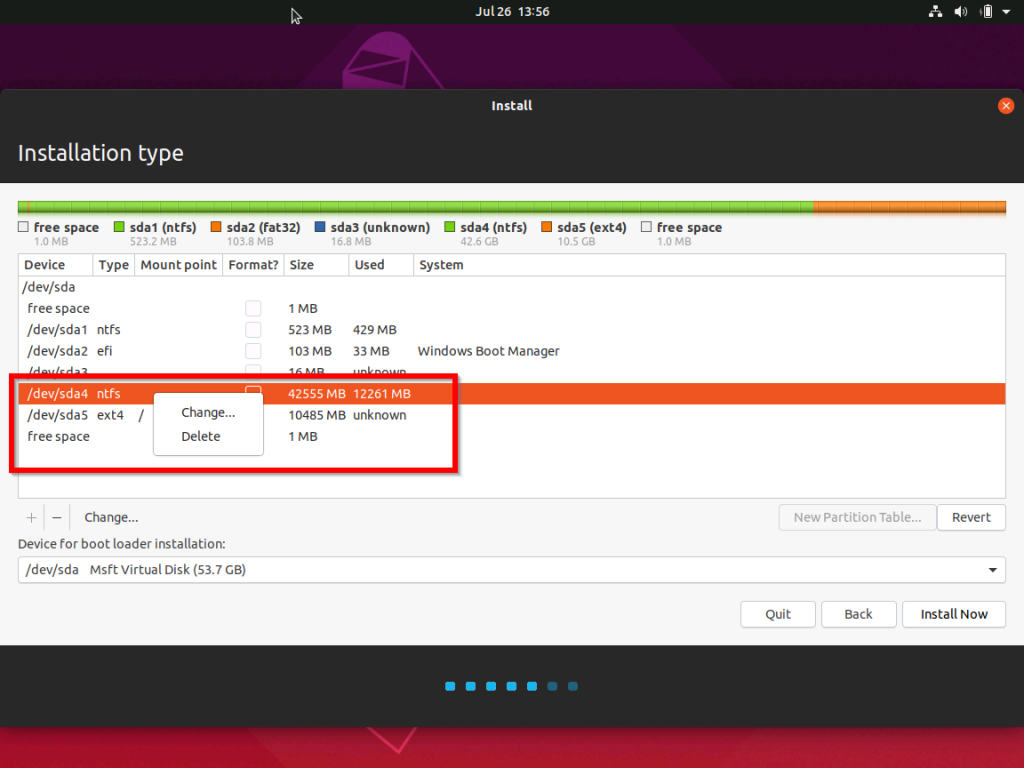
Step-2: Now choose Change to change the file system to a Linux file system.
Step-3: When you click on Change , a dialog box will load. In order to change the file system to a Linux file system, click on the drop-down menu. Then select a file system and then click on Ok.
Now check if the problem vanishes with this solution.
3. Define a Root Partition
This solution will work for you accurately if you did not define a root (/) partition. Follow these steps in order to fix the issue:
Step-1: Firstly, Right-click on the partition you wish to use as root and click on Change . You can also double-click on the partition.
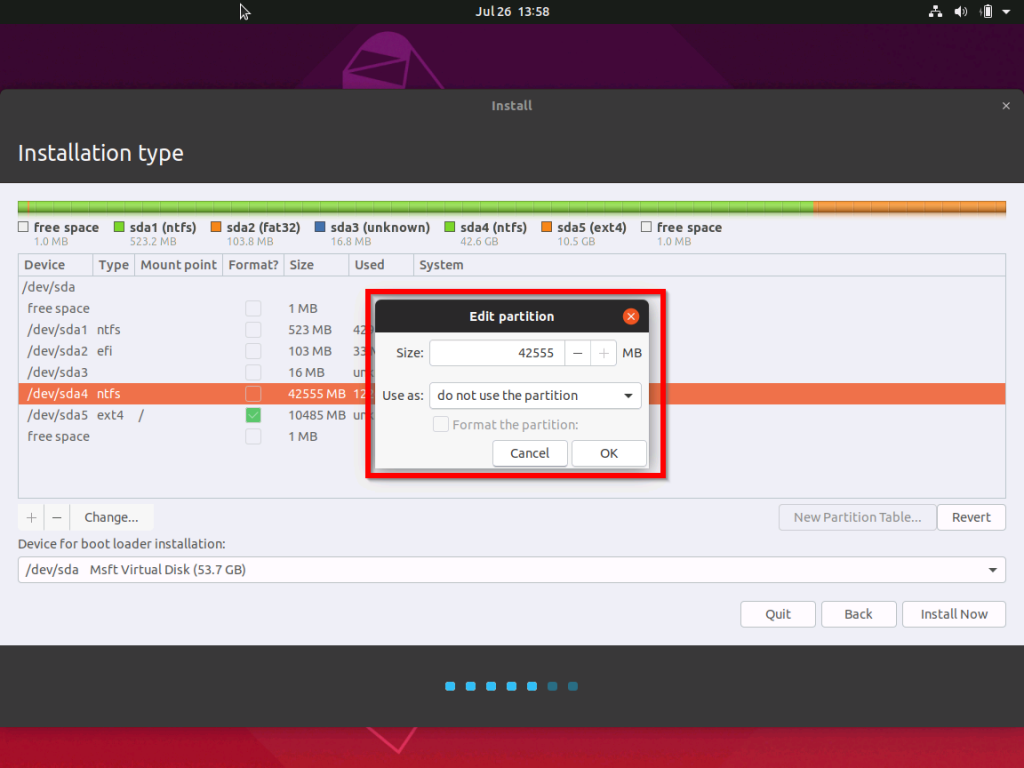
Step-2: When the Edit partition option loads, beside Mount point, click on the drop-down menu and select /.
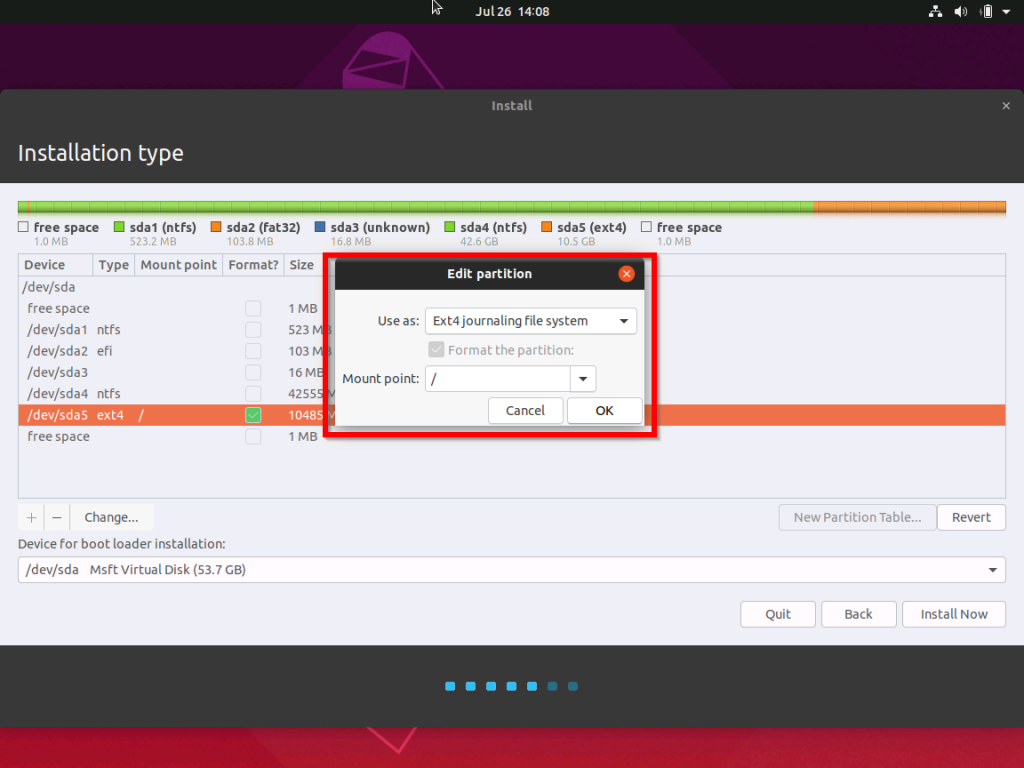
Step-3: Finally, click on Ok to save the changes
You will now be able to continue with your Ubuntu installation. Just choose the partition you created, check the Format column, and then click on Install Now.
Conclusion
These were the 3 Best Methods to resolve the No Root File System is defined issue. In case, you are still in trouble, Id’ suggest visiting Ubuntu Forums to seek further help. For any queries, doubts or suggestions, feel free to visit the Comments section. Hope I helped you.
Related Posts:
Корневая файловая система не определена Ubuntu
Иногда новички во время установки Ubuntu сталкиваются с ошибкой Корневая файловая система не определена, В этой ошибке виновен не дистрибутив и его проблемы сборки, а пользователь, задавший неверные параметры установки системы.
В этой статье мы рассмотрим почему возникает такая ошибка, а также как быстро её исправить. В этом нет совсем ничего сложного.
Ошибка: корневая файловая система не определена при установке
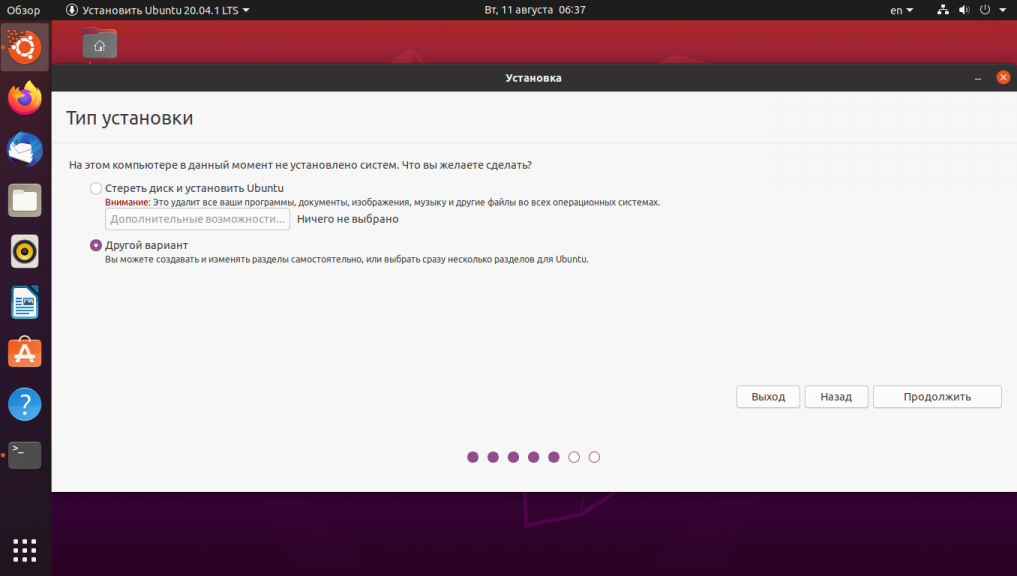
Такая ошибка может возникнуть если во время установки Ubuntu вы выбираете ручную разметку диска, а потом не добавляете корневую файловую систему и пытаетесь перейти к следующему шагу установки:
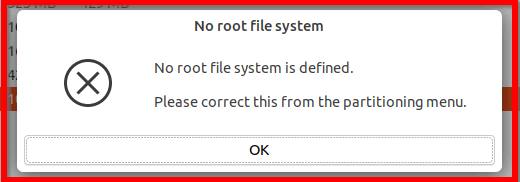
Тогда вы увидите такое сообщение:
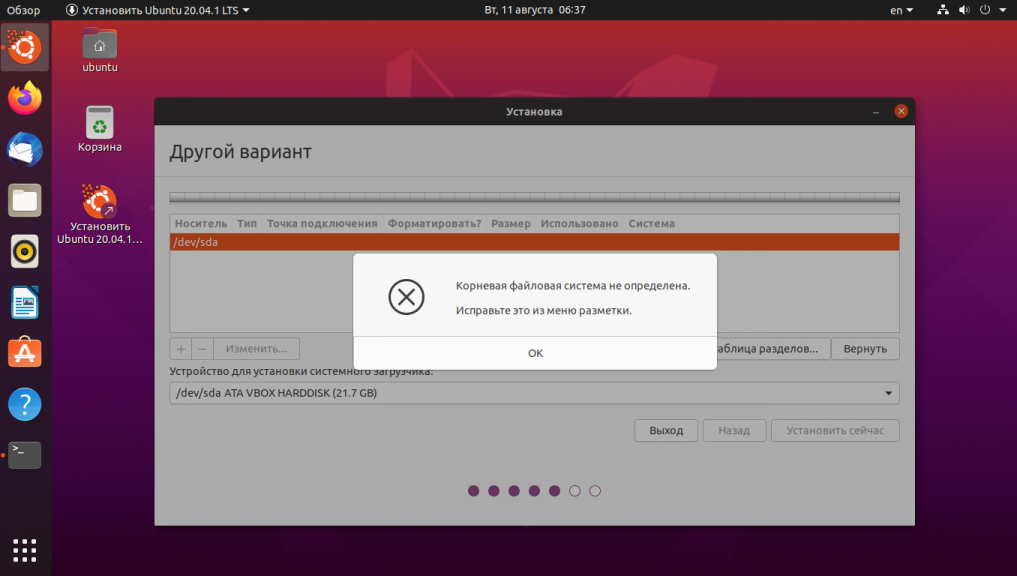
Корневая файловая система, это раздел диска, на который будет устанавливаться основная часть операционной системы Linux. Без этого раздела установка невозможна, поэтому программа установки предлагает вам вернуться назад и всё таки указать нужный раздел.
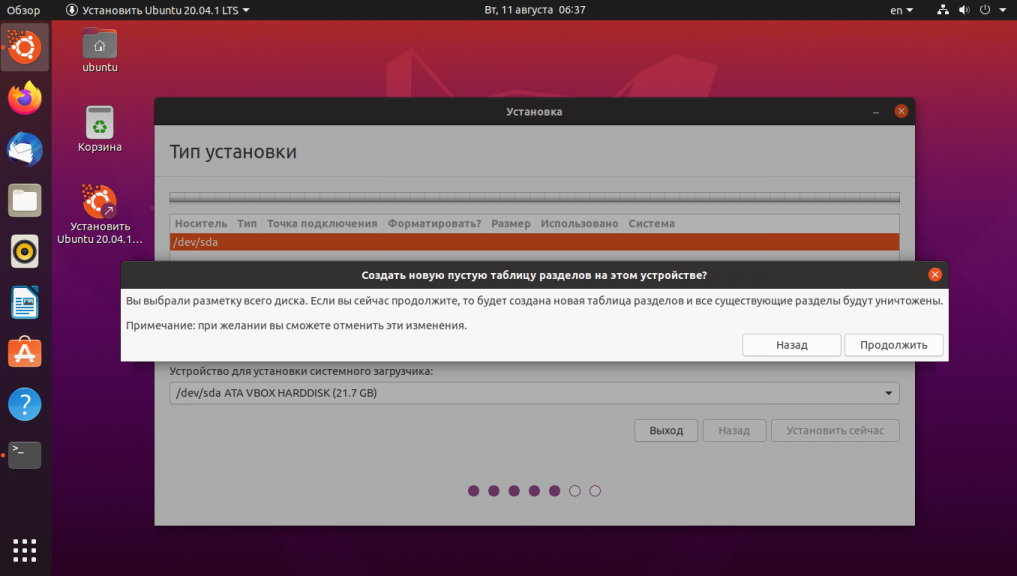
Если ваш жесткий диск, на который вы собираетесь установить Linux пуст, вам следует создать новую таблицу разделов, для этого кликнте по соответствующей кнопке, но не делайте этого если на диске уже есть какие-либо данные, иначе эта операция сотрёт всё, что там было:
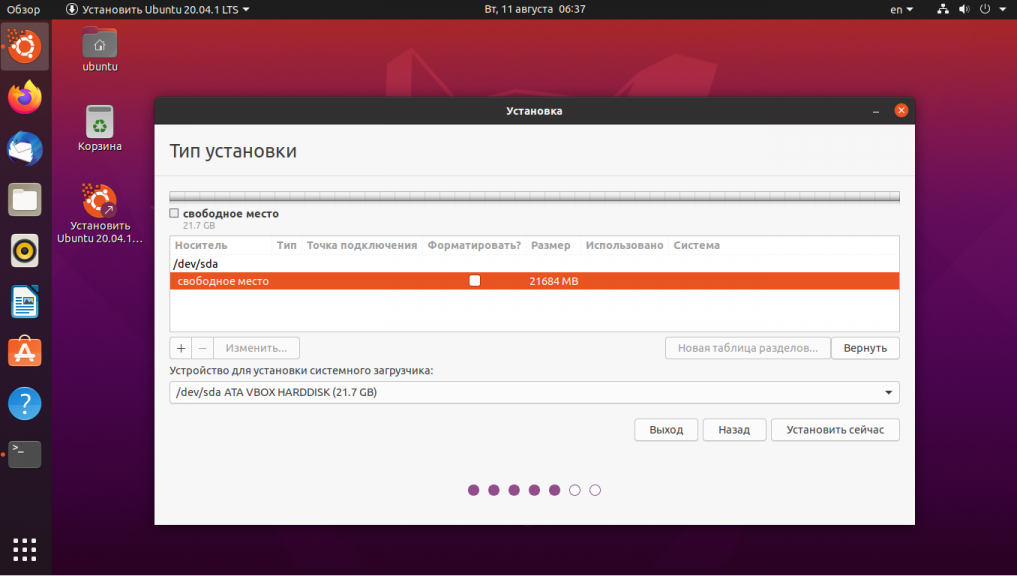
Чтобы создать корневой раздел кликните по надписи Свободное пространство и нажмите кнопку со значком плюса внизу окна:
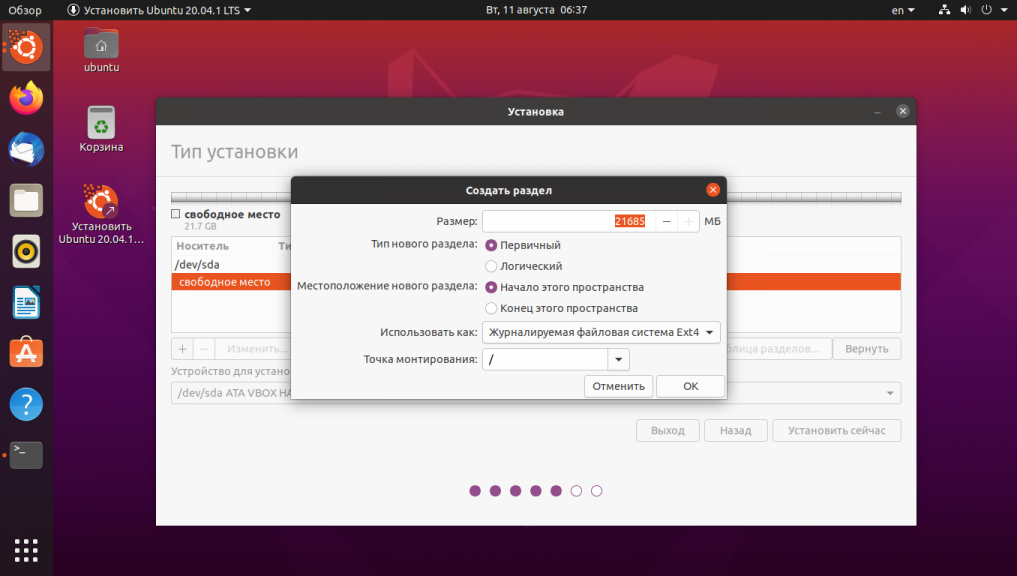
В открывшемся окне обязательно надо выбрать точку монтирования «/», а также желательно выбрать файловую систему семейства EXT в поле Использовать как, она самая стабильная и надёжная:
Именно по точке монтирования установщик определяет, что это корневая файловая система. После этого у вас появится только что созданный корневой раздел в списке разделов:
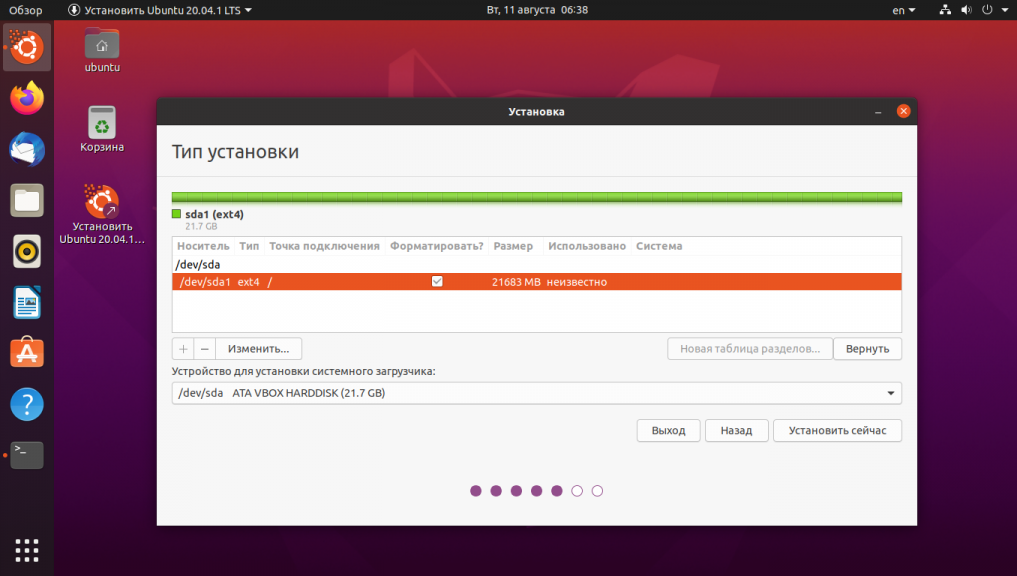
И теперь установка продолжиться успешно, так как всё что необходимо уже есть. Раньше утилита установки ещё предлагала создать раздел подкачки, но теперь в этом нет необходимости потому что подкачка размещается в виде файла на корневом разделе. Теперь вы знаете что делать если у вас возникла такая ошибка, как видите, всё очень просто.
Обнаружили ошибку в тексте? Сообщите мне об этом. Выделите текст с ошибкой и нажмите Ctrl+Enter.