- How to install Kali Linux on Chromebook
- Installing Kali Linux on Chromebook
- Step 1. Backup Your Data and Powerwash Your Chromebook
- Step 2. Enable Developer Mode
- Step 3. Download Crouton
- Step 4. Install Kali Linux
- Conclusion
- Kali linux on a chromebook
- Kali on ASUS Chromebook Flip — Build-Script Instructions
- Kali on ASUS Chromebook Flip — User Instructions
- Kali on ASUS Chromebook Flip — Image Customization
How to install Kali Linux on Chromebook
I f you have used a Chromebook for a while, you have probably realized that despite ChromeOS is a Linux-based operating system; it has been scraped most of the features you would find on a basic Linux distro. Google did acknowledge this problem and introduced support for Linux and Android apps on Chromebooks. However, if you are an advanced Linux user, you might still feel limited and desire something much more like running your favorite Linux distribution on a Chromebook.
Installing Kali Linux on Chromebook
In this tutorial, we will give you a step-by-step guide on installing Kali Linux on a Chromebook. Kali Linux is a Linux distribution with a focus on penetration testing and security auditing. It is among the most popular operating system in the security field, boasting more than 600 free and open-source penetration testing tools and utilities. So let’s get started right away.
Step 1. Backup Your Data and Powerwash Your Chromebook
Tip: This step is meant to create more space on your drive and allow you to install another operating system alongside ChromeOS. If you have already enabled developer mode and have enough space on Chromebook, skip to Step 3. If you have NOT enabled developer mode, skip to Step Two since that will also erase your local data.
Powerwashing, your Chromebook, will erase any local data you might have stored in your storage drive. Therefore, carrying out a backup is highly recommended before performing a Powerwash. Please check out our detailed guide on How to Powerwash (Reset) a Chromebook if you are new to all this.
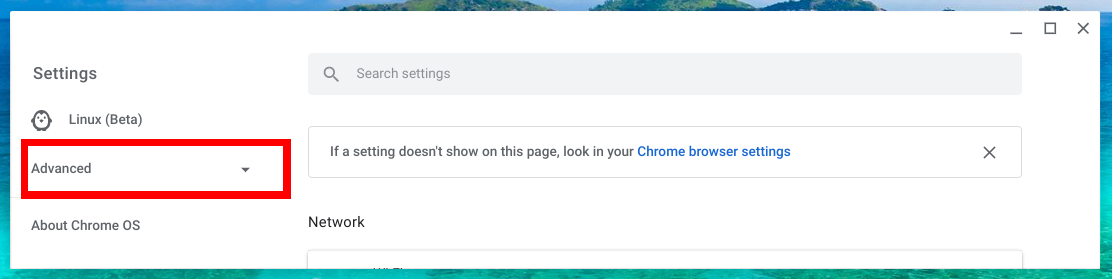
However, it’s not a complicated process. First, open the Settings window and click on the Advanced tab on the left to reveal the Reset Settings button.
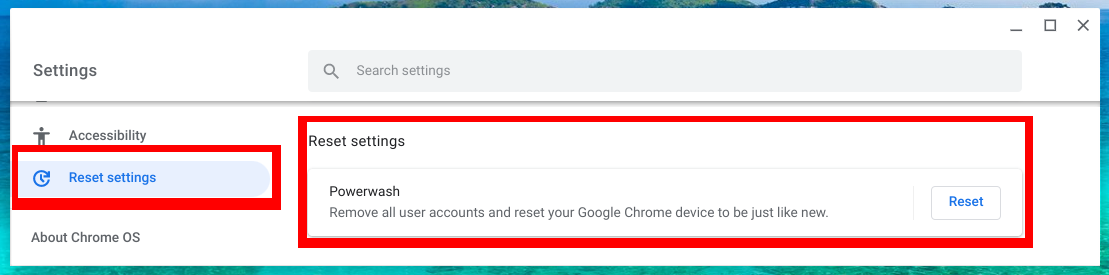
Click the Reset Setting buttons. On the left screen, you will see the option to powerwash your Chromebook. Click Reset to get started. At this point, the Chromebook will reboot, erasing all the data.
Step 2. Enable Developer Mode
Enabling developer mode on your ChromeOS essentially allows you to carry out more tasks other than the limited ones. For example, you can install Android app APKs, able dual-boot capabilities, and even side-load applications. However, similar to the Powerwash step, this will also erase all the local data on your Chromebook.
The process can be a little complicated, and I highly recommend you read our master guide, which gives you a step-by-step procedure to enable Developer Mode on a Chromebook.
Step 3. Download Crouton
Note: Steps to install crouton have changed! Therefore, if you have installed a Linux distribution before, the steps used in this tutorial might differ since they adhere to the latest crouton installation instructions.
With developer mode enabled, we can now install Kali alongside our ChromeOS. These two operating systems will reside on the same storage drive, and you can switch between the two using the keyboard shortcuts – Ctrl+Alt+Shift+F1 and Ctrl+Alt+Shift+F2. That is made possible by using Crouton (Chromium OS Universal Chroot Environment).
Crouton is a free and open-source package available on GitHub. To download Crouton directly, use this link.
Step 4. Install Kali Linux
After you have successfully downloaded Crouton, we can proceed to install Kali Linux on Chromebook. First, enter the Crosh Terminal using the keyboard combination Ctrl + Alt + T. Type shell to launch the ChromeOS shell.
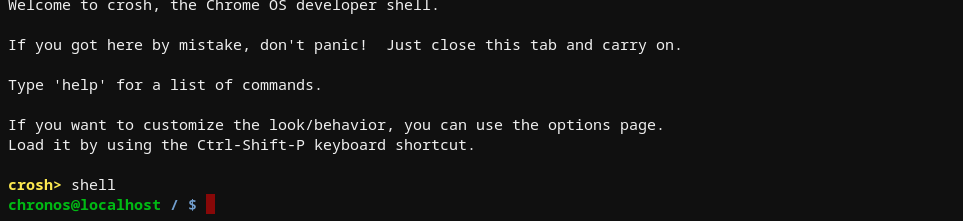
After starting a Shell, we can now start installing Kali Linux. First, execute the command below to make the crouton package executable.
sudo install -Dt /usr/local/bin -m 755 ~/Downloads/crouton
Launch crouton with the command below. This will show you the Crouton help text.

Execute the command below to install Kali Linux.
sudo crouton -n kali -r kali-rolling -t core,xiwi,xfce,extension
Let’s take a look at the arguments in this command.
- Kali-rolling is the version of Kali Linux that we will be installing. Of course, you can change this depending on your expertise.
- Xfce is the Desktop Environment that we will use for our Kali Linux installation. It is considered one of the light-weight Desktop Environments available.

Tip: If an error occurs (e.g., internet/power issues) and the download doesn’t complete successfully. You can continue by adding the -u (update) parameter at the end, as shown below.
sudo crouton -n kali -r kali-rolling -t core,xiwi,xfce,extension -u
Kali Linux is a huge package, and the download process might take quite some time, depending on your internet speed. After a while, you will see the prompt to set up a new Unix username and password. Use anything for the username but not root.

enter username and password
When done, you will be presented with the Chronos shell prompt. Let’s switch to kali with the command below.
Next, we will install the data bus for the X Window System with the command below.

We can now proceed to launch Kali Linux. Execute the command below.
After a few seconds, a window will open to reveal the beautiful Kali Linux XFCE desktop.
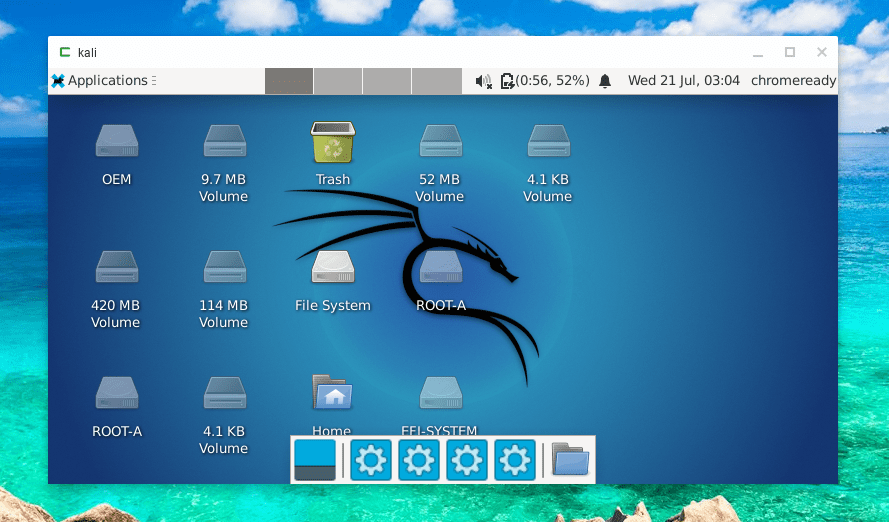
The Chromebook version of Kali Linux doesn’t come with most packages, and you will have to install them manually from the command line. However, that shouldn’t be hard since most of the tools are free and open-source.
Conclusion
That’s all! We have successfully installed Kali Linux on our Chromebook. Did you face errors executing any of the commands above? Please feel free to reach out in the comments section.
Arun Kumar
Arun Kumar is a computer engineering graduate with a passion for writing about all things tech. In his spare time, he loves sharing his knowledge and experience with others through his writing on ChromeReady. As a daily Linux user, Arun enjoys experimenting with different distros on VirtualBox and recently acquired a Chromebook to explore the evolving world of this exciting operating system. With a desire to share his learnings with others, he is committed to providing insightful and informative content to help readers get the most out of their devices. When he’s not blogging, Arun enjoys staying active and can often be found swimming or playing tennis. With a passion for technology and a dedication to sharing his insights, Arun is a valuable asset to the tech writing community.
Kali linux on a chromebook
The ASUS Chromebook Flip is a quad core 1.8GHz, with 2GB or 4GB of RAM Chromebook with a 10.1″ 10 point mult-touch touchscreen. Kali Linux fits on an external microSD card or USB drive.
By default, the Kali Linux ASUS Chromebook Flip image contains the kali-linux-default metapackage similar to most other platforms. If you wish to install extra tools please refer to our metapackages page.
The build script for the Veyron based Chromebooks has not been converted to the new style, so builds may fail. If you are planning to build for this board, please consider updating the script to the new way, and submitting it as a merge request.
Kali on ASUS Chromebook Flip — Build-Script Instructions
Kali does not provide pre-built images for download, but you can still generate one by cloning the Kali-ARM Build-Scripts repository on GitLab, and follow the README.md file’s instructions. The script to use is chromebook-veyron.sh .
Once the build script finishes running, you will have an “img” file in the directory where you ran the script from. At that point, the instructions are the same as if you had downloaded a pre-built image.
The easiest way to generate these images is from within a pre-existing Kali Linux environment.
Kali on ASUS Chromebook Flip — User Instructions
To install Kali on your ASUS Chromebook Flip, follow these instructions:
- Get a fast microSD card or USB drive with at least 16GB capacity. Class 10 cards are highly recommended.
- Use the dd utility to image this file to your microSD card (same process as making a Kali USB.
In our example, we assume the storage device is located at /dev/sdb . Do not simply copy these value, change this to the correct drive path.
This process will wipe out your microSD card or USB drive. If you choose the wrong storage device, you may wipe out your computers hard disk.
This process can take a while, depending on your PC, your microSD card or USB drive speed, and the size of the Kali Linux image.
Once the dd operation is complete, boot up the ASUS Chromebook Flip with the microSD card or USB drive plugged in, and hit CTRL+U before the 30 second timeout.
Kali on ASUS Chromebook Flip — Image Customization
If you want to customize the Kali ASUS Chromebook Flip image, including changes to the packages being installed, changing the desktop environment, increasing or decreasing the image file size or generally being adventurous, check out the Kali-ARM Build-Scripts repository on GitLab, and follow the README.md file’s instructions. The script to use is chromebook-veyron.sh .
Updated on: 2023-May-30
Author: steev